Recover Your Data: How to Find and Restore Missing Files in Windows
How to recover files which were lost, went missing or just disappeared from your folder in Windows? How to recover files deleted by Windows Defender? Regardless of what caused the disappearance of files, be it an accidental removal, a system error or a virus, we’ll show you easy and well-tested method to recover them.
- Method 1. Windows Search
- Method 2. Check the Recycle Bin
- Method 3. Recently opened files
- Method 4. View temporary files
- Method 5. Search in the cloud or email attachments
- Method 6. Search and restore with data recovery tools
- Method 7. Recovery from File History
- Method 8. How to recover files deleted by “Windows Defender”
- Conclusion
- Questions and answers
- Comments
Sometimes important documents, photos or other files just disappear, or you just don’t remember in which folder they are stored. This might become quite a problem, especially when you need such an important document or file right here and right now.
Using a number of partitions to keep different files in is a useful habit, but in its turn, this might become an issue when you search for necessary data – you may just forget where exactly you keep a certain file.
In today’s article, we’ll cover a few methods to search for files in Windows, learn how to recover accidentally deleted files, how to find necessary data in one of the million folders, and how to recover files removed by Windows Defender.

🧺 How to Recover Files and Folders After Sending Them to the Recycle Bin and Deleting? (Windows 11)
Method 1. Windows Search
The first step to take if you need to find a specific file is to use the Search feature.
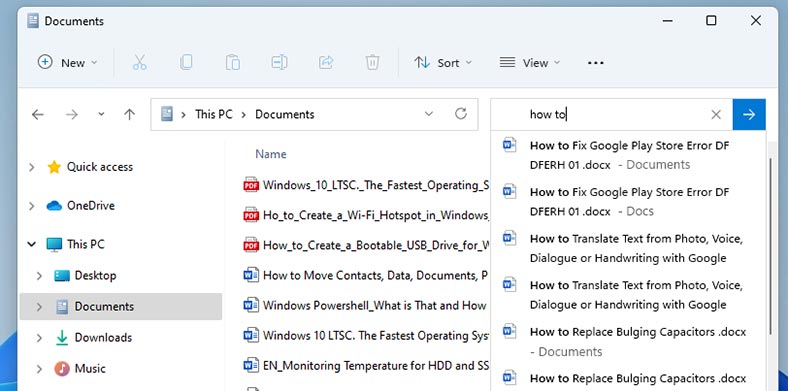
To find a required file, click on the search icon on the taskbar. Alternatively, open the Explorer and type the file name in this field.
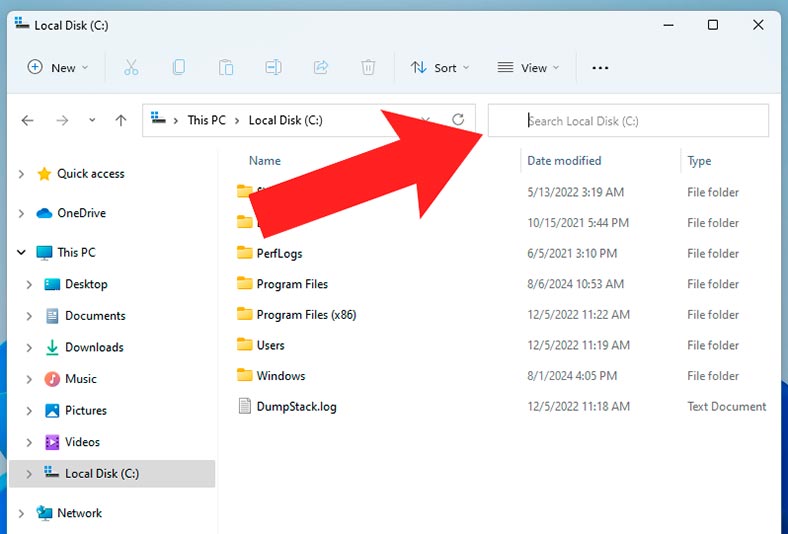
To search in all locations on your computer instead of searching a specific disk only, click on This PC on the left.
As soon as you start typing the file name in the search field, the operating system will automatically suggest similar elements. Click on the file you need and keep typing the name.
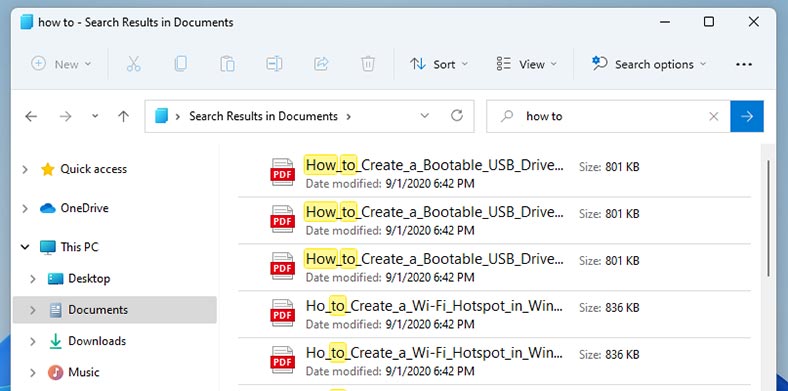
As a result, you will see the found data with its location.
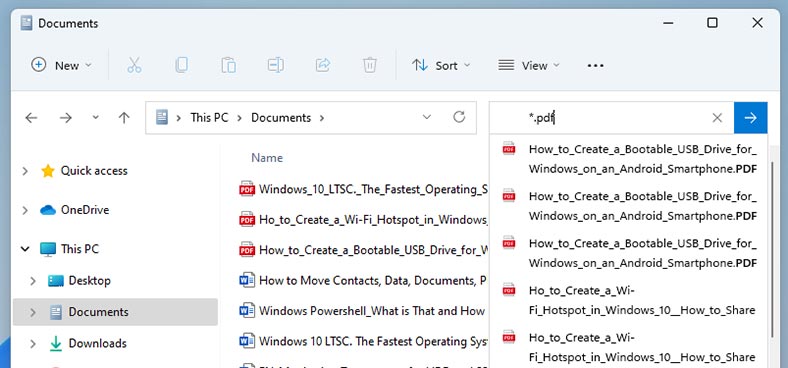
If you don’t remember the name of the required file, you can search for it by file type. To do it, type an asterisk in the search field, and then specify the file extension – *.png, *.jpg, *.doc etc.
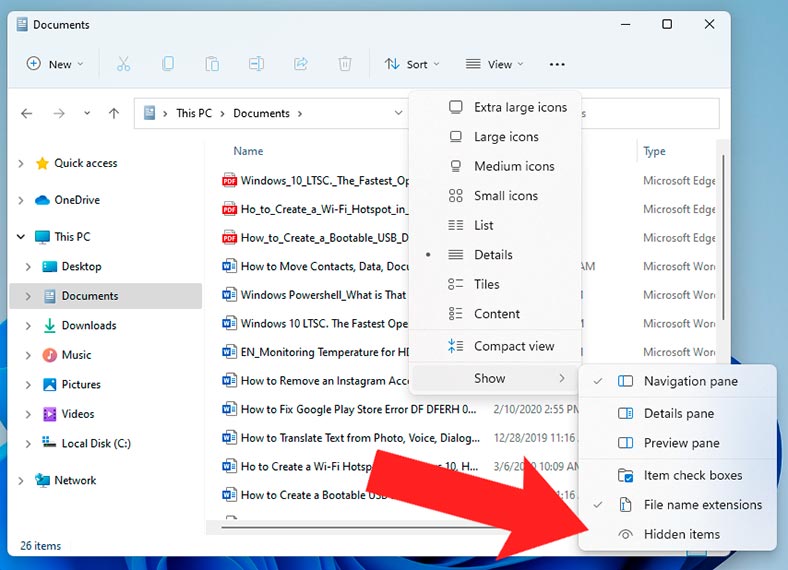
Sometimes the file you need to find can be a hidden one.
In order to see hidden files you need to enable the option to display them. In the Explorer, click on View – Show – Hidden items. Make sure there is a tick next to this option.
Method 2. Check the Recycle Bin
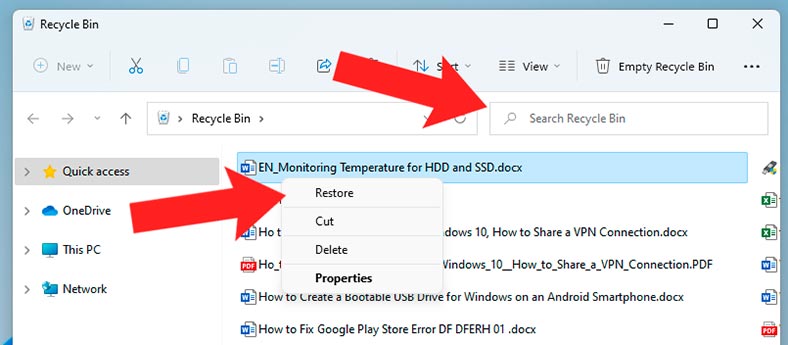
It would be useful to check the Recycle Bin: if a file was deleted accidentally, it could end up in the Bin.
Open it to see if the file you need is there. The Recycle Bin window looks similar to the Explorer. So if there are many files, you can use the search feature by file name or file type.
Recover the necessary file: right-click on it and choose Restore. As a result, it will appear in the folder from which it was deleted. If you don’t remember where that folder is located, search for it in the Explorer.
Method 3. Recently opened files
Another search method is to check recently opened files.
To do it, open the Explorer. Dy default, it will open in the quick access panel displaying the list of recently opened files. To open a file, double-click on it.
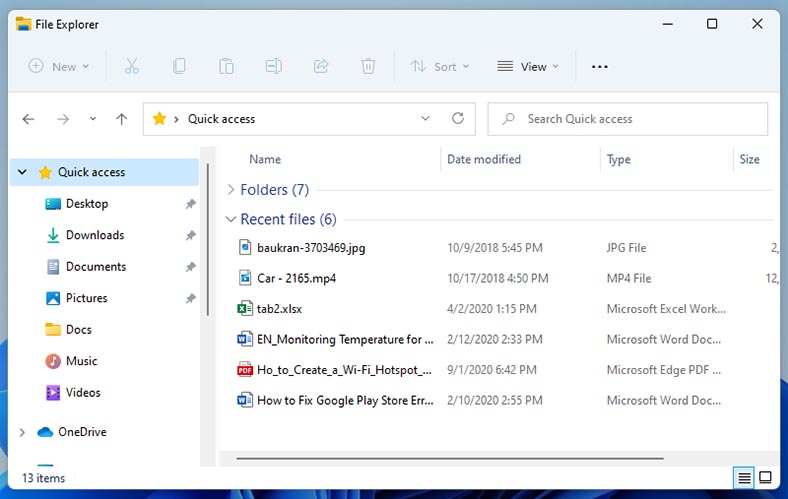
Besides the recent file list, Windows also keeps a more extensive list of recent items. To open such list, follow this path:
%AppData%\Microsoft\Windows\Recent\
When you go there, it opens the folder Recent items.
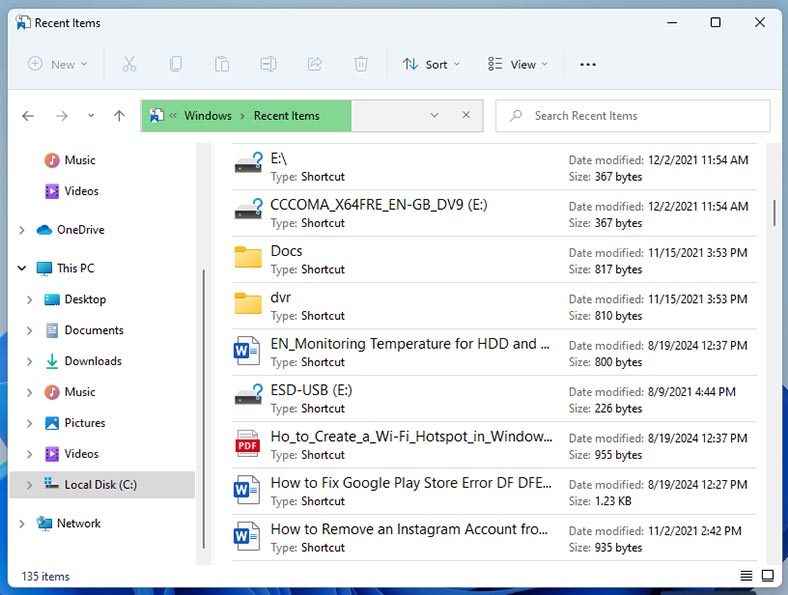
Just like in any other folder, files can be sorted by name. To change the sorting order, right-click on the empty space and select “Sort.” You can sort them by date of modification, so the most recent files will be shown on top of the list. Alternatively, use the search feature.
Method 4. View temporary files
Files may get lost after a system error or app failure, or when an update goes wrong. In this case, they may end up in one of the folders intended for temporary files - Temp.
To find out if your file is there, open the Run window (use the keyboard shortcut Windows + R), and type the following:
%systemdrive%\Windows\Temp
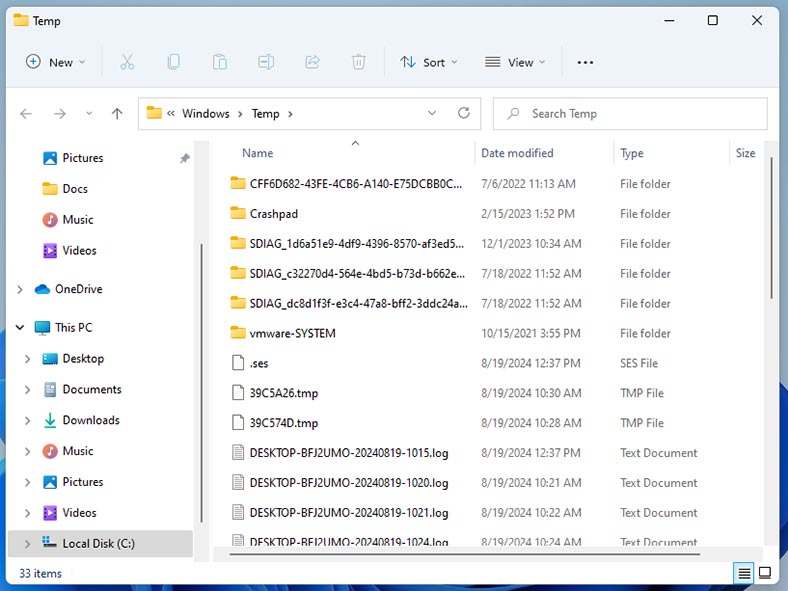
Find and recover the required files.
To access the second folder, open the Run window and type the following path:
%userprofile%\AppData\Local\Temp
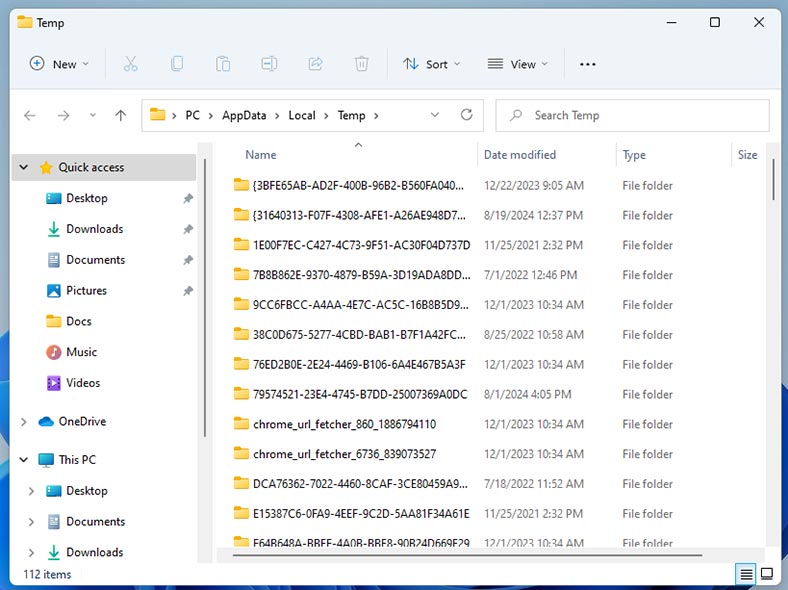
Find the required file and copy it to the preferred directory.
Method 5. Search in the cloud or email attachments
If you keep important backups in the cloud storage, then you’ll be able to find them and recover from the cloud. Use the search field to find the required file and download it to your PC.
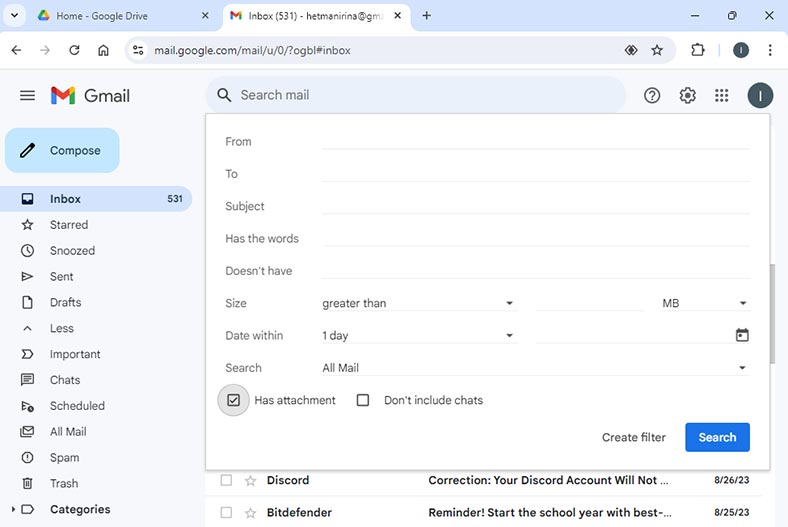
Another place to look for files is your email. If you sent or received by email a file which is now lost, look for it in your mailbox.
For example, when you are in your Gmail box, click on the options icon in the search field.
Check the box for – Has attachments. You can also specify the size and time range to narrow down the search.
Method 6. Search and restore with data recovery tools
Sometimes standard methods for search and recovery may not help. In this case, use a data recovery tool.
Hetman Partition Recovery will help you recover files lost as a result of accidental removal, erasing or disk formatting. It will help you restore lost or missing files.
It supports all popular file systems and disk types. It will help you quickly scan the necessary disk and restore lost files.
Download, install and run the program: it will scan your computer automatically and display all connected hard disks.
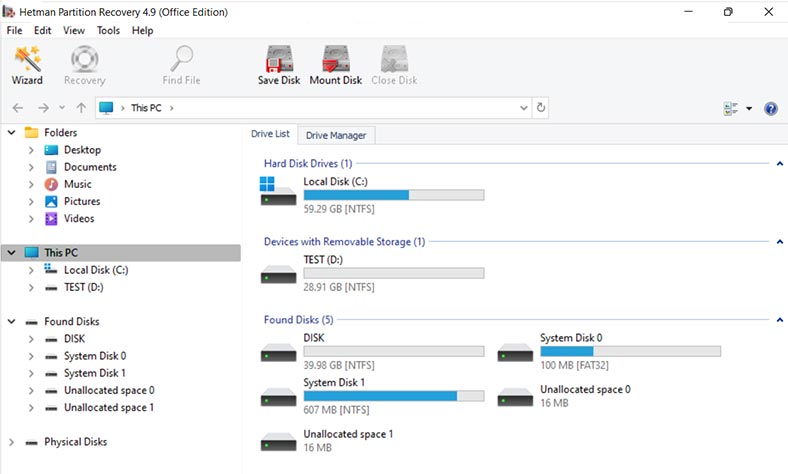
Now select the disk where the required files used to be and run the scan.
Right-click on the disk and choose Open. Choose the scan type - Fast scan or Full analysis.
For starters, we recommend a Fast scan - it will take less time.
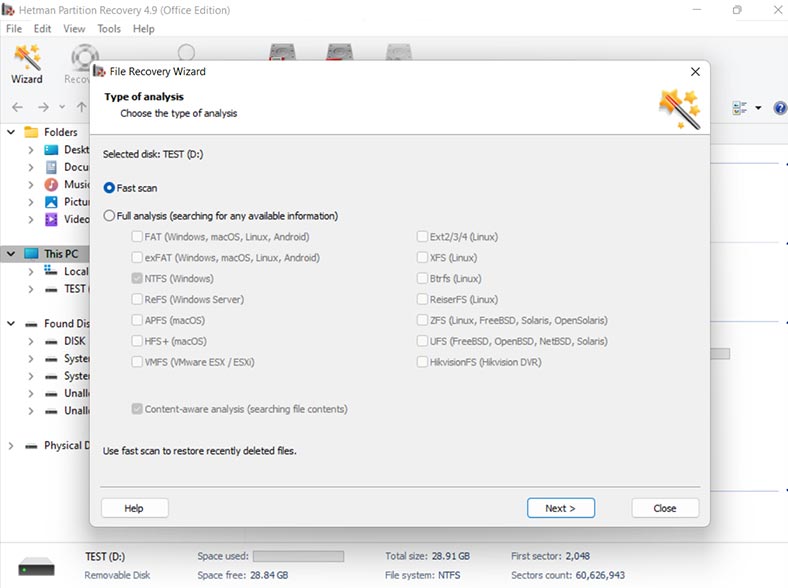
As a result, the tool will scan the disk in no time and display all files and folders it has found. Open the folder where the lost files used to be: previously deleted files have a corresponding marking.
Select all the items you want to recover and hit the Recovery button.
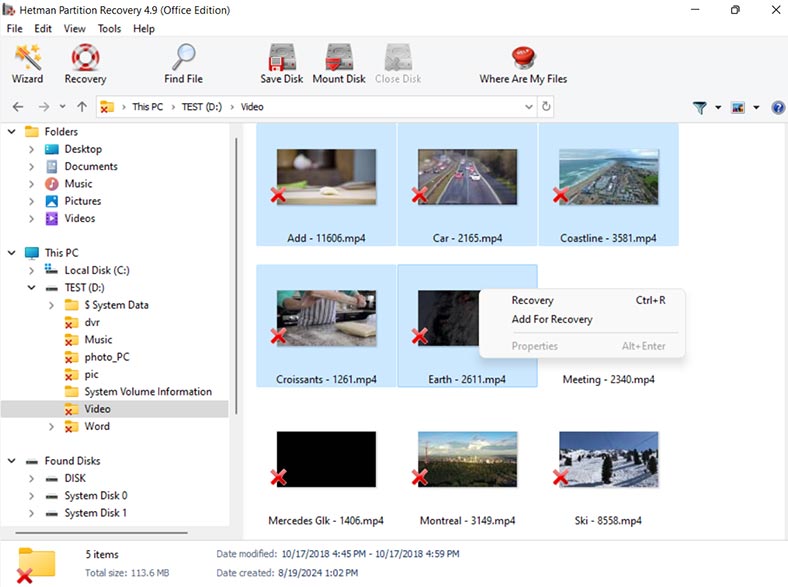
Choose where to save them (the disk and folder). Then click Recovery again. When the operation is over, you will find the recovered files in the folder you have chosen.
If you don’t know in which folder the required file used to be, the recovery tool has a built-in search feature. Type the file name or a part of it, search by file name as in the Explorer, type an asterisk, and then add file extension.
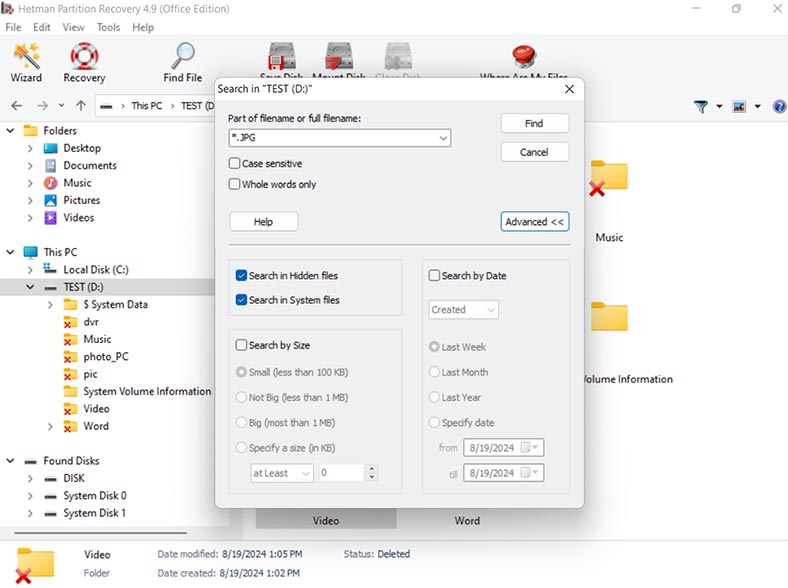
In advanced settings, you can choose to search by size and date.
If the Fast scan can’t find the required files, then go for Full analysis.
To do it, return to the main menu, right-click on the disk and choose Analyze again.
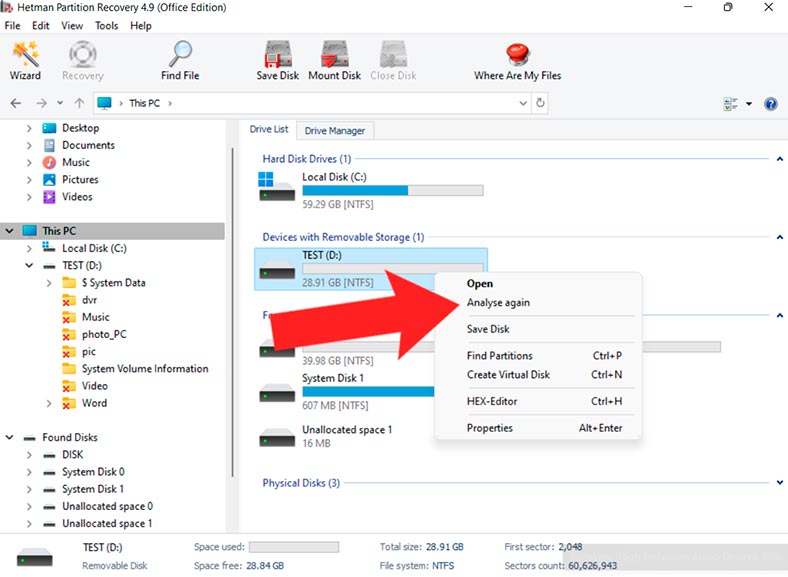
Then select Full analysis and specify the file system. This process takes some time, depending on the disk size.
When the scan is over, open the folder where the lost files used to be, or use the search feature. Select and recover the necessary files.
Method 7. Recovery from File History
One of the solutions could be a utility integrated into Windows – File History. It will help you recover missing files.
Make sure that this option is active. If it isn’t, it won’t be able to recover files.
To check if this option is enabled, open Control Panel - File History.
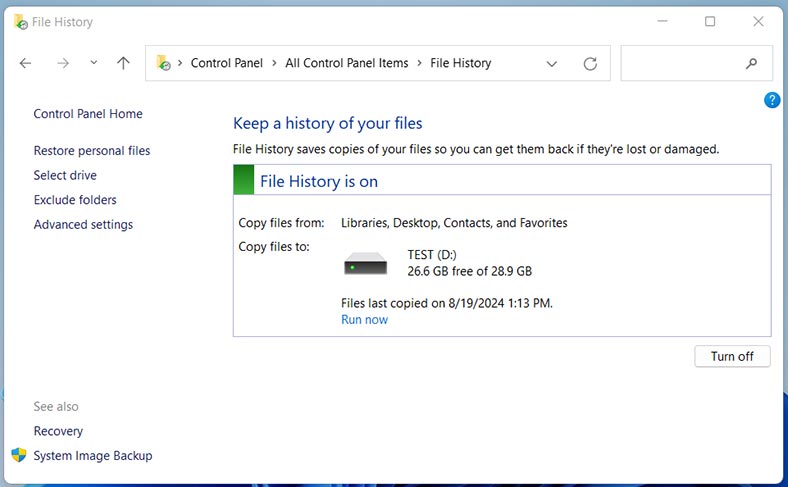
If it is, you will see the disk where the copies of files are saved to.
Click on Restore personal files. As a result, a new window will open where you can choose the backup date.
Then open the folder where the previously deleted file used to be. Select it and then click on the green Restore button. As a result, it will appear in the folder from which it was deleted.
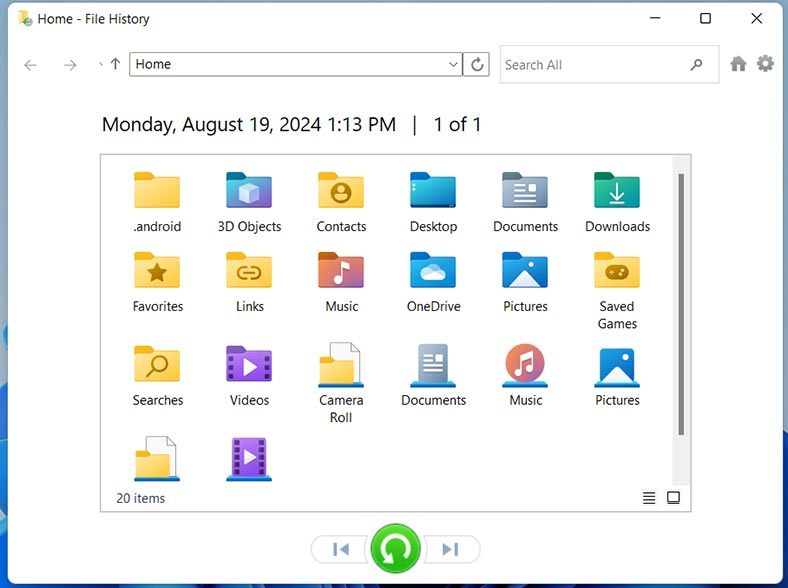
With this tool, you can also restore a previous version of the file, after some changes have been made.
To do it, in this folder you should right-click on the file and choose Show more options – Restore previous versions.
Select the required file version of the file and hit one of the buttons:
- Restore (the file will be overwritten with the selected version);
- or Open (the previous version of the file will just open).
Method 8. How to recover files deleted by “Windows Defender”
Another reason why files may go missing is when they get deleted by Windows Defender.
Windows Defender is an integrated antivirus in Windows OS. It helps to keep your computer safe from viruses and malware. However, it may sometimes identify harmless files as threats and remove them. As a result, one of your apps may stop working.
To restore such files, open Settings – Privacy and security – Windows Security – Open Windows Security. Here, open Protection history.
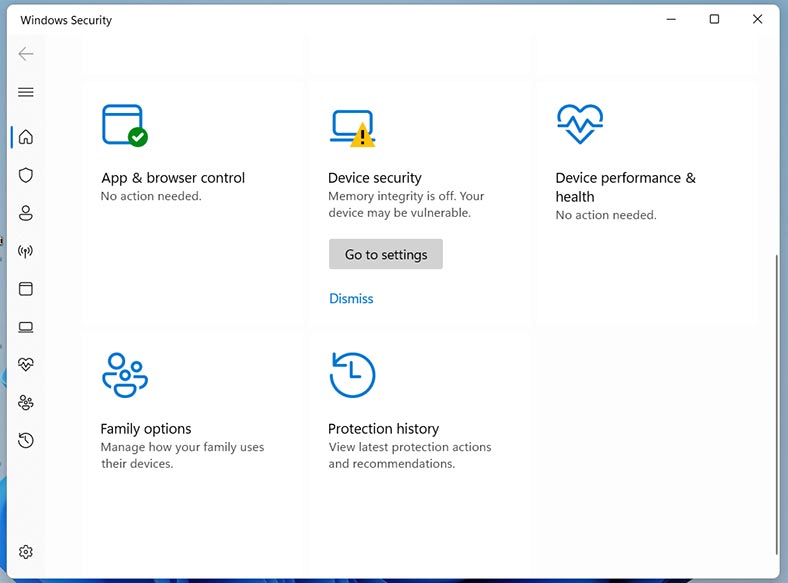
Search the list of threats for the file which has been deleted or placed into the quarantine. Click on the entry of such file to view details.
Then click on Actions - Allow on device to restore the file to its original location.
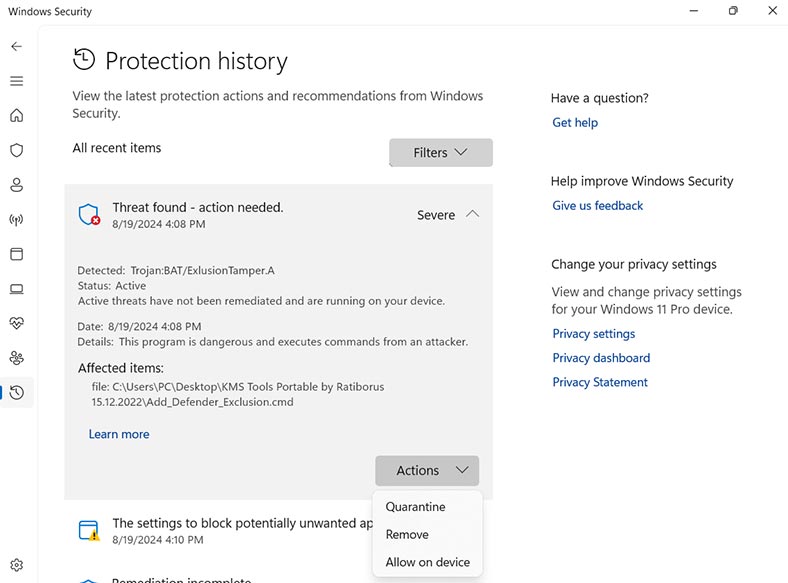
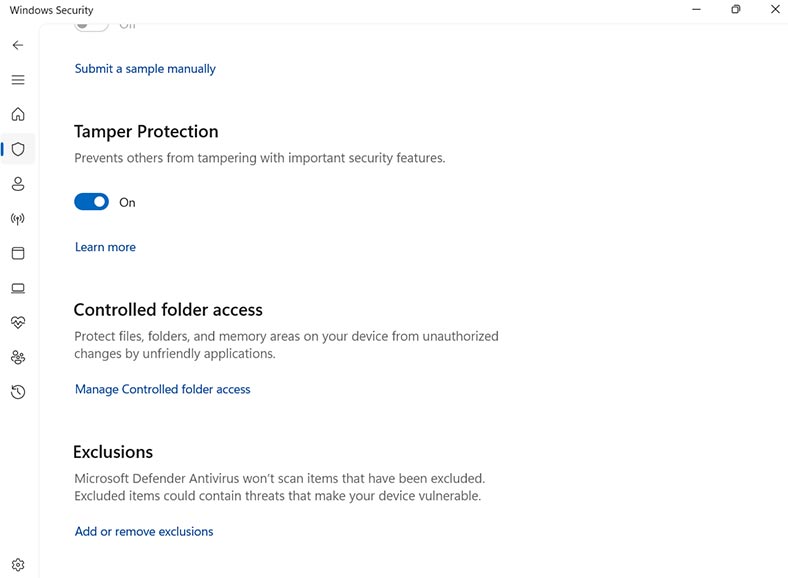
If you are sure that the file is safe, and you don’t want Windows Defender to remove it again, then add such file to exclusions.
To do it, in Windows Security select Virus & threat protection. Here, open Manage settings.
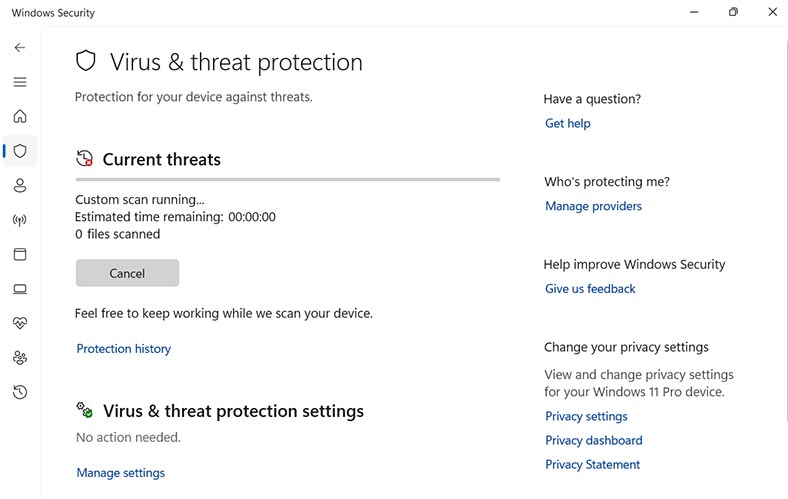
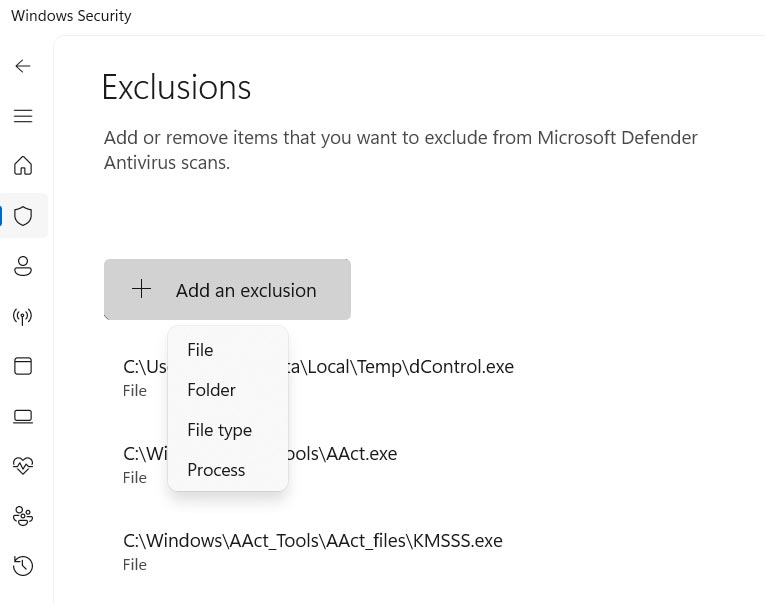
Scroll down to Exclusions and click Add or remove exclusions.
Click on Add an exclusion and choose a file or folder that you would like to exclude from the virus check.
Also, all files deleted by Windows Defender can be recovered with the help of data recovery tools. Hetman Partition Recovery will easily help you restore such files. Just scan the disk where they were stored and get them back.
Conclusion
Today we have explored the ways to find and recover deleted, missing or lost files in Windows, and what recovery methods to use. We also described recovering files deleted by Windows Defender. At the first sight, finding and restoring files may seem too complicated, but with the described methods, you can easily get your lost files back.
| Method | Description | Action |
|---|---|---|
| 1. | Search feature in Windows | Use the search feature in Windows Explorer. Type the file name or a part of it in the search field. |
| 2. | Checking the Bin | Open the Bin and check if your lost files are there. If they are there, select them and click Restore. |
| 3. | Recently opened files | Open the list of recently opened files in the app where you worked, or in the File Explorer, to find the recently modified or opened files. |
| 4. | Viewing temporary files | Open Windows Explorer and go to the folder %TEMP%. Temporary copies of your files may be stored there. |
| 5. | Searching in the cloud or in email attachments | Check cloud storage locations (OneDrive, Google Drive etc) or your emails for copies of the files that might have been sent or saved. |
| 6. | Searching and recovering with a data recovery tool | If other methods don’t help, use a data recovery tool, such as Hetman Partition Recovery. |
| 7. | Recovering from File History | If File History was enabled, you can recover the files. Go to Control Panel - File History. |
| 8. | How to recover files deleted by Windows Defender | If a file is deleted by Windows Defender, then open the Defender, go to Protection History and find the file on the list of removed threats. |


