Data Recovery from a Non-Operable WD My Cloud Mirror NAS: RAID Rescue
In this article, learn how to recover data from a RAID on a non-operable NAS WD My Cloud Mirror. Whether you’re a system administrator or a user facing data loss due to a non-operational NAS, we’ll walk you through the entire recovery process step by step. From identifying the issue to implementing effective recovery strategies, this tutorial equips you with the knowledge and tools needed to successfully retrieve your valuable data and minimize downtime. Don’t let a non-operable NAS leave your data inaccessible – watch now and regain control!
- Step 1. Checking the device before data recovery
- Step 2. How to change RAID level for WD My Cloud Mirror NAS
- Step 3. How to recover data from a RAID based on WD My Cloud Mirror NAS
- Conclusion
- Questions and answers
- Comments
NAS devices are quite a popular choice when it comes to data storage, thanks to their reliability, flexibility and the opportunity to provide access to files from various devices located almost anywhere. However, even the most reliable devices may encounter issues that eventually cause of loss access to user data.
WD MyCloud Mirror is a convenient and reliable model designed to store and exchange data within a local network, but we can’t possibly exclude a situation when it breaks down and you lose access to important files. In this case, even having the RAID technology onboard can’t bring your files back.

How to Recover Data from a RAID Based on a Non-Operable WD My Cloud Mirror NAS
Step 1. Checking the device before data recovery
When a network-attached storage experiences any issues, you should identify the cause of the problem – sometimes it’s just a damaged power cable – or the cable which is no longer connected.
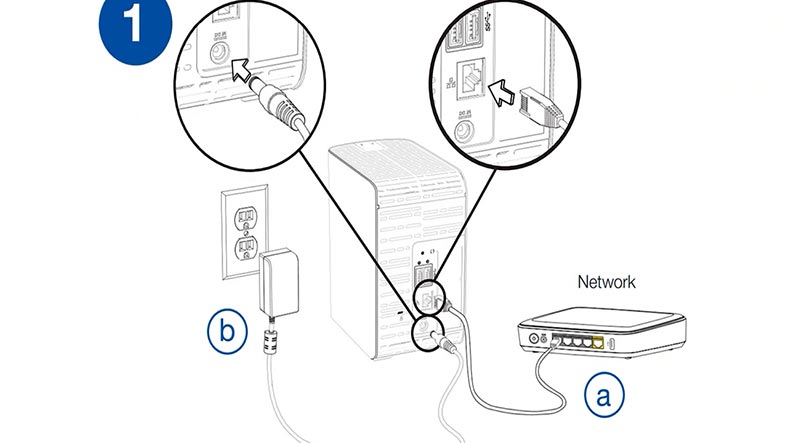
The first thing to check is all cables and connectors. Make sure that all cables are connected correctly and reliably. Try using other cables and ports to exclude possible connection issues, and check the power supply – it might be the culprit actually causing the problem.
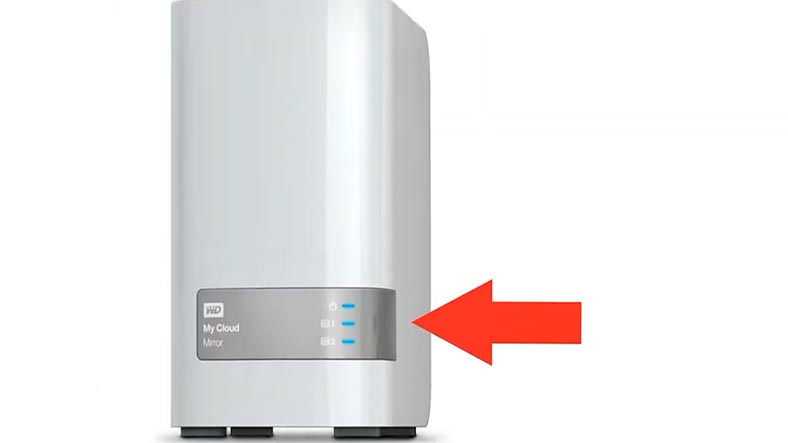
If LED indicators are on, try opening the manager window and restarting the device; if there is no access to the device, restart it with the power cable. Unplug it from the device case, and then plug it again. After the restart, give your NAS some time to boot and initialize.
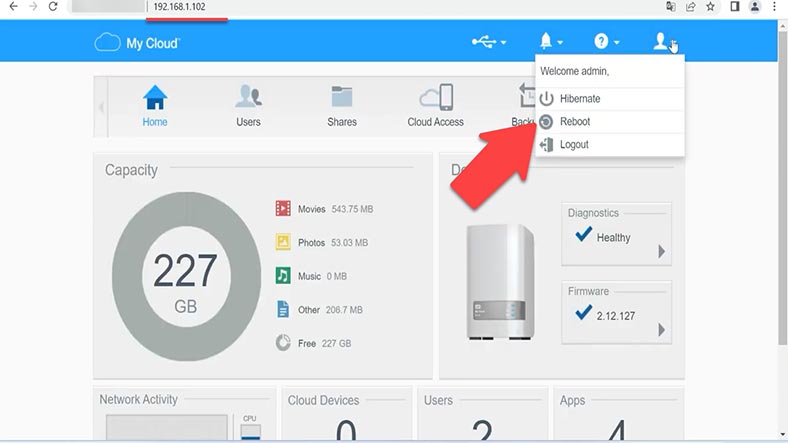
If the NAS is still unresponsive, connect it to another computer or use a different network interface. This will help you exclude possible issues involving the computer or the network.
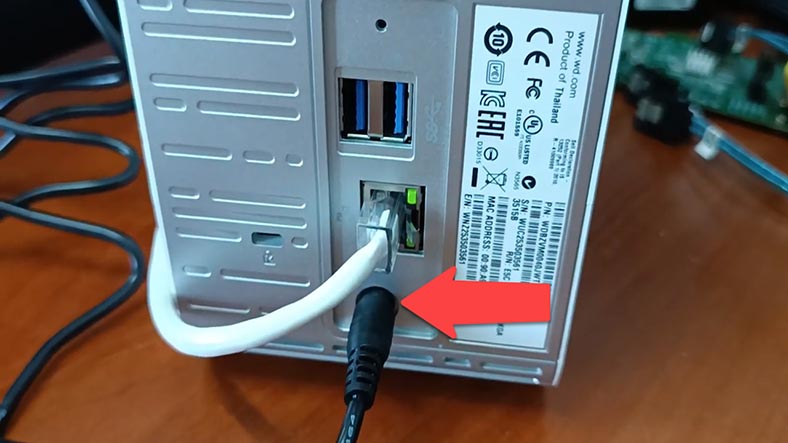
Also, you should realize that there is always a risk of losing all data when you make an attempt to recover data from a non-operable NAS. That is why it is so important to back up your files so that you can prevent data loss in case of a hardware failure.
If a NAS is out of order, the network drive becomes inaccessible which may bring grave problems. All files stored on the hard disks are no longer available for users. This could become a disaster, especially if these disks contain important data including personal files, photos, videos or documents.
Although the files are physically still there, they can’t be retrieved even if you connect the hard disks directly to the computer. It happens because data on NAS disks is usually organized in a special format which cannot be recognized by an ordinary PC. Moreover, the hard disks might use various RAID configurations which only makes the data retrieval process more difficult. In such cases, you need a specialized software tool to restore access to your files.
Step 2. How to change RAID level for WD My Cloud Mirror NAS
Before you start data recovery operations with the help of third-party apps, let’s explore how to change the RAID type on this specific device and learn more about how disk arrays are created.
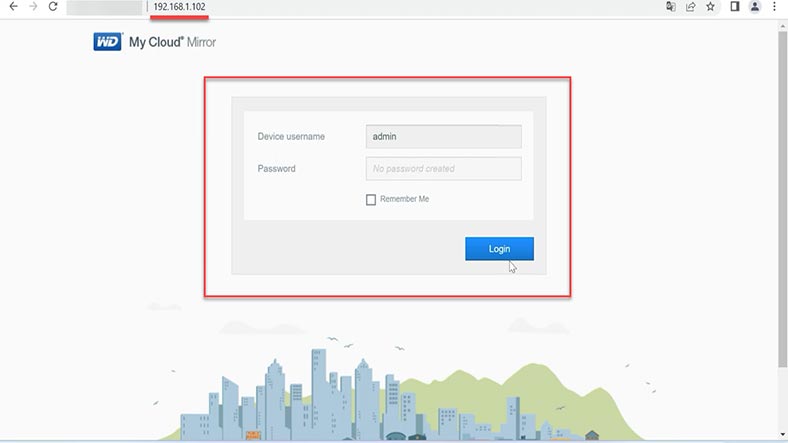
Enter the NAS management interface. To do it, open a web browser and enter the IP address of your storage device in the address bar. Enter your credentials (the login and password).
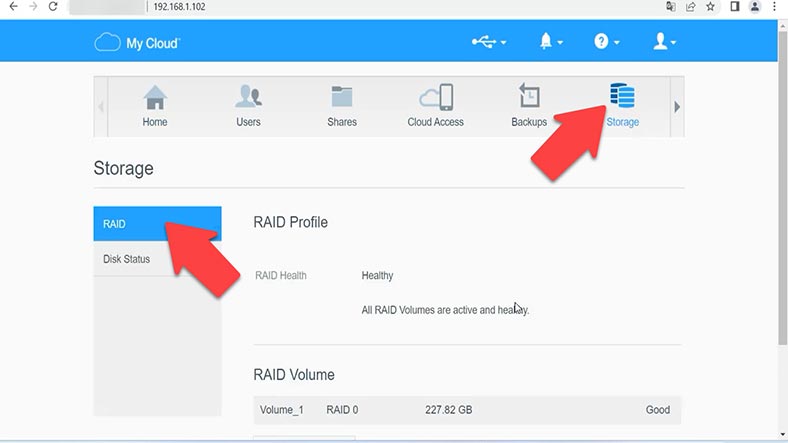
Open Storage – RAID.
After that, click on Change RAID Mode, then you will see a warning, so click ОK to continue.
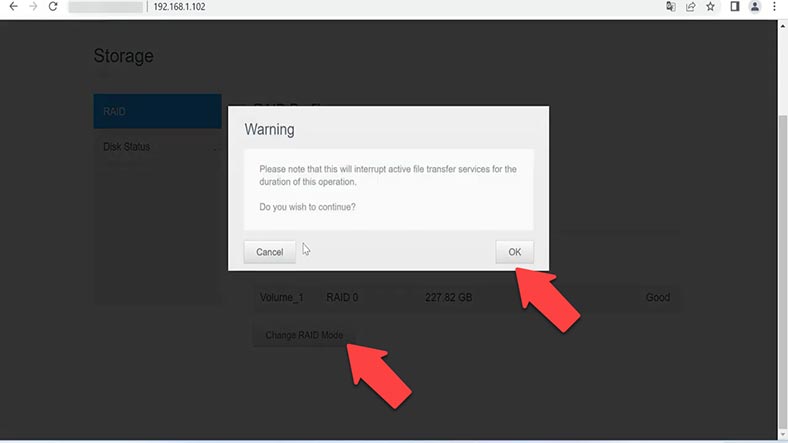
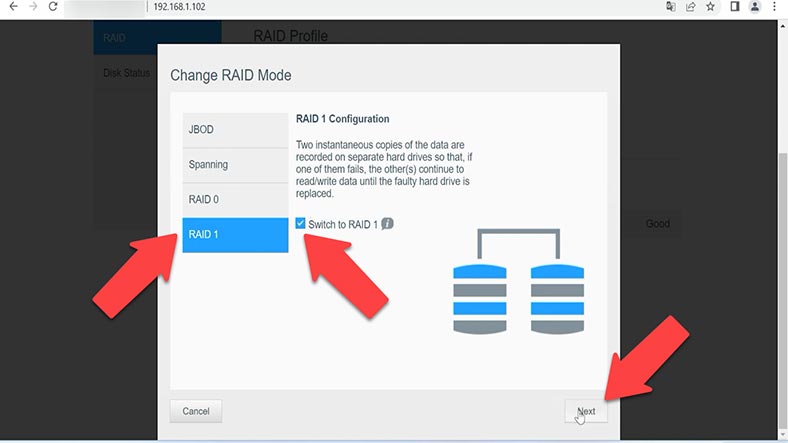
This storage device offers you several RAID levels to choose from: jbod, spanning, RAID 0 and RAID 1. The RAID configuration is performed during initial NAS setup. Select a RAID level, check this box and click Next.
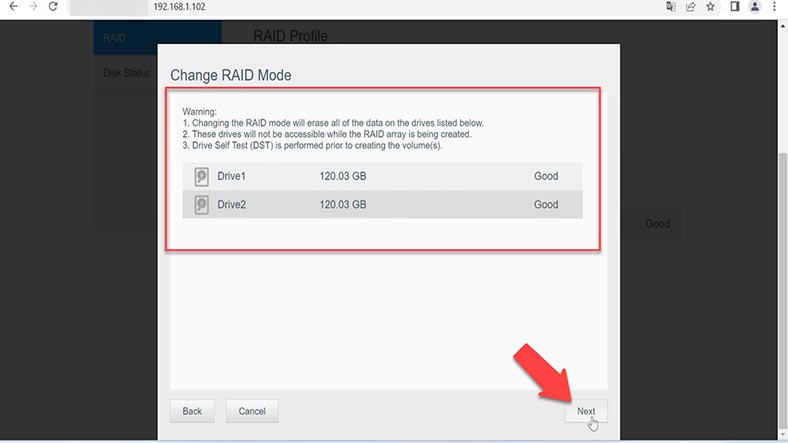
At the next stage, wait until the hard disks are checked and then click Next again. This operation is going to erase all information stored on the hard disks. It means you will lose all data which was kept inside the previous disk array.
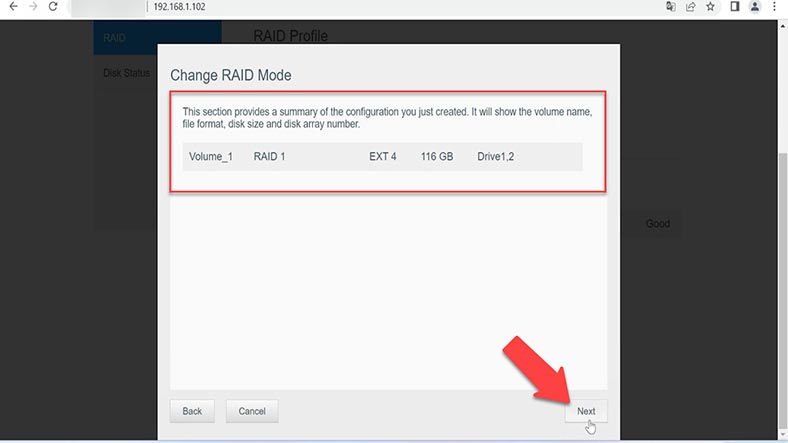
Check the properties and click Next, then Finish to complete the operation.
Wait until the rebuilding is complete. After initialization and formatting, the network storage will appear on your network.
Step 3. How to recover data from a RAID based on WD My Cloud Mirror NAS
If you failed to restore operability of the network-attached storage, or there is no way to do it, you should use a specialized tool for recovering data from NAS systems – Hetman RAID Recovery.
| Step | Description | Actions |
|---|---|---|
| 1 | Identifying the RAID type | Determine which RAID type was used on your NAS (RAID 0, RAID 1, RAID 5, etc.). This will help decide the next steps. |
| 2 | Disconnecting NAS and removing hard drives | Turn off the NAS, carefully remove the hard drives, and prepare them for connection to another device or computer. |
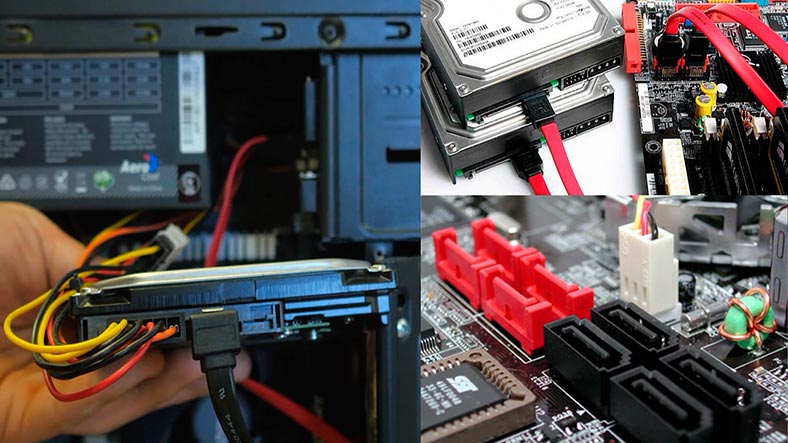
| 3 | Connecting drives to the computer | Use a special adapter or connect the drives directly to the computer using a SATA or USB interface. |
| 4 | Using RAID recovery software | Run a RAID recovery software, such as Hetman RAID Recovery, R-Studio, UFS Explorer, or other tools that support RAID recovery. |
| 5 | Scanning and recovering data | Scan the drives and recover the data. Save the recovered files to another storage device or computer. |
| 6 | Checking data integrity | Ensure all important files are recovered and their integrity is intact. Check each file before final copying. |
With Hetman RAID Recovery, you’ll be able to scan the hard disks in the non-operable NAS and recover the lost files. This utility supports various RAID levels and file systems, which makes it a versatile solution to recover data from different NAS models.
It will help you in case of breakdown, hardware failures, disk formatting or file system damage on your NAS. The utility runs a deep scan of the disk space and recovers data even in most complicated scenarios.
It has a user-friendly interface to help even novice users to find their way through the recovery process and perform the required operations to bring their files back.
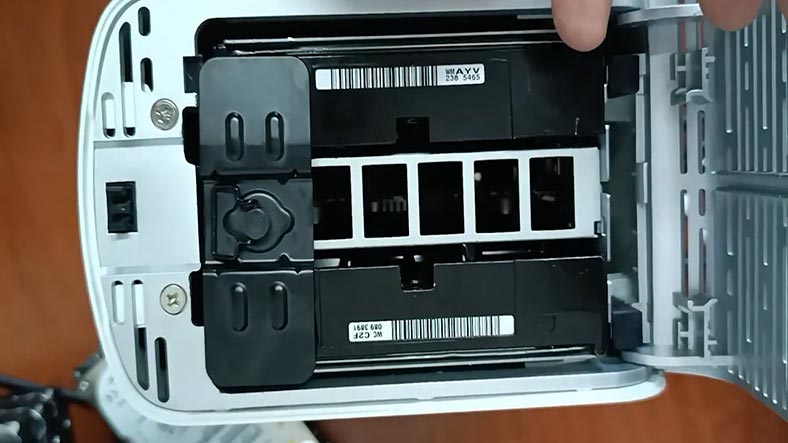
To get access to the hard disks, you should take them out of the NAS device and connect them directly to a Windows computer.
In case with RAID 0 and RAID 1, the operating system is unable to display the disk contents, so in the disk management window they will be shown as unidentified or having the RAW status.
If your computer’s operating system suggests initializing or formatting the disks after they are connected, don’t do it: this will erase the data completely, and recovery will become a much more challenging process.
Download and install Hetman RAID Recovery on your computer. When started, the program will automatically scan the disks connected to this computer and rebuild the damaged RAID system. In the main window, you will see the RAID rebuilt with the available hard disks.
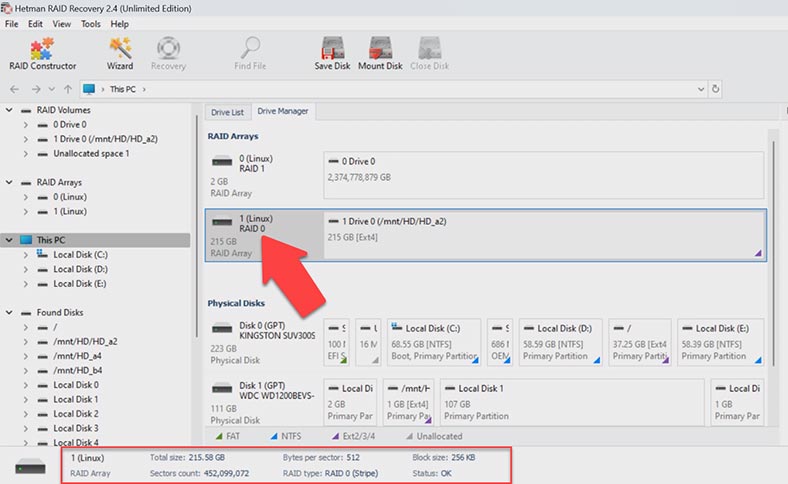
To find necessary files, right-click on the volume and click Open. After that, choose the scan type – Fast scan or Full analysis. For most simple scenarios, Fast scan will suffice: this operation takes less time. If it can’t find the required files, then go for Full analysis.
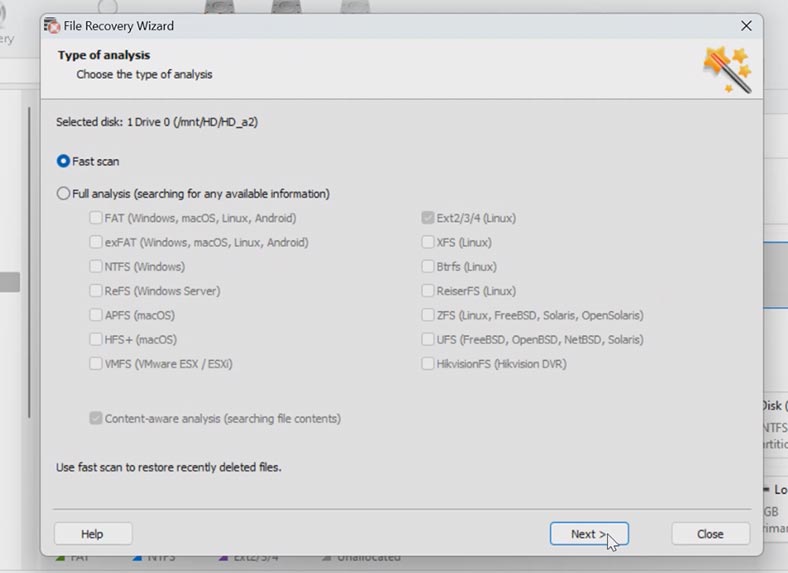
To do that, go back to the program’s main window, right-click on the volume and choose – Analyze again – Full analysis – specify the file system for this disk and click Next.
This program saves the entire structure of files and folders, so it’s very easy to find a required item. When the scan is over, open the folder where the lost files used to be. Preview is available for deleted files, and you can see their contents when you click on them. Previously deleted files are marked with a red cross. This program can also recover accidentally recovered data. Select all the data you want to restore, and click the Recovery button.
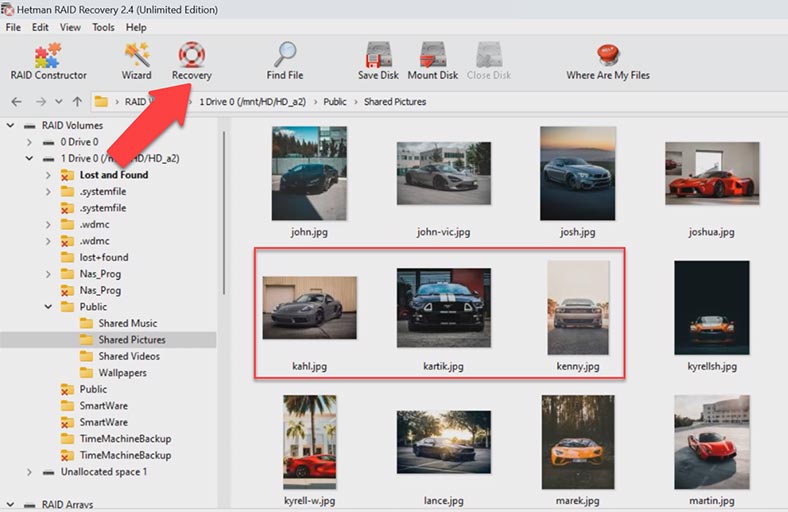
Specify where to save the files (choose the disk and folder), and click Recovery again. Make sure you choose to recover files to another disk or computer to avoid overwriting the original data. In the end, you will find the recovered files in the folder you have chosen.
This program can recover data from any RAID level supported by this device – you can see that recovery is available for RAID 1 and RAID 0. In the same way, you’ll be able to recover data from JBOD and SPAN configurations.
Conclusion
Today we have explored the steps required to recover lost data from a RAID system when a NAS storage breaks down. Hopefully, this article helped you to understand how to recover data from WD MyCloud Mirror if something went wrong with that NAS. Always remember that regular backup is the best practice to prevent data loss.


