Data Recovery from a RAID System: Coping with a Dead 3Ware 9650SE-4LPML Controller
In this comprehensive guide, learn how to recover data from a RAID system with a dead 3Ware 9650SE-4LPML controller. Whether you’re a system administrator or a user facing data loss due to a RAID failure, we’ll walk you through the entire recovery process step by step. From identifying the issue to implementing effective recovery strategies, this tutorial equips you with the knowledge and tools needed to successfully retrieve your valuable data and minimize downtime.
- 1. How to build a RAID 5 on 3Ware 9650SE-4LPML controller
- 2. How to replace a faulty 3Ware 9650-4LPML controller
- 3. How to recover data from a crashed RAID 5 system after 3Ware 9650SE-4LPML controller breakdown
- 4. How to rebuild a RAID manually with the RAID Constructor
- 5. Conclusion
- Questions and answers
- Comments
RAID arrays are an effective method to ensure safety and reliability of data storage by combining several hard disks into one logical volume and distributing data across them.
Controllers play a crucial role in building a RAID system as well as in ensuring data integrity and availability.
Controllers of this model 3Ware 9650SE-4LPML are a reliable and popular solution to create various RAID systems. However, a controller may fail one day, just like any other device. When the controller stops working properly, it triggers a series of grave problems, and loss of access to your data stored on the disk array is only one of them. Such situation can become a severe problem especially when you store valuable or necessary files on that disk array.
The 3Ware 9650SE-4LPML controller crash or failure can be caused by various factors including hardware issues, controller errors, or physical damage. As a result, the normal operation of your RAID system is disrupted and you face the problem of losing access to your files, or even losing you data.
Data recovery from a non-operable RAID based on the 3Ware 9650SE-4LPML controller requires special knowledge and a particular approach. It is important to take effective action to minimize the risks and preserve the integrity and accessibility of your data.

How to Recover Data from a RAID System with a Dead 3Ware 9650SE-4LPML Controller
1. How to build a RAID 5 on 3Ware 9650SE-4LPML controller
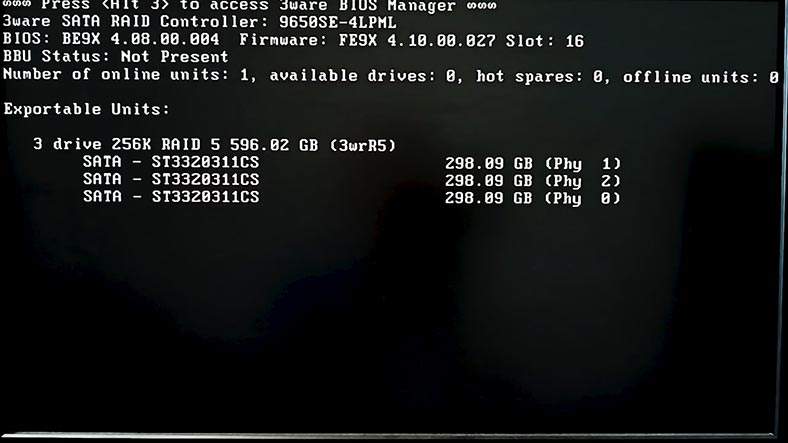
To understand how a RAID is designed, let’s explore the process of building a disk array on this controller model, 3Ware 9650SE-4LPML. You can create a RAID with the controller’s BIOS. Access it by pressing the key shortcut Alt + 3 while the system is booting.
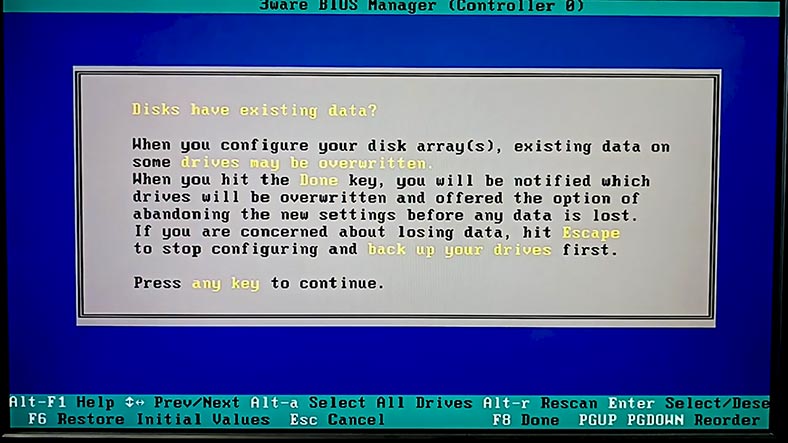
You will see a warning that changing the array configuration can result in overwriting the files. Press any key to continue. If you need to make changes to the configuration or create a backup, press Esc.
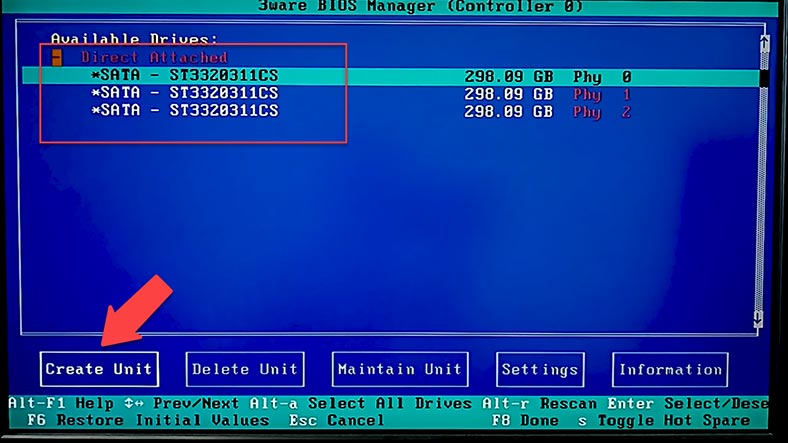
To create a new array, choose the disks with the Space key or press the key shortcut Alt + A to select all drives, then press Tab to jump to the button Create Unit, or press the key shortcut Alt + C, then press Enter.
At the next stage, give the array name and press Enter. After that, choose the RAID level and specify the stripe size. Change other properties if necessary. To open additional settings, click Advanced. When all the properties are given, click OK.
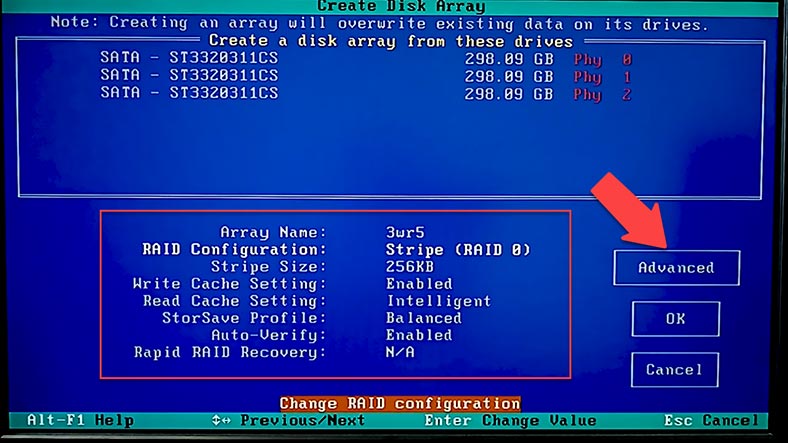
After the drives are initialized, the RAID is ready for work. To save the configuration and restart, press F8, Yes.
2. How to replace a faulty 3Ware 9650-4LPML controller
Now let’s find out how to replace a faulty controller. First of all, you need a controller of exactly the same model, 3Ware 9650SE-4LPML. After that, disconnect the storage system from the power source and remove all cables connected to the faulty controller.
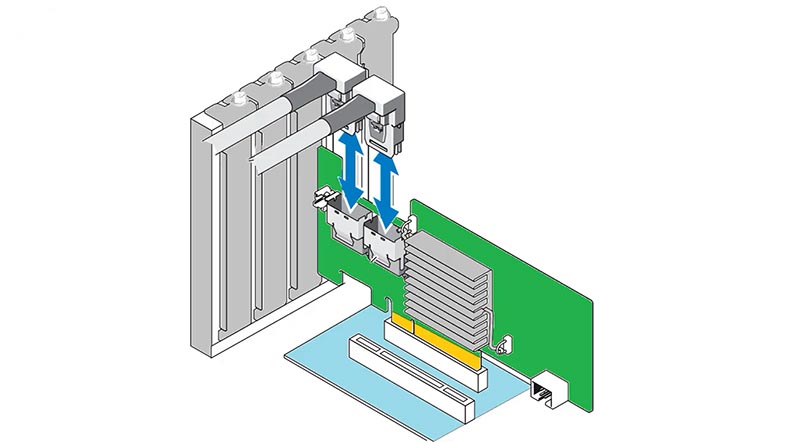
Then take the old controller carefully from the system case and replace it with a new one.
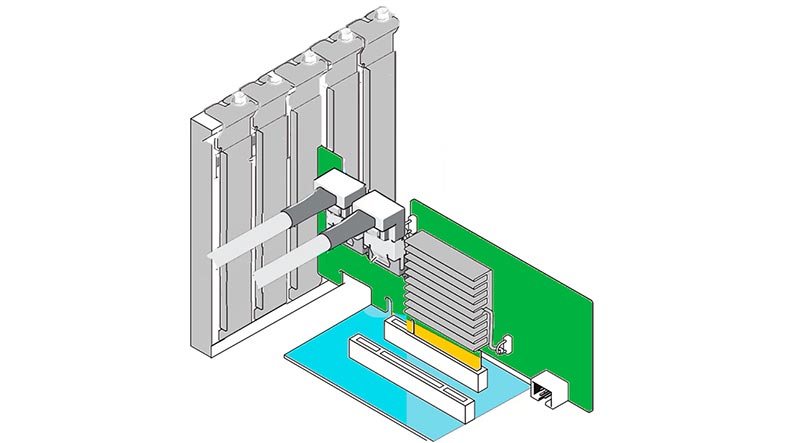
Make sure that all cables are connected properly and sit tightly in their ports. It is also important to observe the original connection sequence for the drives.
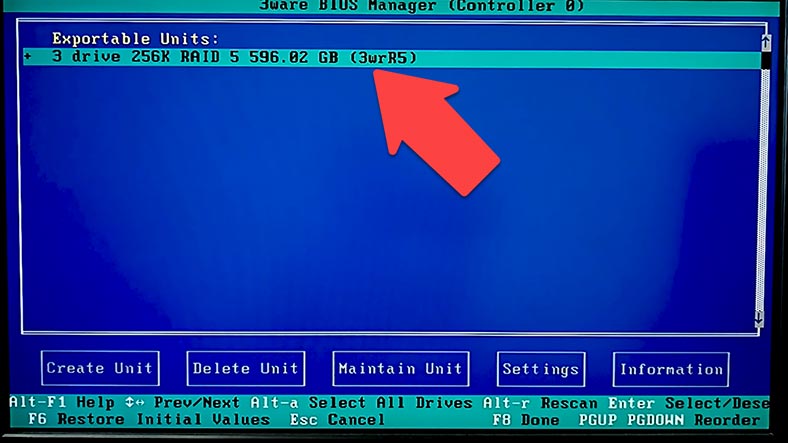
Power on the system and wait until it boots. Access the new controller’s settings. The controller should upload the configuration automatically. Press Esc to restart.
3. How to recover data from a crashed RAID 5 system after 3Ware 9650SE-4LPML controller breakdown
If you can’t find a controller of the same model, or you can’t replace the faulty item with a new one, the second method to restore access to your files is to use a specialized software tool – Hetman RAID Recovery.
| Step | Description | Actions |
|---|---|---|
| 1 | Familiarization with the controller documentation | Before starting the recovery process, familiarize yourself with the 3Ware 9650SE-4LPML controller manual and technical documentation. |
| 2 | Disconnecting and removing RAID disks | Power off the system, carefully remove the disks from the controller, and prepare them for connection to another device or PC. |
| 3 | Connecting the disks to another controller or PC | Connect the disks to another 3Ware controller or directly to a PC using a SATA/USB interface. |
| 4 | Using data recovery software | Run a data recovery program like Hetman RAID Recovery that supports RAID arrays and 3Ware controllers. |
| 5 | Data analysis and recovery | Analyze the disks and recover the data, saving it to another storage device or PC. |
| 6 | Checking the integrity of the recovered data | Ensure the integrity of the recovered files to make sure they are not damaged. |
Hetman RAID Recovery supports all popular RAID types, most file systems and various array patterns used by many RAID controllers. It can rebuild the crashed RAID with the available hard disks and help you recover important files. For data recovery, you need to connect all the hard disks to the motherboard of a Windows computer.
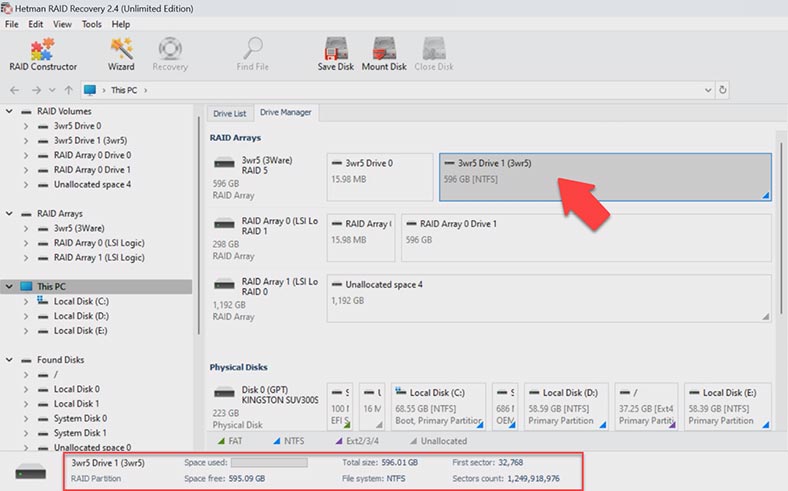
The program will automatically rebuild the damaged system with the hard disks. What is more, it can also rebuild a RAID system even if one or several disks are missing, but it depends on the array type – RAID 5 or 6 and its varieties. If your motherboard has less SATA ports or power connectors than necessary, use additional adapters and expansion cards.
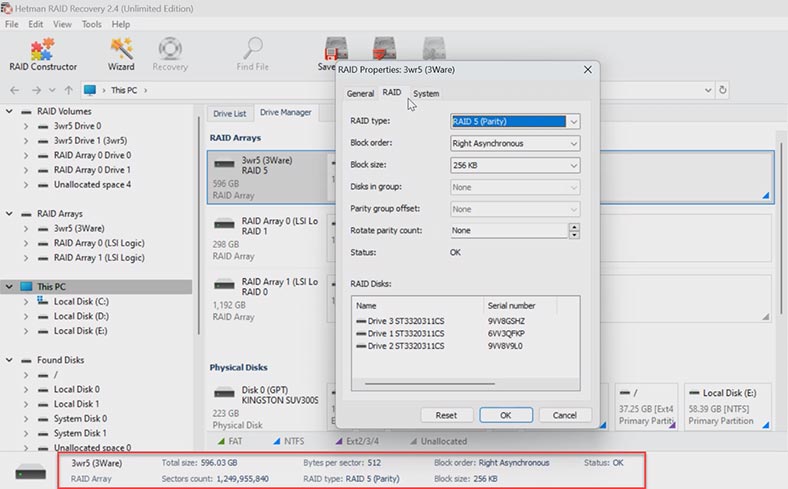
After the array is built, Hetman RAID Recovery enables you to check the correctness of its identification in the Drive Manager. The brief RAID information is displayed below. If necessary, you can view the array properties including the list of hard disks used to create it.
To start looking for files, right-click on the volume and choose Open. After that, select the scan type – Fast scan or Full analysis. We recommend running a Fast scan first – it will take less time.
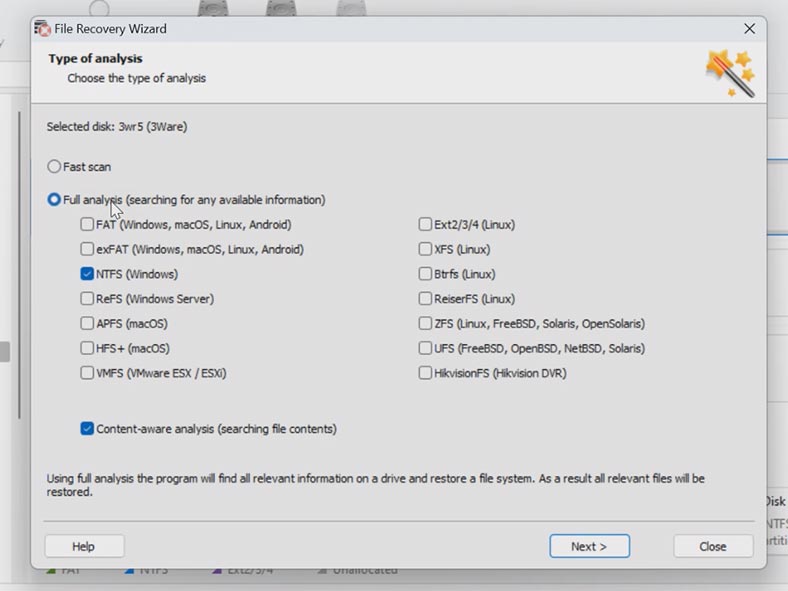
If Fast scan is not available or the program can’t find the missing files, then go for Full analysis. Go back to the main window, right-click on the volume and choose – Analyze again – Full analysis – specify the file system and click Next.
When the scan is over, open the folder where the files which you need to recover used to be stored. All files can be previewed so you can see the contents of documents, photos and even videos. The program also marks the previously deleted files with a red cross.
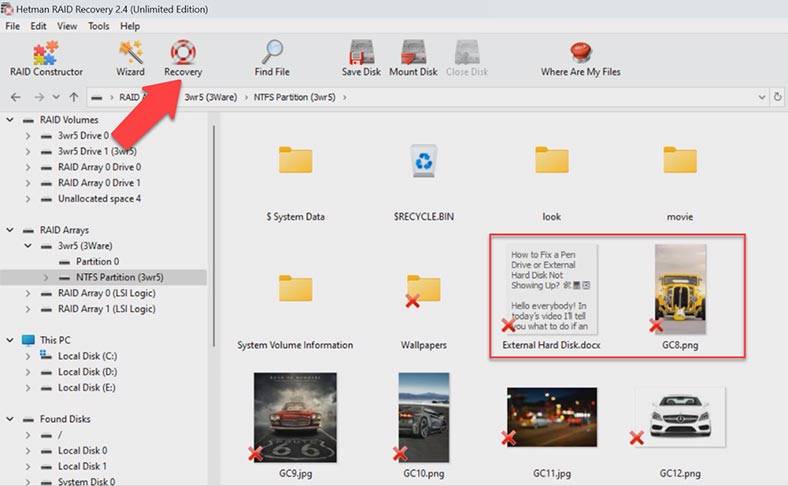
Select the files you want to restore, and click the Recovery button. Specify where to save the path (choose the disk and folder), and click Recovery again. After the recovery operation is over, you will find the recovered files in the folder you have chosen.
This is how Hetman RAID Recovery provides you with a convenient and effective way to recover data from a non-operable RAID system based on 3Ware 9650SE-4LPML controller even if you don’t have another controller of the same model or can’t access the hardware resources of your system.
4. How to rebuild a RAID manually with the RAID Constructor
In some situations, the program may fail to rebuild the RAID automatically. It can happen when the service information on the disks is erased, so the program cannot identify parameters of the crashed RAID.
In such cases, the RAID Constructor with a manual build feature will help you.
This tool will save the day when the disk beginning is erased, together with the information about the array parameters. This is what typically happens when disks are connected to another controller and the previous configuration is erased, when the RAID is rebuilt, or when disks are initialized. After initialization, data will be erased completely.
If you know the array parameters, start the Constructor, choose Manual Mode – Next. Specify the array type, block order and size. Add the disks it used to include, and replace the missing disks with empty drives by clicking the “plus” button.
You may have to specify the offset which tells you where the beginning of the disk is located.
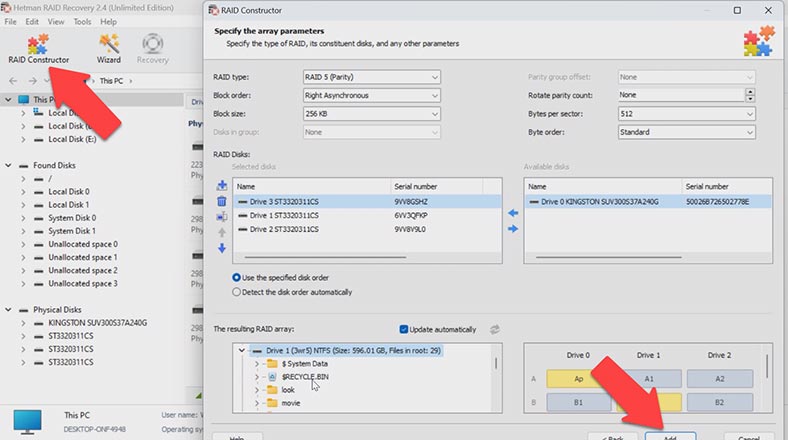
When you give all the parameters you know, you will see the preview of your RAID, and if all information is correct, you can unfold it to see its folders here. Fill in all the properties, and click Add. After that, the RAID system will appear in the Drive Manager. Now start the scan, search for files, and recover the ones you need.
5. Conclusion
Today we have explored several ways of recovering data from a crashed RAID after a controller breakdown. If you can, replace the faulty controller with a similar one. If you can’t, use a data recovery tool, Hetman RAID Recovery.
In either case, always remember to back up your files regularly. Such backups will help you recover data when the controller fails, or in case of other unexpected problems.


