Recover RAID 5: Motherboard Controller Guide
Need to recover data from RAID 5 based on a motherboard controller? Our comprehensive guide has got you covered! Learn step-by-step instructions and expert tips for successfully salvaging your data from the motherboard RAID 5 setup. Say goodbye to data loss worries and hello to recovered files!
- Case 1. How to replace a faulty hard disk
- Case 2. If the wrong disk was excluded from the array. Reset Disk to Non-RAID
- Case 3. What to do if the motherboard fails
- Case 4. Accidental removal of a RAID system in the Intel Rapid Storage Technology menu. Delete Volume
- Conclusion
- Questions and answers
- Comments
The RAID technology lets us boost read/write speed several-fold, and ensures a certain level of fault-tolerance for the drives within such system. That is why this technology is widely used in all kinds of organizations, from small businesses to multinational corporations. Most of the time, RAID systems are meant to store very important data, and that’s where high reliability is a must. However, nothing lasts forever, and disk arrays are no exception. A variety of things may affect the safety of your data: an operating system error, a power cut, a hardware issue, and the notorious human factor as well.

5️⃣ How to Recover RAID 5 Based on a Motherboard Controller 5️⃣
The main question you’ll have to answer if it happens is how to restore the operability of your system, or copy the important files elsewhere? In fact, this article attempts to instruct you on what to do in such situations.
Case 1. How to replace a faulty hard disk
If one of the disks within the array is out of order, the RAID status information will be displayed before booting the operating system, and you’ll see that the array is damaged. In my case, this is RAID 5.
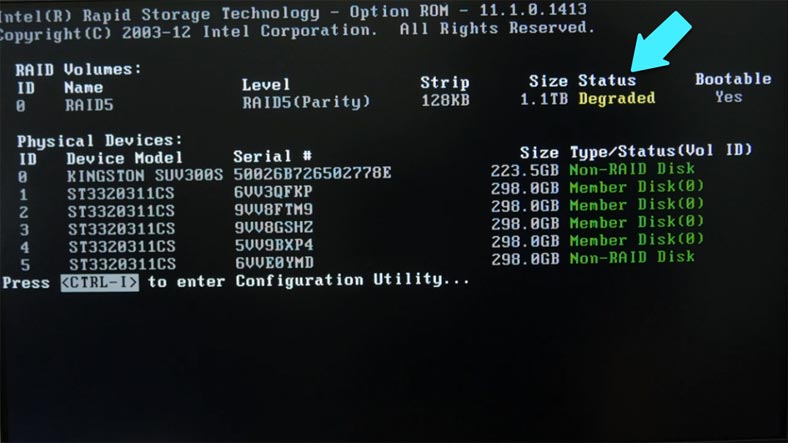
To replace the faulty disk with a new, healthy one open the Intel Rapid Storage Technology menu. Do it by pressing the key shortcut Ctrl + I while the computer is booting.
You will see the list of all your disks, and you can tell which of them is down by checking their serial numbers.
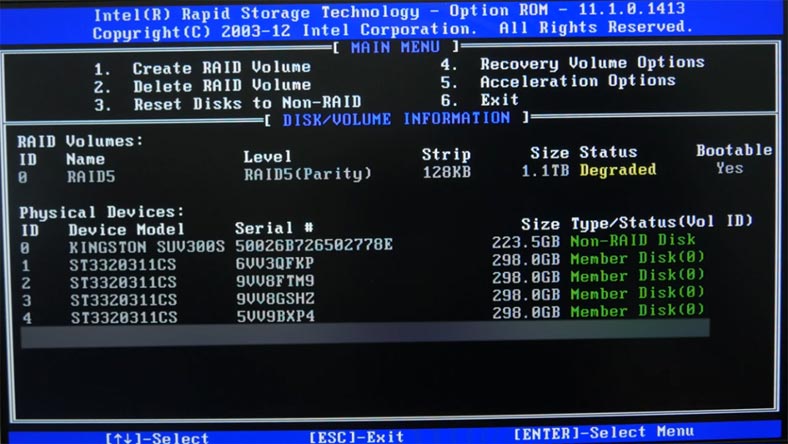
Shut down the computer and disconnect that disk. After that, connect a healthy disk instead, and turn on the computer. Open the Intel RST menu, and you’ll be suggested to repair the damaged array by adding a new disk for rebuilding.
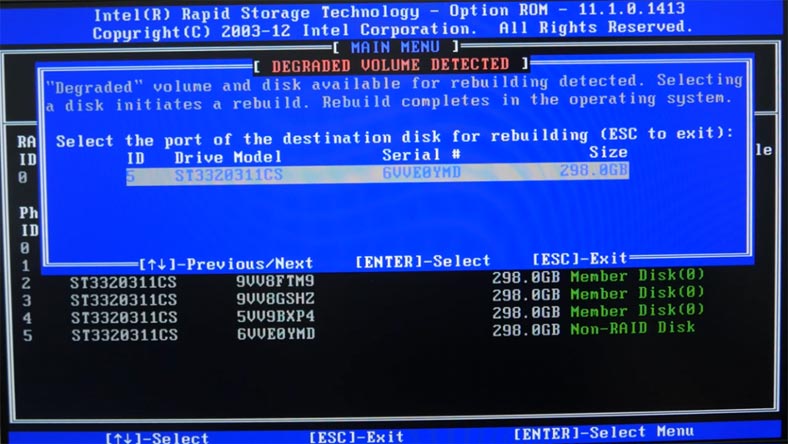
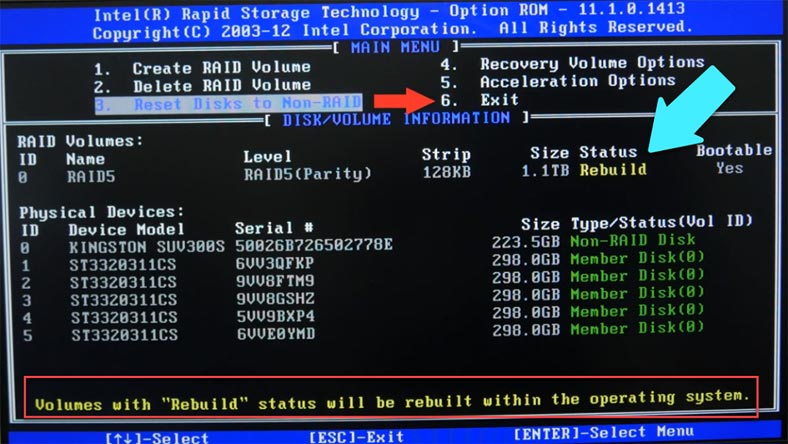
Select a disk, press Enter, and the status will change into Rebuild. Below, you’ll see a message saying that volumes with “Rebuild” status will be rebuilt in the operating system. Press 6 in the menu above to exit and boot the operating system.
Case 2. If the wrong disk was excluded from the array. Reset Disk to Non-RAID
If accidentally picked the wrong drive for rebuilding or excluded it from the RAID system, the whole disk array will be damaged after the operating system boots, and all of its data will become inaccessible. Use Hetman RAID Recovery to extract data from the damaged array.
This software product supports all RAID types and can recover data from inoperable arrays or drives that make it up. It will read the array properties and the information about the motherboard it is built on. After that, it will rebuild the damaged array and restore your files.
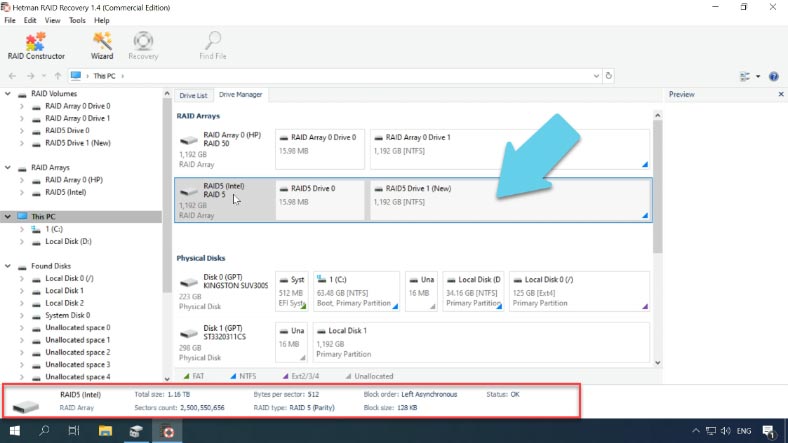
The program identifies the array properties immediately and then rebuilds it automatically. The detailed information is displayed in the lower part of the window.
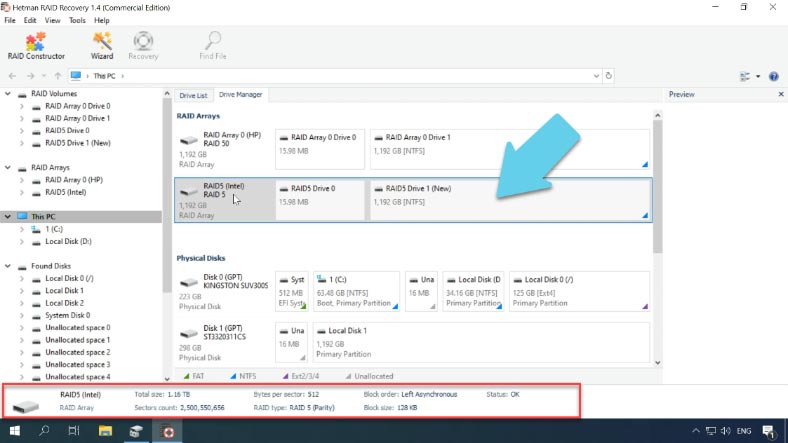
Before you start the recovery process, make sure you have a disk of the same or larger capacity than the amount of data you’re going to recover.
Right-click on the volume icon and choose Fast scan. When the scan is over, you only have to select the necessary files or folders, and click “Recovery.” Then give the path to save the recovered files and confirm the operation. When the recovery process is complete, you’ll see all the files in the specified directory.
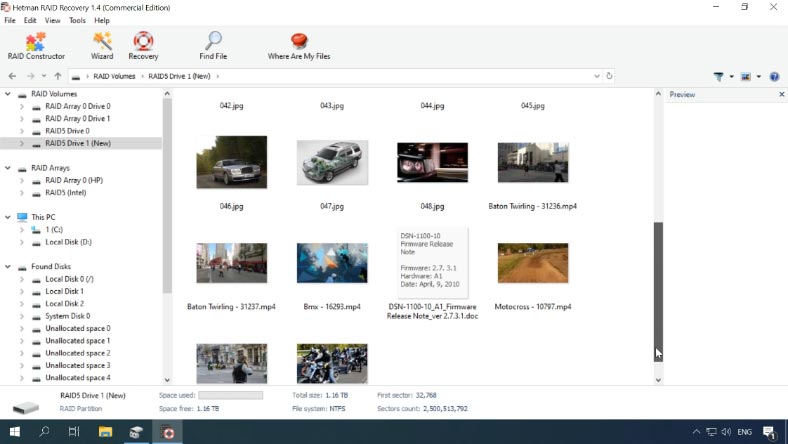
If the Fast scan is not too informative, run “Full analysis.” This is going to take much longer, but in the end, you’ll be able to see all the information still remaining on the disks, including the files that have been deleted.
Case 3. What to do if the motherboard fails
If a hardware failure occurs or the motherboard breaks down, and you connect the drives to another computer, you’ll certainly need a third-party software product to recover the information, because a different controller on the other computer’s motherboard won’t be able to identify the array properly, while the operating system will suggest to initialize or format them in the Disk Management window.
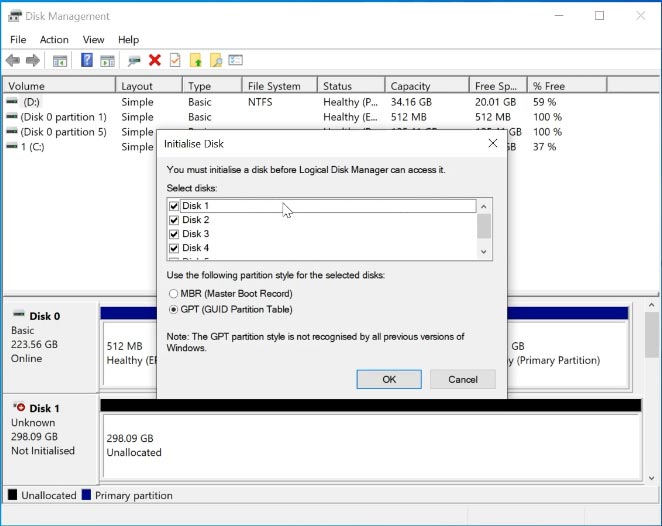
Never agree to that, as it will erase all the remaining data in every drive within the disk array. Instead, our utility will be able to rebuild the RAID system automatically, scan the drives and recover the files you need.
Case 4. Accidental removal of a RAID system in the Intel Rapid Storage Technology menu. Delete Volume
Hetman RAID Recovery will help you recover data even if your RAID system is completely removed in the Intel RST menu.
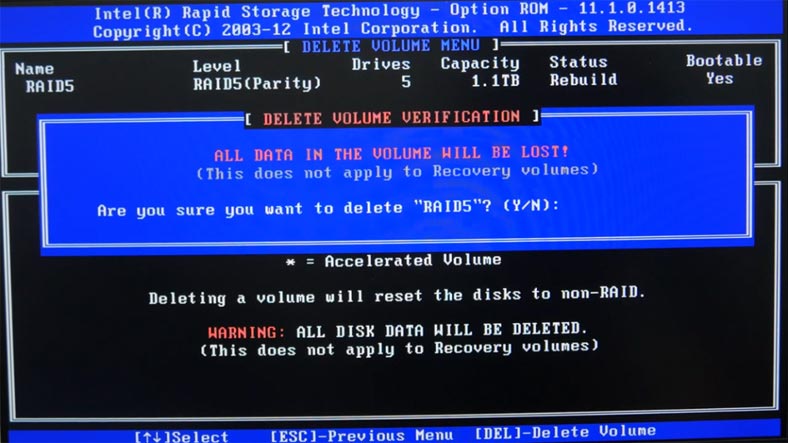
As you can see, even in this scenario the program was able to identify the type of the damaged array and rebuild it automatically. All you have to do now is to scan it and restore the data you need.
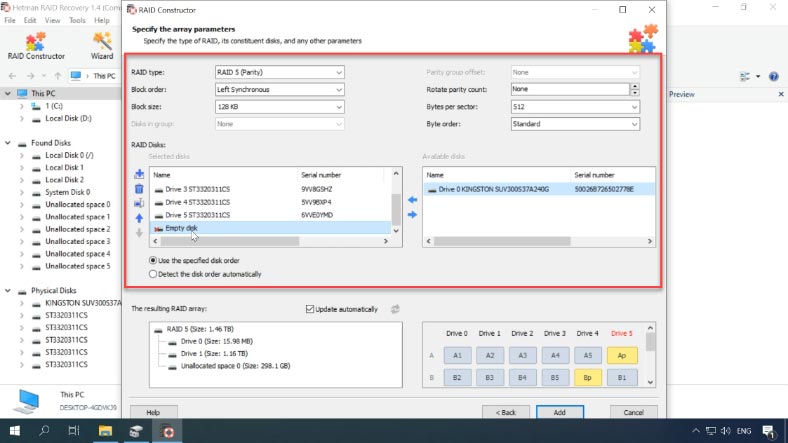
If the program fails to rebuild the damaged array automatically, use the RAID Constructor.
Select “Manual Mode” and click “Next,” then specify all the settings of the array.
RAID type, the order and size of the blocks it used to consist of, select them from the list and specify the correct order. Fill the missing disks with empty ones. After all the settings are complete, click “Add” and it will appear in the Drive Manager immediately. The last step is to scan it and recover the necessary files.
RAID 5 remains operable if one disk fails, but with two disks down, the array becomes completely inoperable and there is no way to access the information from such a storage system. However, with our program, you’ll be able to recover information from an array lacking two or even more disks, but a part of that data will be damaged.
Conclusion
After all, any RAID type is vulnerable to damage and may fail due to a variety of reasons. That is why it is crucial to a have a backup copy of important data so that all your files can be recovered without affecting the workflow. Hetman RAID Recovery comes to the rescue with a bundle of features to make data recovery from faulty, damaged, or formatted disk arrays simpler and easier than before, and it supports all popular RAID formats. With this tool, your lost data will be back without a sweat.
| Characteristic | Description |
|---|---|
| Supported RAID Types | RAID 0, RAID 1, RAID 5, RAID 6, RAID 10, JBOD |
| File System Compatibility | NTFS, FAT, FAT32, exFAT, ReFS, HFS+, Ext2/3/4, XFS, ZFS |
| Supported Devices | Hard drives, SSD, NAS (QNAP, Synology, WD, Buffalo, etc.), USB storage |
| Recovery Capability | Data recovery from damaged, inaccessible, or formatted RAID arrays |
| User Interface | Intuitive graphical interface with step-by-step recovery wizard |
| Preview Feature | Option to preview files before recovery |
| System Requirements | Windows 7, 8, 10, 11, Windows Server 2008 and later |
| Additional Features | Virtual machine recovery, save to external disk or disk image |


There are two types of RAID failures:
- one of the disks falls out of the array (for example, because it was removed, or because it failed);
- a disk is only partially operable (for example, read operations are fine, but you can’t write any data).
When receiving a request to read data from a faulty disk, the controller should read data from all available disks, and then restore the missing data.