StarWind SAN&NAS Data Recovery: How to Retrieve Data from Virtual NAS
Discover how to recover data from a Virtual Network-Attached Storage using StarWind SAN&NAS. Whether you’re a system administrator or a user facing data loss in a virtual environment, we’ll explore the best methods and techniques for retrieving your valuable data. From troubleshooting to advanced recovery strategies, we’ve got you covered. Regain access to your data!
- How to install and configure StarWind SAN & NAS in VMware
- Data recovery on StarWind SAN & NAS
- Pros and Cons of StarWind SAN&NAS
- Conclusion
- Questions and answers
- Comments
In today’s article, we’ll describe how to recover data from a RAID level 5 with the XFS file system, or a virtual machine based on VMware hypervisor. This tutorial is also suitable for other ways of building a virtual network-attached storage: Hyper-V, KVM and so on.
| Recovery Method | Description | Advantages | Disadvantages |
|---|---|---|---|
| Recovery using backup | Using previously created backups to restore lost data. | Quick and simple recovery if backups are up-to-date. | Requires regular backup creation. |
| Using built-in StarWind SAN&NAS tools | Applying tools built into StarWind SAN&NAS for data recovery. | Integration with the system, automation capability. | Limited functionality compared to specialized software. |
| Data recovery using Hetman RAID Recovery | Specialized software for recovering data from RAID arrays and virtual storage. | High efficiency, support for various RAID types, capability to work with different file systems. | Requires technical skills for setup and use. |
StarWind SAN&NAS is a powerful and convenient tool to create and manage network storage systems. It allows users to unite several physical disks into a single data storage, with the opportunity to back up and replicate data. However, just like any other equipment, even with the most reliable system onboard, StarWind still has a risk of data loss due to various factors such as hardware failures, operating system errors, or human faults.

How to Recover Data from a Virtual Network-Attached Storage StarWind SAN&NAS
How to install and configure StarWind SAN & NAS in VMware
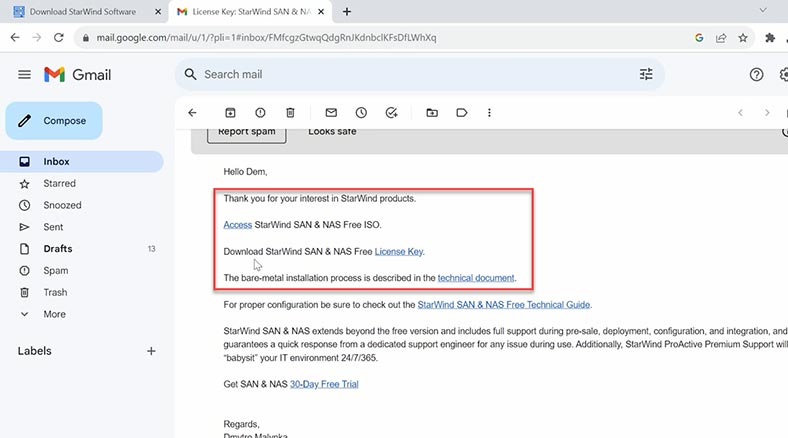
For installation, download an ISO image of the operating system for StarWind SAN & NAS from the official website.
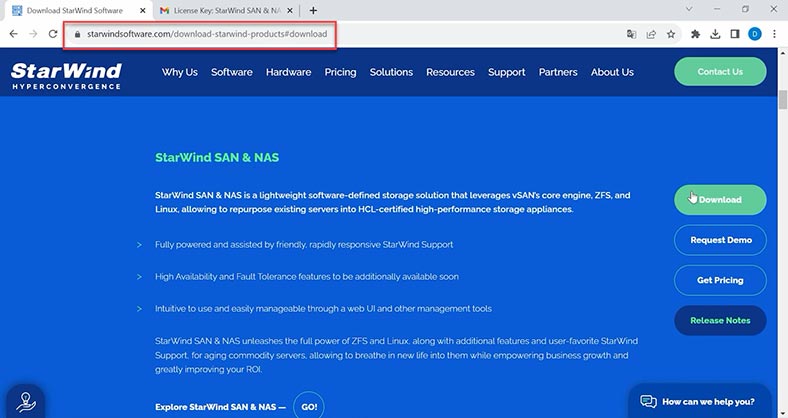
Click Download, fill in the gaps, and then two links will be sent to your email: a link to download the ISO image of the system, and a link to download the trial version key.
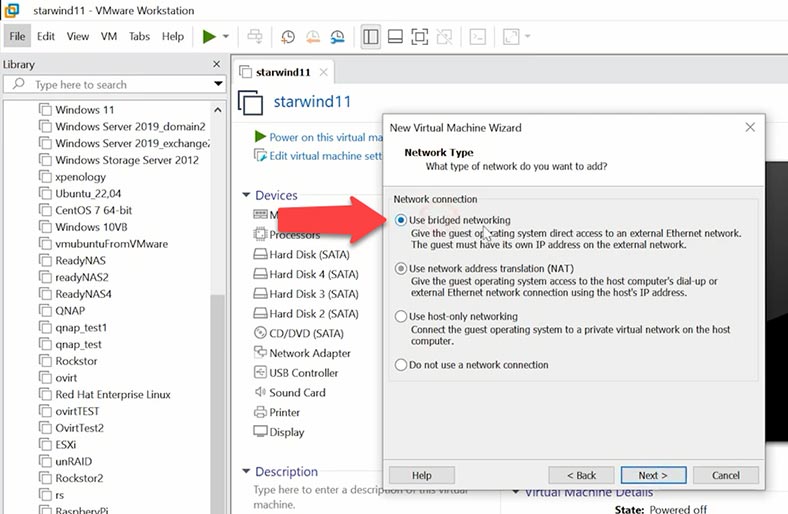
Creating a virtual machine with StarWind SAN & NAS is no different from doing it on Ubuntu. Visit our channel to check out one of our videos for a detailed tutorial on creating virtual machines in the VMware. The only difference is the network settings – to see the machine online choose bridged networking.
Now let’s explore StarWind installation in greater detail, although this process shouldn’t raise any questions.
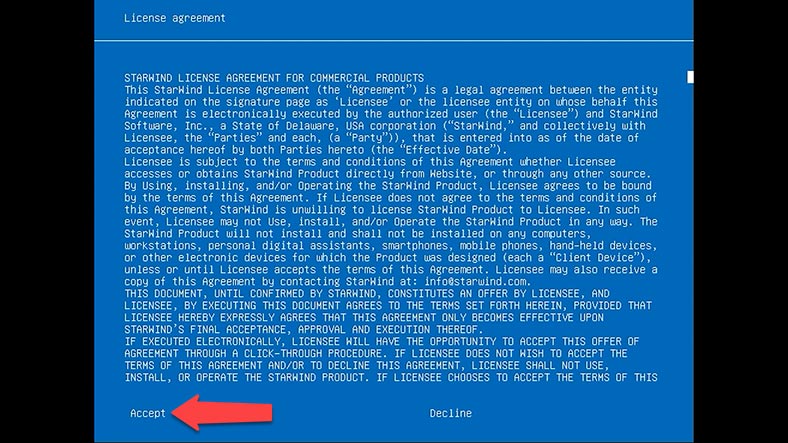
Power on the virtual machine; when it starts booting, you’ll see the license agreement window – accept the agreement to continue.
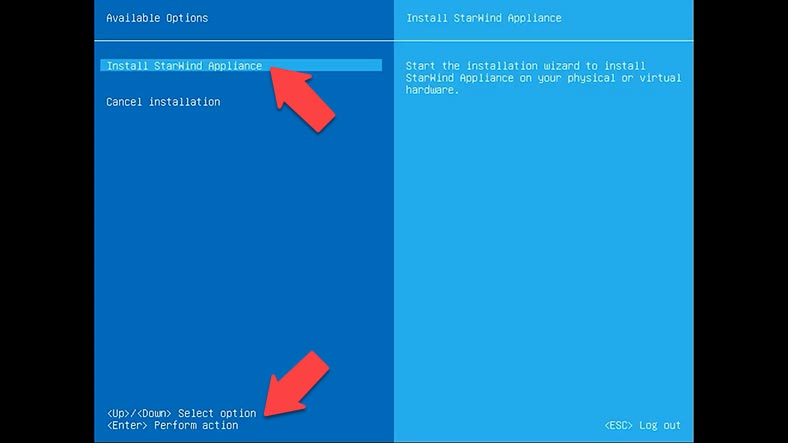
Then you will see the installation window. Make sure the item Install StarWind Appliance is selected, and press Enter.
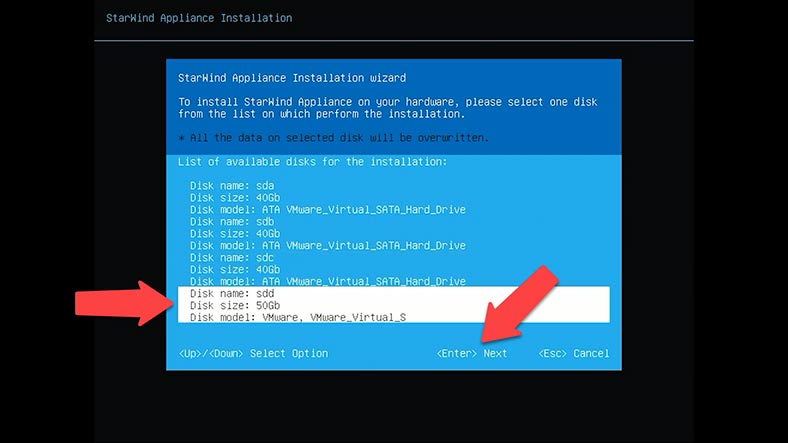
Now choose the disk where to install the operating system. Type Yes to confirm your choice and press Enter. It starts the installation process, so you’ll have to wait a little until it’s over.
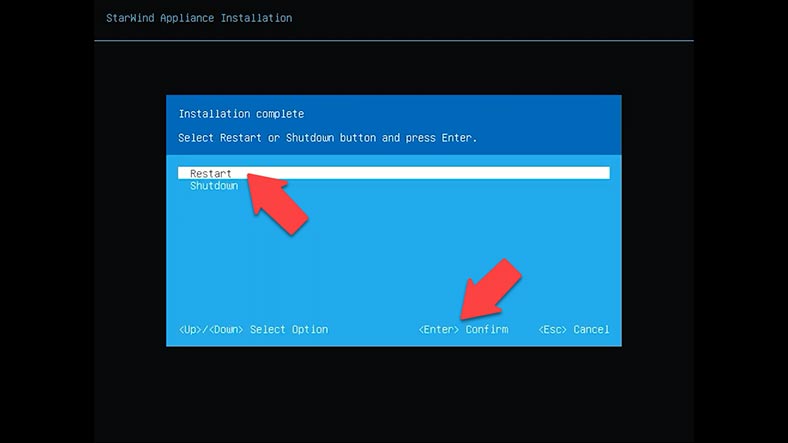
The installation is complete, press Enter to reboot.
When the virtual machine boots, you’ll see the management console. To make your storage device accessible on the network, configure its network settings including the IP address and subnet according to your infrastructure. This will allow other devices on this network to connect to the storage and exchange data, as well as to manage the storage system.
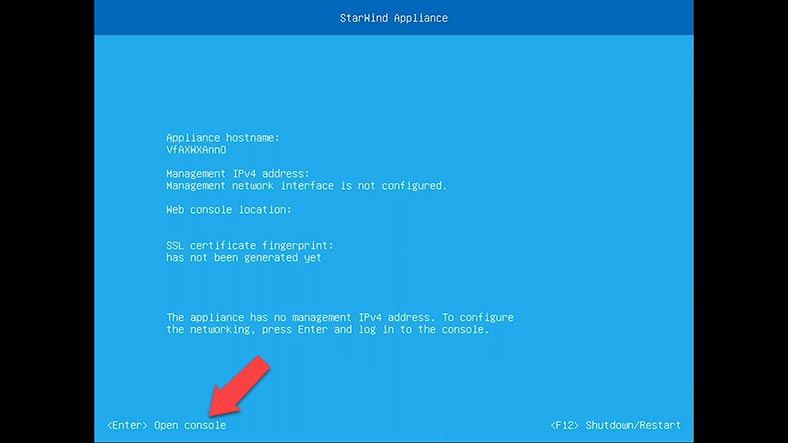
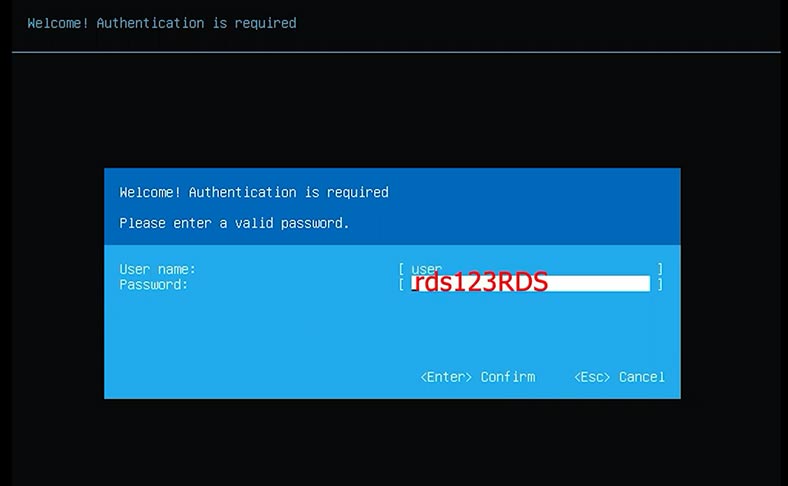
To open the console, press Enter, then type the login and password – by default, the login is user and the password – rds123RDS.
Now open the network settings and press Enter to modify them. Type the IP address, the subnet mask, default gateway, as well as the hostname and DNS, then press Enter to confirm them.
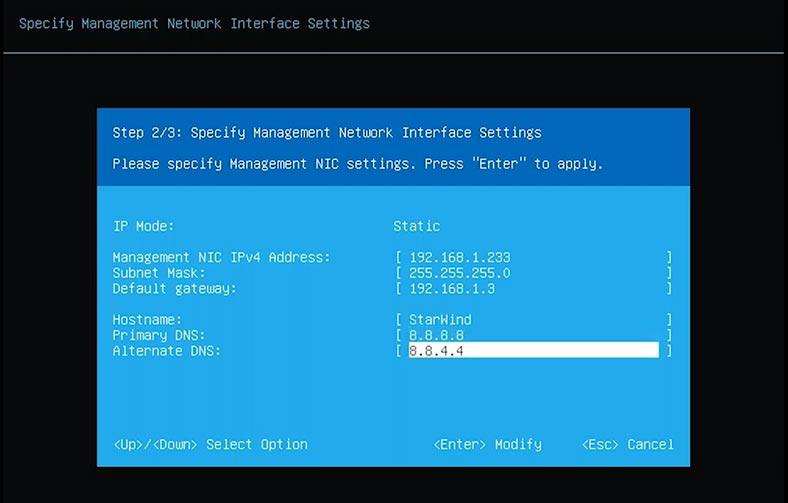
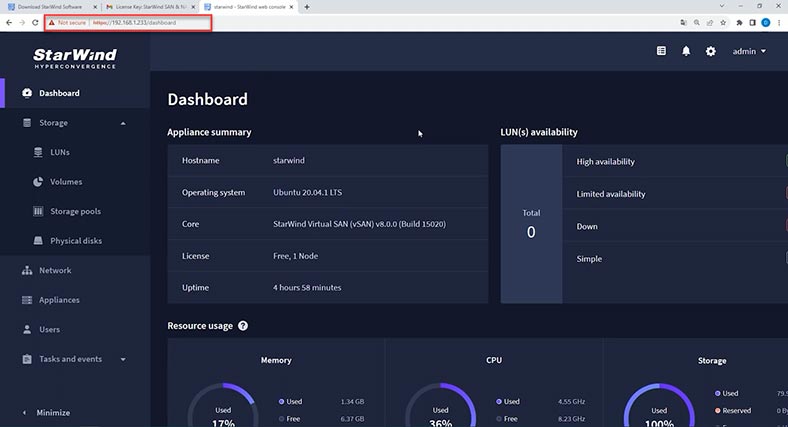
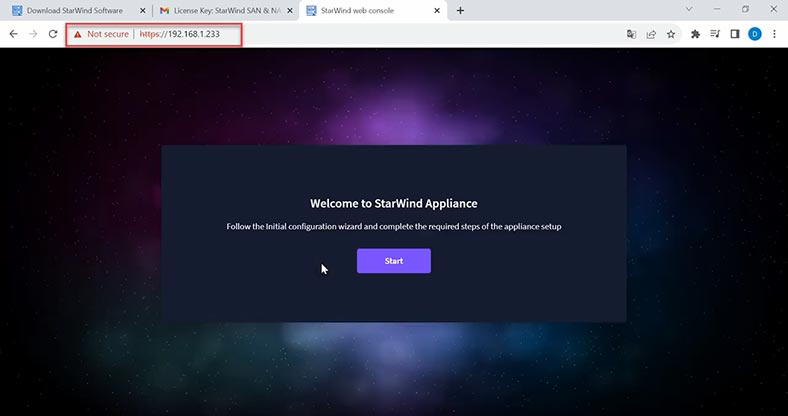
Now when you proceed to this address in your browser, it opens the web interface for StarWind SAN&NAS.
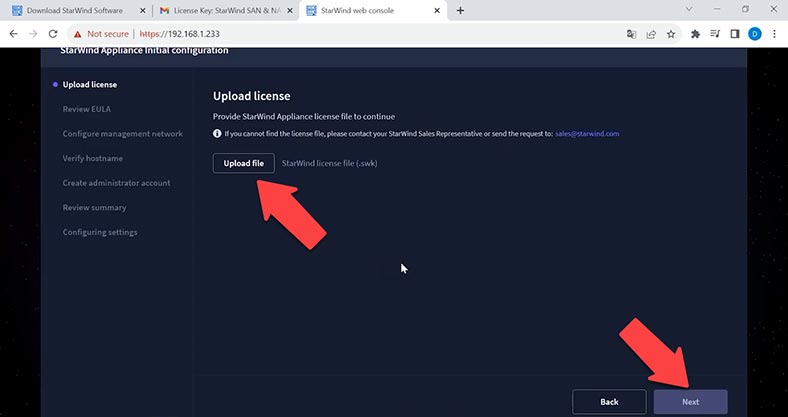
At the next stage, upload the license file. The link to it was sent to you earlier, together with the link to the operating system image.
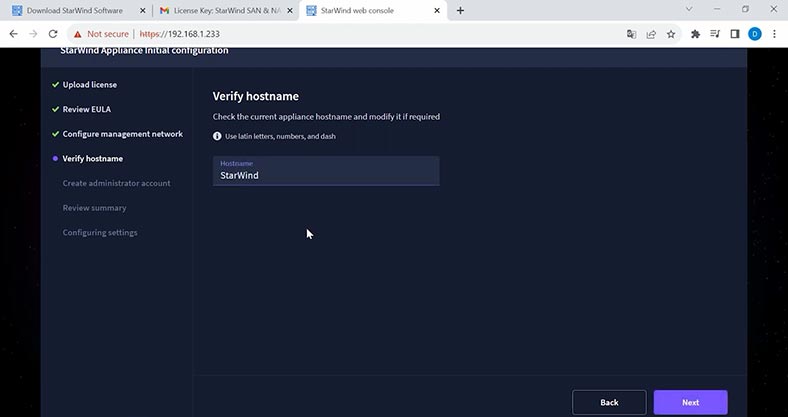
Read and accept the End-user license agreement to continue. View or modify network settings and click Next. Specify the name and location of the virtual machine, and click Next.
Note. We recommend using static network settings in this configuration.
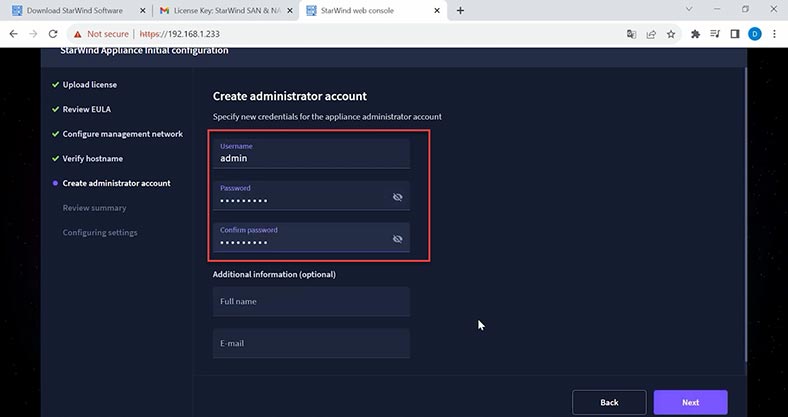
Create an administrator account, give the login and password, confirm the password and click Next.
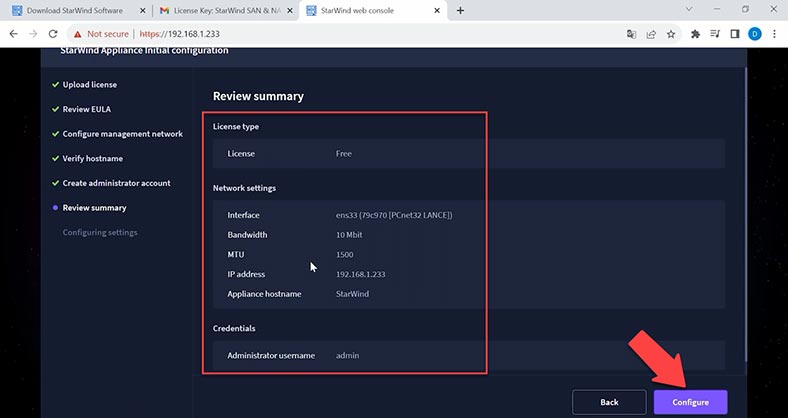
Review the selected properties and click Configure to start setting up your storage. Wait until the initial configuration wizard configures StarWind SAN&NAS.
When the storage is configured and ready for work, click Finish to install StarWind vSphere plug-in, or uncheck the box to skip this step and proceed to the login page.
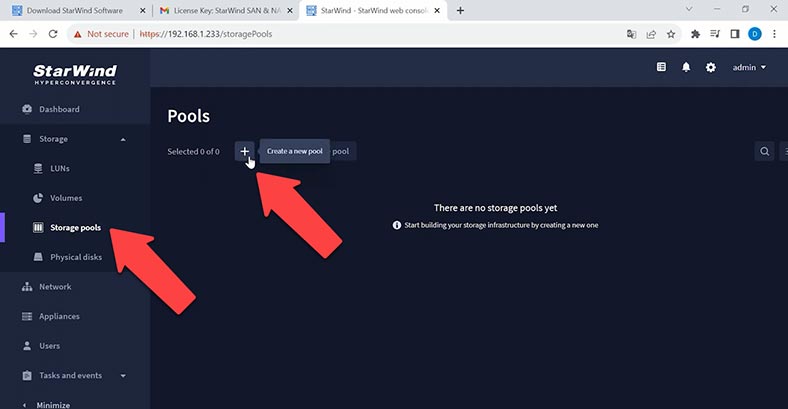
Enter the login and password for the new user. Here, you can create a pool, volume and so on. Let’s create a RAID in this operating system. This RAID will be based on mdaddm technology.
To build a RAID with the available hard disks, open Storage, Storage pools. Click on Create a new pool.
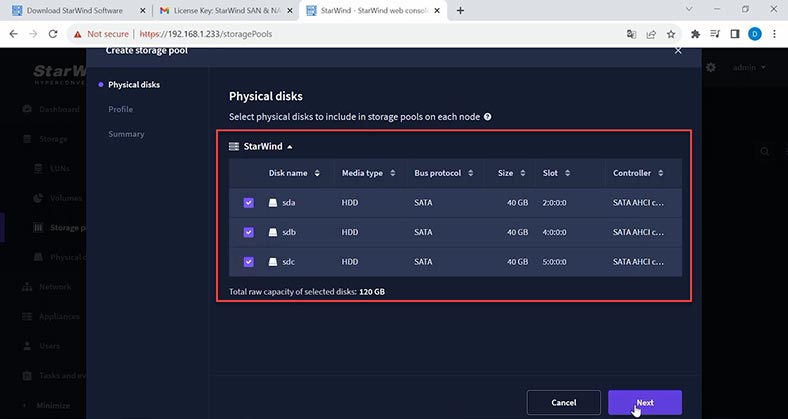
After that, select disks and choose the pool profile for this pool – the recommended automatic one or manual.
In the manual profile, you can select the RAID level and file system – by default, it’s XFS. When all the properties are ready, click Create. When the creation process is complete, the pool will appear in the Storage Pools window.
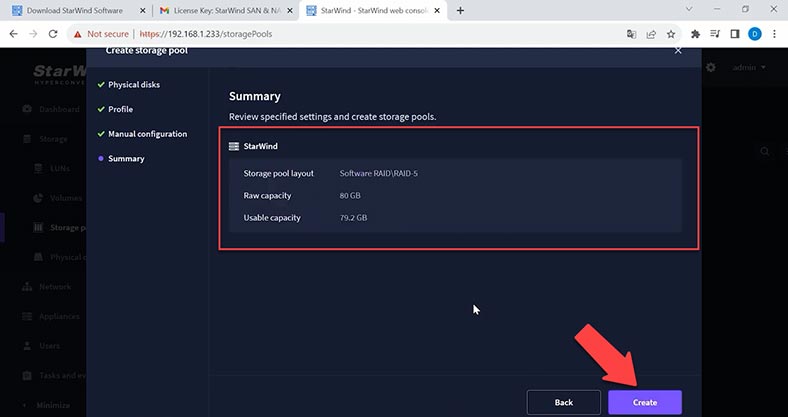
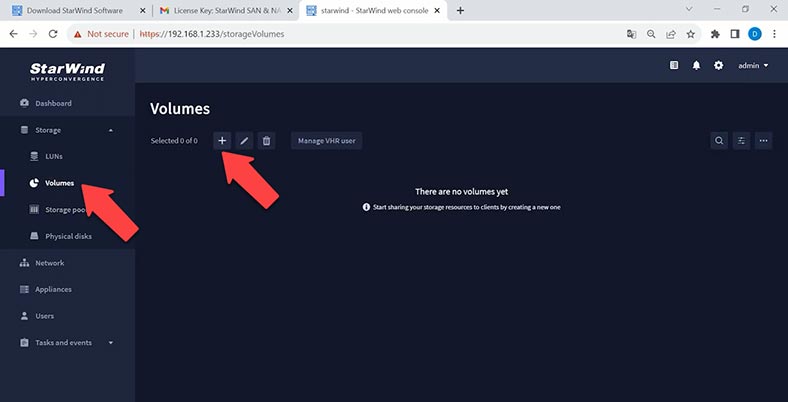
Now you can create a volume. Open the Volume tab and click Create a new volume.
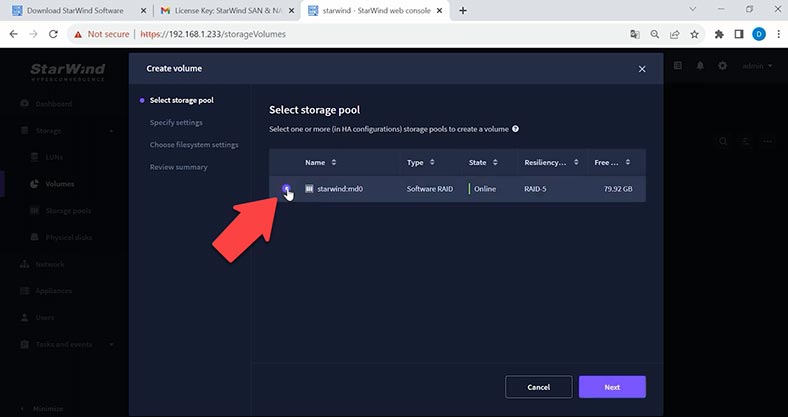
Select the storage pool where the new volume should be created.
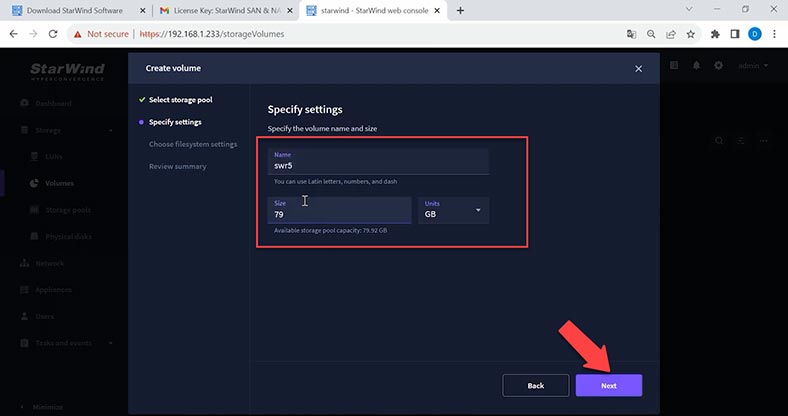
Give the pool name and size.
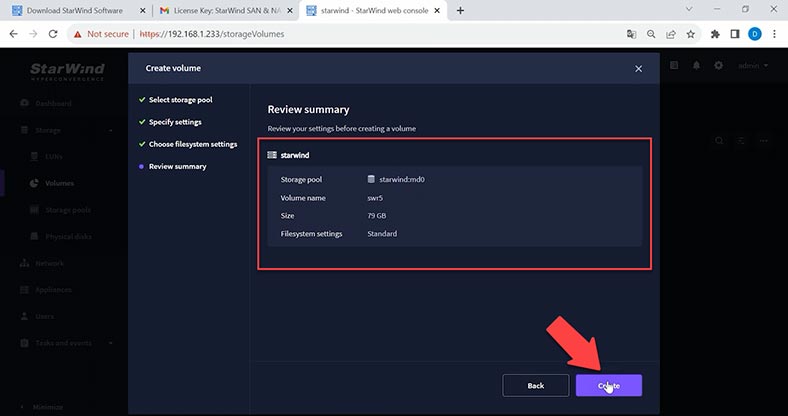
At the next stage, choose your file system settings, review the properties and click Create.
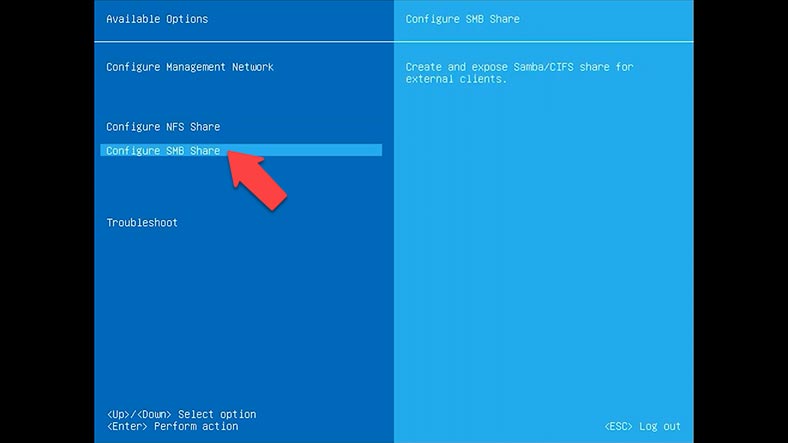
When the volume is ready, you can create a shared folder and configure access to it. Open the storage management console. Configure the SMB protocol.
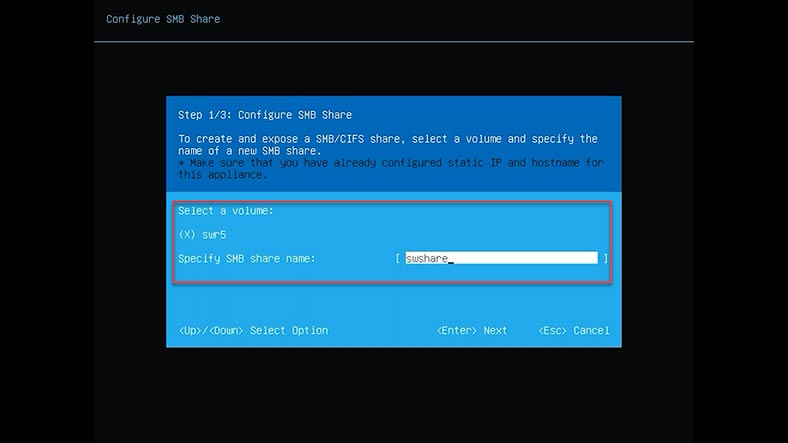
Create a shared folder, check this option for the required volume and give the shared folder name; then press Yes and Enter to confirm.
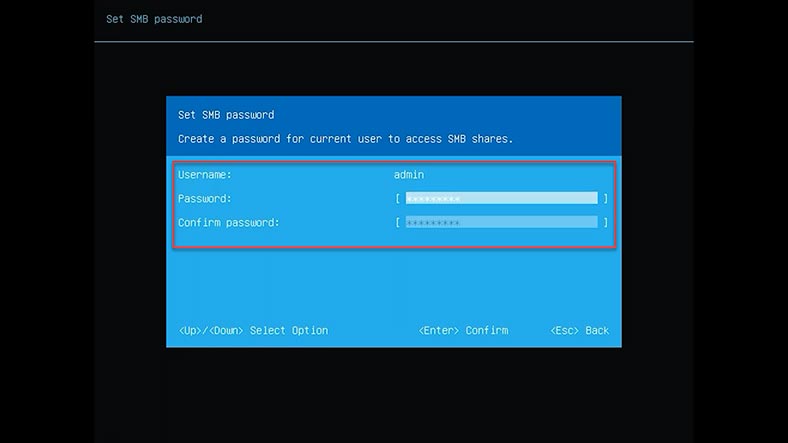
After that, change the SMB password.
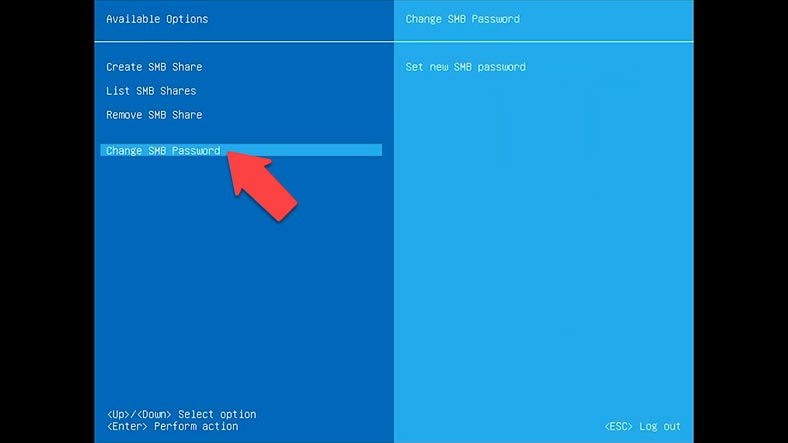
Otherwise the shared folder will never appear on your network.
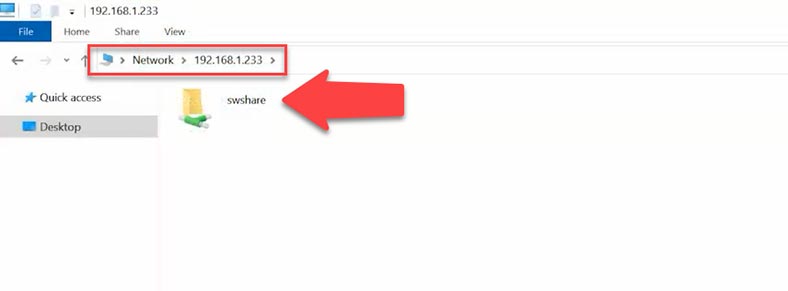
Open the File Explorer, and voila, the folder is available for data upload.
Data recovery on StarWind SAN & NAS
If you need to recover data from a crashed RAID with StarWind SAN&NAS operating system or from the system drive, use a dedicated tool – Hetman Recovery. If you want to recover data from a system drive, choose Hetman Partition Recovery, and you’d like to do it from RAID – install Hetman RAID Recovery.
It supports most popular file systems, RAID levels and array patterns used by various NAS manufacturers, including StarWind.
Since this NAS is based on a virtual machine, the recovery tool also supports work with virtual disk files used by various hypervisors.
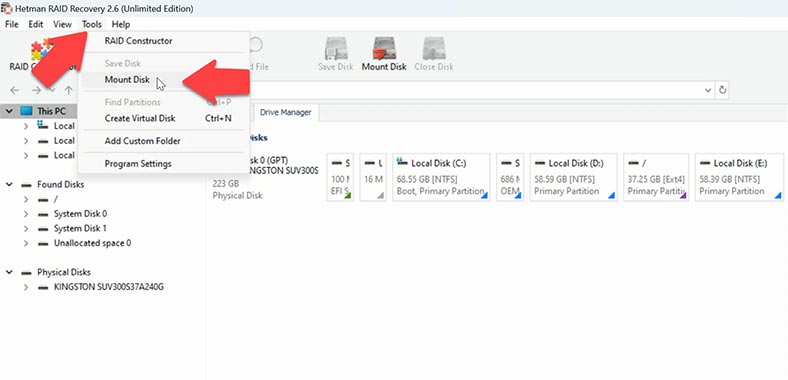
Download, install and run Hetman RAID Recovery. To search for lost files on virtual machine disks, they should first be mounted into the recovery tool. To do it, click Tools – Mount Disk.
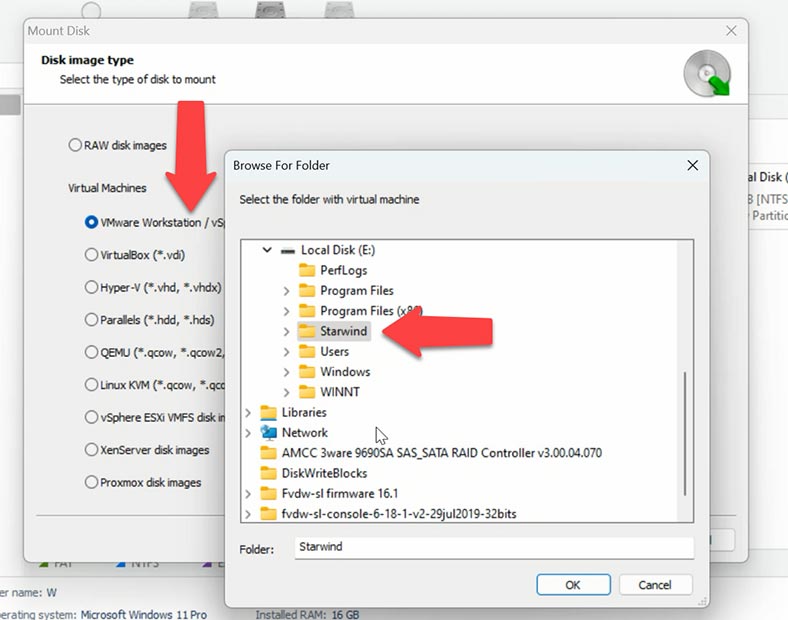
Then choose the virtual disk type or hypervisor, and give the path to the virtual disk files – OK and Next.
After that, the disks will appear in the program’s window, and you will see your RAID. The recovery program will automatically rebuild the RAID with the available hard disks, so all you have to do is to scan it.
The system drive is displayed in the program’s window separately from others. Due to peculiarities of the file system, and for convenience reasons, it is separated and shown as a detached device. If you need to recover data from this drive, right-click on it and choose Open. Select the scan type and start the disk analysis.
The RAID array is shown above. To start searching for lost files, right-click on the array and choose Open.
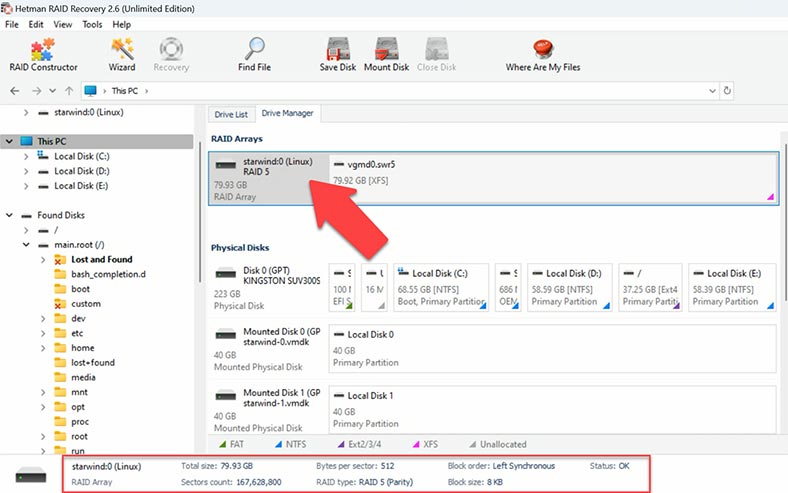
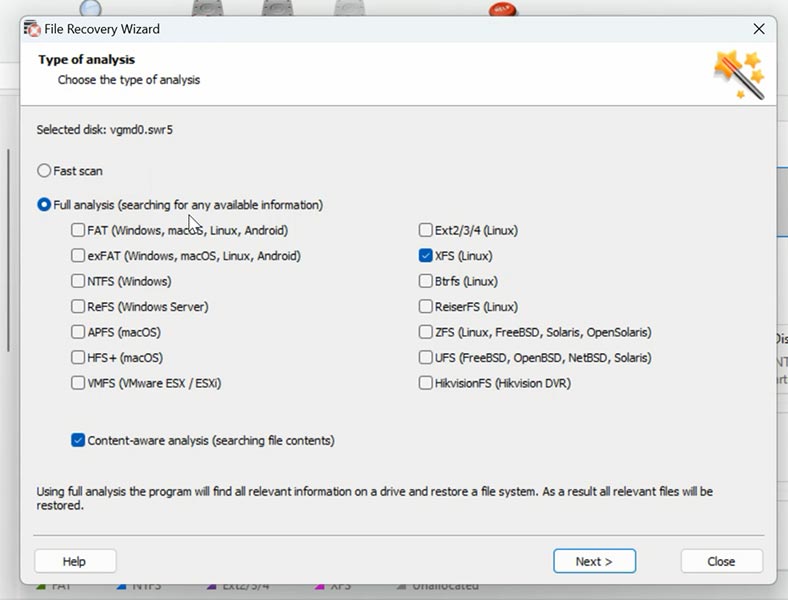
Now select the scan type. For starters, we recommend running a Fast scan first – it will take less time.
If the program failed to find the necessary files, then run Full analysis. To do it, go back to the main window, right-click on the array and choose – Analyze again – Full analysis. Select the file system type for this disk, and uncheck the box for Content-Aware analysis to accelerate the search process. In very complicated scenarios, you can choose to scan the disk with Content-Aware analysis enabled.
When the scan is over, open the folder where the lost files used to be. This recovery tool preserves original file names and folder structure, which makes the recovery process as user-friendly and convenient as possible. Besides, the program lets you preview the file contents before recovery, which helps you to make sure that you’re going to recover exactly the data you’ve been looking for. The contents of every file is displayed in the preview window. Any files which were previously deleted are shown with a corresponding marking.
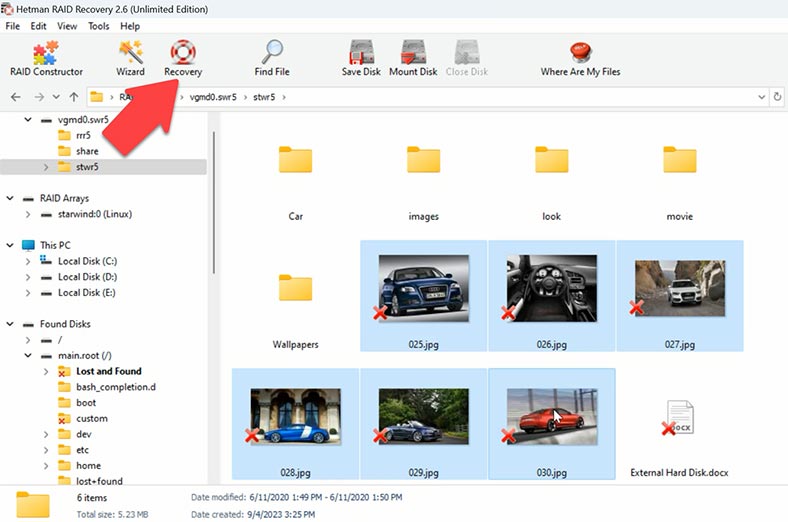
Select all the items you want to recover and click the Recovery button.
Specify where to save the data (choose the disk and folder), and click Recovery again. When the recovery process is complete, you’ll see all the files in the specified directory.
Pros and Cons of StarWind SAN&NAS
Pros:
- Cost-Effective Solution: StarWind VSAN delivers a cost-effective solution compared to traditional storage systems, making it a viable option for businesses looking to optimize their infrastructure expenditure.
- Disaster Recovery Integration: StarWind seamlessly integrates disaster recovery functionalities, ensuring data protection and preventing data loss in case of disaster scenarios.
- Backup Appliance Compatibility: StarWind supports backup appliances, enabling smooth integration with popular backup solutions like Veeam Backup & Recovery. This compatibility enhances data backup and recovery capabilities.
- High Availability (HA): StarWind’s HA feature eliminates single points of failure by providing redundancy at the node level, minimizing downtime and ensuring continuous operation.
- Hyperconverged Infrastructure (HCI): StarWind Virtual SAN facilitates HCI setups, combining compute, storage, and virtualization resources into a single integrated platform for simplified management and improved efficiency.
- Efficient Replication: StarWind enables efficient replication of data between nodes, ensuring data synchronization and maintaining RTO (Recovery Time Objective) and RPO (Recovery Point Objective) targets.
- Flexible Backup Solutions: StarWind supports various backup solutions, including VTL (Virtual Tape Library) integration, providing flexibility in backup and recovery strategies to suit different business requirements.
Cons:
- Limited Documentation: Some users may find the documentation provided by StarWind Software lacking in depth or clarity, requiring additional support or resources to fully understand and implement the solution.
- Integration Challenges: Integrating StarWind with existing infrastructure or backup repositories may pose challenges, especially in environments with diverse hardware or software configurations.
- Compute and Storage Limitations: StarWind’s performance may be limited by the compute and storage capabilities of individual nodes, potentially impacting overall system performance or scalability.
- Competitor Comparison: While StarWind offers competitive features and functionalities, it may face competition from other vendors offering similar solutions, requiring thorough evaluation to determine the best fit for specific use cases.
- Outage Impact: In case of an outage or failure, the impact on operations may vary depending on factors such as the amount of data, replication setup, and recovery processes, necessitating careful planning and mitigation strategies.
- Complex Setup Process: Setting up StarWind SAN&NAS may require expertise in areas such as PowerShell scripting, RAID configurations, and integration with existing infrastructure, potentially increasing the complexity of deployment for some users.
Conclusion
Today we have explored how to recover data from StarWind SAN&NAS virtual storage. It is important to keep in mind that data loss prevention strategies and regular backups can help you considerably reduce the corresponding risks. Also, remember to monitor the condition of your equipment to avoid unexpected failures and issues related to the work of your NAS. With all these things combined, you can ensure safety and reliability of your data storage system.


