Facing Supermicro AOC USAS S8iR Controller Failure: Data Recovery Techniques
Learn how to recover data from a RAID system with a dead Supermicro AOC-USAS-S8iR controller. Whether you’re a system administrator or a user facing this hardware failure, we’ll explore the best methods and techniques for retrieving your valuable data. From troubleshooting to advanced recovery strategies, we’ve got you covered. Regain access to your data!
- How to build a RAID
- How to replace a faulty controller
- Supermicro AOC USAS S8iR Data Recovery
- Conclusion
- Questions and answers
- Comments
The RAID technology allows users to combine several hard disks into a single data storage for improved reliability and performance.
It is used to ensure data integrity and accessibility even if one or several disks fail. Such opportunity is implemented through creating copies of data, or distributing data across hard disks.
The controller Supermicro AOC-USAS-S8iR is the device in charge of disk management in a RAID array.
It controls how data is written and information distributed, and it also ensures storage integrity.
A controller breakdown may cause problems with accessing the data stored on your disks, since it is the controller that manages their read and write operations. Without a controller, the operating system is unable to recognize the structure of data on the disks, which makes that data merely inaccessible.
That is why, when the controller or other hardware elements fail, it is important to take the right steps to replace or restore such hardware items, and run data recovery operations if necessary, in order to reduce data loss and ensure its accessibility.
Now we’re going to explore the steps and methods of data recovery which will help you recover the lost information. To get a general idea of how data is stored inside a RAID, let’s see how to create it on this specific controller model.

How to Recover Data from a RAID System With a Dead Supermicro AOC USAS S8iR Controller
How to build a RAID
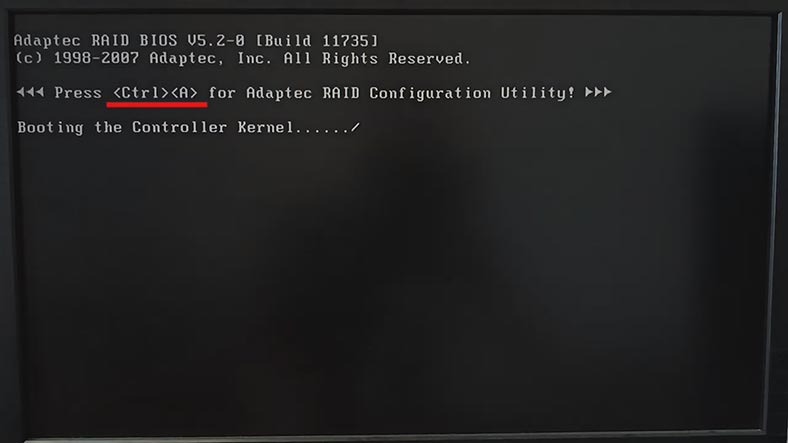
To build a RAID, open the controller’s BIOS: while the computer is booting, press the key shortcut Alt+A.
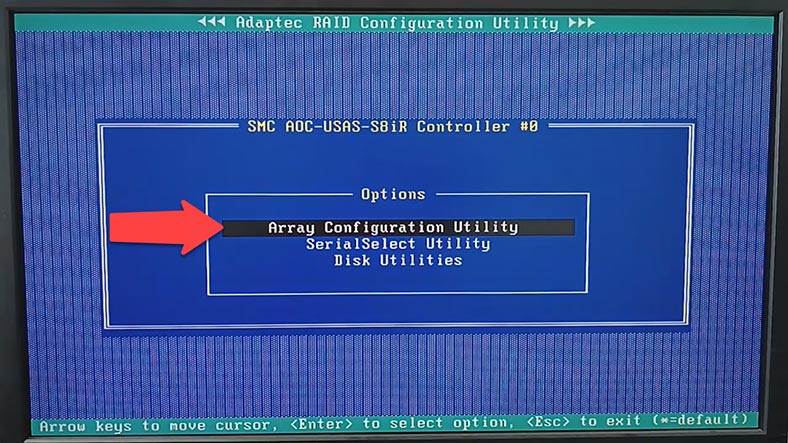
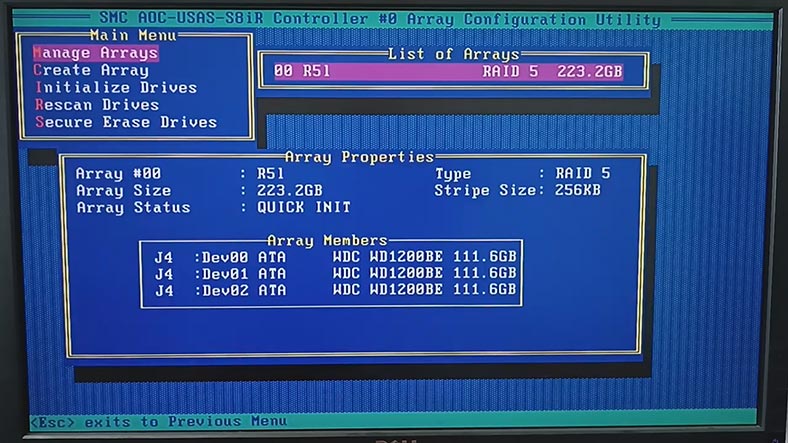
After the manager app is ready, open Array Configuration Utility.
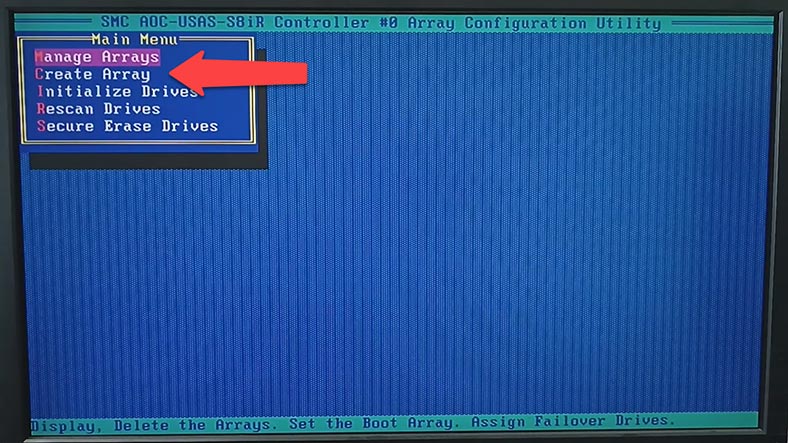
Then choose Create Array.
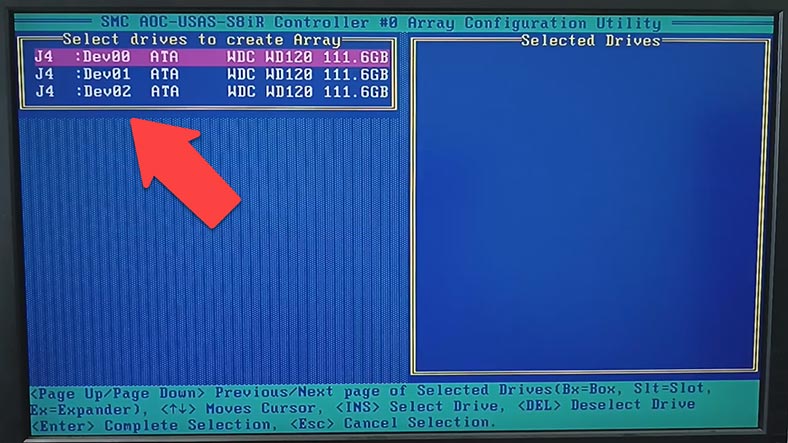
Now select the disks to use in your future array. If the disk list is empty or they are shown in grey, they should be initialized first.
During initial setup, all drives must be initialized before we can use them. Disk initialization overwrites the disk partition table, and all the data stored on that disk becomes inaccessible.
Don’t initialize the disks which are part of the boot array or contain important data.
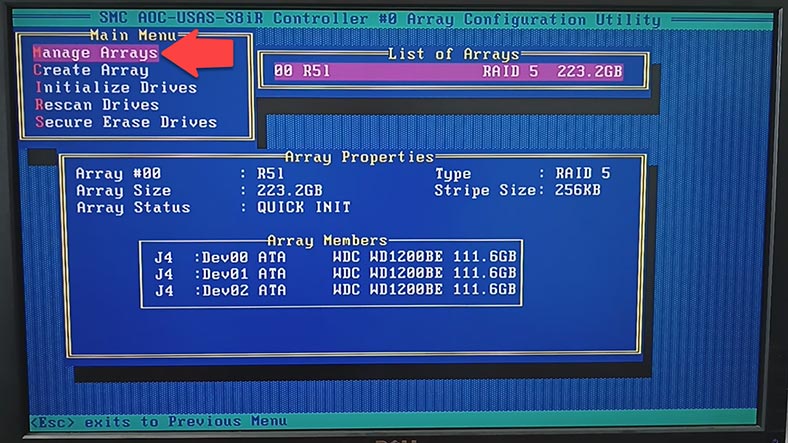
To find out which disks are related to a certain array, go to Array Properties.
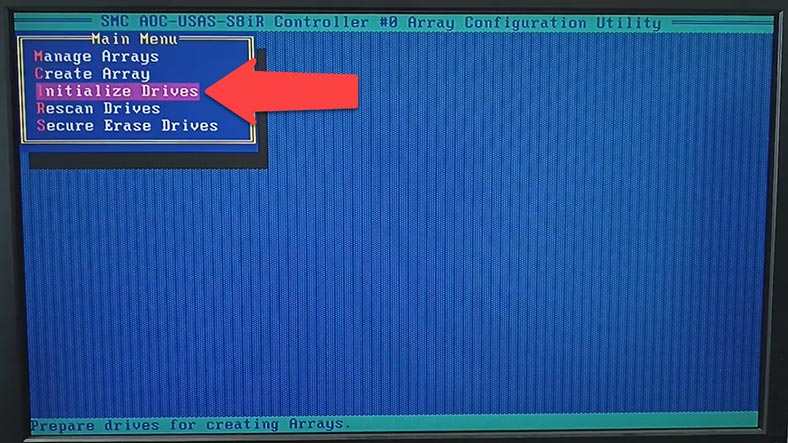
To initialize the disks, use the Array Configuration Utility menu to select a corresponding option – Initialize Drives – and press Enter.
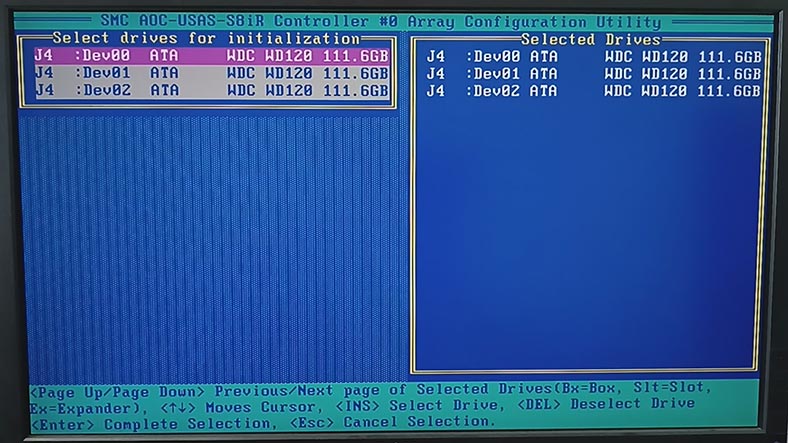
In the window Select drives for initialization choose the disks you want to initialize and press Insert or Space. The selected disk will appear on the list of Selected Drives, so press Enter to start initialization.
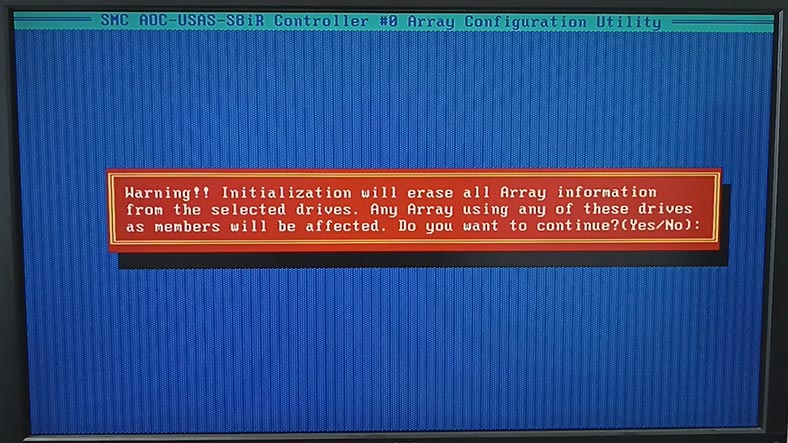
When this message appears, make sure that you have selected the right disk for initialization and press Y to continue, or N to cancel this step.
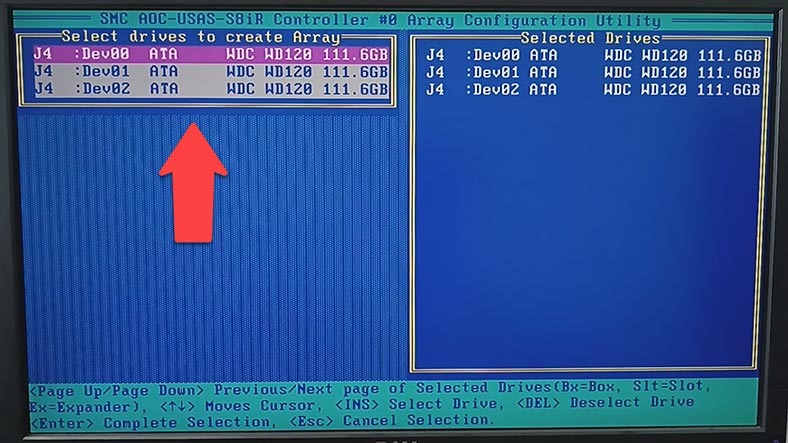
When the initialization is complete, you can build an array with these disks. In the main menu of the Configuration utility, click on Create Array. Then select the drives to be used in this array, and click Enter to continue.
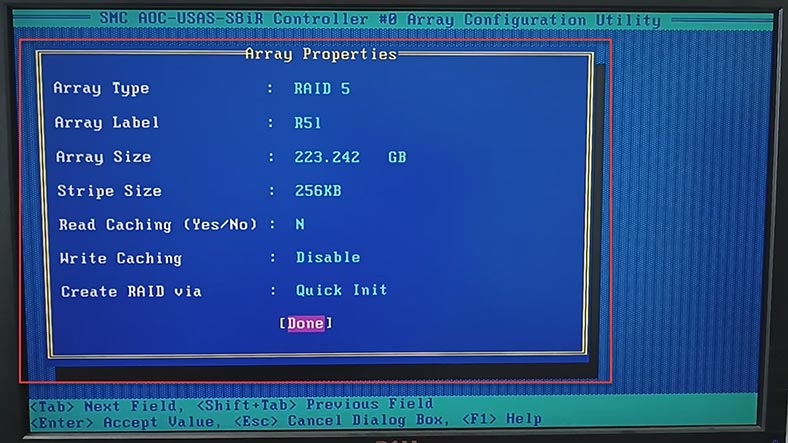
After that, choose the RAID level, array label, size, stripe size, cache settings and disk initialization method. When all properties are given, choose Done and press Enter.
Now that the array is built, just wait until it is initialized. Then you can sign in to the system, partition the volume and write your data there.
How to replace a faulty controller
Now let’s explore a situation when the controller is out of order. How can we recover data from the disks of a crashed RAID after its controller breaks down?
When the controller is down, all data on the disks remains unchanged since the RAID controller manages disk access permissions and the way disks are organized into arrays, but it doesn’t influence the actual contents of every disk. This means that when a controller is replaced or restored, or when a bunch of disks are transferred to another controller, the data itself should be intact. However, in order to ensure normal operation and easy access to the data, the new controller should be set up properly according to the previously used RAID configuration. This way, preservation of data on the disks when the controller is down helps us to avoid data loss and makes the process of replacing the controller and recovering data much easier.
For replacement, you’ll need a new controller of the same model or a compatible one supporting the same disk types and RAID configurations as the old controller. It is important to make sure that the new controller can read the RAID configuration from the disks, since the information on the arrays and their properties is stored on those disks. After replacement, the controller should be set up according to the previously used configuration, including disk order, RAID type and array properties, so that you get access to your data without losing the information. Visit the manufacturer’s website to carefully study the information about possible replacement options.
Disconnect the disks from the non-operable controller.
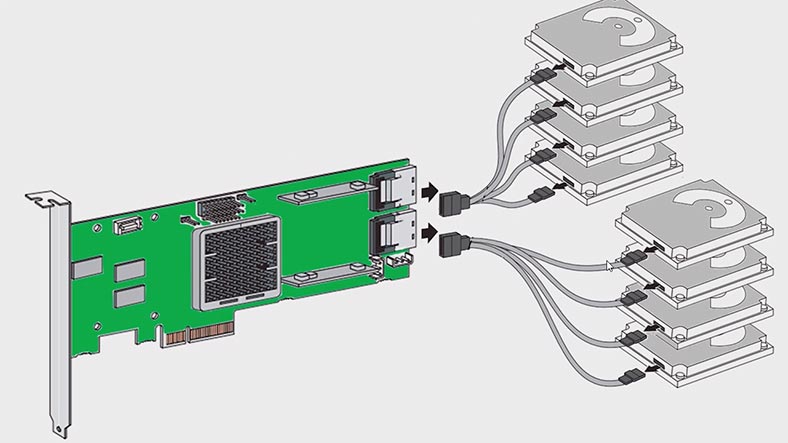
Then take the old controller carefully out of the system case and replace it with a new one.
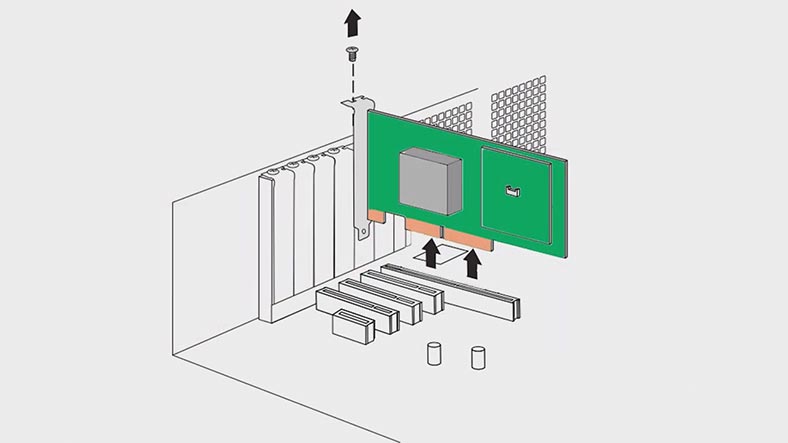
Reconnect the disks in the same order as they were connected before. After that, restart the computer and access the controller’s BIOS.
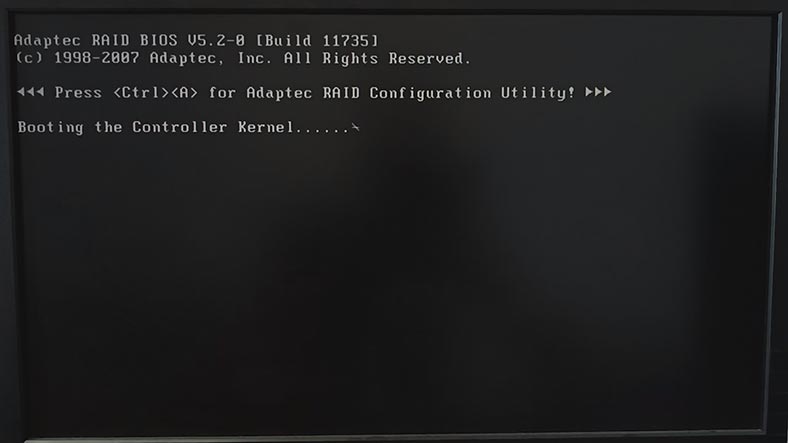
When prompted to save the previous configuration, confirm it and set up the array with the old properties. It is important to avoid disk initialization or disk array rebuilding – this will erase all the data. Also, we recommend against taking any actions involving the disks if there is no backup.
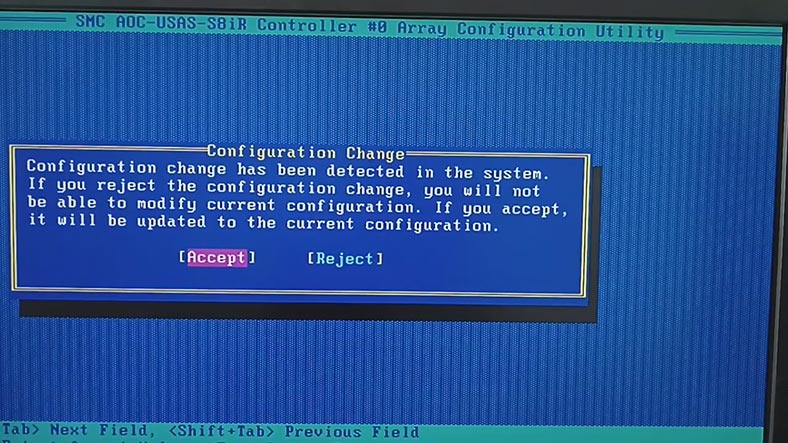
If you’re not sure you can replace the controller without data loss, it’s better to entrust it to professionals.
Supermicro AOC USAS S8iR Data Recovery
How to recover data from a crashed RAID 5 on Supermicro AOC-USAS-S8iR controller
If you failed to restore the array with the first method, the second method to recover data involves specialized data recovery software which can work with RAID systems.
Hetman RAID Recovery supports all popular RAID types, most file systems and various array patterns used by numerous RAID controllers. The app will rebuild the damaged RAID with the available hard disks, so that you’ll be able to retrieve important files.
For data recovery, you need to connect all the hard disks to the motherboard of a Windows computer.
The program will automatically rebuild the damaged array with the available hard disks. Depending on the RAID level, it can also rebuild a RAID system even if one or several disks are missing. For RAID 5 it’s one disk, and for RAID 6 – two disks.
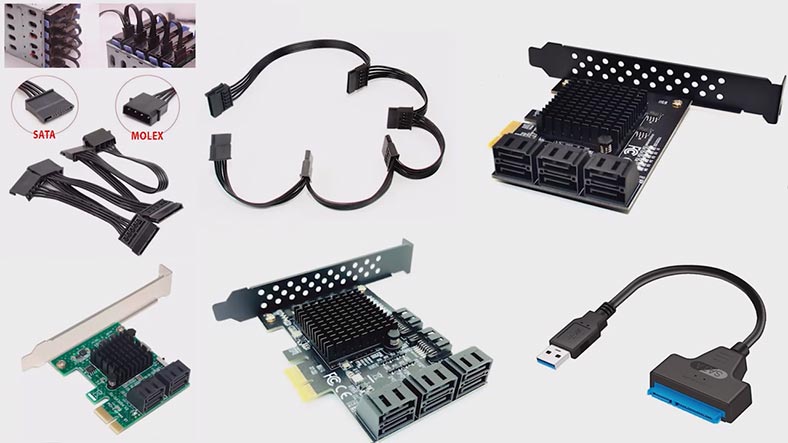
If your motherboard has less SATA ports or power connectors than necessary, you can use additional adapters and expansion cards.
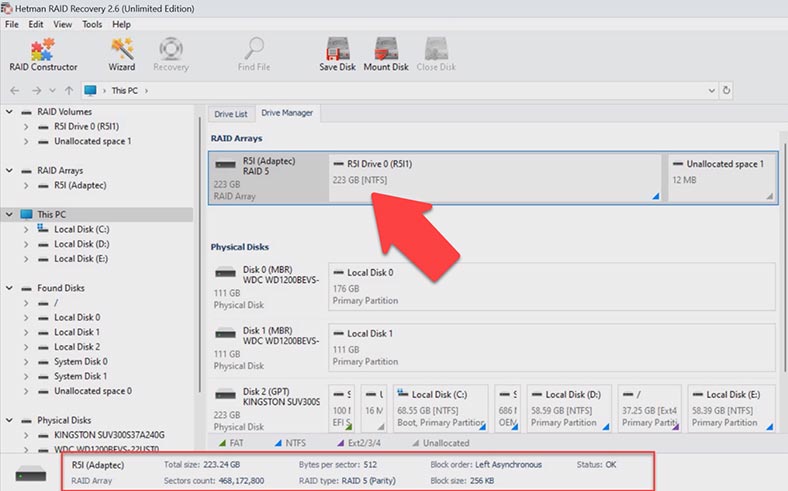
Check if the program managed to rebuild the crashed array correctly. In the Drive Manager window, select the RAID and review its properties. The brief RAID information is displayed below.
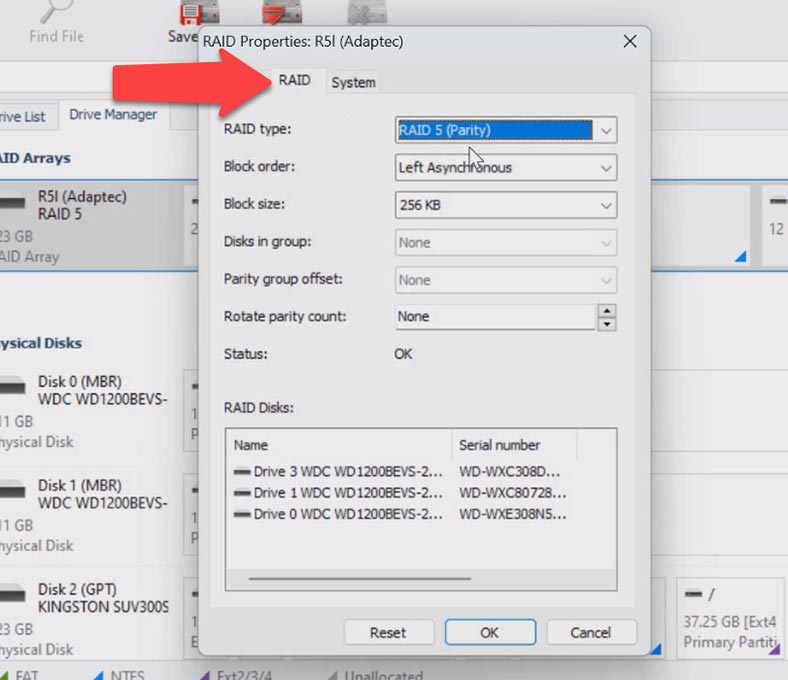
To get more detailed information, right-click on the array and open its properties. In the RAID tab, you can view all information about the array including the hard disks, their order, offset and so on.
To start looking for files, right-click on the volume and choose Open. After that, select the scan type – Fast scan or Full analysis. If the controller has just broken down, a Fast scan is enough, and it takes less time.
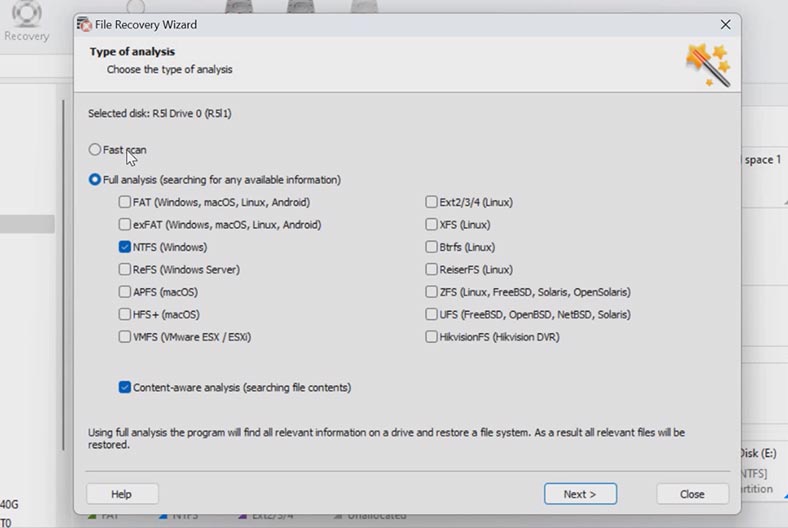
In more complicated situations, when the program can’t find the missing files after the Fast scan was applied or after the disks were erased partially, go for Full analysis. To do it, go back to the main window, right-click on the volume and choose – Analyze again – Full analysis – specify the file system and click Next.
When the scan is over, open the folder where the lost files used to be. This program preserves the entire structure of files and folders along with their original names, so it’s very easy to find a required item. The contents of every file is displayed in the preview window. Any files which were previously deleted are shown with a corresponding marking.
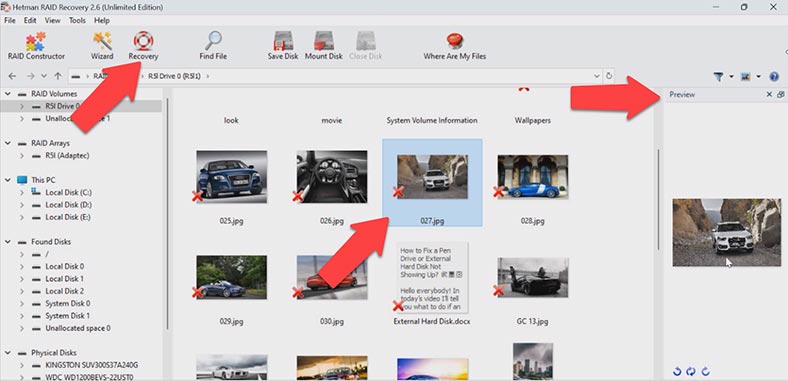
Select all the items you want to recover and click the Recovery button. Specify where to save the data (choose the disk and folder), and click Recovery again. When the recovery process is complete, you’ll see all the files in the specified directory.
How to build a RAID manually after the configuration was erased
In some situations, the program may fail to rebuild the RAID automatically. It can happen when the service information on the disks is erased, so the program cannot identify parameters of the crashed RAID. In such cases, the RAID Constructor with a manual build feature will help you.
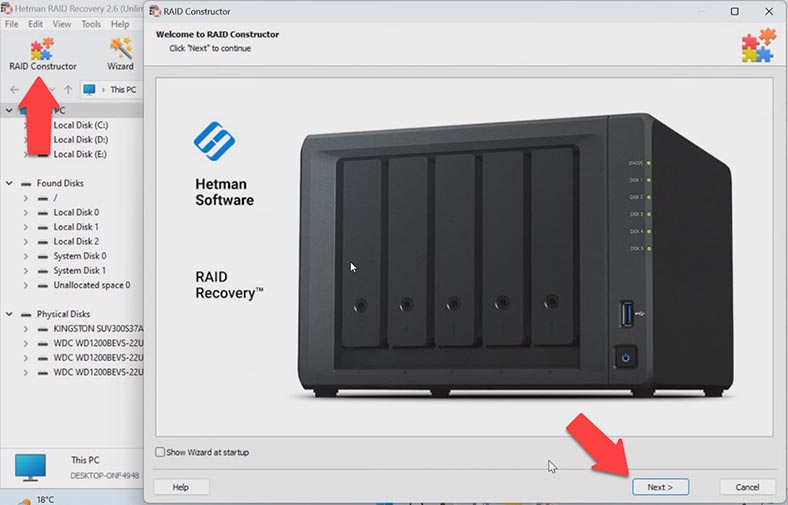
This tool will save the day when the disk beginning is erased, together with the information about the array parameters. This is what typically happens when disk are connected to another controller and the previous configuration is erased or when the RAID is rebuilt.
If you know the array parameters, start the Constructor, choose Manual Mode – Next.
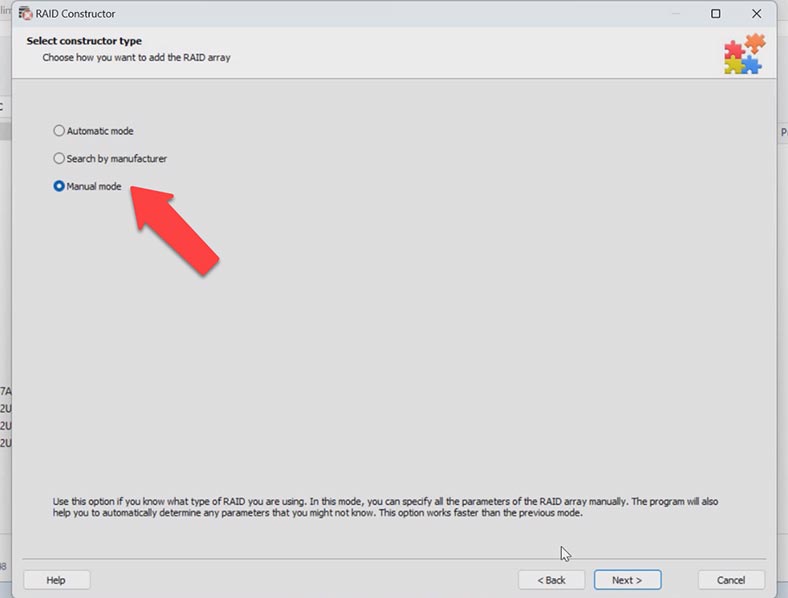
Specify the array type, block order and size. Add the disks it used to include, and replace the missing disks with empty drives by clicking the “plus” button. You may have to specify the offset which tells you where the beginning of the disk is located. After that, give the disk order.
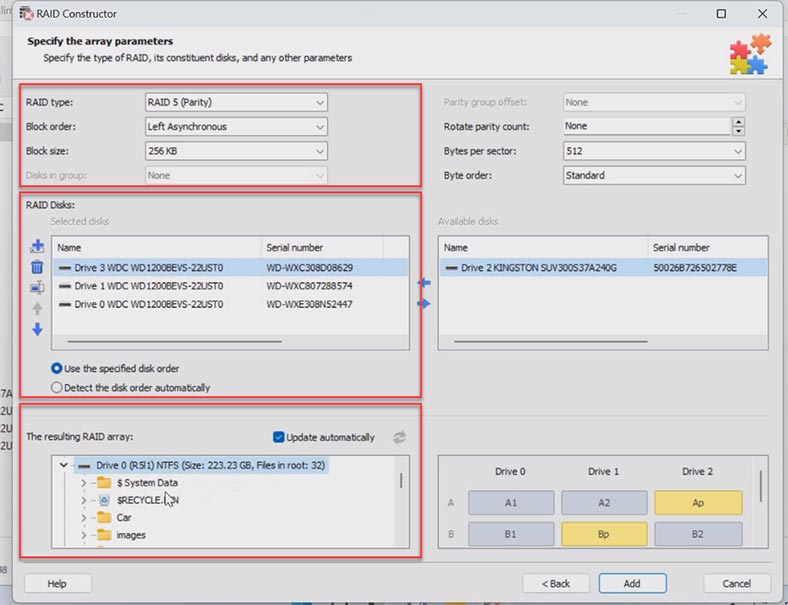
When you have entered all the parameters you know, you will see the rebuilt RAID, and if all information is correct, you will see its folders here as you unfold it. Fill in all the properties, and click Add. After that, the RAID system will appear in the Drive Manager.
Now start the scan, search for files, and recover the ones you need.
Conclusion
To draw the bottom line, we’d like to emphasize the importance of backing up your important data on a regular basis. Such backups will help you recover important files when the controller fails, or in case of other unexpected problems. But even if there is no backup to use in an emergency, now you know how to recover your files if the RAID controller breaks down one day.
| Step | Description | Tips | Notes |
|---|---|---|---|
| 1. Power off the system | Turn off the server or computer using the Supermicro AOC USAS S8iR controller. Disconnect power and all cables. | Ensure the system is completely disconnected from the power supply to avoid electric shock. | Allow the system to cool down before proceeding with any work. |
| 2. Inspect the controller | Examine the RAID controller for any physical damage or failure. Ensure all cables and connections are secure. | If the controller has status indicators, check them to determine the condition. | Replace any damaged components or connections before proceeding. |
| 3. Connect to another system | Use external adapters or docking stations to connect the RAID disks to another working computer. | Maintain the order of disk connections to ensure proper RAID reconstruction. | Do not write new data to the disks while connected to another system. |
| 4. Use recovery software | Run RAID recovery software and select the RAID configuration appropriate for your system (RAID 5, RAID 6, etc.). | Ensure the selected software supports the RAID format used on the Supermicro controller. | It is recommended to use reliable software such as Hetman RAID Recovery. |
| 5. Recover data | After identifying the RAID configuration, start the data recovery process. Save the recovered data to another storage device. | Verify that all critical data is recovered before deleting any data from the disks. | Saving data to an external hard drive or cloud storage is a good practice. |


