Expert Advice: Data Recovery from a RAID Array with a Dead Fujitsu D3116 Controller
Unforeseen issues like a dead Fujitsu D3116 controller can lead to data loss in RAID arrays, posing significant challenges for businesses and individuals alike. In this comprehensive guide, we delve into effective strategies for recovering data from a RAID array with a dead Fujitsu D3116 controller. Our step-by-step tutorial provides clear instructions and expert insights to help you navigate through the recovery process. From diagnosing the problem to implementing recovery solutions, we cover everything you need to know to retrieve your valuable data and minimize downtime.
- 1. How to build a RAID with SAS drives on Fujitsu D3116 controller
- 2. How to recover data from a RAID with a dead Fujitsu D3116 controller
- 3. How to build a RAID manually with Hetman RAID Recovery
- 4. Conclusion
- Questions and answers
- Comments
SAS (Serial Attached SCSI) is a technology that provides high performance and reliability for data storage services. In addition to that, servers often use the RAID technology which further improves the reliability of data storage.
| Program | SAS Disk Support | Platforms | Features |
|---|---|---|---|
| Hetman RAID Recovery | Yes | Windows | Support for various RAID types; Data recovery from SAS disks; Support for file systems: NTFS, FAT, exFAT, ReFS, HFS+, Ext2/3/4, Btrfs, XFS; Automatic RAID configuration detection; Recovery of damaged or formatted arrays; File preview before recovery |
| R-Studio | Yes | Windows, Mac, Linux | Automatic RAID configuration detection; Data recovery from SAS disks; Support for various file systems; Disk image creation |
| DiskInternals RAID Recovery | Yes | Windows | Data recovery from SAS disks; Recovery of damaged arrays; Support for various file systems; Data recovery without RAID controller |
| EaseUS Data Recovery Wizard | Yes | Windows, Mac | User-friendly interface; Data recovery from SAS disks after formatting or system failure |
| Stellar Data Recovery | Yes | Windows, Mac | Data recovery from SAS disks; Recovery from various RAID types; File preview; Support for various file systems |
| UFS Explorer RAID Recovery | Yes | Windows, Mac, Linux | Support for SAS disks; Data recovery from various RAID types; Recovery of damaged arrays; Disk image creation |
RAID systems are widely used to ensure safety and reliability when it comes to storing large amounts of information. However, as is the case with any other equipment, we cannot exclude situations when a RAID controller may break down and you lose access to important files.
Today we’ll explore a few methods to help you recover data from a RAID system if your Fujitsu D3116 controller fails. We’ll tell you how to transfer your disks to another controller, and how to use specialized data recovery software to get your RAID data back. These methods will help you restore access to your files and minimize possible data loss.
First of all, you should realize that data recovery from RAID is a complicated process that requires certain knowledge and skills. Before you begin the recovery process, we strongly recommend reading the technical documents and manuals provided by the controller’s manufacturer. If it seems too difficult for you, you’d better contact professionals, since any careless actions can make the task even more complicated.

How to Recover Data from a RAID Array with a Dead Fujitsu D3116 Controller
1. How to build a RAID with SAS drives on Fujitsu D3116 controller
For better understanding of how the RAID technology works, let’s explore the process of creating a disk array system on this specific device.
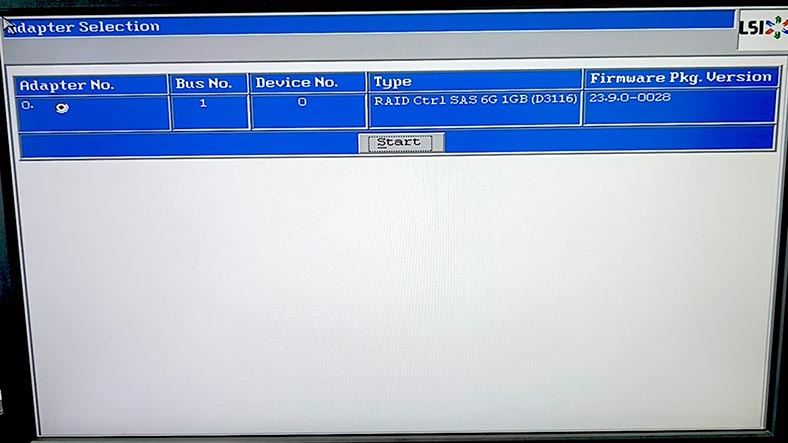
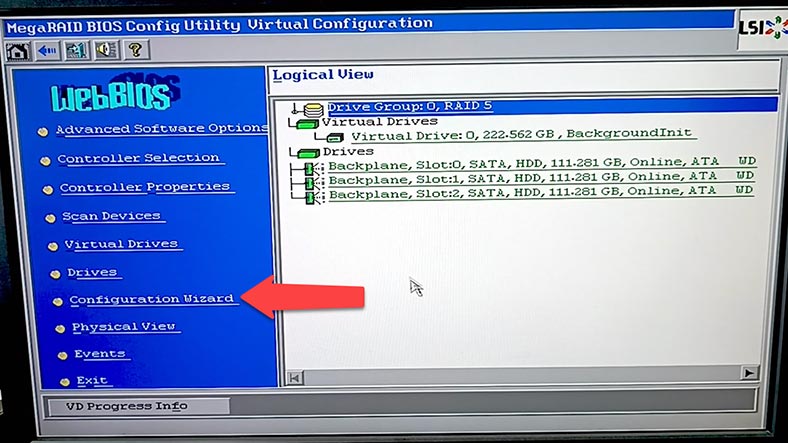
To create a RAID on a Fujitsu controller, you need to enter its BIOS, and you can do it by pressing Ctrl + H shortcut while the computer is booting. If you have several controllers installed, select the one you want to use and click Start to continue.
Open the configuration wizard.
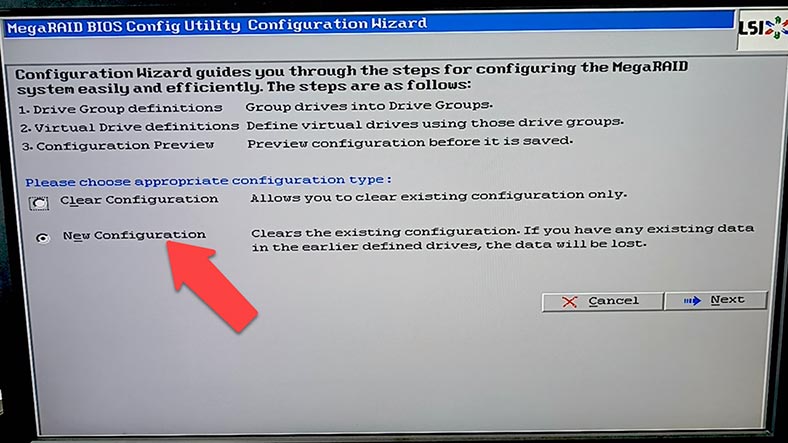
In the wizard window, choose New Configuration and click Next. You will see a warning that the current configuration will be cleared and all data will be lost. Click Yes to continue.
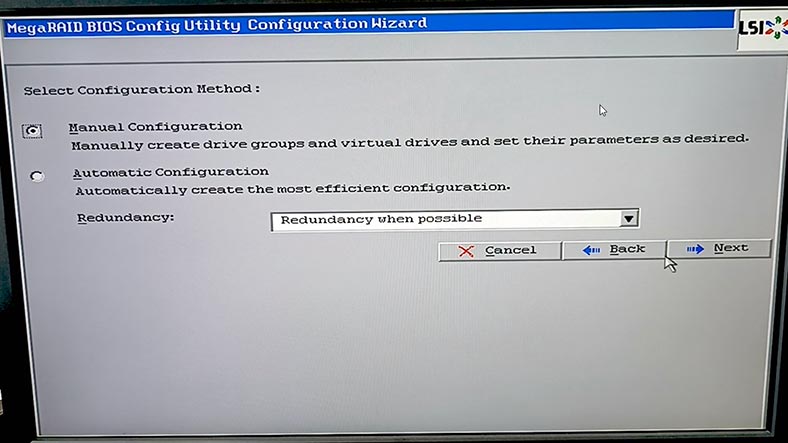
Now choose the RAID configuration method – manual or automatic – and click Next.
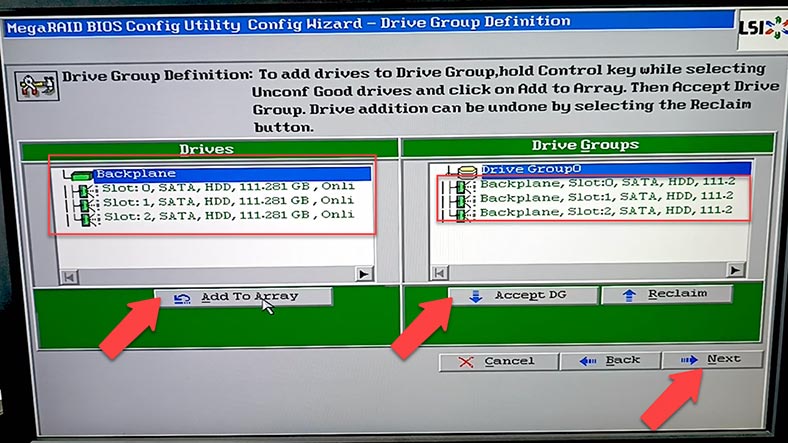
Select the disks that the future RAID will consist of, and click Add to Array. As a result, they will be added to a virtual group. Click Accept DG to confirm it, and then Next.
Now add this group to SPAN – click Add to Span, and Next.
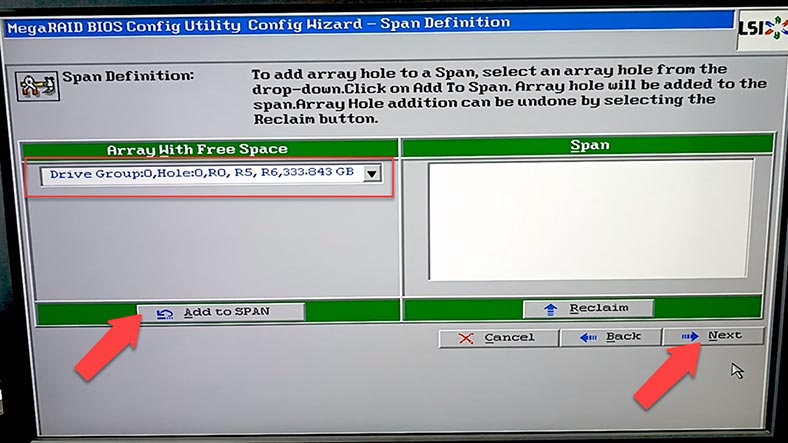
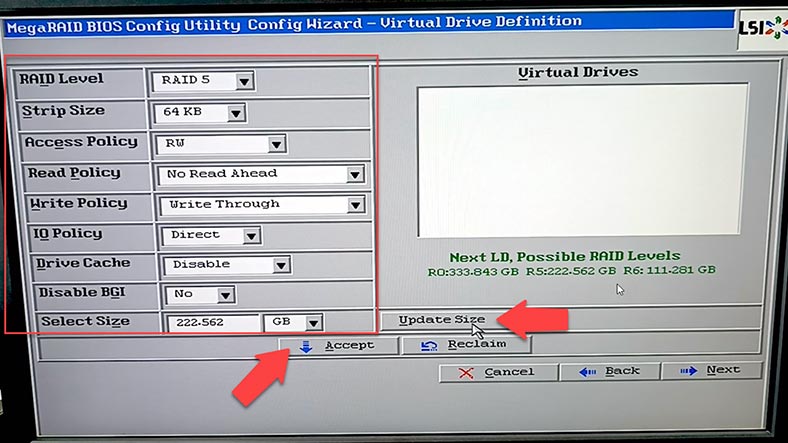
At this stage, you should choose RAID level, strip size, configure read and write policies, cache etc. When you’re done with all properties, click Update Size and Accept, and then Next, Accept and Yes to save the configuration. After that, click Yes one more time to start disk initialization.
This will run fast initialization, but if you need to wipe the drives completely, select Slow Initialize and click Go. Now the RAID system is ready, and the last step is to restart the computer.
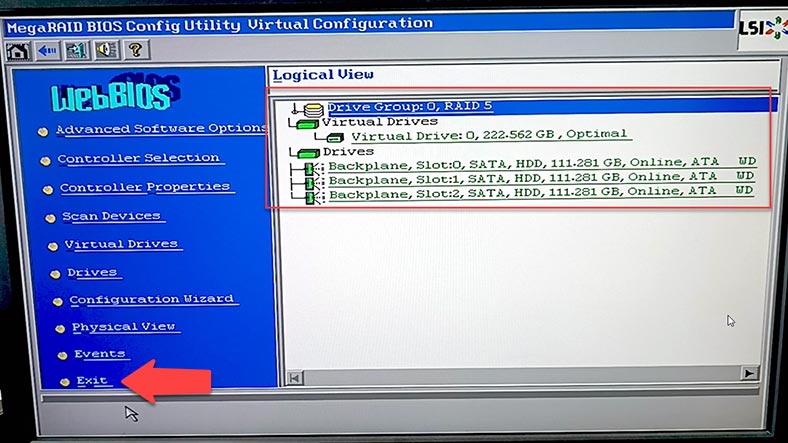
After that, you’ll be able to partition the volume and add some data.
2. How to recover data from a RAID with a dead Fujitsu D3116 controller
If you lost access to the disk array because of controller breakdown, there are a few ways of retrieving your data.
The first recovery method to use if your Fujitsu D3116 controller failed is to transfer the disks to another controller which is still healthy. For this method you will need one more controller of the same model, or a compatible one. If you are not sure you can do it on your own, consult professionals. Make sure that this operation is safe for your data – otherwise, wrong actions may erase the disks completely, along with your precious files.
The second method to recover data involves specialized data recovery software which can work with RAID systems.
| Program | SAS Disk Support | Platforms | Features |
|---|---|---|---|
| Hetman RAID Recovery | Yes | Windows | Support for various RAID types; Data recovery from SAS disks; Support for file systems: NTFS, FAT, exFAT, ReFS, HFS+, Ext2/3/4, Btrfs, XFS; Automatic RAID configuration detection; Recovery of damaged or formatted arrays; File preview before recovery |
| R-Studio | Yes | Windows, Mac, Linux | Automatic RAID configuration detection; Data recovery from SAS disks; Support for various file systems; Disk image creation |
| DiskInternals RAID Recovery | Yes | Windows | Data recovery from SAS disks; Recovery of damaged arrays; Support for various file systems; Data recovery without RAID controller |
| EaseUS Data Recovery Wizard | Yes | Windows, Mac | User-friendly interface; Data recovery from SAS disks after formatting or system failure |
| Stellar Data Recovery | Yes | Windows, Mac | Data recovery from SAS disks; Recovery from various RAID types; File preview; Support for various file systems |
| UFS Explorer RAID Recovery | Yes | Windows, Mac, Linux | Support for SAS disks; Data recovery from various RAID types; Recovery of damaged arrays; Disk image creation |
There are various software tools to help you recover data from a damaged RAID system. One of them is Hetman RAID Recovery.
This utility supports all popular RAID types, most file systems and array patterns used by various RAID controllers.
For data recovery, you’ll need to connect all the hard disks to the motherboard of a Windows computer, because this utility is only compatible with this operating system so far. On the other hand, you can use it to recover data from file systems used by other operating systems as well.
If you used SAS drives to build a RAID (just like I did), you won’t be able to connect them directly to the motherboard. For this specific case, you need a controller that supports direct connection without using RAID. For example, you can use an HBA controller.
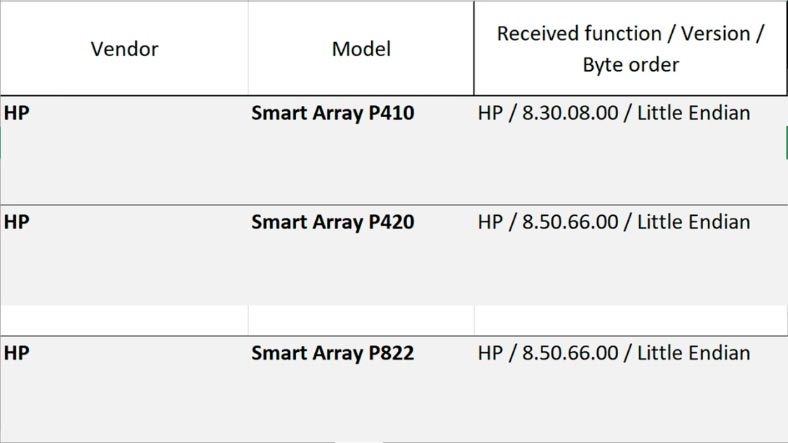
Disconnect the disks from the dead controller, connect an HBA controller to the motherboard of your Windows computer, and connect the disks to the HBA controller.
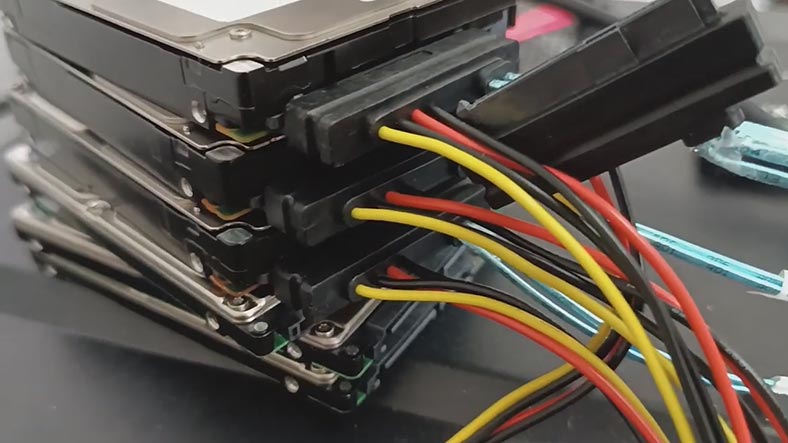
If you notice that the program doesn’t show all connected disks, open the Disk Management app and check if the operating system has identified every disk. If only some of them are displayed, you’ll have to connect them one by one, create their images, and then recover data from such images.
For this purpose, do the following: start Hetman RAID Recovery, open the Tools menu – Save Disk. Alternatively, right-click on the disks and choose Save Disk.
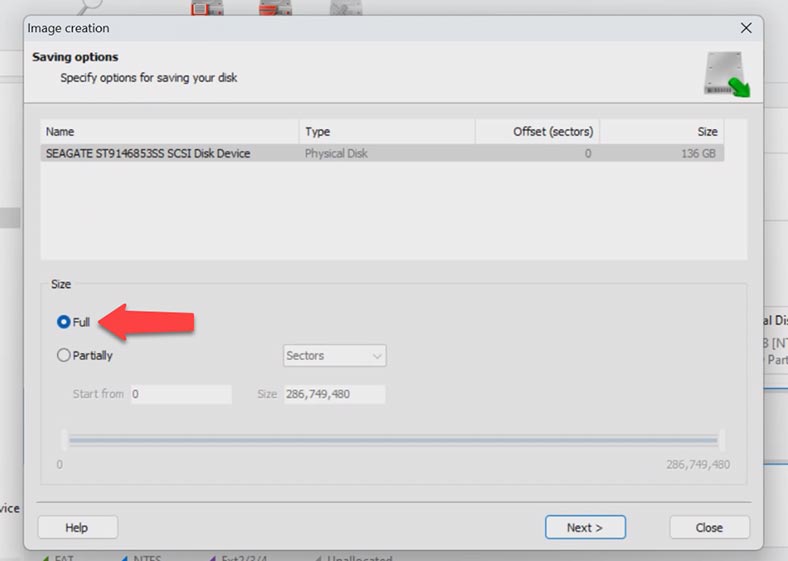
Remember to check the option to save the image of an entire disk. Click Next. Choose where to save the image file – Hard disk – and give the path. It can even be a shared folder on your network. Then click Save.
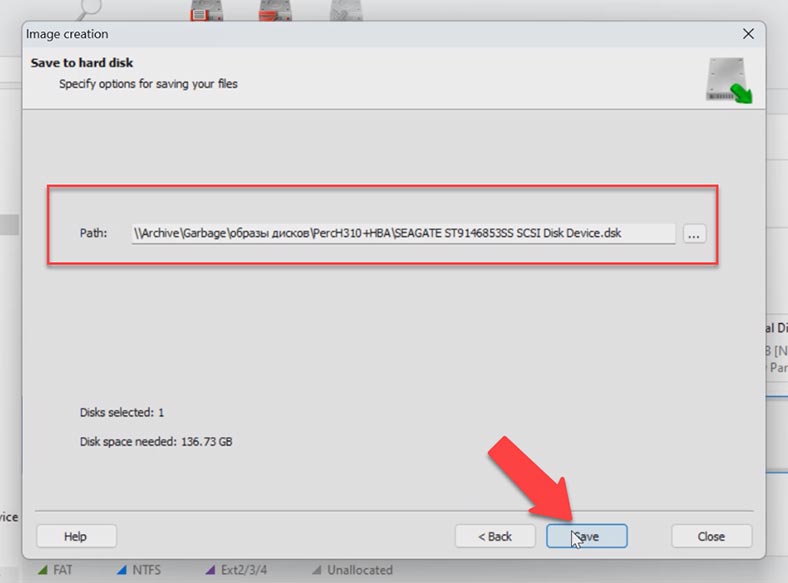
One important thing is to make sure you have enough space on your hard disk to save a disk image, so keep that in mind before you begin.
After you have saved images of every disk, open the Tools menu – Mount Disk – check the option for RAW images – and click Next.
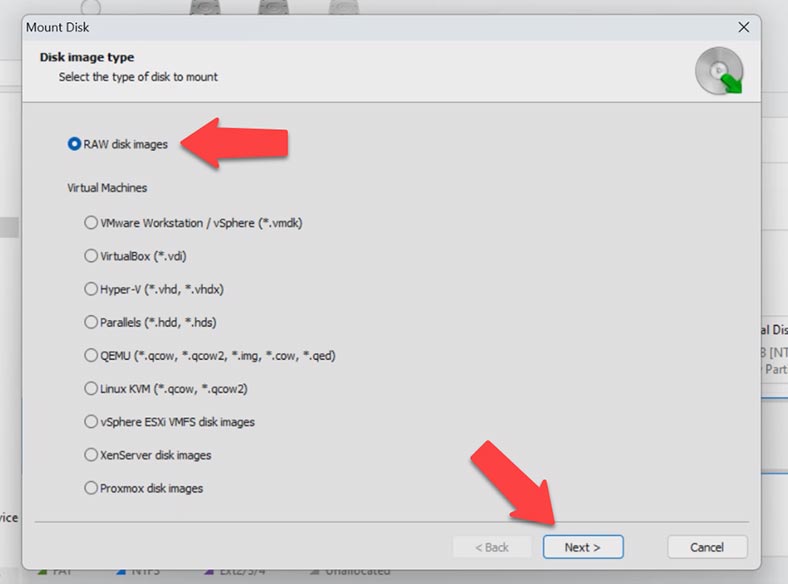
Select all the disk images and click the Open button to upload the disks into the utility.
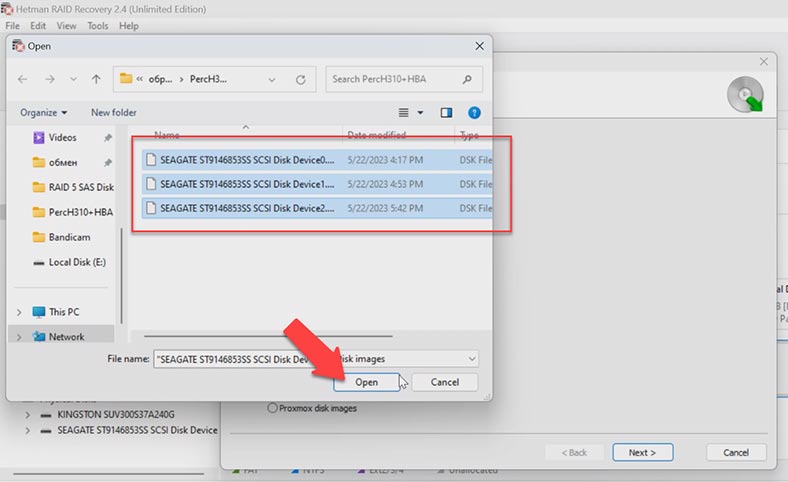
Hetman RAID Recovery will use the images (as if they were physical disks) to rebuild the RAID automatically. When you select the volume, its information will be displayed below: check if the program has built it correctly. If everything is correct, right-click on the volume and choose Open.
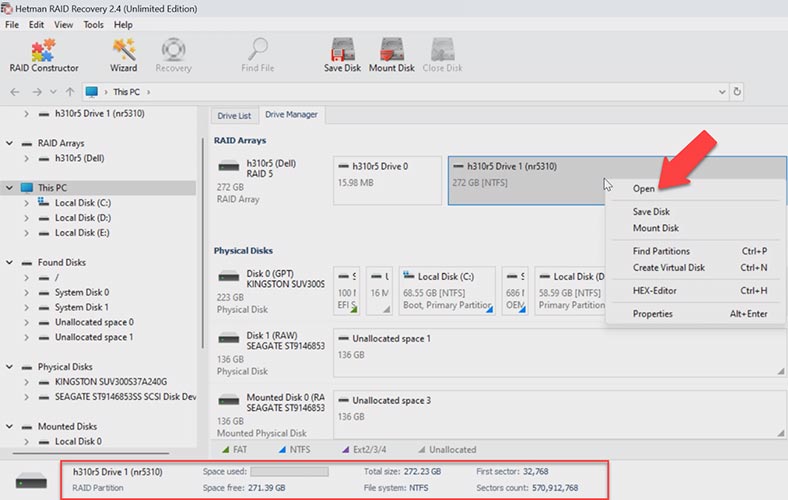
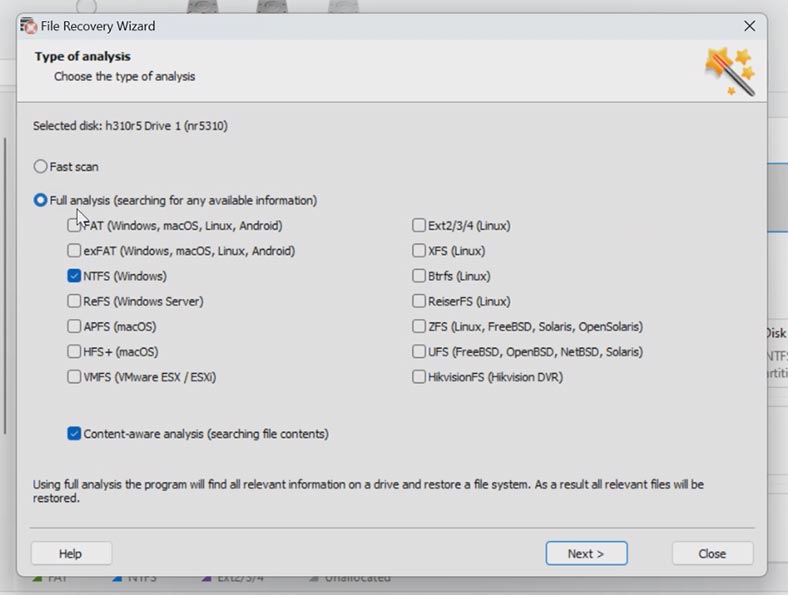
After that, choose the scan type – Fast scan or Full analysis. For most simple cases, Fast scan is enough, and it takes less time.
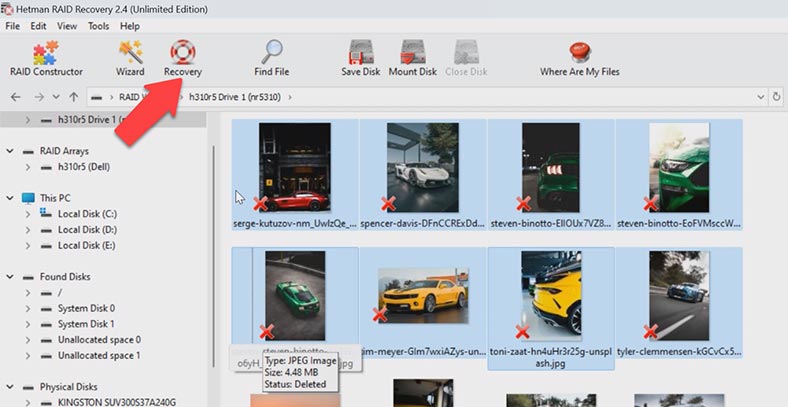
In my case, the program has coped with the task easily. It has rebuilt the RAID automatically from SAS drive images and it found all the files which were stored on this disk array. It also displays deleted files which are marked with a red cross.
Select all the items you want to recover and click the Recovery button. Specify where to save the data (choose the disk and folder). And click Recovery again. When the recovery process is complete, you’ll see all the files in the specified directory.
If the program can’t find the missing files after the Fast scan, then go for Full analysis. To do it, return to the main menu, right-click on the volume and choose Analyze again – Full analysis. Choose the file system type. You can uncheck the option for Content-Aware analysis, as it will make the process go faster. If you still can’t find the necessary files, run Full analysis again, but this time with the Content-Aware option enabled.
3. How to build a RAID manually with Hetman RAID Recovery
In some situations, the program may fail to rebuild the RAID automatically. It can happen when the service information on the disks is erased, so the program cannot identify parameters of the crashed RAID. For such situations, the program has the manual mode for rebuilding with RAID Constructor.
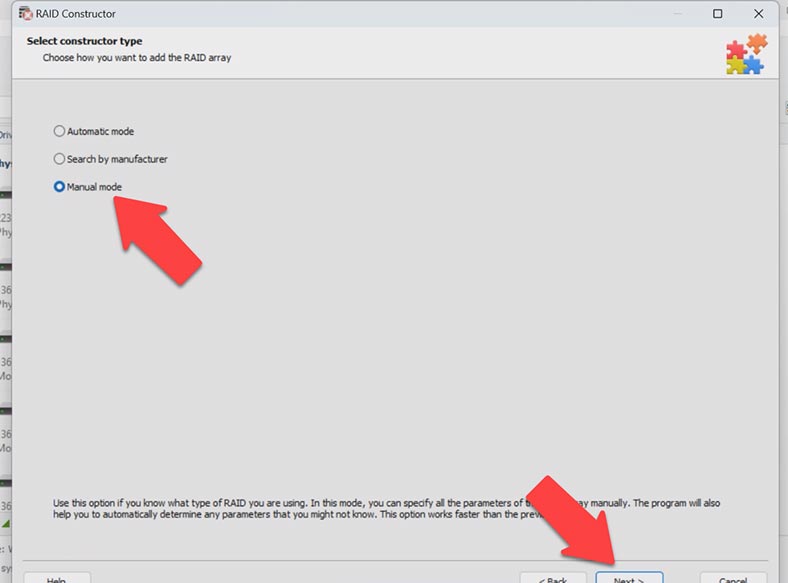
If you know the array parameters, start RAID Constructor and try building the array manually. Start the Constructor, choose Manual Mode – Next.
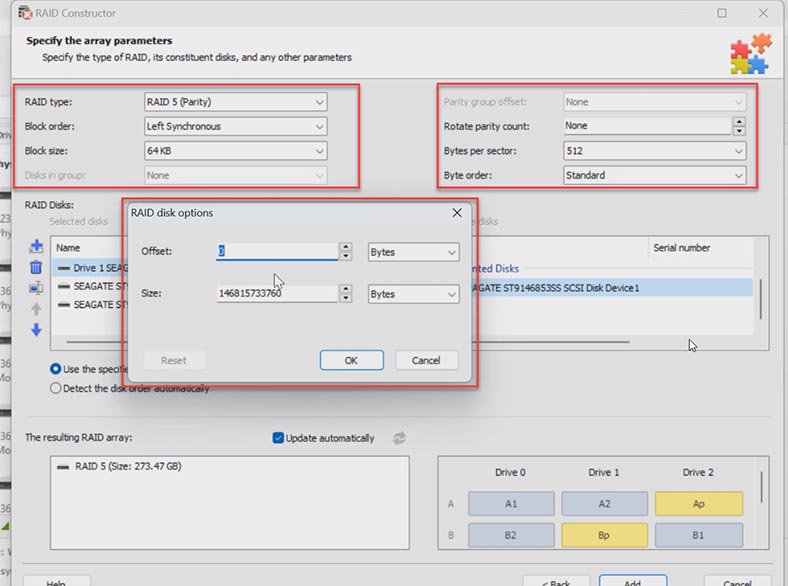
Specify the array type, block order and size. Add the disks it used to include, and replace the missing disks with empty drives by clicking the “plus” button. You may have to specify the offset which tells you where the beginning of the disk is located. One more thing to choose is the disk order.
When you give all the parameters you know, you will see your RAID, and if all information is correct, you will see its folders here.
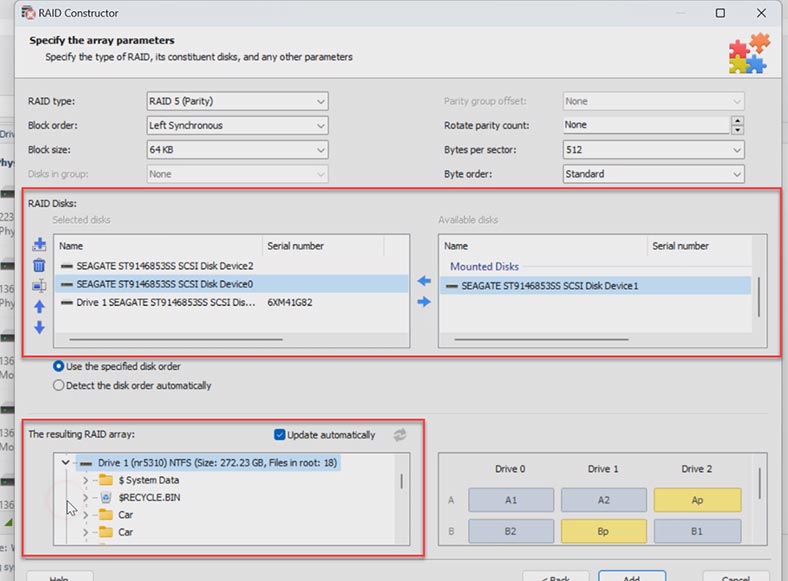
Fill in all properties, and click Add. It will appear in the Drive Manager immediately. Now start the scan, search for files, and recover the ones you need.
4. Conclusion
Today we have explored several ways of recovering data after a controller breakdown, and what tools are required in certain cases.
Data recovery from a RAID system after Fujitsu D3116 controller breakdown can be a challenging task, but you’ll be able to restore your files by following the steps described in this tutorial. Always remember the importance of backing up your files regularly. Keeping your backups on separate storage devices or in cloud services will help you avoid data loss in case your RAID controller fails or other unpleasant things happen.
If you’re not sure you can handle it, it’s always better to contact professionals. We hope that our advice and recommendations will come in handy in recovering data from a RAID system based on Fujitsu D3116 controller.


