Rescuing Data from RAID 6 on Terra NASbox 5: Expert Solutions
Discover effective methods to recover data from RAID 6 on Terra NASbox 5 in this comprehensive guide. Whether you’re encountering data loss due to RAID failure or seeking proactive measures, this tutorial provides expert insights and practical solutions. From diagnosing issues to implementing recovery strategies, we’ll equip you with the knowledge and tools necessary to retrieve your valuable data and mitigate downtime effectively.
- What causes data loss for NAS
- How to create a RAID
- How to enable an FTP server
- How to add a shared folder
- How to create a folder snapshot
- How to create an iSCSI volume
- Terra NASbox 5 data recovery
- Conclusion
- Questions and answers
- Comments
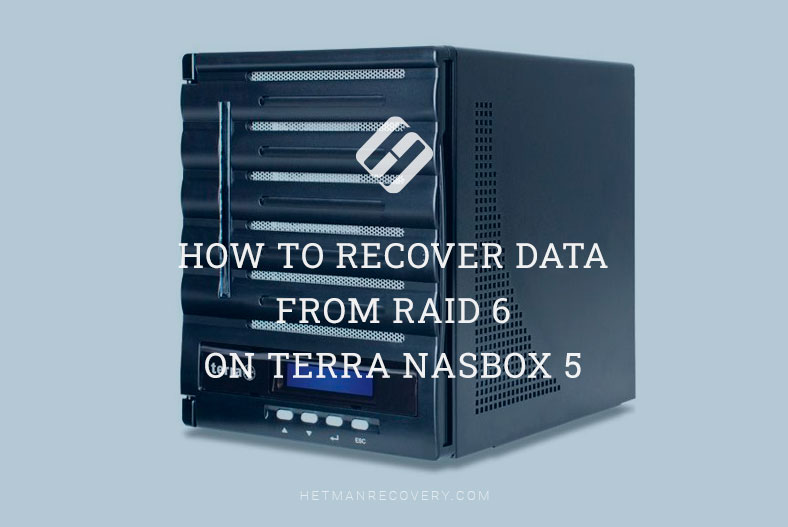
TERRA NASBOX 5G2 is an easy-to-use storage server allowing you to access your files over the network. On this device, data integrity is provided by the RAID feature that ensures safe storage and easy recovery. A RAID-based NAS lets users add or remove hard disks depending on their needs.
Just as any other data carriers and RAID configurations, a NAS is not a fail-safe option regardless of the RAID type it is built on. There are a number of factors that can trigger data loss.

How to Recover Data from RAID 6 on Terra NASbox 5
What causes data loss for NAS
One of the most widespread causes behind data loss is damage to the file system or hardware failures. Power failures or voltage surges may affect the controller, hard disks or other hardware parts of your NAS system. Accidental deleting, formatting, wrong configuration, and other user errors also take their toll. One more thing that can cause data loss is when your attempt to flash latest NAS firmware goes wrong.
| Number | Cause | Description |
|---|---|---|
| 1 | Hardware Failure | Failures in hard drives or RAID controllers can lead to data loss if backups are not created in time. |
| 2 | Power Failures | Sudden power outages or surges can damage data or the file system. |
| 3 | RAID Configuration Errors | Incorrect RAID setup or a failure of one of the drives in the array can cause partial or complete data loss. |
| 4 | Viruses and Malware | Viruses or malicious software can corrupt or encrypt data stored on the NAS. |
| 5 | Human Error | Accidental deletion of data or incorrect system configuration can lead to the loss of important information. |
| 6 | Firmware Update Issues | Failed updates to NAS firmware can damage the file system or RAID array. |
When the NAS breaks down or the RAID system is damaged, you won’t be able to restore it using the NAS integrated utilities without losing data, since hard disks are formatted during the rebuild process. In the end, you will just lose all the information currently stored on this disk array. Retrieving data from a damaged or destroyed RAID is no easy task. The matter is that all information is written in fragments to each of the disks that make up the RAID system. In order to access that data, you need to rebuild the crashed RAID using the available hard disks. Such task requires you to have a special tool to recover data from disk arrays.
How to create a RAID
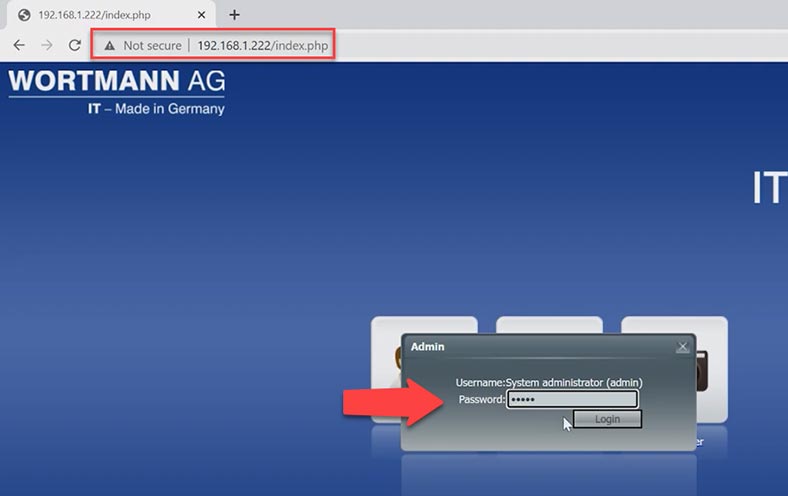
For better understanding of how a disk array is built, let’s explore the process of creating a RAID system on this specific device. Open any browser installed on your PC and go to the address where your NAS is registered. After that, type the IP address into the address bar of your browser. Type the administrator’s password – by default, it’s admin. If you have already changed it, then type your new password.
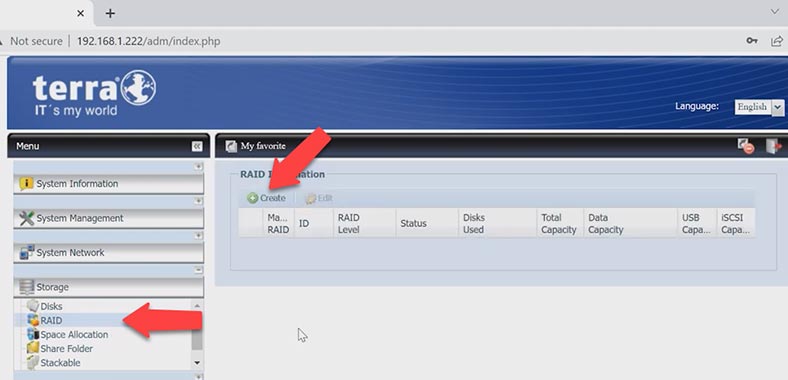
In the manager window that opens, click on the RAID icon, or open the Storage tab and choose RAID. To add a new array, click the Create button, with a plus on it.
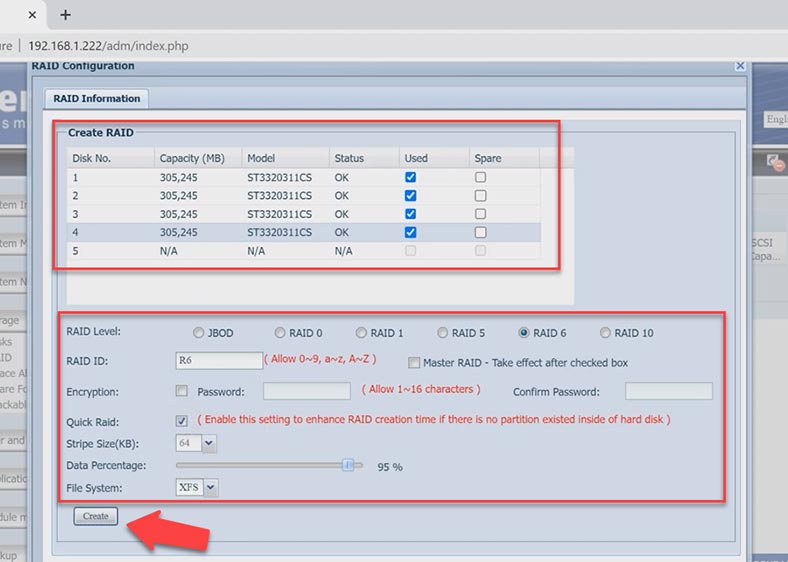
Here, check the boxes for disks that your RAID should include, select its type, change its name, stripe size and file system if necessary. To confirm your choices, click Create and then Yes, when the warning window appears.
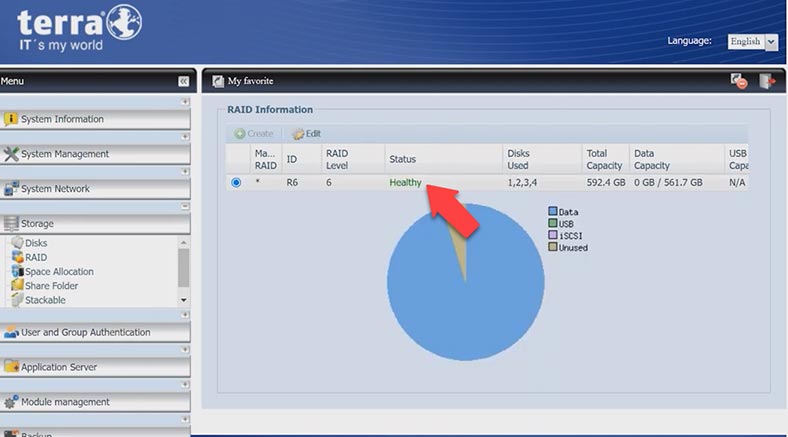
When the creation process is over, you’ll see a window saying that the RAID has been successfully created – click OK.
How to enable an FTP server
Files will be added to the NAS by FTP, so I’ll show you how to configure it.
To enable an FTP connection, expand the tab System Network – FTP. Change the option to Enable and then configure additional settings; after that, click Apply to confirm the changes.
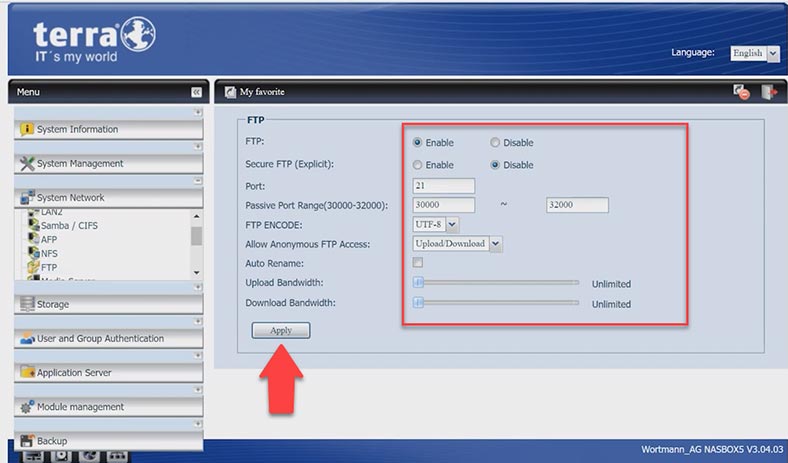
Now that your FTP server is on, you can access the network drive by an FTP connection and write some data to the NAS.
How to add a shared folder
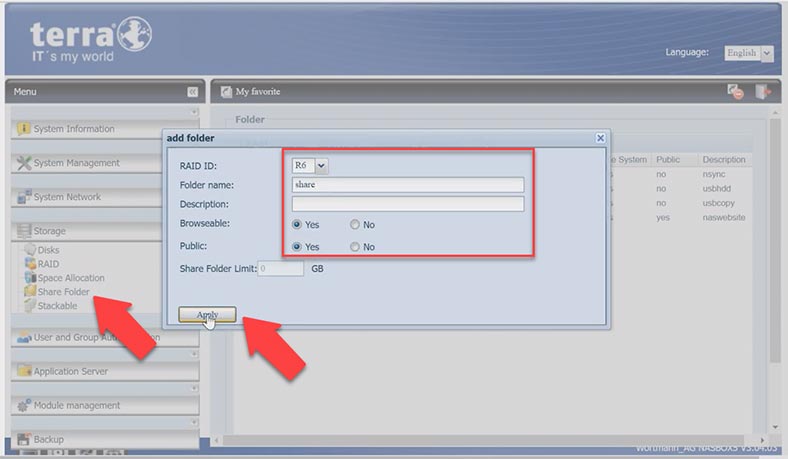
But before that, you should add a new shared folder. To do it, click on the shortcut – Share Folder – Add. Set the folder name and access permission, then click Apply and OK. After that, connect to the network storage by FTP and add necessary files there.
How to create a folder snapshot
This NAS model lets you take snapshots of your data. It’s a useful feature that will secure your files against accidental removal. Click to select the folder the current state of which you would like to copy, then click Snapshot and wait until the process is complete.
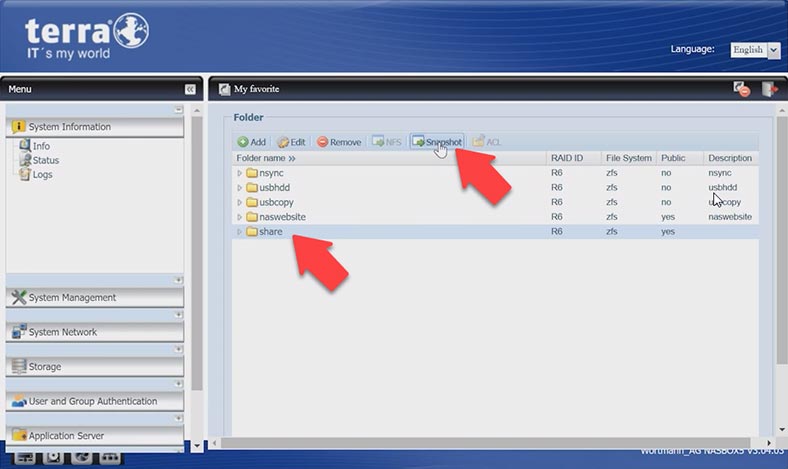
In the end, you will receive a backup copy of this folder and its current contents.
How to create an iSCSI volume
In addition to an FTP connection, Terra NAS lets you configure an iSCSI connection. To create an iSCSI volume, go to the tab Storage – Space allocation. Click on the Add button.
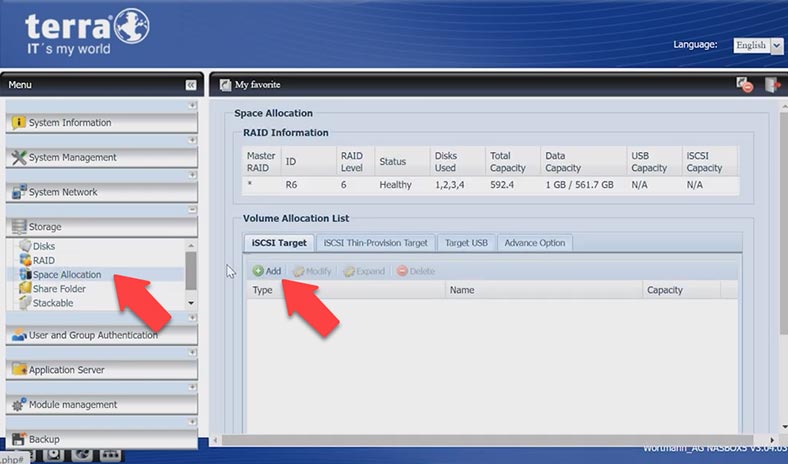
Give the required size, target name, and other settings. Click OK to confirm the changes you have made. The iSCSI volume is created – OK.
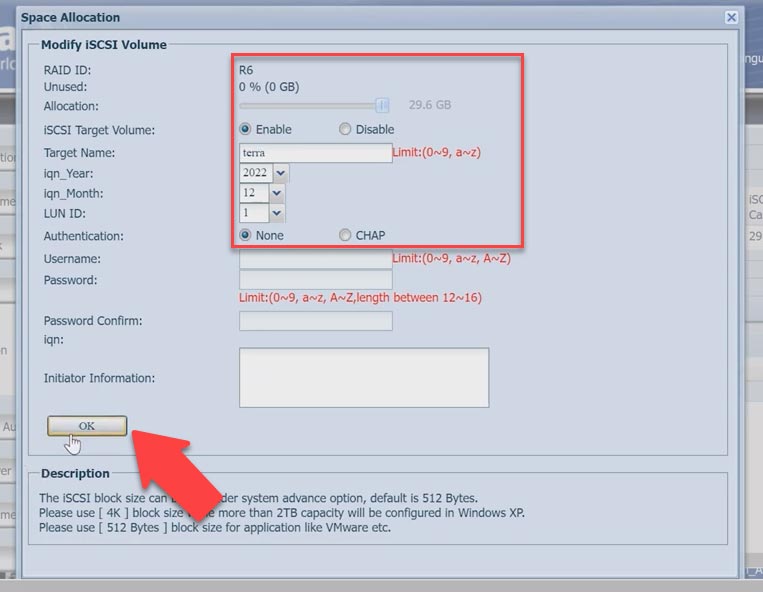
The final step is to connect it to the computer and format in Disk Management, and it will appear in Windows Explorer.
Terra NASbox 5 data recovery
How to recover data from an iSCSI volume
If you accidentally removed some files from an iSCSI volume and you can’t see them in the Recycle Bin, they can be restored with specialized data recovery software called Hetman Partition Recovery. In the case of an ordinary deletion, you don’t have to take hard disks out of the NAS and use them to build a RAID system. Just scan the array and recover the files you are looking for.
Hetman Partition Recovery has found the network iSCSI volume and recognized it as a physical one, just like your computer’s operating system has. It means you can easily scan it and recover the accidentally removed data.
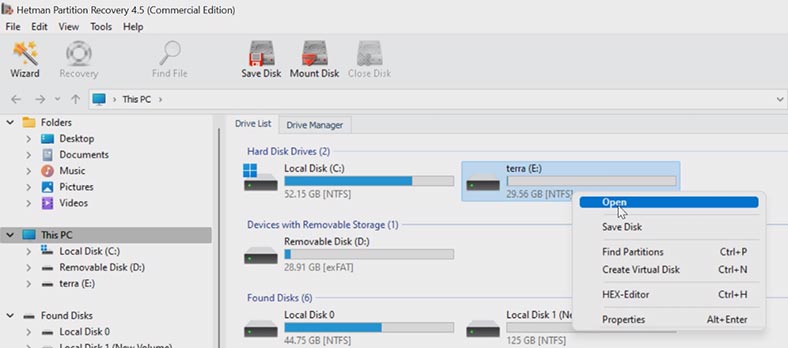
To start the recovery process, right-click on the disk and choose Open. Choose the scan type: in such cases, Fast scan should be enough. Wait for the scan to be over and check what it can do. As you can see, the program has easily found the files that have been deleted. The last step is to recover them.
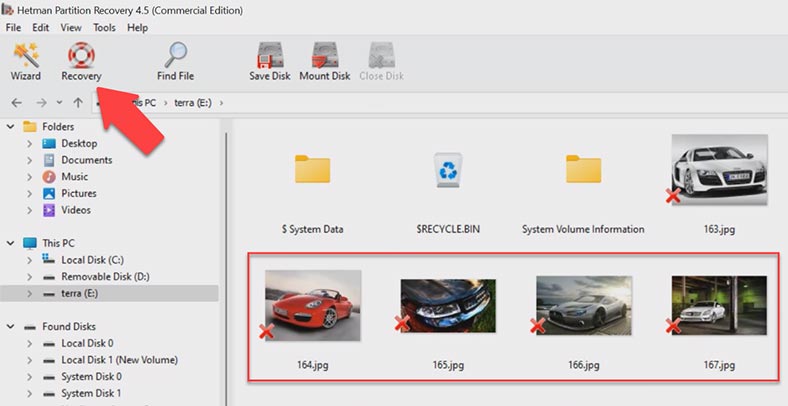
Select everything you want to restore, and click the Recovery button. Choose where to save the files – the disk and the folder. When the recovery process is complete, you’ll see all the files in the specified directory.
How to recover data from a non-operable NAS
If your RAID is damaged or destroyed because the NAS broke down, or there was a hardware failure, misconfiguration, a firmware issue, or loss of access to the network drive etc, you’ll be able to rebuild the RAID and retrieve important files with the help of a specialized data recovery tool called Hetman RAID Recovery.
It supports most popular file systems, RAID technologies and types. The program will automatically rebuild the damaged RAID system with the available disks.
To extract the data from the disks, take them out of the non-operable NAS device and connect them to a Windows computer. If your motherboard has less SATA ports or power connectors than necessary, you will need additional adapters and expansion cards.
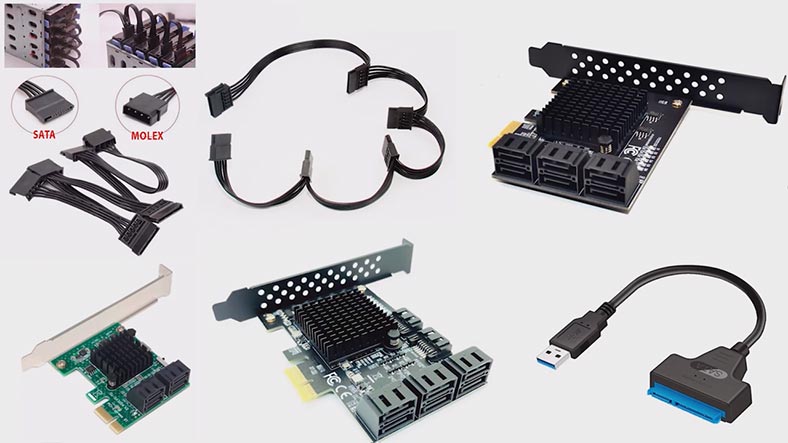
When the hard disks are connected, the operating system may suggest to initialize or format the disks. Remember to never agree to either operation, because it can erase the remaining information completely.
Hetman RAID Recovery will identify the disks automatically, read their service information and rebuild the damaged RAID system. The detailed information on your array is displayed below.
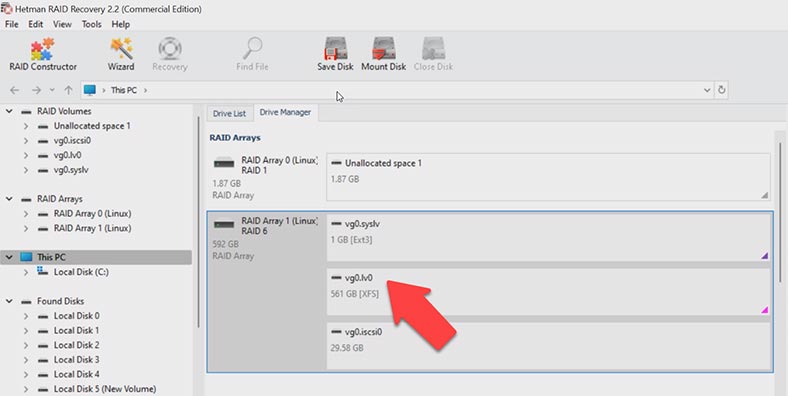
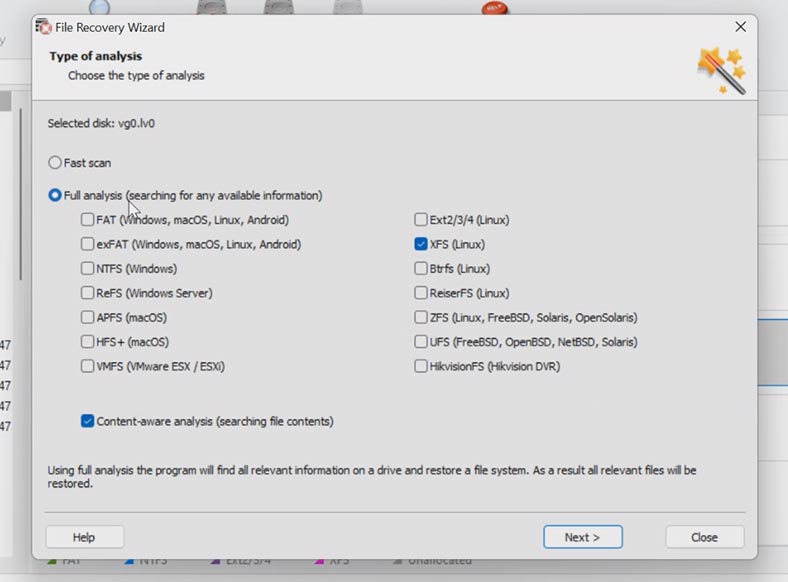
To start looking for the files, right-click on the disk and choose Open. After that, choose the scan type – Fast scan or Full analysis. We recommend beginning with a Fast scan – this will take less time, and it works fine in most typical recovery scenarios. If the program couldn’t find the files you need, go back to the main window, right-click on the disk and choose – Analyze again – Full analysis – specify the file system for this disk and click Next.
As you can see, the program has rebuilt the damaged RAID easily and found all the files stored on the network drive. The previously removed files are marked with a red cross. You can use the preview window to see the contents of all files.
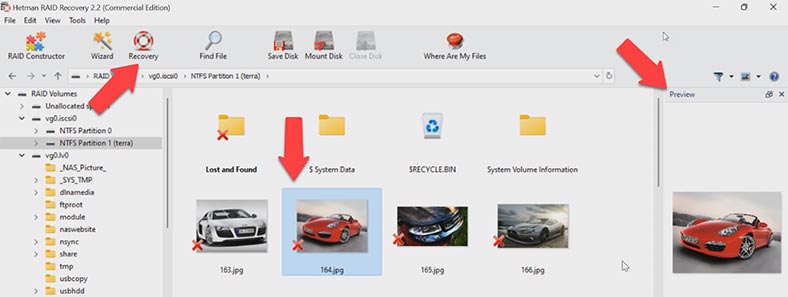
Select all the files you want to recover and click Recovery, then choose the path where you want to save them – the disk and the folder – click Recovery and Finish. In the end, you will find the recovered files in the folder you have chosen.
You can also recover files from an iSCSI volume in the same way. Open the volume; as you can see, in this case Fast scan is not available, but Full analysis is. Specify the file system if you know it, otherwise leave the settings at their default values. The Content-Aware search option may be disabled unless you think it’s necessary to use it. Wait for the analysis to finish. The program has found all the files that have been stored on this iSCSI volume, including the deleted ones. All you have to do is to save the recovered files.
How to rebuild a damaged RAID manually with the RAID Constructor
In some cases, when disks are damaged or their service information is erased, Hetman RAID Recovery may have difficulty in automating the array rebuild process. If the program failed to rebuild the RAID with the available hard disks but you know its properties, you can perform this operation manually, with the help of the RAID Constructor.
To do it, open the Constructor, and select the Manual mode option here. In the next window, fill in all the RAID properties you know: the RAID type, block order and size, add the disks it used to include, use the arrows to specify their order, and replace the missing disks with empty drives by clicking the “plus” button.
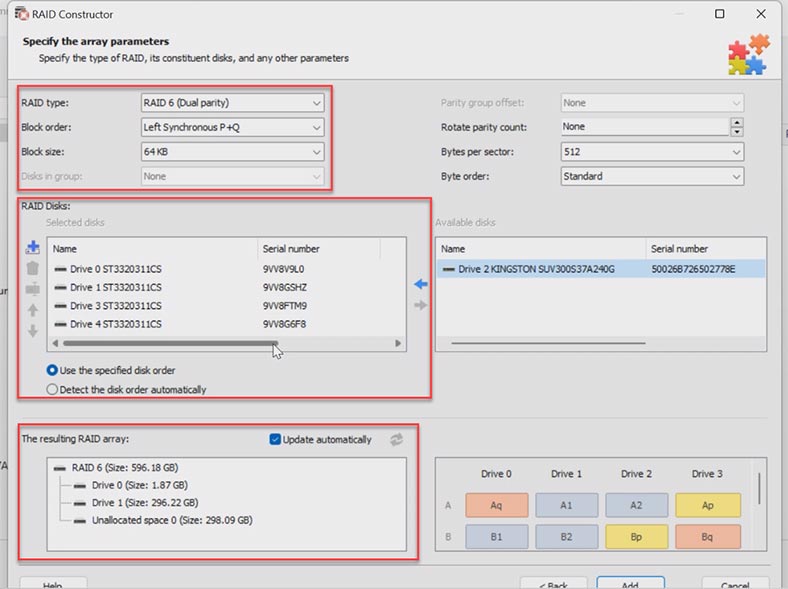
Also, you can specify the offset that helps to locate the beginning of the disk. Sometimes, the program may have difficulty in identifying it automatically, so you’ll have to enter the offset value manually.
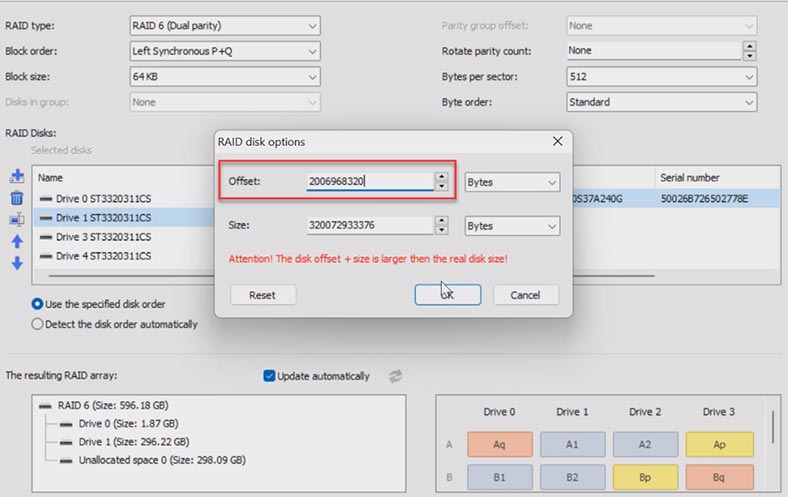
When you specify all the properties you know, click Add, and the array you have built manually will appear in the Drive Manager. After that, start the scan, look for the files you want to recover, and hit Recovery.
Conclusion
Data recovery from a RAID system is a complicated procedure so it is important that you treat the damaged disks carefully as you try to recover the files. With Hetman RAID Recovery, you can create disk images and then scan the images instead of the actual disks, so your damaged disks will last longer.


