Data Recovery from RAID 6 on QNAP TS-439U-RP/SP NAS | Guide
Learn how to recover data from RAID 6 on a non-operational QNAP TS-439U-RP/SP NAS. Discover how to recover data from a RAID 6 on a non-operational QNAP TS-439U NAS. Essential steps for data retrieval outlined in this article.
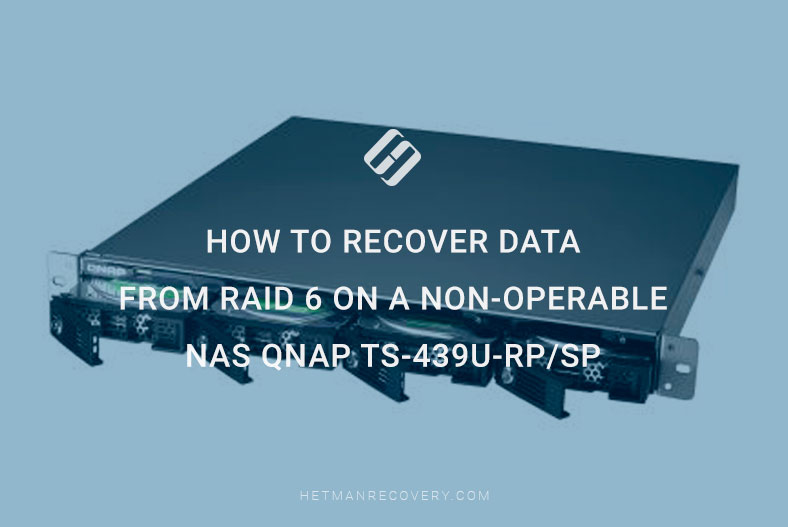
- So what should you do if your NAS Qnap TS-439U-RP-SP displays a failure, but your valuable data is locked inside that RAID 6?
- How to create RAID 6 Qnap NAS
- Identifying problems in Qnap NAS TS-439U
- How to recover data from RAID 6
- How to recover data from a virtual LUN disk on iSCSI target
- Conclusion
- Additional Considerations for QNAP NAS Data Recovery
- Questions and answers
- Comments
Qnap NAS is quite a reliable type of storage network system, but unfortunately, there is no equipment that is 100% safe from possible issues. Sooner or later, a network-attached storage may fail, and all the data inside it will become inaccessible.

The Ultimate Guide to Recovering Data from RAID 6 on a Non-Operable NAS Qnap TS-439U-RP/SP
So what should you do if your NAS Qnap TS-439U-RP-SP displays a failure, but your valuable data is locked inside that RAID 6?
Before you start recovery operations, it’s essential to understand that any manipulations involving a RAID system may entail the risk of data loss. That is why the first step is to back up your stuff if possible.
There may be all kinds of issues, and very often the NAS just won’t turn on or refuses to boot. In such situations, its hard disks tend to remain operable, and it gives us a good opportunity to recover the data. In this article, we’ll see how to retrieve files from a RAID system when a network-attached storage breaks down.
How to create RAID 6 Qnap NAS
For better understanding of how the RAID technology works, let’s explore the process of creating a disk array system on this specific Qnap NAS.
RAID is a technology that allows combining several hard disks into a single logical volume in order to improve performance and fault tolerance.
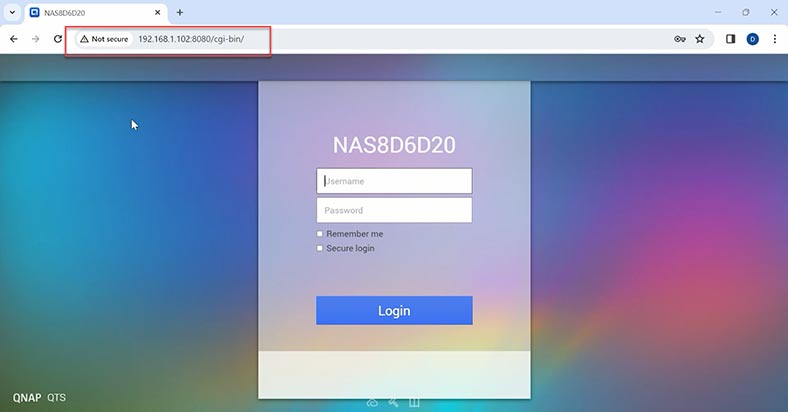
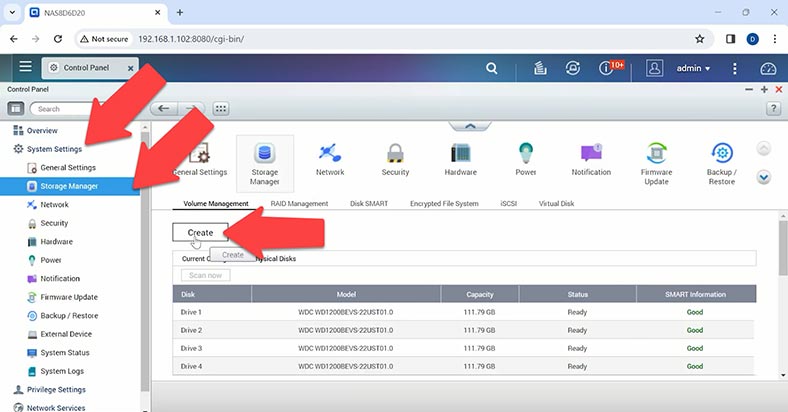
So if you need to create a RAID, enter the web interface of your Qnap NAS, using the corresponding IP-address in your browser. When you’re there, open Control Panel and go to Storage Manager. In the Volume Management tab, click on the Create button. Hit OK to continue.
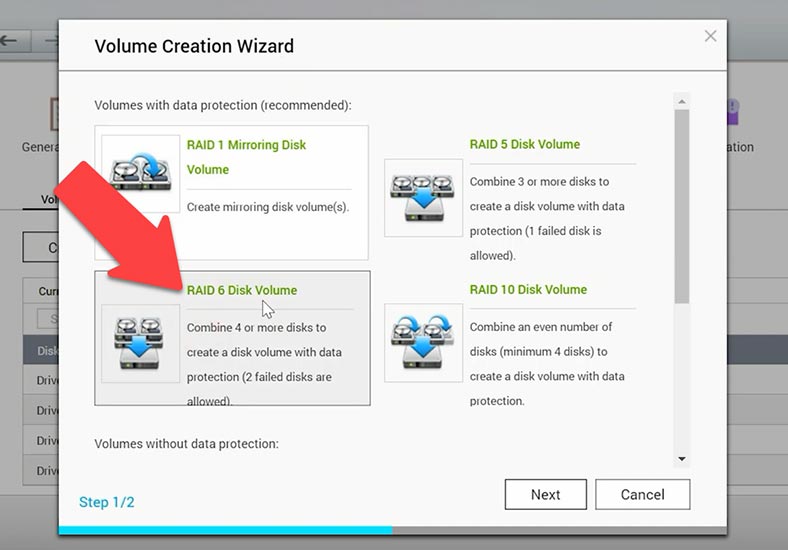
In the Volume Creation Wizard window, choose the RAID type: in my case it is RAID 6, and click Next.
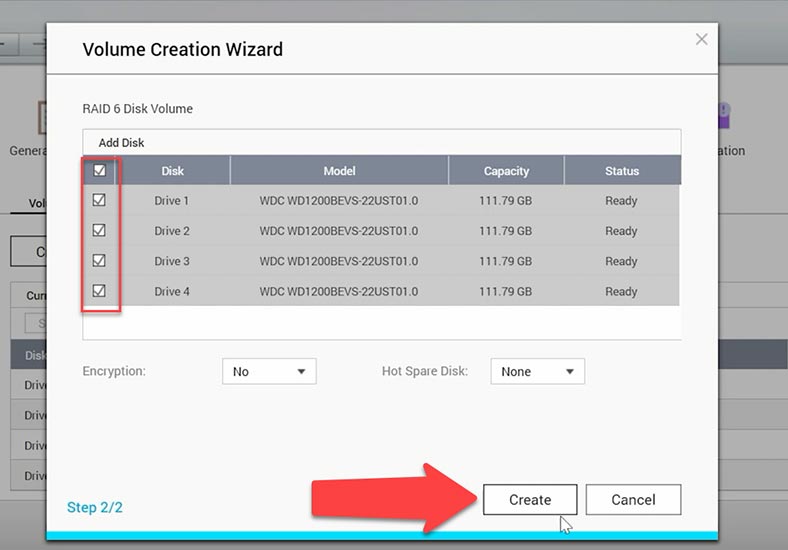
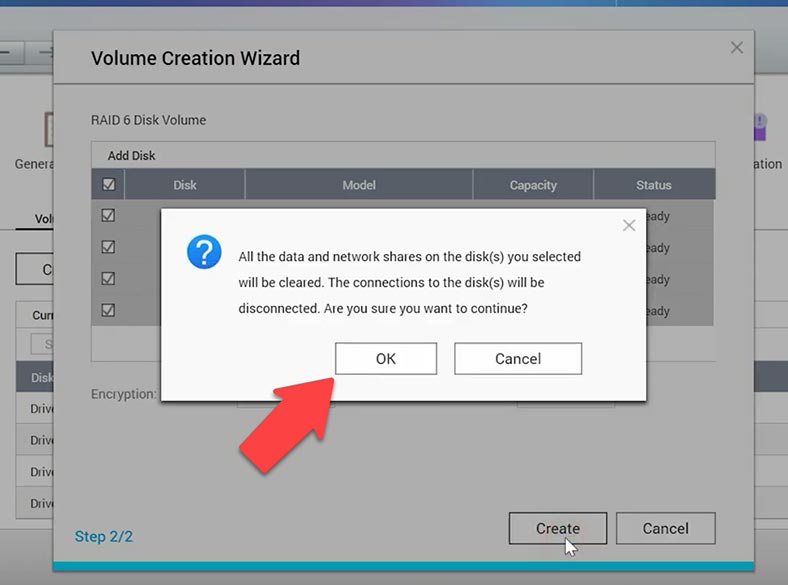
Select the drives for this array and click Create.
After that, you will see a warning that data on these disks will be erased, so click OK to confirm it.
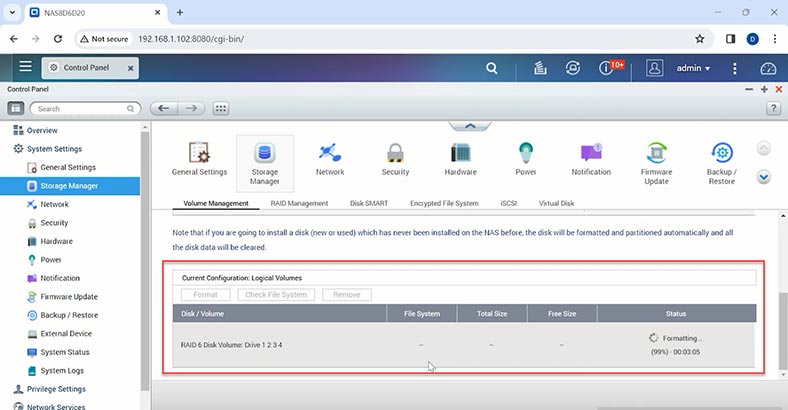
Then the array will be built, disks will be formatted, and the disk space will be initialized. This process is quite long and may take a lot of time.
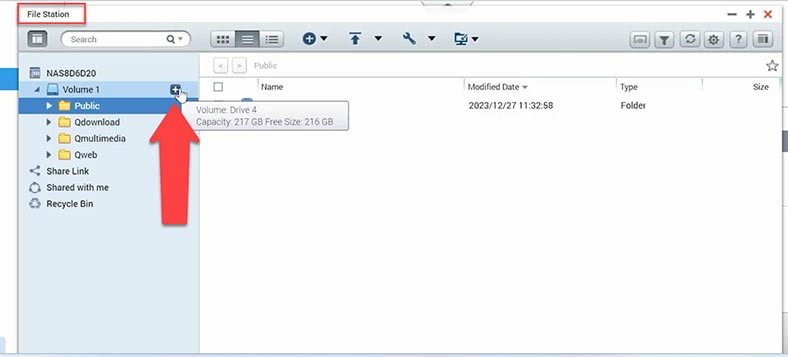
When it’s over, you’ll be able to create a shared network folder and change other volume settings. Now it’s time to create that shared folder. Open File Station and click on the plus button – Create.
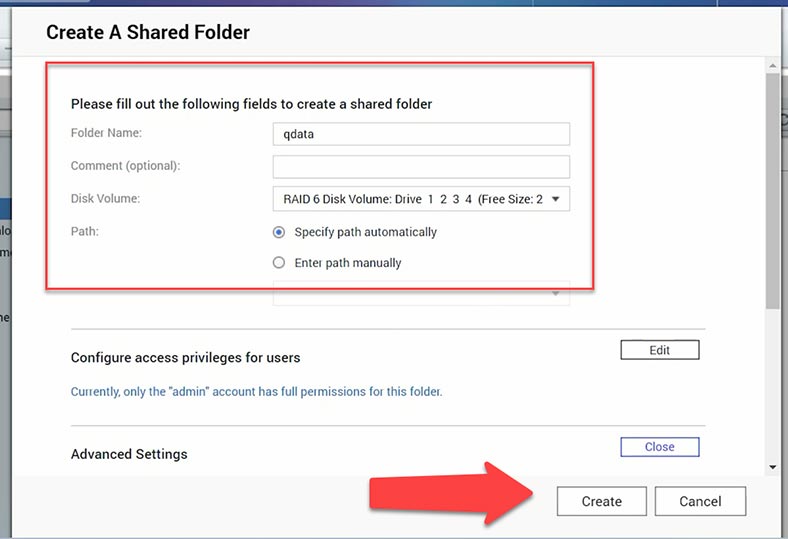
Give it a name, and modify permissions if necessary. Here we go, here’s your shared folder.
Now you can upload some data.
Identifying problems in Qnap NAS TS-439U
If the network-attached storage doesn’t respond to your pressing the on/off button or it shuts down suddenly, something may be wrong with it.
In such situation, the first step is to troubleshoot the issue. We’ll begin with finding out why this Qnap NAS refuses to turn on. This problem can be caused by hardware issues, power issues, software bugs etc.
For starters, run a visual examination.
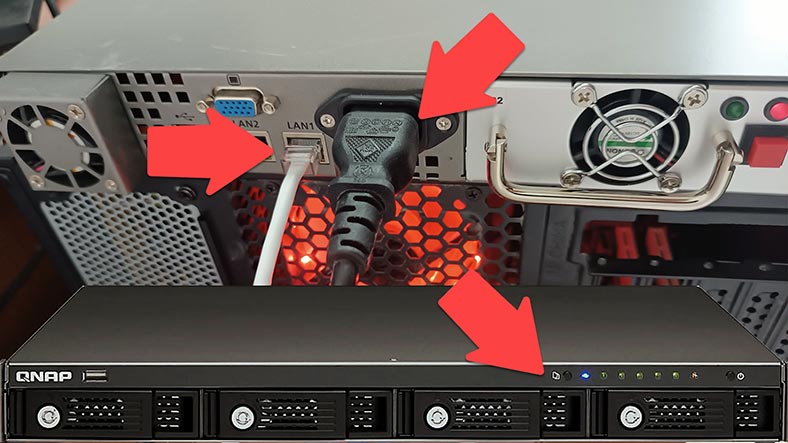
Check the power connector and the network connector. Make sure that the LED indicators on the front panel are OK. Have a look at the power, disk status and network connection indicators.
If the device works but it can’t be accessed over the network, check its status by accessing the web panel. Use the web interface by entering the IP address of your NAS in a browser. Try to log in and see if the general information about your device is displayed properly.
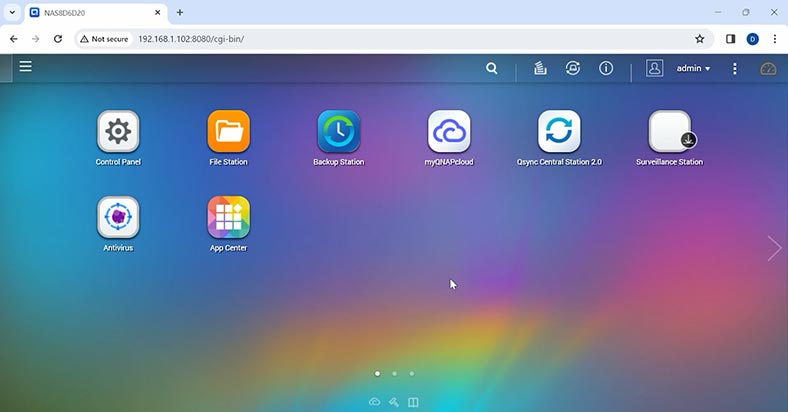
Make sure that your network settings are correct and check the network connection. If there are any problems in accessing the network, reconnect the network cable or reconfigure the connection.
How to recover data from RAID 6
If the steps I have just described didn’t help you to identify and eliminate the problem, you can still retrieve files from a non-operable NAS with a dedicated recovery tool for RAID systems.
Download, install and run Hetman RAID Recovery. It will rebuild the damaged RAID with the available hard disks, so that you’ll be able to retrieve the remaining data.
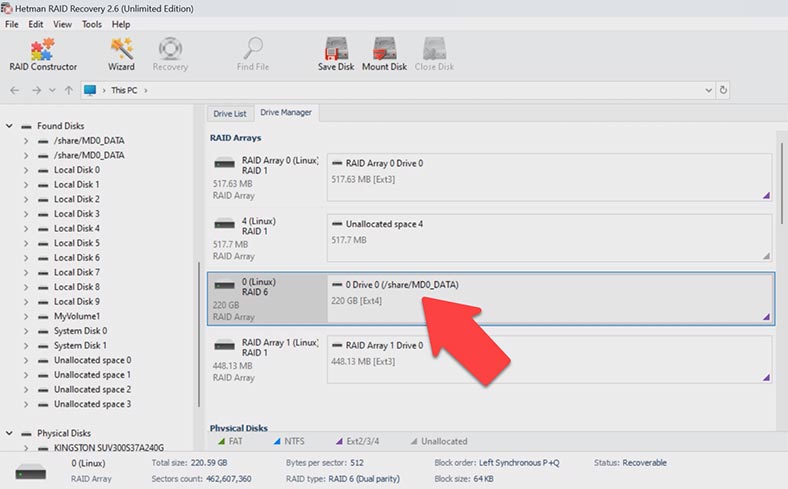
To start the recovery process, take the drives out of the storage device and connect them directly to the motherboard of a Windows computer.
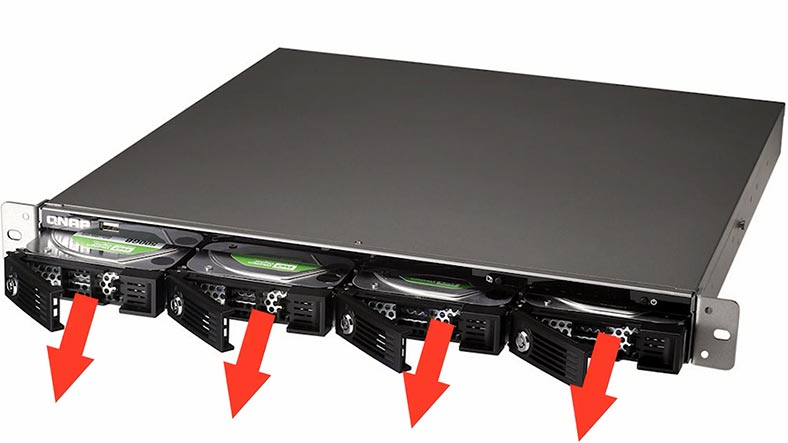
The most important thing is to connect all disks at the same time. The only exception is when you work with a RAID system that can remain operable when one or more hard disks are missing. In the case of RAID 6, two hard disks can be excluded from the array, provided that the rest of the disks are still operable.
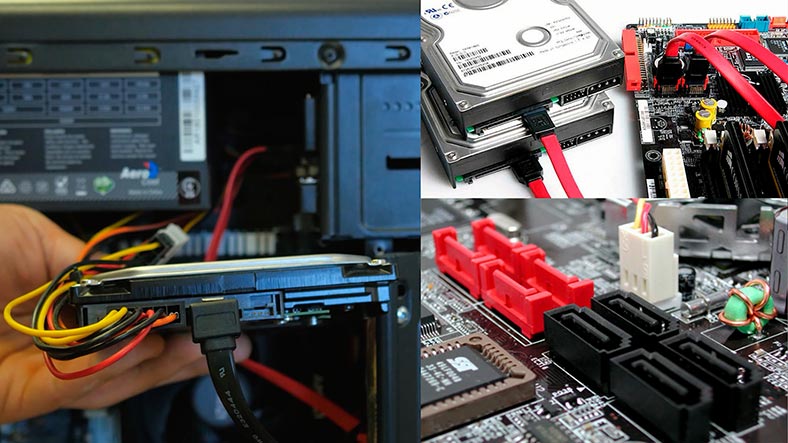
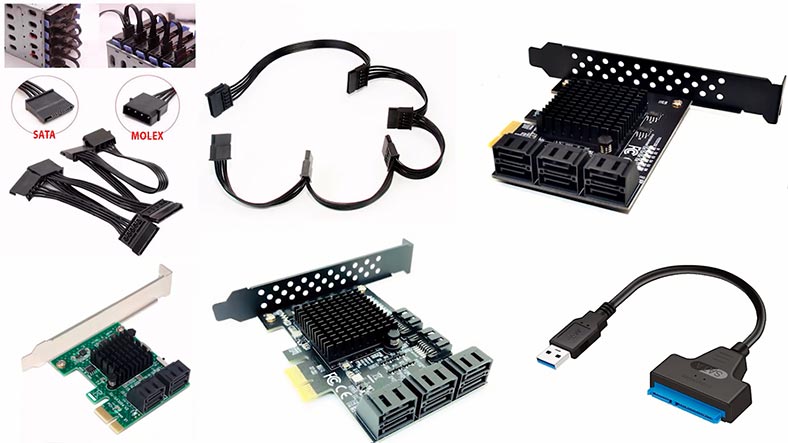
If it’s impossible to check operability of all disks, just connect all the HDDs that this RAID consisted of. If your motherboard lacks SATA ports or power connectors to connect all the disks, you can solve the problem by using special expansion cards and adapters.
When taking the hard disks out of the NAS, don’t forget to mark them with numbers so that you will put them back into your NAS in the same order they used to have. Also, you will need some space to save the data – and it should be of the same capacity as the data you’re trying to recover.
Hetman RAID Recovery supports all popular file systems and RAID types.
The operating system may suggest initializing of formatting the hard disks for further use when they are connected to the computer. Never agree to that. If you do, there is a high risk of losing any remaining information, and it can make the recovery process much more complicated, either.
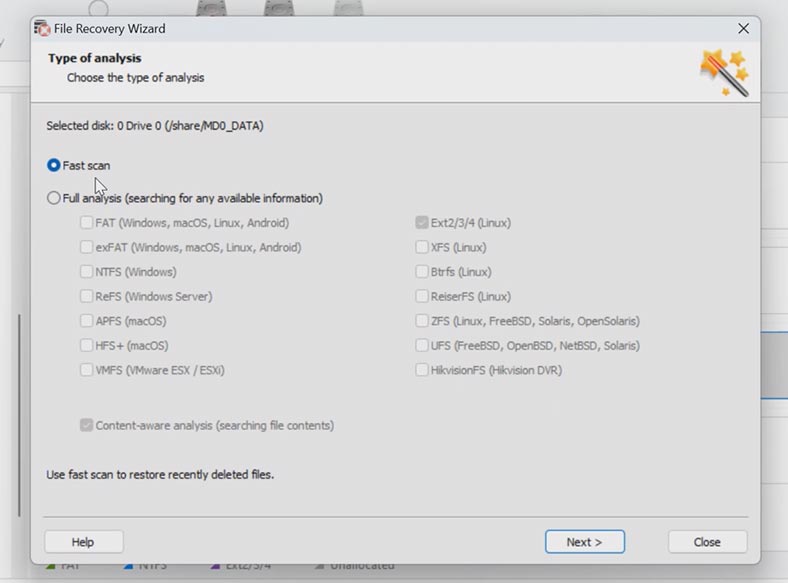
To have your files back, start disk analysis. Right-click on the volume and choose Open. After that, choose the scan type – Fast scan or Full analysis. If the NAS is down, but the program manages to rebuild the RAID correctly, a Fast scan is enough.
When the scan is over, open the folder where the lost files were stored. The previously removed files are marked with a red cross. You can see the contents of every file in the preview window, and this also applies to photos, videos and documents.
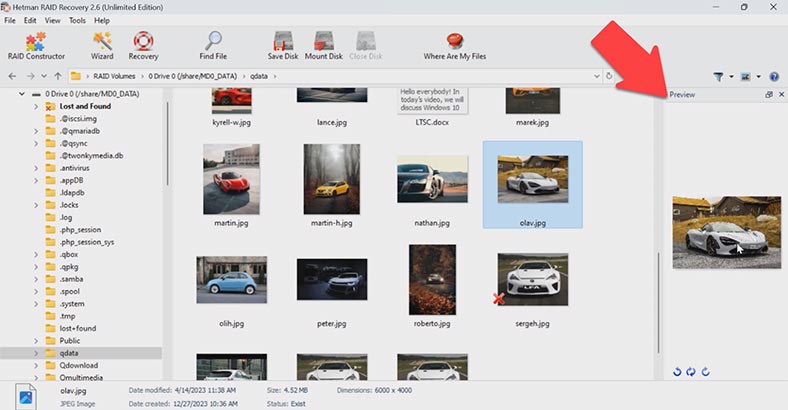
To open a file in full-screen view, right-click on it and choose Full screen preview.

Select all the items you want to recover and click the Recovery button. Choose the directory where you want to save the files (the disk and the folder), and click Recovery again. In the end, you will find the recovered files in the folder you have chosen.
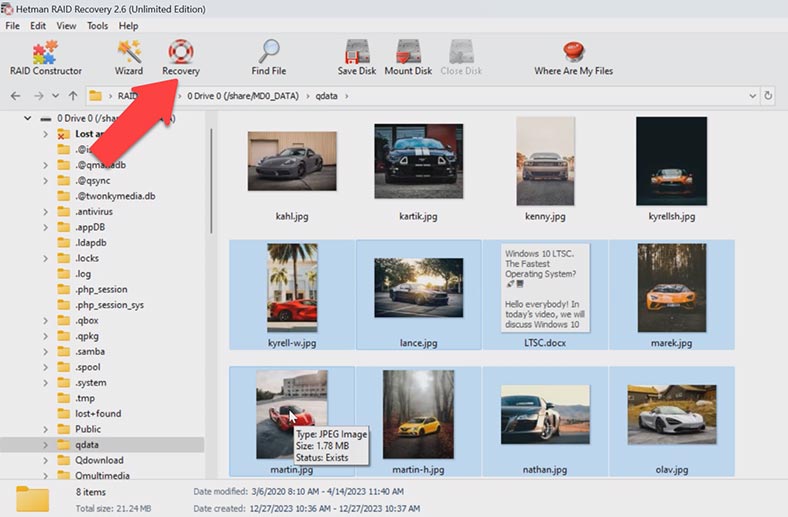
To ensure more safety for working with damaged drives, this program has a feature to scan disk images instead of actual HDDs. This will reduce the disk load on your drives and extend their lifespan. To create a disk image, right-click on a drive and choose Save Disk. Specify the path to save the file.
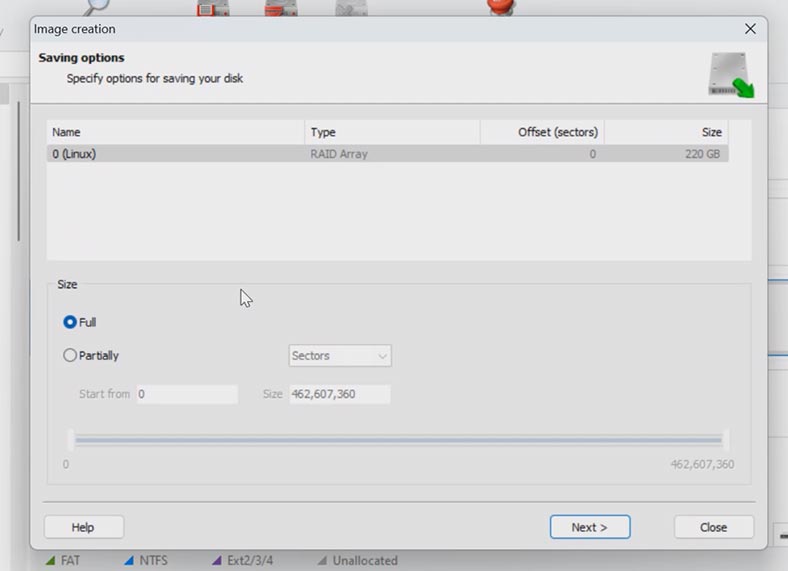
After that, you’ll be able to mount this image and scan it. To mount a disk image, open the Tools tab – select Mount Disk – specify the path to the image file, select it and click Open.
How to recover data from a virtual LUN disk on iSCSI target
If you stored virtual LUN disks on your RAID and you had a configured target iSCSI storage, you should restore its .img file before retrieving any data from there. This image contains the files that have been written to the virtual network drive.
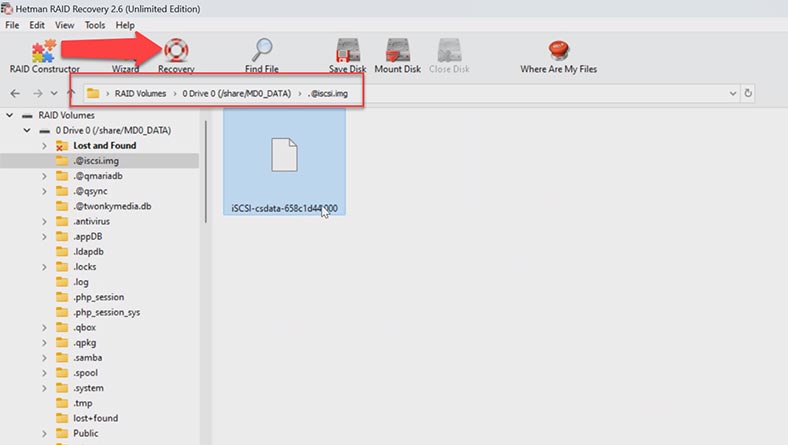
After scanning it with the recovery software, go to the folder @iscsi.img and recover files with the name of the required LUN to any directory you find convenient. After that, go to the main window of the recovery tool and mount the recovered file. Tools – Mount Disk – RAW disk image – select all files, choose the one you need and click Open.
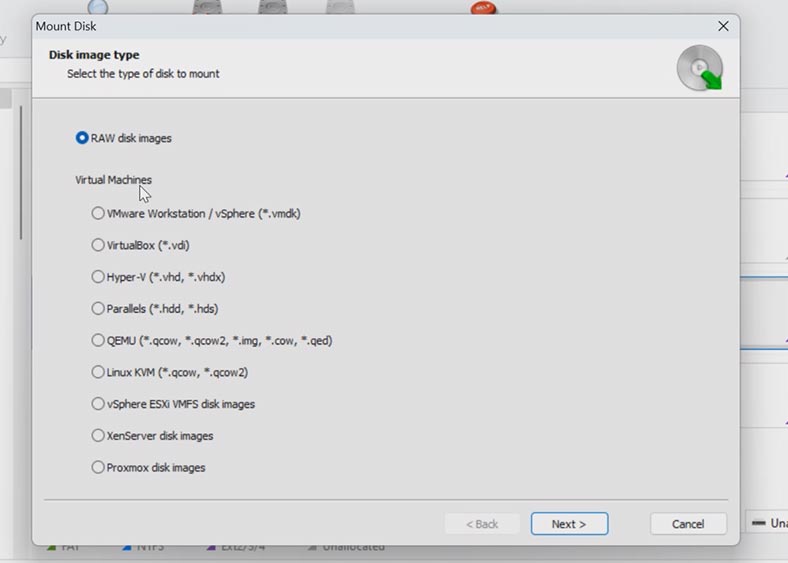
Now scan the mounted disk. Right-click on the disk – Open – Fast scan. Go to the folder where the files for recovery were stored, choose the items you need and click Recovery, select where you want to save them, and click Recovery again. When the recovery process is complete, you’ll see all the files in the chosen directory. This is how you can recover files which were stored on the iSCSI target which is no longer accessible over the network.
Conclusion
Today we have explored the key steps in recovering data from RAID 6 based on a non-operable Qnap NAS. Remember that the data recovery process may turn out to be long and complicated, and it always requires you to be most attentive, so make sure to follow our recommendations closely.
| Step | Description | Tips | Notes |
|---|---|---|---|
| 1. Device Shutdown | Turn off the NAS Qnap TS-439U-RP/SP and carefully disconnect all hard drives. | Record the order of disk connections for later reconfiguration. | Store the disks in anti-static bags to avoid damage. |
| 2. Connect Disks to PC | Use docking stations or adapters to connect each disk to the computer. | Ensure that all disks are connected simultaneously for proper RAID reconstruction. | Do not attempt to write data to the disks to prevent further data loss. |
| 3. Use Specialized Software | Run RAID recovery software and select the appropriate configuration (RAID 6). | Familiarize yourself with the software instructions and settings beforehand. | It is recommended to use reliable software such as Hetman RAID Recovery. |
| 4. RAID Reconstruction | The software will automatically detect the RAID configuration and begin the array reconstruction process. | Ensure the software correctly recognizes all disks before starting the process. | The process may take some time depending on the data volume and connection speed. |
| 5. Save Recovered Data | After the process is complete, save the recovered data to another storage device. | Do not save data on the same disks from which recovery was performed. | It is recommended to store the data on an external hard drive or in the cloud. |
Before you begin, always analyze the situation. Find out what exactly caused the system to fail. Recovering data from RAID may call for specialized tools. Always use only well-tried software.
Another recommendation is to back up your information on a regular basis. This simple step will help you avoid data loss in case any failures or malfunctions occur. Remember that successful data recovery depends on a number of factors, and the final result may vary in every specific case.
Additional Considerations for QNAP NAS Data Recovery
Powering on the NAS
To begin the recovery process, ensure that your QNAP NAS is correctly powered on. Check if the NAS is starting up properly by observing the status lights and listening for the usual startup sounds. If the NAS fails to start, you may need to troubleshoot power connections or consider a firmware update to resolve issues that prevent booting.
Connecting the NAS
If your QNAP NAS model, such as the TS-439U-RP/SP, doesn’t respond after powering on, check the connections. Make use of the VGA or HDMI port to connect a monitor. This direct video output can help you see error messages directly from the NAS, offering clues on what might be going wrong.
QNAP NAS Data Recovery Steps
When it comes to data recovery, especially from models like TS-439 Pro II, TS-259 Pro, or TS-859 Pro, it’s crucial to follow the steps systematically to avoid further data loss. If you encounter issues during the recovery process, see further troubleshooting tips provided by QNAP or contact customer service for guidance.
Recovery Requirements and Tools
The recovery process from RAID configurations like RAID 6 requires specialized tools and understanding of how these arrays are structured. Tools such as Hetman RAID Recovery can help in reconstructing the array and recovering the data. Ensure you have a clear understanding of the NAS model and RAID configuration before proceeding.
Applicable Models and Enterprise Solutions
This recovery guide is applicable to a range of QNAP models, including the SS-439, SS-839, and the enterprise-level SS-ECx79U series NAS. For enterprise NAS solutions, the recovery process might involve additional steps or specialized support due to the complexity and scale of the storage used.
Firmware and System Updates
Always ensure that your QNAP NAS is running on the latest firmware version. An outdated firmware can lead to issues that might hinder the recovery process. If the recovery process fails, one of the troubleshooting steps should include checking and updating the firmware.
Conclusion and Further Assistance
Recovering a NAS system, such as the QNAP TS-439U-RP/SP, can be challenging. If the above methods do not resolve the issue, it may be necessary to see professional data recovery services. Remember, the ability to recover data can vary significantly based on the NAS model, the nature of the failure, and the specific RAID configuration. For any persistent issues or complex scenarios, don’t hesitate to reach out to QNAP’s customer support for additional guidance and support.


