How to Recover Data from an External Hard Disk on Mac
Read this article to find out how to recover lost data from a removable disk on your Mac. We’ll find out which recovery method works best in each case, and see if we can recover all files in various data loss scenarios.
- What to do if you encounter disk access issues?
- How to recover lost data from a removable disk on your Mac
- How to create a disk image in macOS
- Conclusion
- Questions and answers
- Comments
When data gets deleted, modern operating systems including MacOS do not physically remove them immediately – on the other hand, the deleted files may be stored on the disk for some time until they are overwritten with other information. While a file is physically located on the disk, you’ll be able to recover it with the help of specialized data recovery software.
When trying to recover such files, you should consider important aspects: how long ago the files were deleted, and how intensively the removable disk was used after the files were deleted.
Remember: the sooner you stop using the external disk for writing new data, the better chances you have to recover the lost data. That is why you should stop writing anything to such disk as soon as you realize some files are lost.
On the other hand, reading files or transferring them from such removable disk does not affect the chances of recovery, so you can safely copy the remaining data from the disk.

WARNING! How to Recover Data from an External Hard Disk on Mac the Right Way
What to do if you encounter disk access issues?
If there are any problems with accessing the disk, we recommend checking it for basic connection issues.
-
Make sure that the external disk is correctly connected to your Mac. Use an original cable, since third-party cables can either be damaged or incompatible.
-
Try connecting the disk to another USB or Thunderbolt port, since a faulty port can cause such problems as well.
-
If your hard disk has a power indicator, make sure it blinks or glows.
-
Listen closely to how the disk works: strange sounds or absence of rotating platter noises may indicate physical damage.
-
It would only be better if you connect the drive to another Mac or MacOS computer to exclude the possibility of your computer playing tricks with the drive.
-
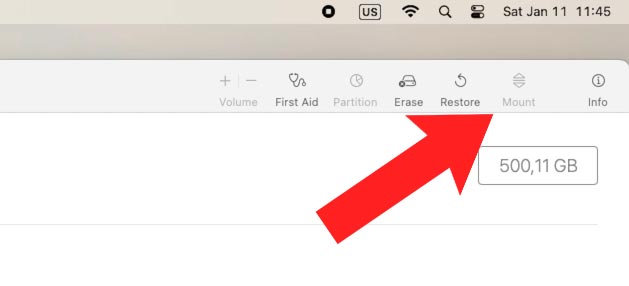
Open Disk Utility. If the disk is displayed but cannot be mounted, select it and click Mount.
-
If such disk was previously used with Windows, it might be formatted in NTFS which MacOS can only read. In this case, you need a data recovery tool to help you copy files from the disk with an unsupported file system.
How to recover lost data from a removable disk on your Mac
Now let us analyze a few scenarios involving loss of files and the methods applied to recover such files.
Method 1. How to recover deleted files from Trash
It works as a temporary storage for deleted files which are available for recovery. Depending on its settings, files may remain in Trash until it is emptied. You can do it manually or set a certain time limit, after which it gets emptied automatically.
If you say that files from an external hard disk don’t go to the Trash – no, they do. Even a removable disk contains a hidden Trash folder where deleted files are stored.
Files which are located in the removable disk Trash will also be displayed in the main Trash folder, if such disk is connected to a Mac.
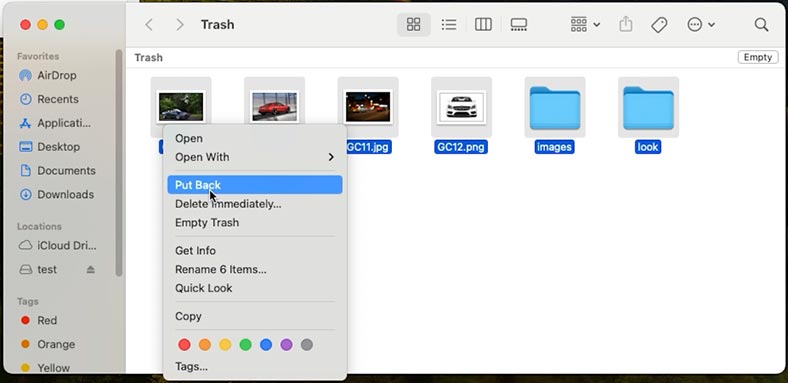
To recover them, connect the removable disk to your Mac, and then open the Trash folder by clicking on its icon.
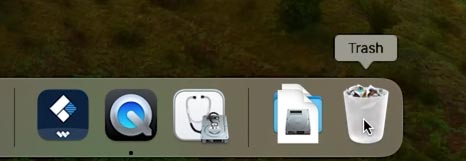
Find the file you’d like to recover, right-click on it and select the option Put Back. After that, the file will be restored to its previous location. Open the disk and check it.
Method 2. How to recover files with Hetman Partition Recovery
If Trash is empty and there are no files, then you need to use a data recovery tool – Hetman Partition Recovery.
| Option | Description |
|---|---|
| Name | Hetman Partition Recovery |
| Purpose | Recovering deleted, damaged, and inaccessible data from hard disks, SSDs, memory cards and USB drives. |
| Supported file systems | FAT/exFAT, NTFS/ReFS, APFS/HFS+, Ext2/3/4, ReiserFS, XFS/UFS/ZFS, Btrfs, VMFS, HikvisionFS. |
| Supported operating systems | Windows, MacOS, Linux |
| Device types | Hard disks, SSDs, memory cards (SD, microSD), USB drives, virtual disks and virtual machine disks. |
| Additional functions | – Recovering deleted partitions – Creating disk images – Recovering data from disk images – Viewing recovered files before saving |
| File formats | Documents, photos, videos, archives, mail and other file types |
| Ease of use | Step-by-step recovery wizard with a user-friendly interface |
| License | A trial version with file saving restricted |
| Interface languages | Multi-language support |
This utility will help you to recover data from external hard disks and any other devices with popular file systems including APFS and HFS, as well as FAT32, NTFS and exFAT.
In fact, it means that Hetman Partition Recovery can scan any external hard disk, even if it was formatted for Windows. Thanks to using a comprehensive algorithm, this utility is able to recover file names, attributes and contents along with the original structure of all directories on a disk.
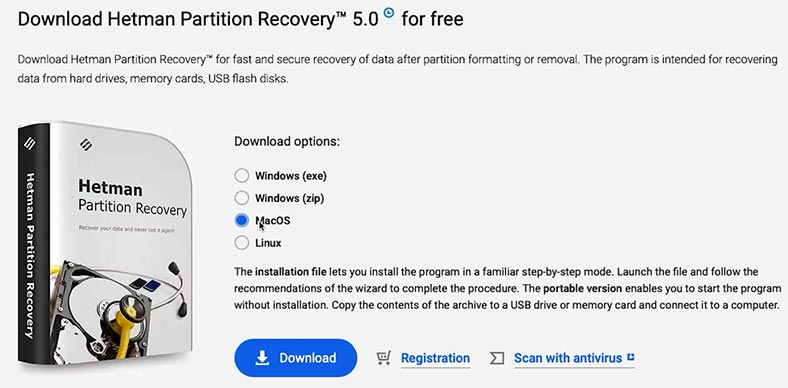
Go to and choose the version for MacOS.
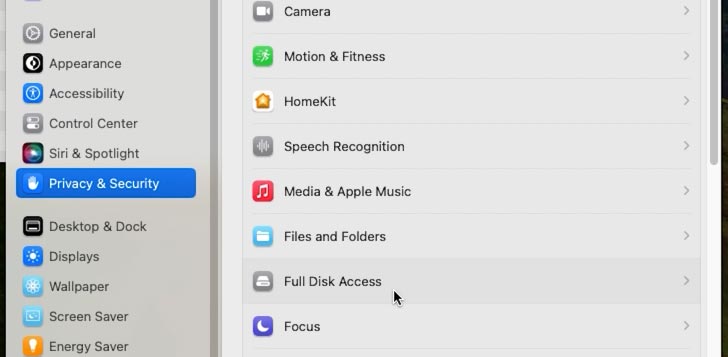
The utility needs full access to hard disks to work properly. Go to security settings and grant access to disks. Type the user password here.
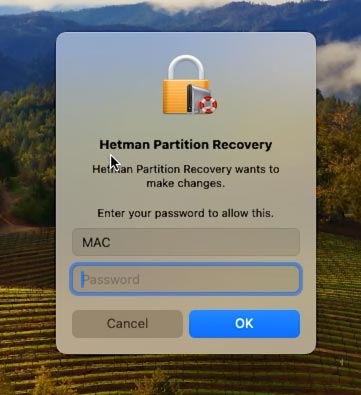
After that, start the program. Since it was not installed from the official store, the user account password is required.
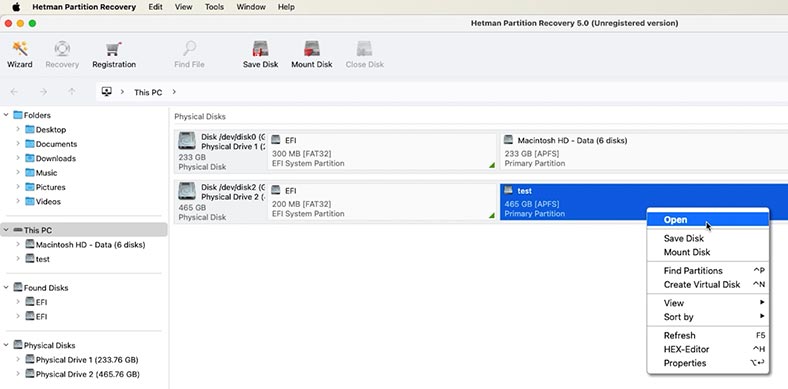
When launched, the utility will display all connected disks in the main window. Find your removable disk here. Right-click on the disk and choose Open.
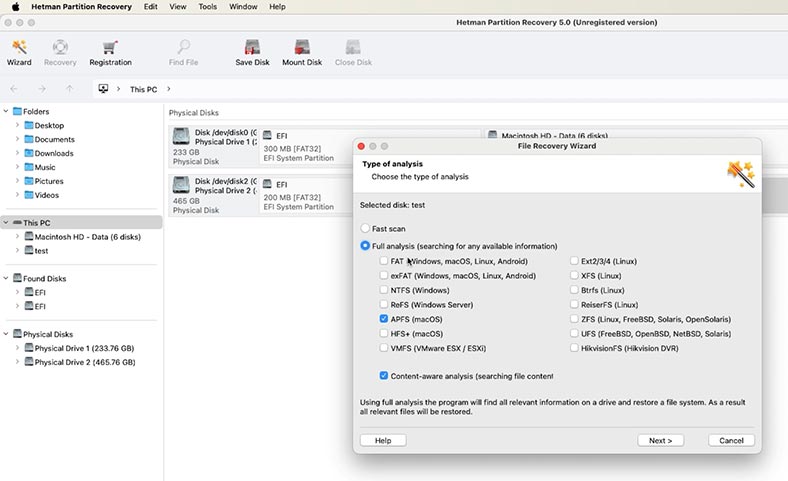
Your next step is to choose the scan type: Fast scan or Full analysis. For starters, we recommend a Fast scan – the utility will promptly analyze the disk and display the files it has found.
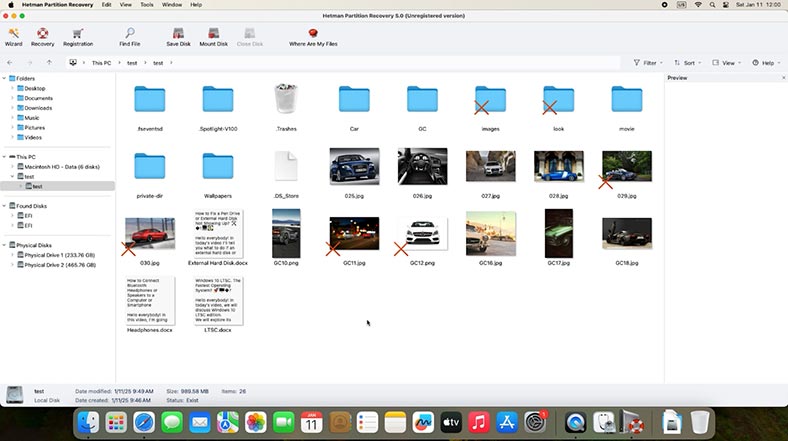
.
Previously deleted files will have a corresponding marking.
If the utility failed to find the necessary files, then run “Full analysis.” To do it, return to the main menu, right-click on the disk and choose Analyze again – Full analysis.
Specify the disk file system and wait until the scan is over. This process is quite long and its duration depends on the scanned disk size.
When the scan is over, open the folder where the lost files used to be. You can see the contents of every file in the preview window. Select all the items you want to recover and hit the Recovery button, specifying where to save them.
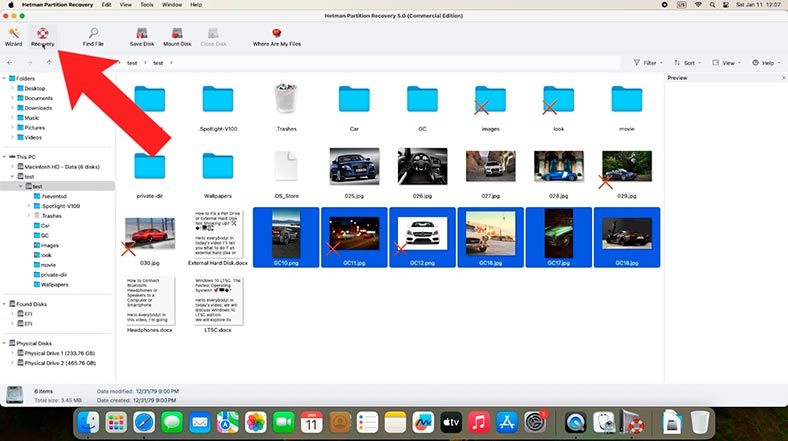
There is one important aspect to keep in mind: we don’t recommend saving files to the same disk from which they are recovered, since it can erase the remaining data and reduce its chances for recovery. If it happens, such files cannot be recovered.
All right, now choose a disk with the sufficient amount of free space. Choose the disk and folder, and click Recovery again.
When the process is over, you will find the recovered files in the folder you have chosen for saving them.
Method 3. How to recover lost files with Time Machine
If you regularly use the Time Machine utility to back up your disk contents, you can use it to recover data as well. This is an excellent solution to protect important files.
To recover files from an external hard disk with the help of a Time Machine backup:
-
Connect a data storage device containing your Time Machine backups to a computer.
-
Open the Finder window in the folder where the lost files used to be stored. In this case, it is a folder on the external hard disk.
-
Now start Time Machine by clicking on the corresponding option in the menu.
-
Navigate the list of available backups with the timeline and arrows to find the files that need to be recovered.
-
Select the ones you need and click Restore.
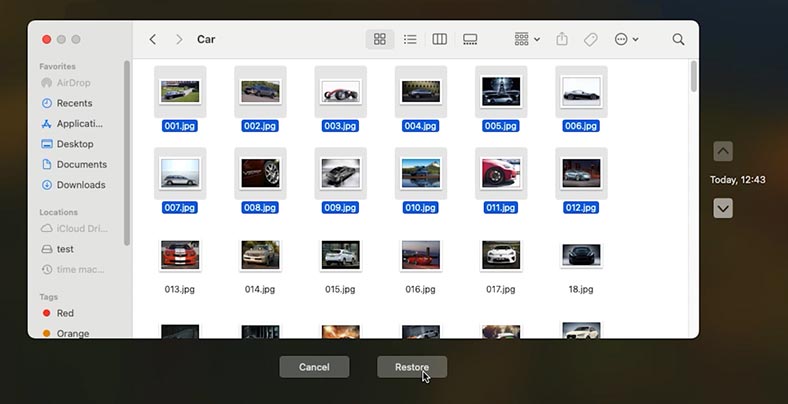
The files should reappear in their original directory on the external hard disk.
An important notice: if your backup has not been updated, or the lost files have never been included into the backup, Time Machine won’t be able to restore such files.
Method 4. Repairing the disk with Disk Utility
If your disk experiences read errors, or its file system gets damaged and it makes the disk unreadable, while its files become inaccessible, use an integrated utility called First Aid.
Even if the file system is damaged, data recovery tools will be able to read the disk and help you retrieve their contents.
Disk Utility is a basic utility for macOS. To start it, open Launchpad and then find Disk Utility. It will help you in case of regular disk connection issues or file access problems.
Now connect an external hard disk to your Mac and run Disk Utility.
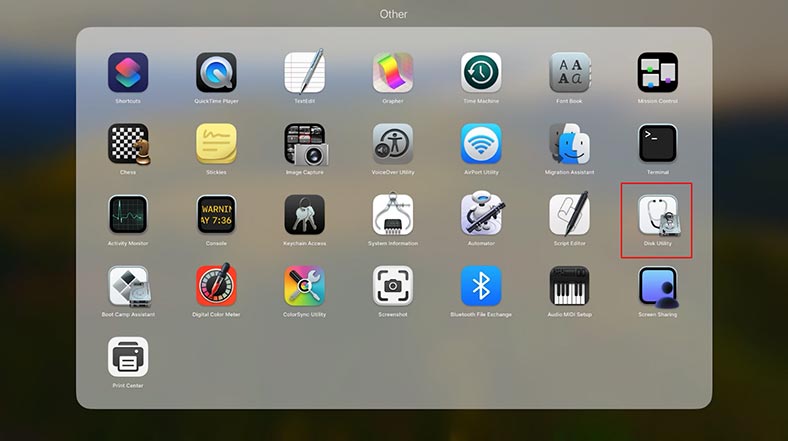
Select the external hard disk from the list in the left-side panel of the app.
Click First Aid to run the process of checking and repairing the disk.

To repair the errors, you’ll be suggested to continue the process, and the disk will be unavailable until the check is over and identified errors are fixed.
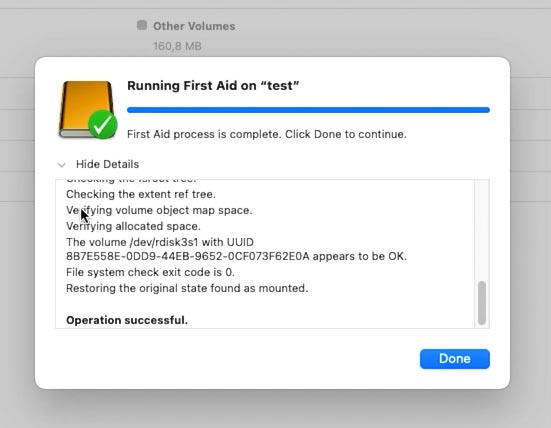
When the repair is over, we recommend backing up important data as soon as possible or creating a disk image. This must be done, since this disk can fail at any moment and all your data will be lost forever.
How to create a disk image in macOS
When it comes to creating disk images, you can use Hetman Partition Recovery.
To do it, select the required disk in the app window and click on Save Disk.
In the settings, choose Full – Save to hard disk.
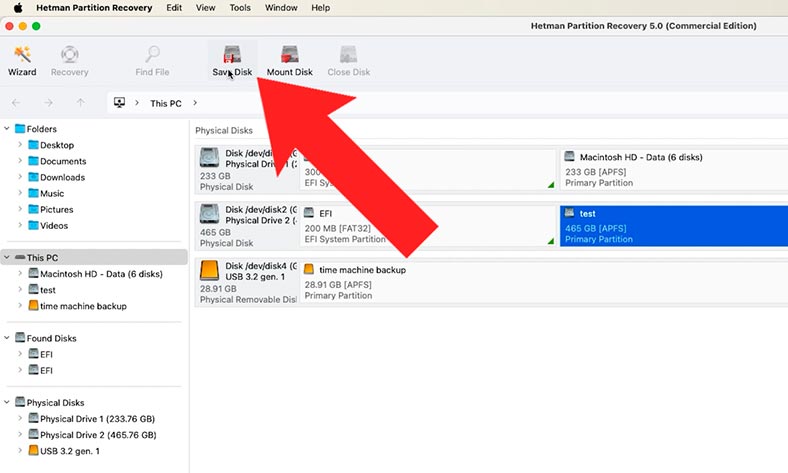
Now choose the directory to save it to. Remember, that the amount of free space on the disk where you want to save the image should be equal to the disk image size, or larger than that.
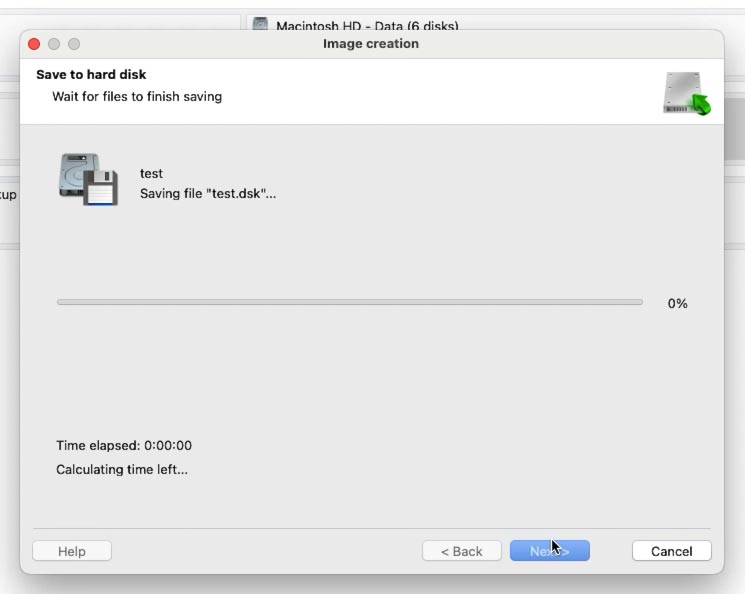
When the operation is over, you’ll get a disk image from where you can retrieve your files at any time.
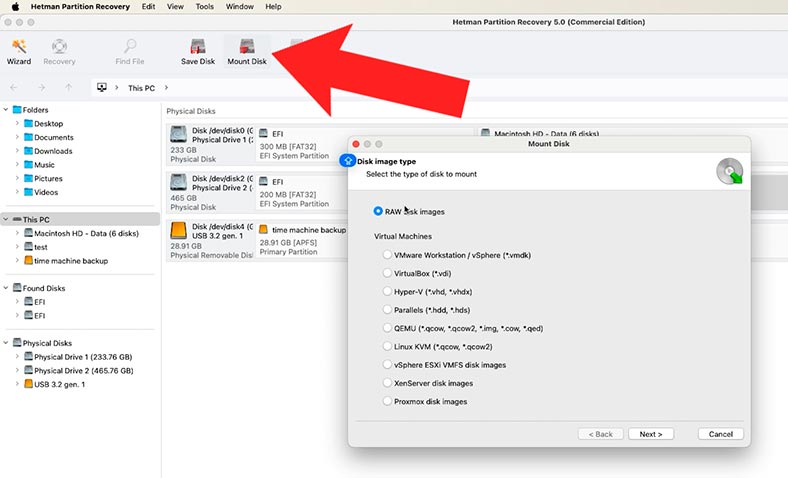
To do it, just mount it in the utility. Click Mount Disk here, then scan it with Fast scan and recover the files you need.
If the external hard disk shows no signs of life or has mechanical damage, its data can be recovered only by specialized service centers.
Conclusion
To minimize the risk of data loss, back up your data regularly with Time Machine and monitor the status of your hardware. In case of data loss, you need to know exactly what to do so your files will never disappear for good. Use only reliable data recovery software to reduce the risks and improve the chances for successful recovery.


