Effective ReadyNAS OS Installation Methods: On a VMware Virtual Machine
In this article, we’ll tell you how to install ReadyNAS OS on a VMware virtual machine. Whether you’re setting up a virtualized network-attached storage environment for testing or production, ReadyNAS OS provides a reliable and feature-rich solution. In this tutorial, we’ll walk you through the step-by-step process of installing ReadyNAS OS on a VMware virtual machine, covering essential setup steps and configuration options. From downloading the OS image to configuring network settings, we’ll help you get your virtual NAS up and running quickly and efficiently. Read now and start leveraging the power of ReadyNAS OS on your VMware virtual machine!
- How to install ReadyNAS OS on a VMware virtual machine
- How to create or change the RAID type
- How to recover data from a RAID array on ReadyNAS
- Data Recovery Software for RAID Arrays
- Conclusion
- Questions and answers
- Comments
ReadyNAS OS is an operating system used for Netgear network storage devices, which offers a wide range of features to manage and protect your data. Installing ReadyNAS OS on a virtual machine lets you use this operating system on any computer having a virtualization manager. This is very convenient for testing, debugging and getting acquainted with this operating system. Also, a ReadyNAS virtual machine can be used as a form of backup to preserve important data which can be restored easily if the ReadyNAS physical device fails.
In this article, we’ll discuss how to install this operating system on a virtual machine and how to configure it properly. In the end, I’ll show you how to recover data from a RAID system built on this virtual machine, with the example of a RAID 50.

How to Install ReadyNAS OS on a VMware Virtual Machine
How to install ReadyNAS OS on a VMware virtual machine
For installation, you need to download an virtual disk image containing ReadyNAS, by clicking on the link to the official website.

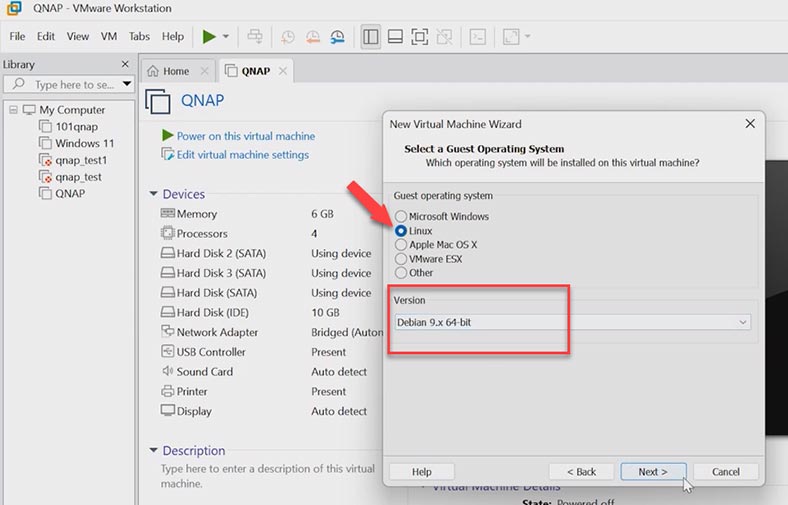
After that, start VMWare and create a new virtual machine: File – New Virtual Machine. Click Next, and choose to install the operating system later – Next. When selecting a guest operating system, choose a 64-bit Linux distribution and click Next. Give a name to this virtual machine and specify its location – click Next and Continue.
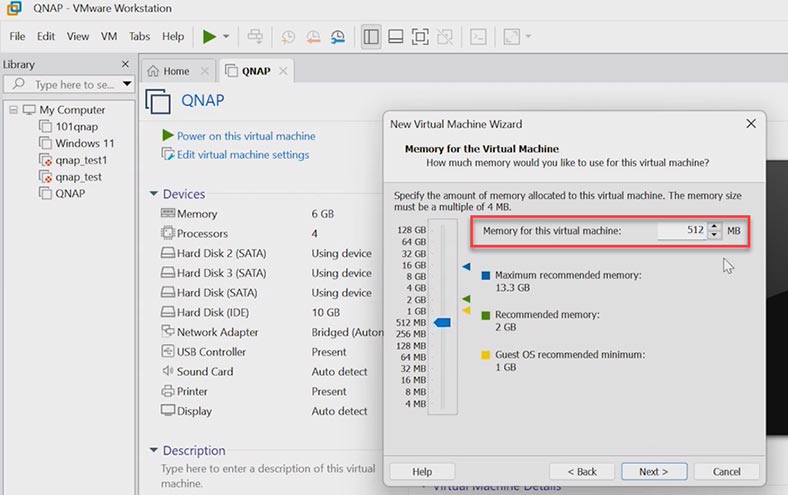
Leave the number of processors as it is, and make sure that your machine has at least 512 Mb of system memory. In the network settings, choose bridge networking and click Next.
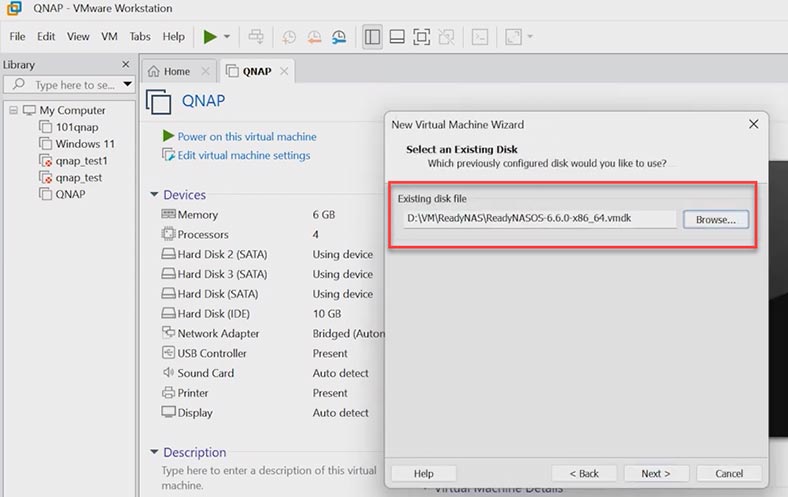
Now add the disk image you have downloaded earlier. Choose its type – SATA, use an existing virtual disk, and give the path to your ReadyNAS image, Open, Next, and Keep existing format.
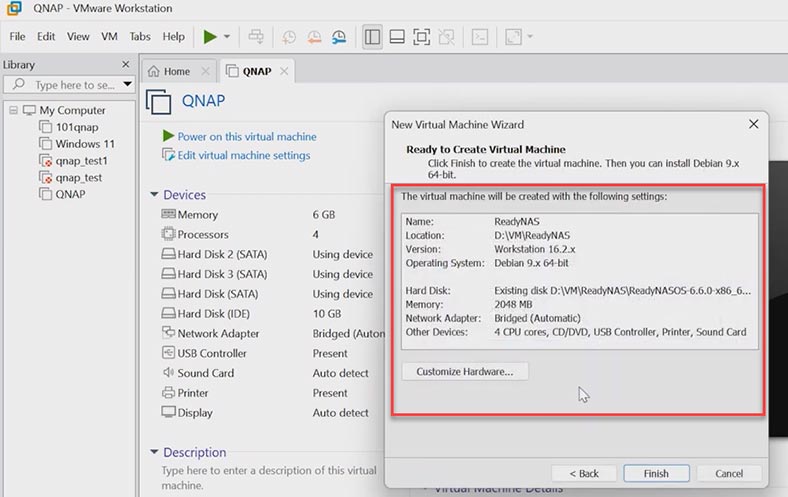
Review all the settings and click Finish. All you need now is to add a few disks, start the machine and begin the installation.
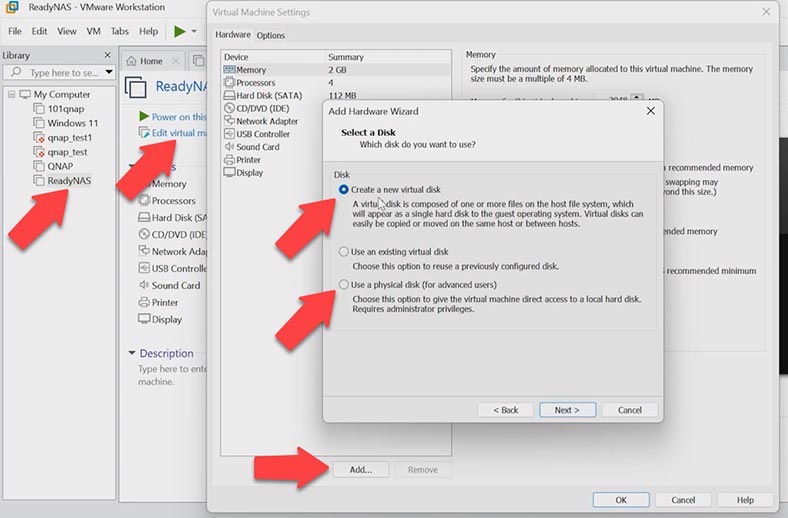
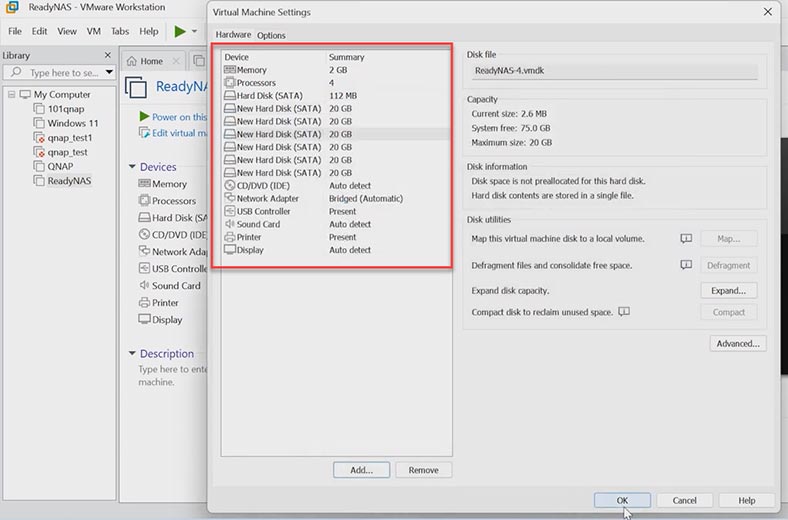
Open virtual machine settings, click the Add button below, Hard Disk, SATA, Create a new virtual hard disk. Or, if you need to add physical disks, choose the corresponding option below.
Give the disk size, choose to store it as a single file, and click Next. Change the destination folder if necessary, and click Finish. In the same way, add as many disks as required.
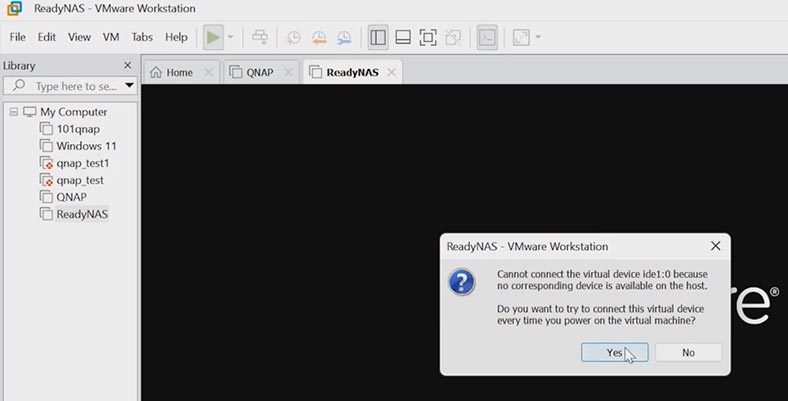
When you’re finished with the configuration, click on this button to start the virtual machine. If you see a warning, click Yes. After that, the ReadyNAS installation begins.
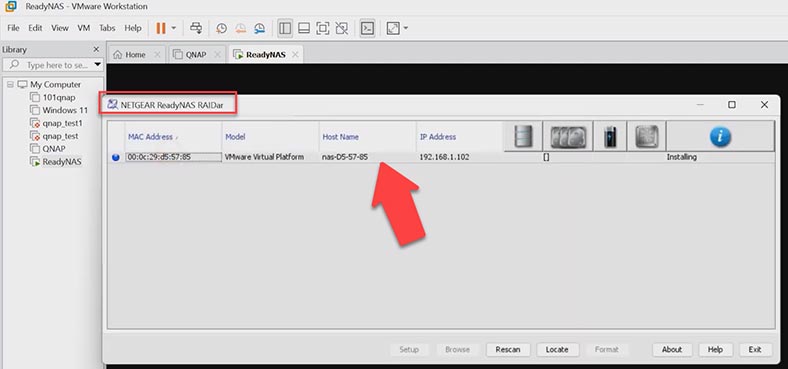
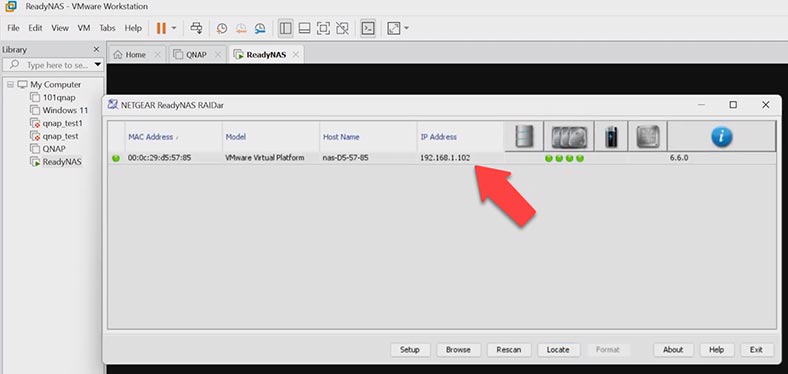
At this stage, you can see your device in the RAIDar app. It shows that the installation is underway.
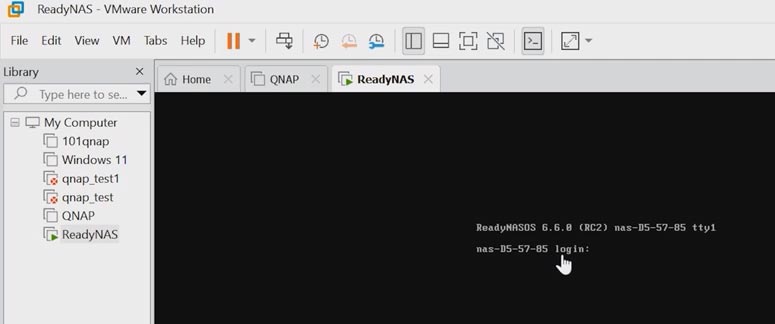
If it’s successful, you will see the version of the operating system installed and the device name.
To learn the network address of your storage device, open the Raidar app. The status has changed.
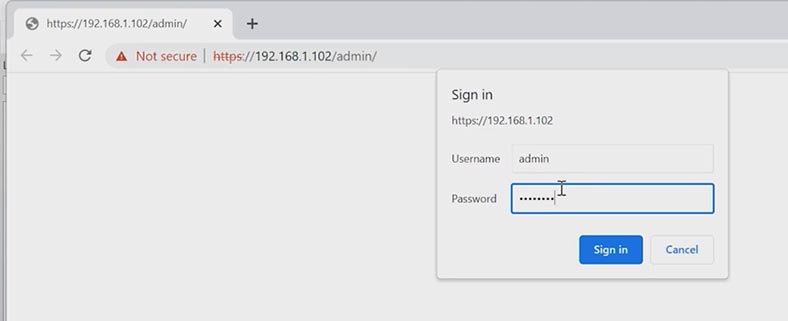
Open any browser and type the IP address of your device into the address bar. Otherwise, click on the Setup button in the Raidar app. The device is using an unprotected protocol, and that’s why you can see this warning. Follow the link to sign in. After that, enter your details: by default, they are admin and password.
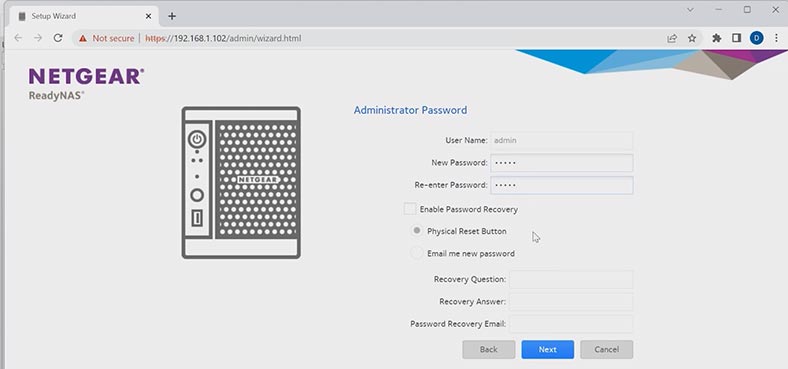
It unlocks access to the management panel, and you will see the welcome screen. Click Next, choose your time zone, set a new administrator password, then click Nextand Apply to finalize the configuration. To access the storage, enter the new sign-in data. That’s all – the ReadyNAS OS configuration is complete.
How to create or change the RAID type
During initial configuration, the system creates a RAID automatically. If you want to change its type, this array should be deleted and then reconfigured. To do it, open the Volumes tab and click on the gearwheel button, then click Destroy. In the pop-up window, type DESTROY and click on the button with the same word. When a volume is destroyed, all the data will be erased from its disks.
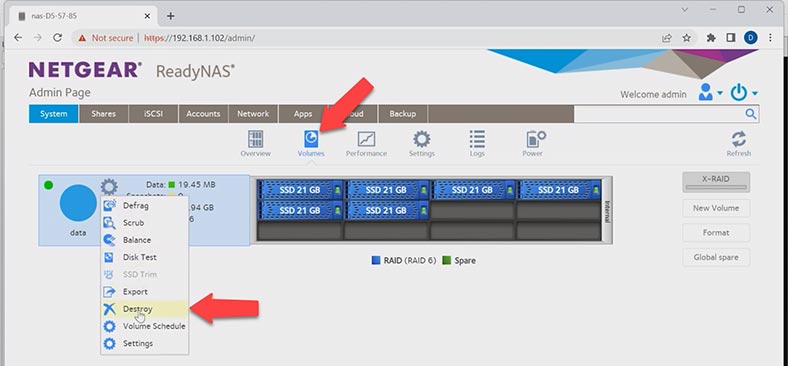
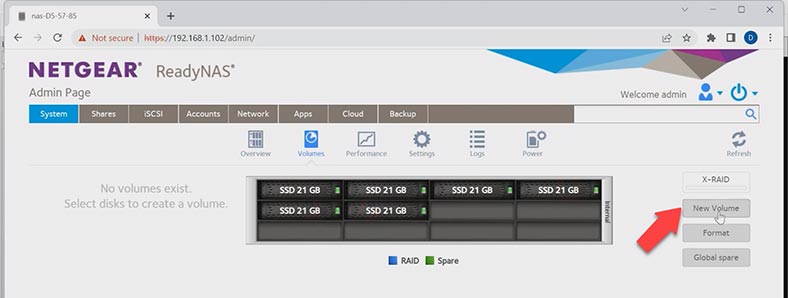
Now you can create a new array. Select the disks and click New Volume.
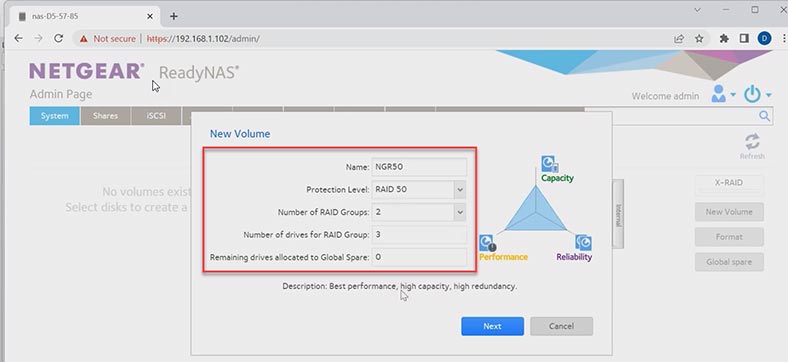
Give it a name and choose the RAID type, then click Next and Create. It starts the process of building the array and resyncing the disks within it. When it’s complete, you’ll be able to upload data to the shared folder.
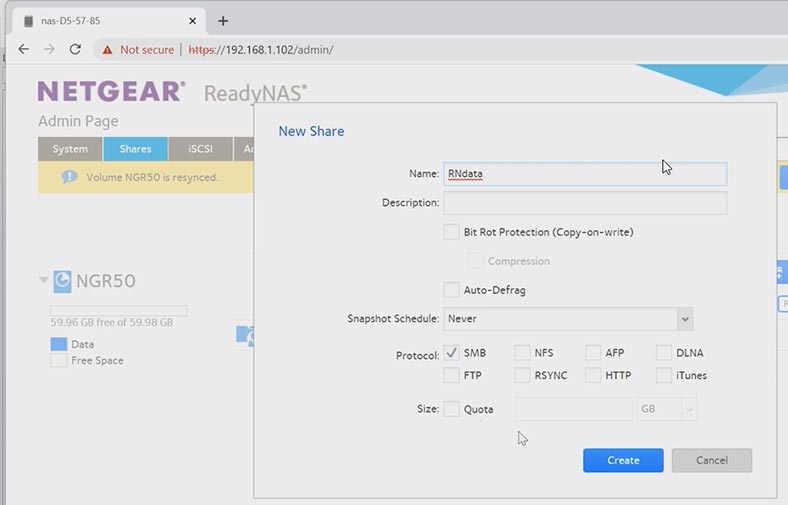
Let’s create a new shared folder. Use the File Explorer to access the network and open the storage.
How to recover data from a RAID array on ReadyNAS
If you accidentally removed data from a virtual machine on ReadyNAS OS or lost access to the machine, or it doesn’t start, and the RAID system is destroyed, you’ll be able to retrieve the information with the help of a specialized tool – Hetman RAID Recovery.
This program supports all popular RAID types and most file systems. It also supports data recovery from virtual machines. The program will automatically rebuild the RAID with the available hard disks regardless of how it was created – with a network storage device, a dedicated controller, or by means of a software RAID.
Download and install Hetman RAID Recovery to your computer. If your disks are physical, the program will automatically scan them and rebuild the crashed RAID. If your disks are virtual, they should be mounted in this program before you proceed.
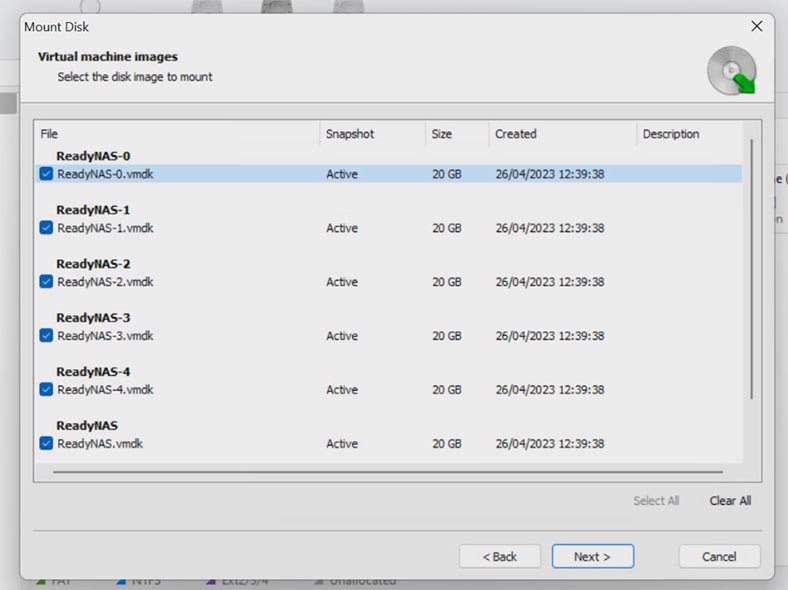
Open the Tools menu – Mount Disk – select image type and click Next.
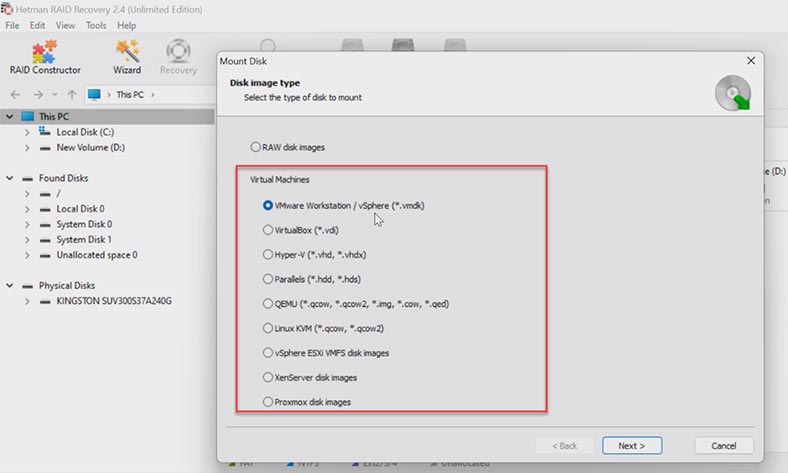
After that, give the path to your virtual machine, or – to be more exact – to the virtual disks which make up your RAID. Select a folder and click OK; you can uncheck the disks which you don’t need to scan, and then click Next.
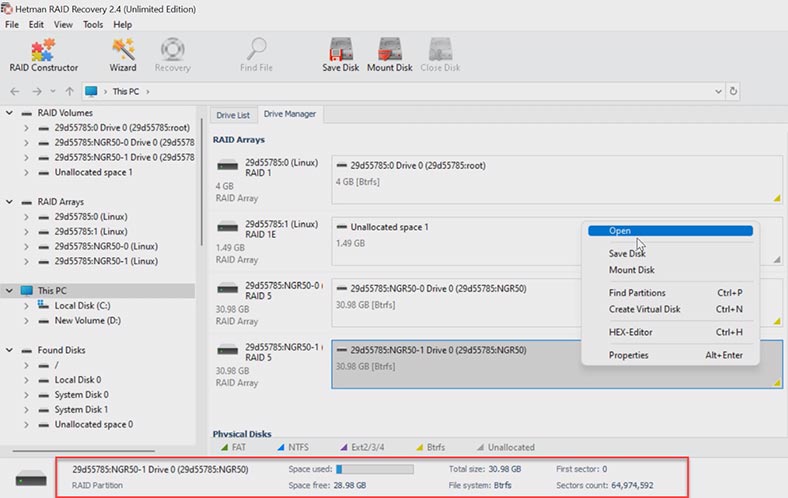
Now the program will scan the virtual disks (similarly to the case with physical disks) and build a RAID system. This is where you can see detailed information about the disk array. Right-click on the volume and choose Open to start searching for files.
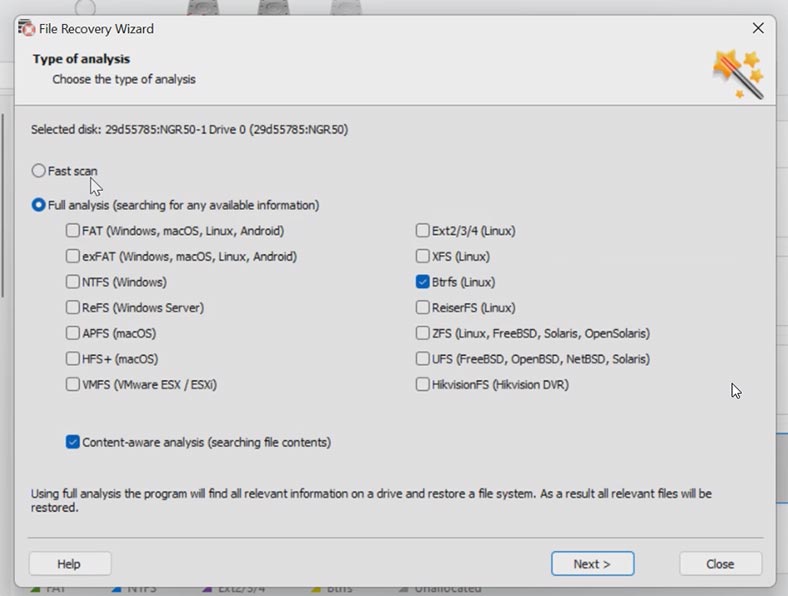
In the next window, choose the scan type. For starters, we recommend running a fast scan first. It will take less time, and it works fine in most simple scenarios. If the program can’t find the missing data, then go for Full analysis.
To do it, return to the main menu, right-click on the volume and choose Analyze again. In the window that opens, select Full analysis, specify the file system of the disk, and click Next.
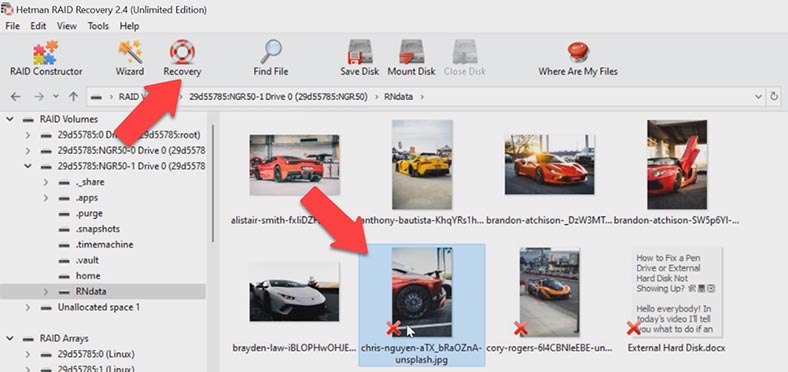
When the scan is over, open the folder where your files used to be stored, select the ones you want to recover, and hit the Recovery button. After that, choose the disk and folder where to save the files and click Recovery again, then Finish. In the end, you will find the recovered files in the folder you have chosen.
To quickly find a specific file, there is a search-by-name feature. Also, this utility lets you save a copy of the entire disk, and then work on it instead of addressing the actual disk all the time. Such feature allows you to protect the disk data from being overwritten, from an accidental disk failure, or from other mistakes that users could make.
It should be noted that recovering data from a RAID can take up quite a lot of time, especially if the array was damaged. Also, 100% recovery cannot be guaranteed. However, using Hetman RAID Recovery can considerably improve your chances for successful restoration of your files.
Data Recovery Software for RAID Arrays
| # | Software | Description | Platform | Key Features |
|---|---|---|---|---|
| 1 | Hetman RAID Recovery | Powerful tool for recovering data from RAID arrays of various levels (0, 1, 5, 6, 10, etc.). | Windows |
|
| 2 | ReclaiMe Free RAID Recovery | Free software for recovering data from RAID arrays, supports various RAID types. | Windows |
|
| 3 | EaseUS Data Recovery Wizard | Universal data recovery tool, including for RAID arrays. | Windows, macOS |
|
| 4 | UFS Explorer RAID Recovery | Professional tool for recovering data from RAID arrays, well-suited for complex cases. | Windows, macOS, Linux |
|
| 5 | R-Studio | Powerful data recovery tool supporting RAID arrays and complex file systems. | Windows, macOS, Linux |
|
Conclusion
To sum up, we can say that creating a virtual machine with ReadyNAS OS and recovering data from a RAID based on ReadyNAS could become necessary in various situations related to loss of data, hardware failures, or when you need to test and use this operating system. Regardless of your reasons, it is always important to know how to restore critical data with specialized tools like Hetman RAID Recovery. We hope that you find this article useful, and it will help you both with installing ReadyNAS OS on a virtual machine and with recovering any lost data.


