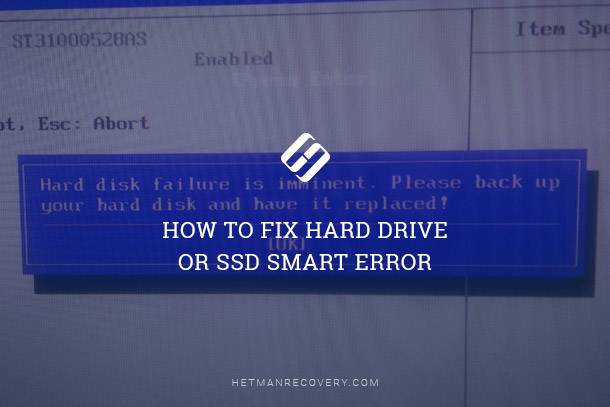
Corrupted Disk Structure? Here’s Your Solution!
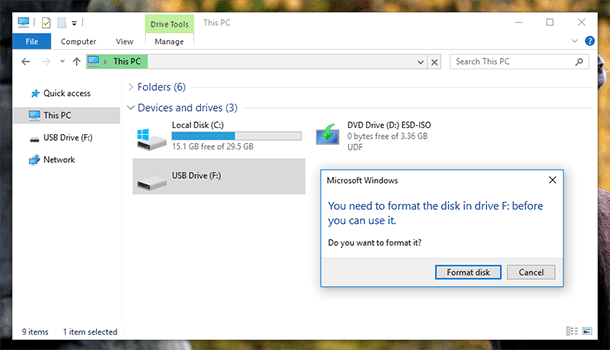
Encountering the error “Disk Structure is Corrupted and Unreadable”? In this comprehensive guide, discover what you can do to recover your valuable data. Learn expert solutions for troubleshooting and ensure the safety and integrity of your data!
- Step 1. Overview of the Problem
- Step 2. Disconnect the Device and Reconnect it Again
- Step 3. Reinstall the Device Driver
- Step 4. Run CHKDSK (disk checking)
- Step 5. Checking the Disk if Windows can’t Boot
- Step 6. Disk Checking with Disk Management
- Step 7. Recovering Data from a Damaged (Corrupted) Disk
- Questions and answers
- Comments
Step 1. Overview of the Problem
You can encounter a problem when Windows doesn’t give you access to a hard disk. The system may freeze when the Explorer addresses the disk or just close the Explorer. Such symptoms suggest that your data storage device is either damaged and needs to be replaced, or that important system data is damaged, such as MFT or partition table.
Often you can face such errors when dealing with removable media such as memory cards and USB drives, though there are chances to have them with an HDD or SSD. Let’s see what you can do to overcome this problem and recover data from an inaccessible device.
If there is a problem related to loss of data, you should find out if your device works or not. If the device is broken completely, no software can help you to fix it and recover data. However, don’t jump to conclusions before you run a complex testing and diagnostics of the disk.
Step 2. Disconnect the Device and Reconnect it Again

How to Fix Flash Drive Errors: The Drive Can’t Be Recognized, Wrong Size, RAW File System 🛠️👨💻🤔
In case with a removable media this procedure is as simple as possible. Disconnect a memory card or USB drive using Safely Remove Hardware function. Examine the USB port or card reader visually. If you can find dust, water or damaged contacts, clean the device or try using another port or card reader. Reconnect the USB drive or memory card.
For an internal hard disk or SSD, the disconnecting procedure is also simple. Disconnect the computer or laptop from the power source, remove a few screws to remove a side panel or lid. Find the hard disk and disconnect its power and data cables. For more convenience, you may want to remove the screws to take the hard disk out of the system unit. Examine the disk and both cables carefully for any signs of mechanical damage. A disk may become inaccessible because a cable is fractured or broken, so try connecting the disk with another cable. Both cables should be attached to the disk firmly.
An important note. All connecting or disconnecting operations with the disk should be done only when the power is off. In case with a laptop, disconnect the battery as well.
Step 3. Reinstall the Device Driver
Remember that updating the driver or firmware of your device may result in a loss of data, so make a backup copy beforehand. It is not recommended to update them for the disk where your operating system is installed.
To update the driver, remove the device from Device Manager; to do it, right-click on the Start button and start the application.

Extend the Disk drives section, right-click on the problem disk and click “Uninstall”.

Wait for the disk to be removed and start searching for devices. To do it, select in the menu: Action – Scan for hardware changes.
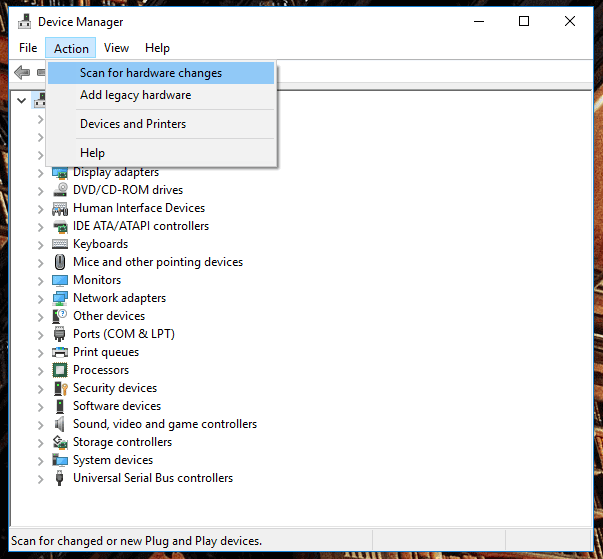
The system will find a new device and suggest installing drivers for it. Use the disk manufacturer driver if the driver installed by Windows keeps generating errors.
Step 4. Run CHKDSK (disk checking)

How to Check Your Hard Disk for Errors and Fix Them in Windows 10 🔎🛠️🗄️
Windows OS offers this tool to check the disk, repair logical errors and fix bad sectors. This tools is known as Error checking or CHKDSK. To start it, right-click on the problem disk and select Properties. Then go to the tab Tools and click on the button Check.

You should run this check as the user with administrator rights. Depending on the disk size and type the check can take up several hours.
As an alternative to this integrated utility, you can also use Victoria. Watch this video for a detailed guide on using it:

How to Use Victoria to Test and Fix Your Hard Disk in 2020 👨💻🛠️💻
Step 5. Checking the Disk if Windows can’t Boot
If errors in the work of the system disk prevent Windows 10 from booting, you can start disk checking from the Recovery Environment. After three failed attempts to boot, the computer will start the recovery environment automatically. You can also use a Windows recovery drive to run recovery tools. Watch our video to see all ways to enter the recovery environment:

Repair Windows With the Automatic Recovery Console / How to Enter the Recovery Environment 🛠️👨💻⚕️
After it boots, run the command prompt from recovery settings and enter the command:
CHKDSK /r (disk letter):
Wait for the operation to be over and restart the computer.
Step 6. Disk Checking with Disk Management
If the system boots all right and problems begin hen Explorer opens the folder This PC, you can hide the problem disk from the system. It will unlock the Explorer and you will be able to back up the necessary files.
To do it, right-click on the Start button and select Disk Management. You can do the same by executing the command DiskMgmt.msc in the Run window.
DiskMgmt.msc

Select the problem partition with the right click and choose “Change Drive Letter and Paths for...” then click “Remove” and confirm your choice. It will hide the disk from the Explorer and let you address your system devices without freezes. Be careful not to remove the letter from the system partition - it won’t work.
Step 7. Recovering Data from a Damaged (Corrupted) Disk
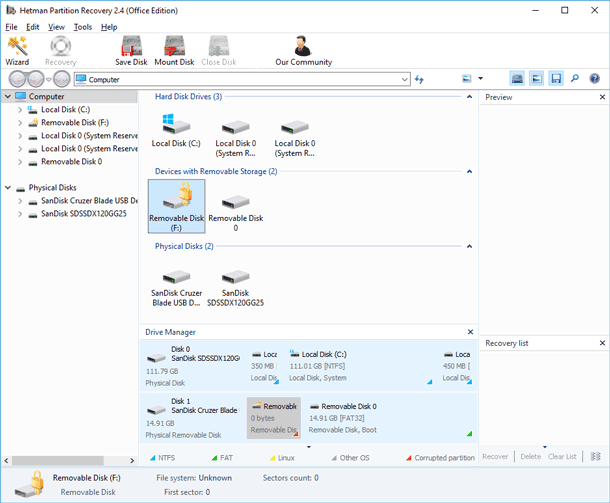
If none of the methods listed above helps you, it is still possible to recover data with Hetman Partition Recovery. Run the program and specify a physical device as an object for scanning. The utility will analyze the disk and list the files available for recovery.
You can view file contents and choose what files you want to save to a healthy disk. When recovering data from a problem disk, always remember that all information there can be lost at any moment. It is for such cases that the utility has a function of creating a disk image.
After such image is created, you can disconnect the problem disk and go on working with the virtual image, without fearing it may crash.
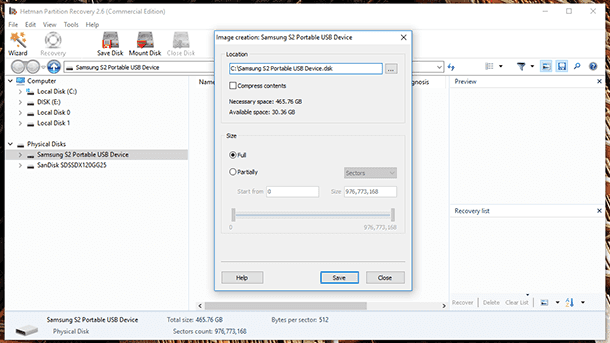
To create an image, select the problem disk and click on “Save Disk” button in the main tab. Specify the path for the image file and wait for the operation to be over.
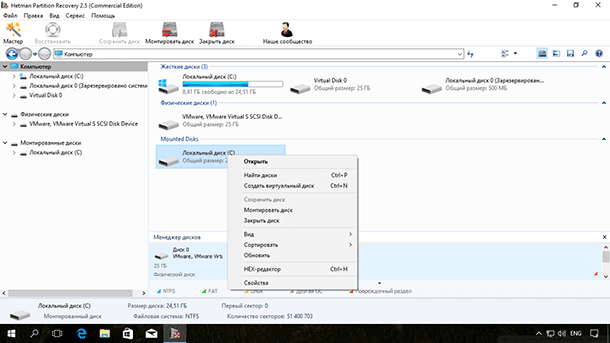
To connect a virtual disk in this program, click on “Mount Disk” and specify the path to the image file. After that, a new disk will appear in the program, and you’ll be able to select it for analysis. Watch this video to learn more about data recovery:

How to Recover Data After Formatting, Deleting or Creating Partitions in 2020 📁🔥⚕️


