Excel Tutorial: Enabling Autosave for Your Files Made Simple
Never Lose Your Excel Work Again: Learn How to Enable Autosave for Your Excel Files! Tired of losing hours of work due to unexpected Excel crashes or power outages? Enable autosave for your Excel files and safeguard your data effortlessly! In this comprehensive tutorial, we’ll show you step-by-step how to enable autosave for your Excel files. Whether you’re working on important spreadsheets or critical data, autosave ensures that your work is always protected. From accessing autosave settings to customizing autosave intervals, we’ve got you covered.
AutoBackup will create a copy of the spreadsheet you are working in when it is saved. In case you make some changes to the original spreadsheet, save them, and then suddenly change your mind, you will always have the opportunity to open the file backup. Every time you save the main spreadsheet file, AutoBackup will update the backup file to the previous version of this spreadsheet.
To have everything confgured, open an Excel spreadsheet. After that:

How to Recover an Unsaved or Lost Microsoft Word, Excel Document or PowerPoint Presentation ⚕️📖💥
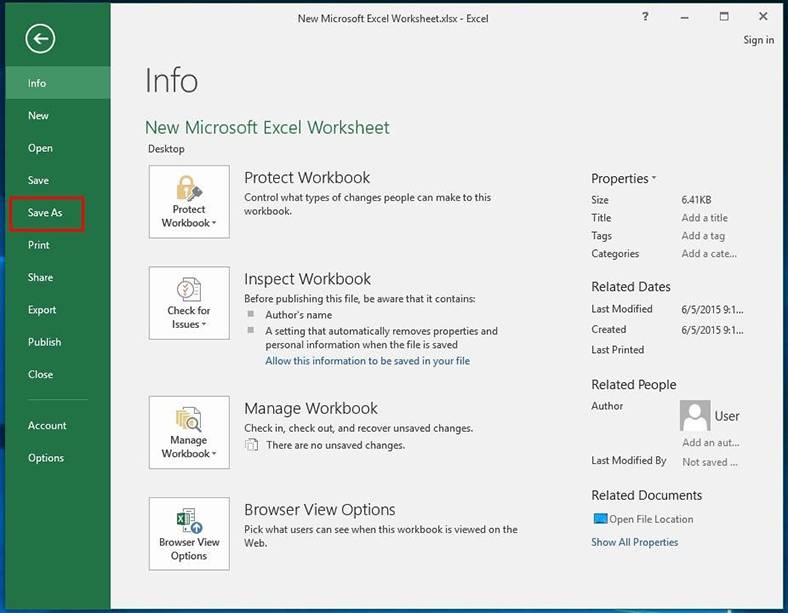
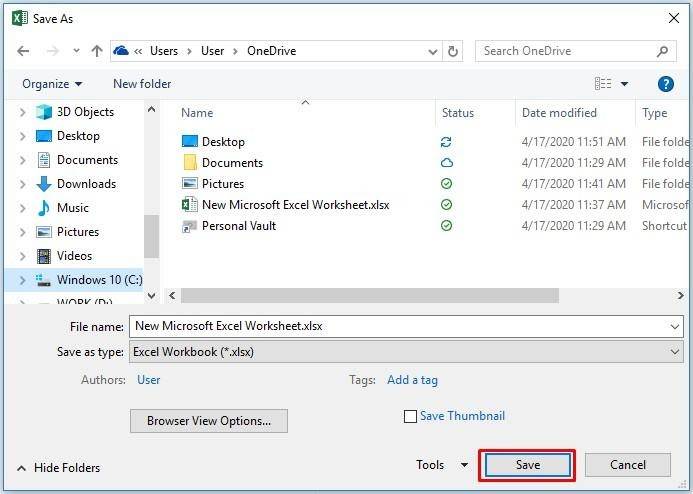
Go to the tab File – Save As
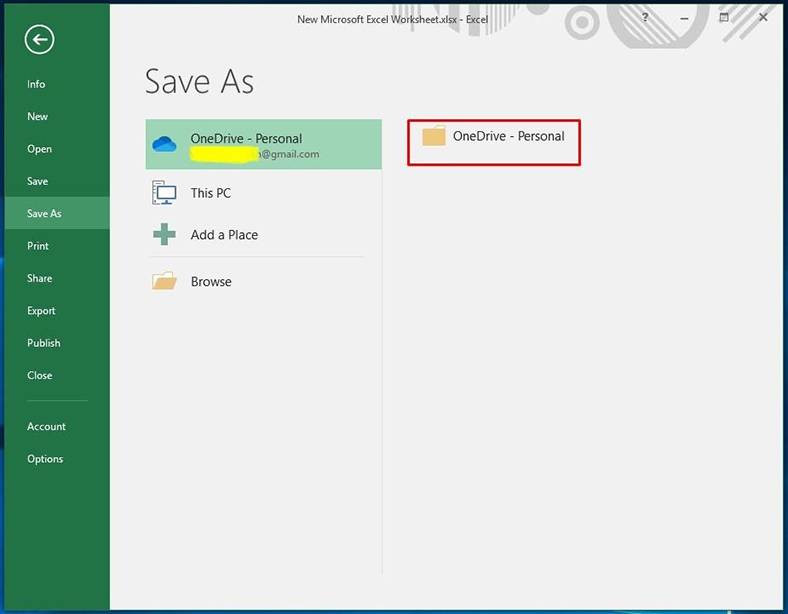
Go to the folder OneDrive: Personal.
Click Tools and choose General Options….
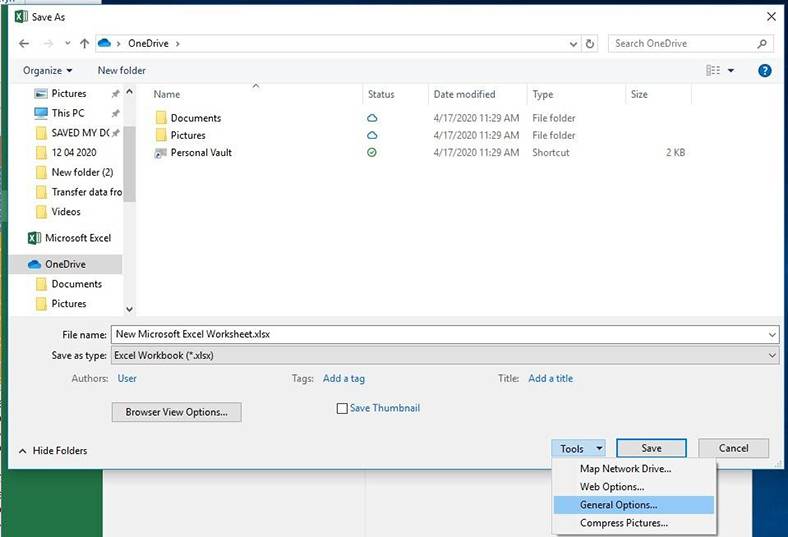
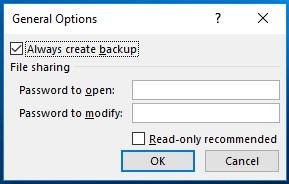
Check the box for Always create backup and click OK.
Hit Save in the document save window.
From now on, every time you edit the spreadsheet file and save it, the backup file will be updated to the previously saved spreadsheet file.
If data backup for Excel was not configured at the time when a file was lost or deleted, you can always use one of the tools for restoring Excel spreadsheets (Hetman Excel Recovery) or bringing back Microsoft Office documents (Hetman Office Recovery).
| Parameter | Description |
|---|---|
| Name | Hetman Office Recovery |
| Purpose | Recovery of deleted, damaged, and inaccessible Microsoft Office document files (Word, Excel, PowerPoint, etc.). |
| Supported Formats | DOC/DOCX, XLS/XLSX, PPT/PPTX, ODT, RTF, CSV, and other document formats. |
| Operating Systems | Windows, MacOS, Linux. |
| Device Types | Hard drives, SSDs, flash drives, memory cards, and other data storage devices. |
| Additional Features | – Document recovery from damaged or deleted files
– Support for file recovery from various data storage devices – Preview of files before recovery |
| Ease of Use | Intuitive interface with a step-by-step recovery wizard. |
| License | Trial version with limitations on the number of recoverable files. |
| Interface Languages | Multilingual support. |

How To Recover Open Writer (odt) and Calc Documents (ods) in 2020 With Hetman Office Recovery 📁🔥⚕️


Yes, there are several alternatives to using Autosave in Excel 2016. These include: