Free Some Space In Your Hard Disk: The Seven Essential Ways
Running out of space on your hard disk and not sure how to free some up? You’re in luck! In this article, we’ll share with you the seven essential ways to free up space in your hard disk. From deleting unnecessary files to optimizing storage settings, we’ll cover everything you need to know to reclaim valuable disk space. Whether you’re a beginner or an experienced user, these tips will help you optimize your storage and keep your system running smoothly. Watch now and unlock the potential of your hard disk!
- Step 1. Run disk cleaning
- Step 2. Uninstall resource-intensive apps
- Step 3. Analyze disk space
- Step 4. Deleting temporary files
- Step 5. Find duplicated files
- Step 6. Reduce the space allocated for System Restore
- Step 7. Other important Windows features
- Questions and answers
- Comments
If you also suffer from lack of free storage space, here are a few tips on how to make more room for really important files and programs.

💽 Nine Common Causes of Partition Loss, and Data Recovery Methods to Use 💽
Step 1. Run disk cleaning
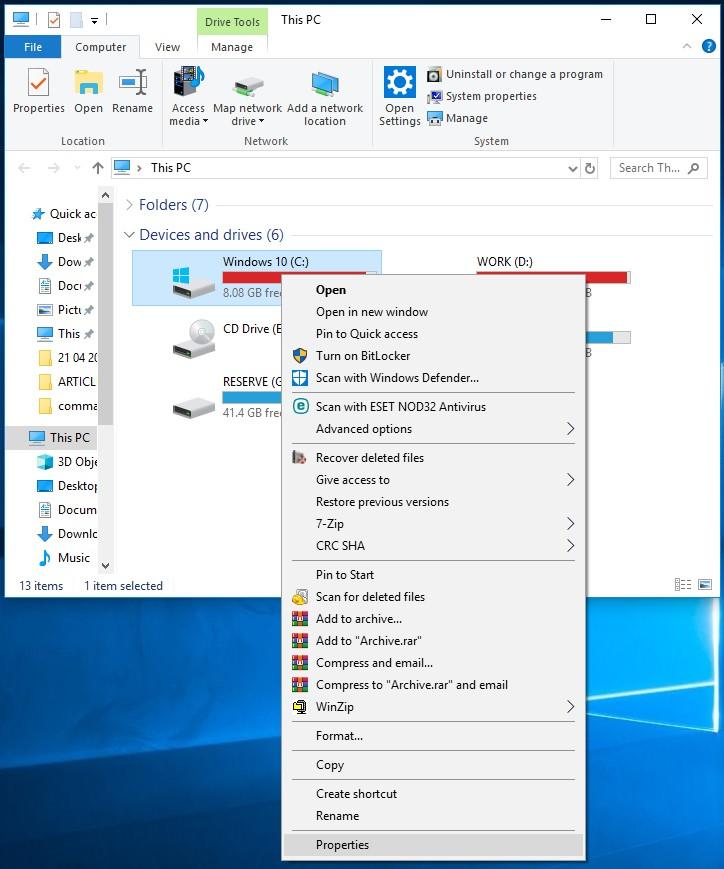
Your Windows operating system has an integrated tool to remove temporary files and unimportant data. To stat it, right-click on one of the disks and select Properties.
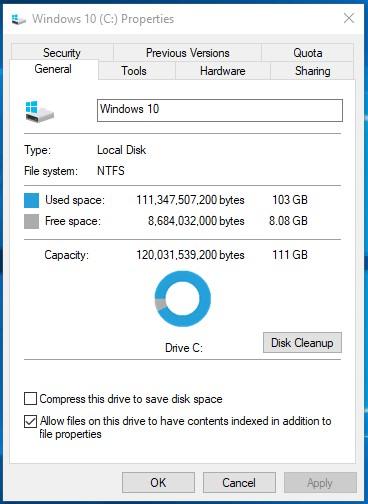
In the Properties window, choose Disk Cleanup.
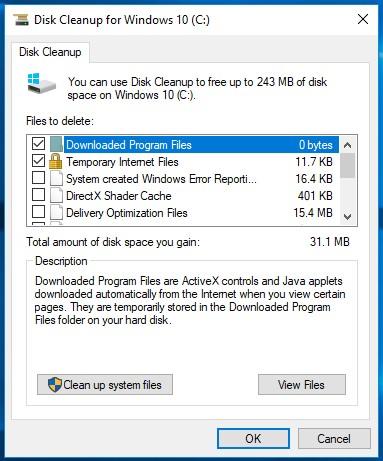
Select file types you’d like to remove (clean) and click OK. Disk cleanup also deletes temporary files, log files and any files that are stored in the Recycle Bin at the moment.
You can also clean system files. If that is what you need to do, click on Clean up system files.
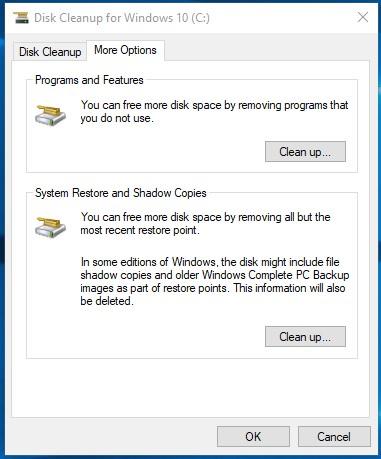
After that, you can jump to the More Options tab and click Clean up in the section System Restore and Shadow Copies in order to remove system restore files. This button will remove the latest restore points so make sure your computer works properly before clicking it: this action is irreversible and you will lose those restore points.
Step 2. Uninstall resource-intensive apps
Generally, uninstalling programs allows to free up some disk space, but some of them are really tiny. In the Programs and Features panel, check the Size column to see how much disk space is occupied by every program.
If you don’t see such a column, look up to find the View menu (upper right corner) and switch it to Details. However, you may notice that some programs don’t show how much disk space they need. Some of them can occupy large portions of your hard disk but still show nothing in the Size column.

In case of Windows 10, you can open Windows Settings and select Apps – Apps & Features.
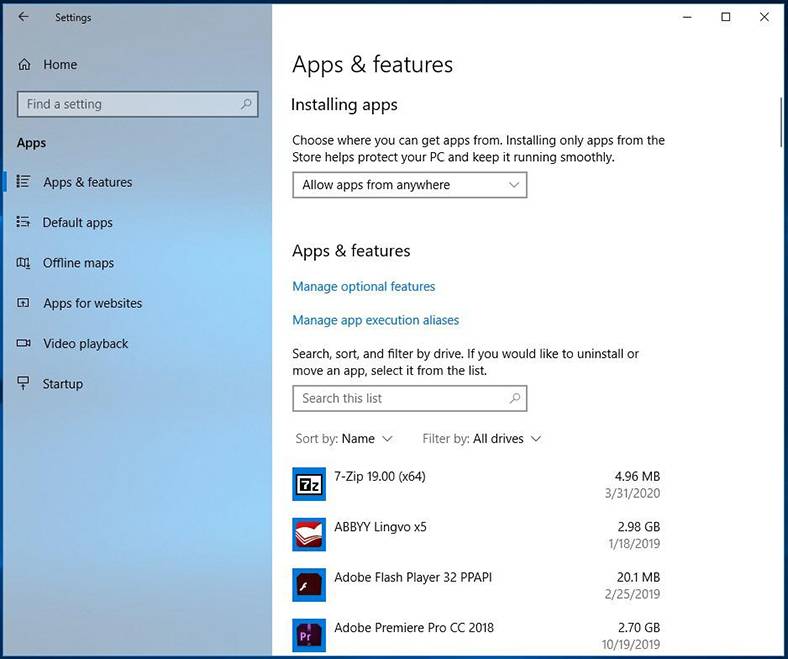
This menu also lets you remove any applications installed from Windows Store. This function is also available on tablet PCs.
Step 3. Analyze disk space
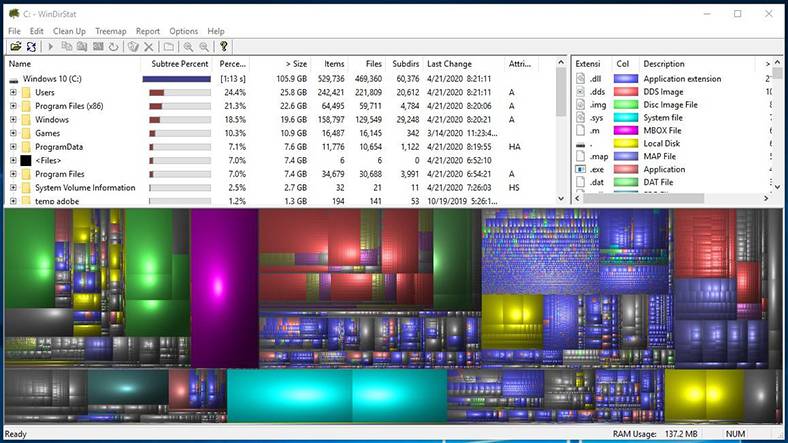
To have a better understanding of what takes up the precious disk space, you can use tools for hard disk analysis. They scan the disk and show what files and folders occupy most space. We will see how they work with the example of a typical tool, WinDirStat.
After scanning the computer, it will show you which folders, file types and files literally eat up most disk space. Make sure that you are not going to delete any important system files – it’s safer to delete personal files only. If a folder of some program in Program Files takes up too much space, you can delete it – WinDirStat will show you how much space it requires, even if you can’t see it in Programs and Features.
Step 4. Deleting temporary files
The Windows integrated cleanup tool is convenient, but it doesn’t remove temporary files generated by other software. For example, it can’t clean browser cache for Firefox or Chrome – while it can mean gigabytes of space to be freed. Browser cache uses the hard disk to save your time when accessing certain websites regularly, but it’s not so important if your goal is to clean up the disk and have more room for your data.
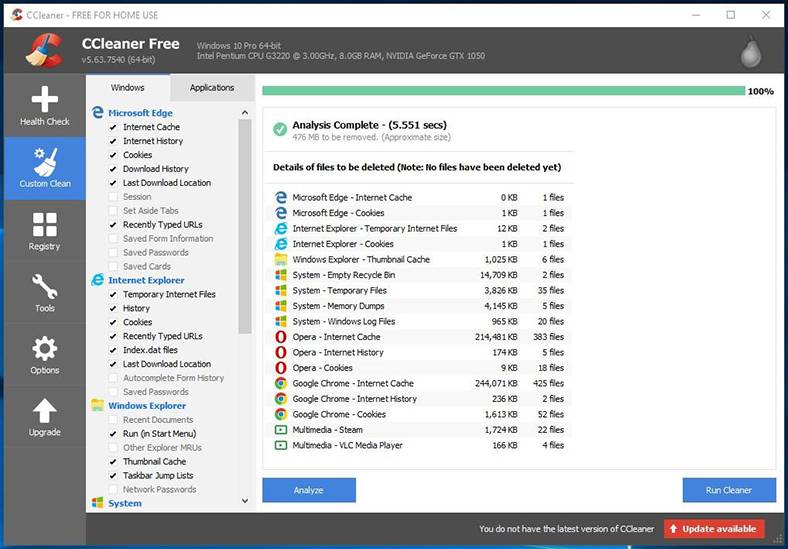
If you’re in for a more aggressive approach in disk cleanup, try CCleaner. It removes unnecessary files created by third-party apps and files that are not managed by Windows Disk Cleanup.
Step 5. Find duplicated files
In addition, you can use special apps to look for extra copies of files which you don’t need, so you can remove the duplicates. These tools do not just remove file duplicates but also show them and let you decide which files can be removed. Depending on the functionality, there are tools able to find duplicates for all file formats, and utilities looking for copies of a certain format only – for example, pictures.
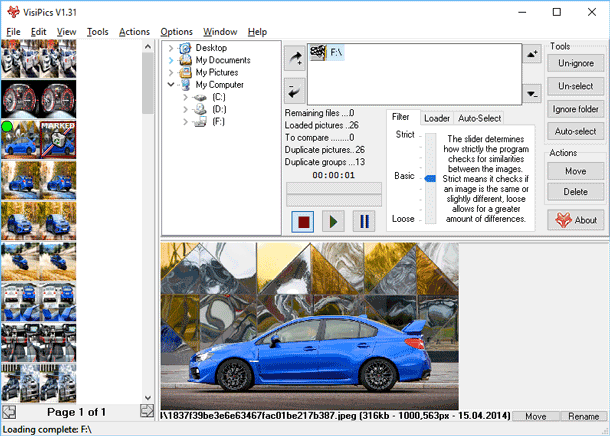
Step 6. Reduce the space allocated for System Restore
If System Restore needs too much space, you can reconfigure it to make it less space-hungry. The disadvantage is, though, that you will have less restore points and less file copies to restore your Windows from, if things go wrong. This is something you have to decide for yourselves: what is more important for you – free disk space or more flexible system restore options?

Step 7. Other important Windows features
The following steps can help you free even more disk space, but at the expense of important Windows features. In fact, we don’t recommend going as far as that, but if you are really low on space, you may consider some of the options:
Disable Hibernation (sleep mode). When your computer goes into the sleep mode, it saves the contents of its system memory (RAM) to the hard disk. It allows to “freeze” the operating system in a working condition without using electricity all the time it is sleeping. When you start the computer again, it will restore the condition it was in when you sent it to sleep. Windows saves the system memory (RAM) contents to disk C: (C:\hiberfil.sys file). If you want to save the disk space occupied by this file, you can disable the sleep mode.
Disable System Restore. If you tried to reduce the amount of disk space required for this feature but you are not satisfied with the result, you can even go further and disable it completely. However, you won’t be able to restore the operating system if things go wrong.
Summing up, think twice before you begin disk cleanup operations: decide how much free space you need to gain and what files can be removed without any consequences. Are there any chances you would look for them in the future? Can your decision to remove them affect your work or your computer’s performance today, or tomorrow?
Keep in mind that files deleted by Windows cleanup tools and third-party cleaners never go to the Recycle Bin, which means there is no quick way to restore them in case you change your mind.
Still, if you got a bit carried away with cleaning operations and discovered that important files are gone, you can always use one of the file recovery tools.


