Recover Data from HP ProLiant DL380p RAID: P420i Controller
Need to recover data from a RAID system based on an HP ProLiant DL380p Server? Our comprehensive guide has got you covered! Learn step-by-step instructions and expert tips for successfully salvaging your data from the DL380p server. Say goodbye to data loss worries and hello to recovered files!
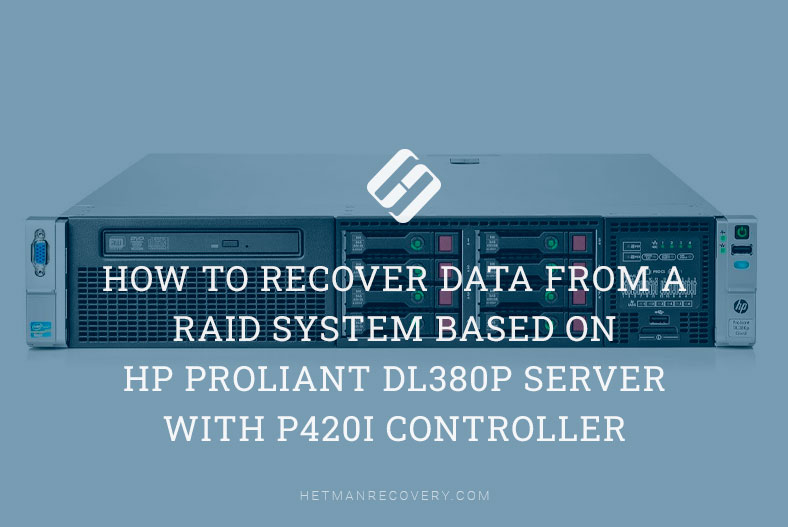

How to Recover Data from a RAID Array Based on Server HP ProLiant DL380p, with P410i Controller
- Creating a RAID using the new graphical interface.
- How to add a spare drive into the RAID system?
- How to install an operating system onto a RAID array?
- Build a RAID with the help of Option ROM Configuration for Arrays
- Data Recovery
- Questions and answers
- Comments
HPE Smart Storage Administrator is a piece of specialized embedded software that helps you quickly configure and manage the storage controller in HP ProLiant servers. It has a simple and user-friendly interface, so if you ever built a RAID before, you will quickly find your way about it. Smart Storage Administrator comes to replace HP Array Configuration Utility (ACU) and features an updated database that expands your storage opportunities.
| Feature | Description |
|---|---|
| RAID Array Management | Allows configuring and managing RAID arrays for optimal performance and operation. |
| Disk Health Monitoring | Provides information on the health of hard drives and alerts for potential issues. |
| SSD and HDD Support | Works with both types of storage devices, offering flexibility in hardware choices. |
| Graphical Interface | User-friendly graphical interface for convenient administrator management. |
| Firmware Updates | Enables the updating of firmware for disk controllers and storage devices. |
| HP iLO Integration | Allows remote storage management via HP Integrated Lights-Out (iLO) interface. |
| Disk Diagnostics | Tools for testing and diagnosing issues with hard drives and controllers. |
| HP ProLiant Server Support | Optimized for use on HP ProLiant servers, ensuring stable integration. |
Our server has a built-in controller for 8 disks, and it supports RAID 0, 1, 5, 10, 50, and 60.
A bit later, I’ll show you how to use it to create a RAID 5 array consisting of 3 disks. For illustration purposes, we’ll explore how to configure it using the new utility and then install the operating system onto this disk array.
Creating a RAID using the new graphical interface.
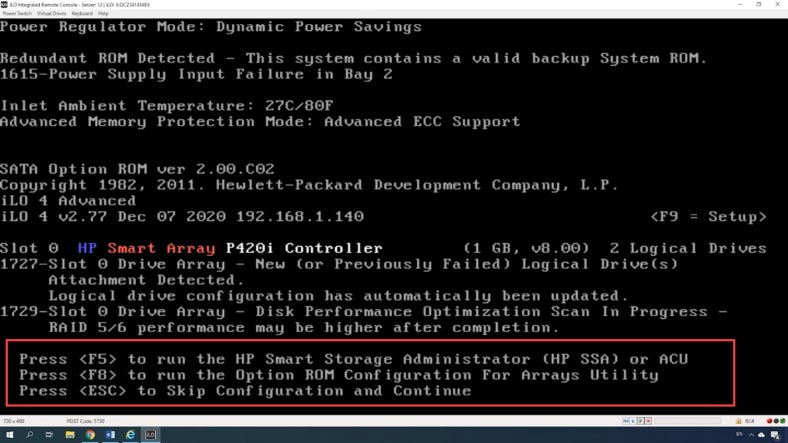
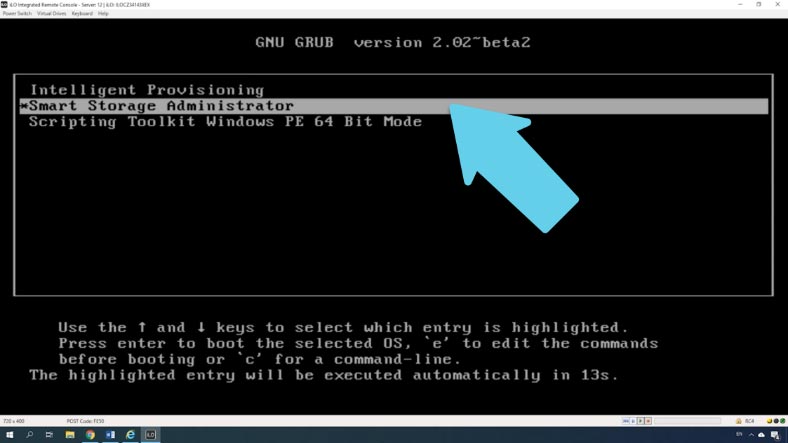
Restart or turn on the server; while it is booting, after the iLO configuration is displayed and when the information on the RAID controller is showing, press the F5 key to start the graphical interface of HP Smart Storage Administrator.
In the GRUB window, select it from the list and hit Enter. Wait until the utility boots, and click on “Smart Array” on the main screen.
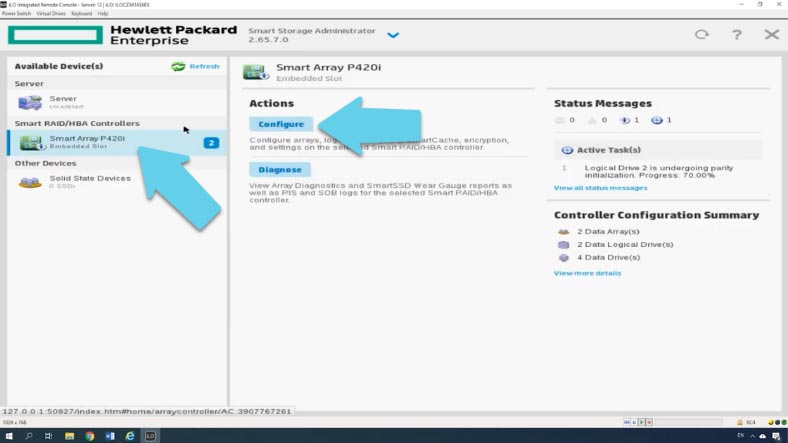
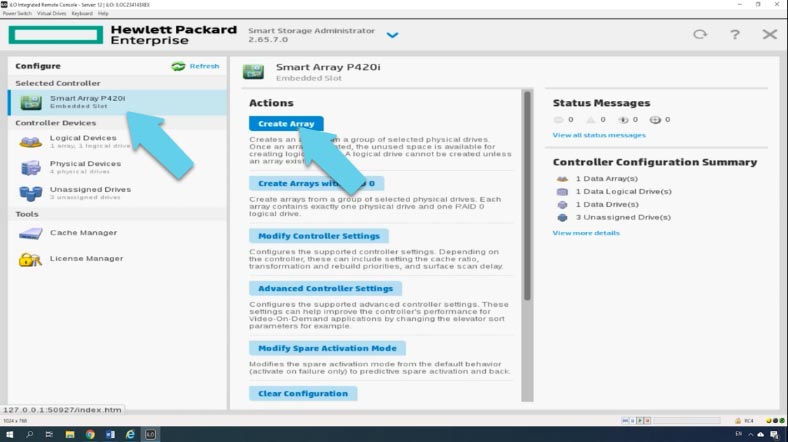
In the “Smart Array” menu, find “Actions,” select the “Configure” option, and then “Create Array”.
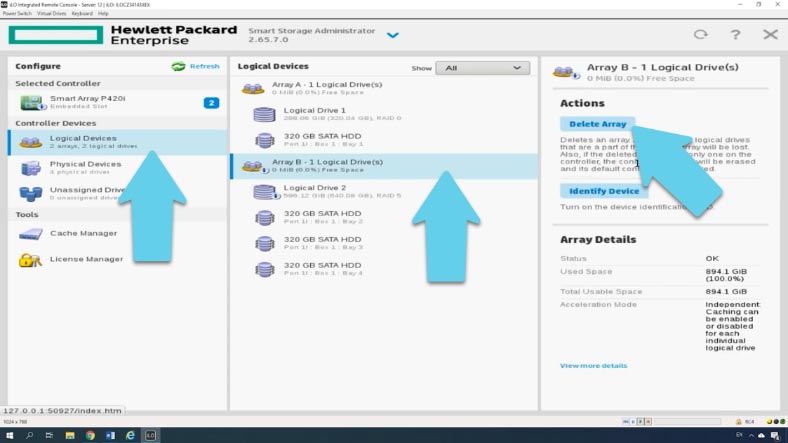
If the disks have already been used in another RAID system, the “Create” button will be unavailable, so you need to remove the previously created disk array first. To do it, open the tab “Logical Devices,” select the RAID you want to remove, and click “Delete Array,” then hit “Yes” to confirm your decision, and then click “Finish”.
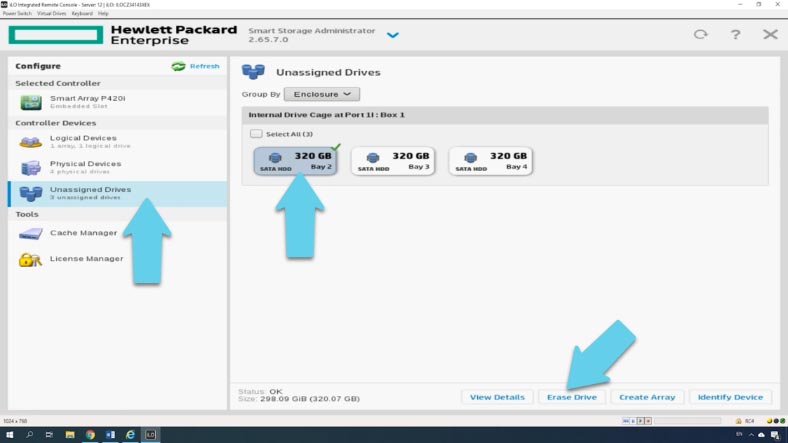
If necessary, the disks that have been used before can be overwritten with zeroes. If you want it, open the tab “Unassigned Drives,” select a disk, and select “Erase Drive” below; choose an erase pattern, then click “OK” and “Yes” to confirm it.
Now you can create a new array, and you can do it right from this menu by selecting all disks and clicking “Create Array”. Otherwise, open “Smart Array”, and then click “Create Array”.
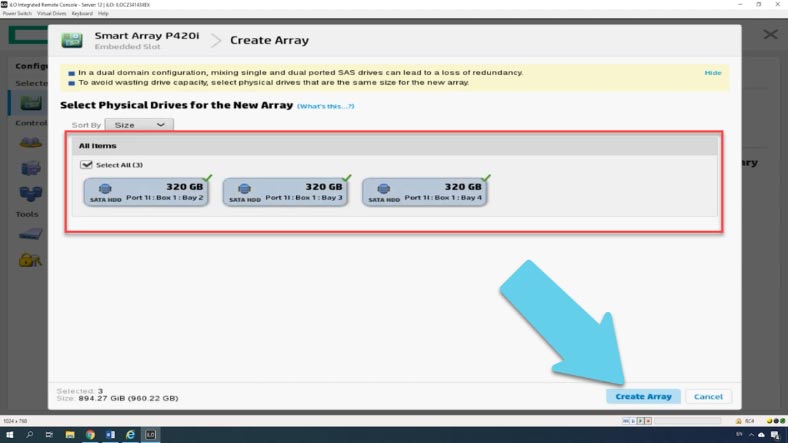
Select the disks that your RAID will consist of, and click “Create Array”.
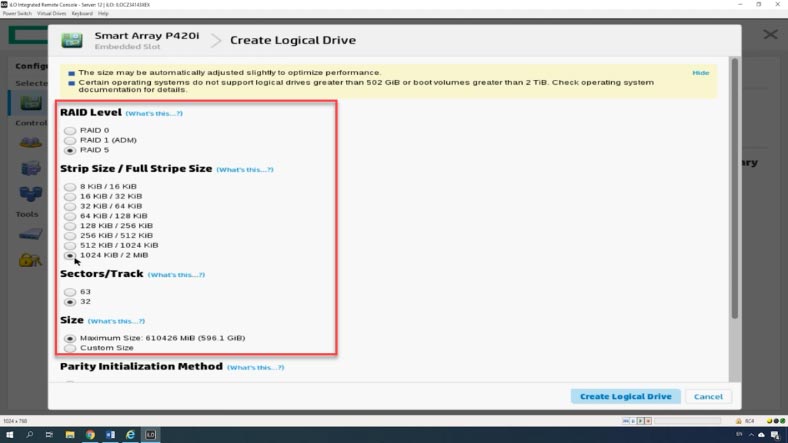
Now it is time to give RAID level, stripe size, and the array size – choose if you want to use all the space you have or set a custom size.
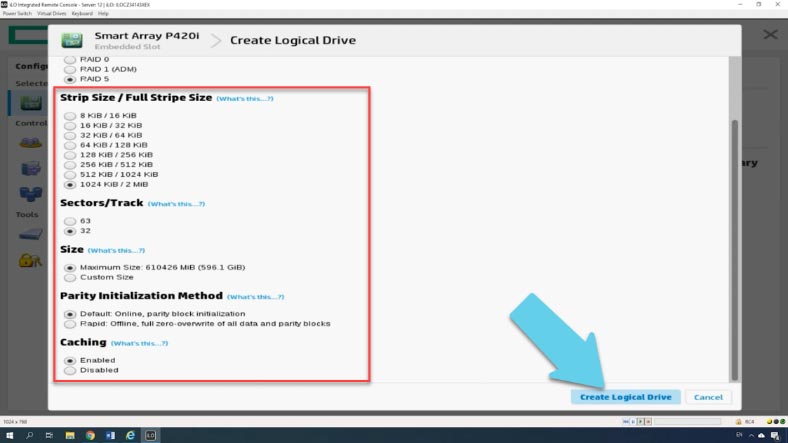
The option “Sectors\track” gives the number of sectors that make up every track; the value 32 disables MaxBoot, while 63 enables it (which reduces performance of the logical volume).
Caching can improve performance by writing data into the cache memory instead of writing it directly to the logical disks.
Now select the initialization method: the default one, or the longer one that involves overwriting blocks with zeroes.
When you’re finished with the settings, click “Create Logical Drive,” check the settings, and then click “Finish” to complete the process.
The new array should appear in the left-hand panel of the main window.
How to add a spare drive into the RAID system?
To ensure uninterrupted work even if one of the disks breaks down, you can add a spare disk before you finish the configuration process.
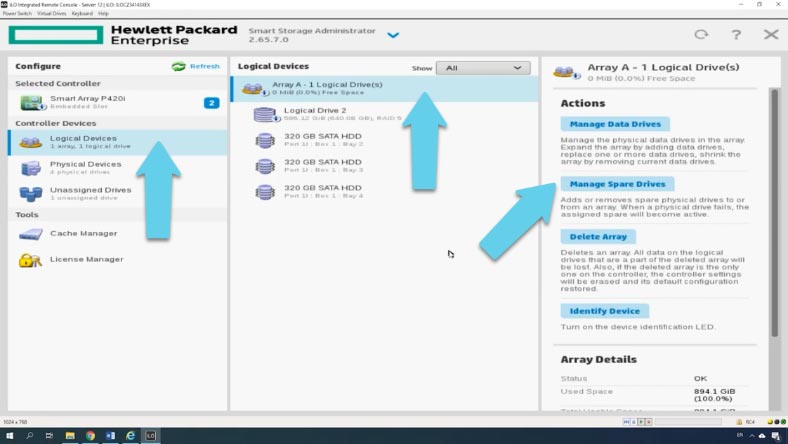
To do it, click “Manage Spare Drives,” select a disk in the next window, and click “Save” to have the spare drive added. In the screenshot, you can see the group of three drives that make up this RAID system, and the fourth one below which is the spare drive.
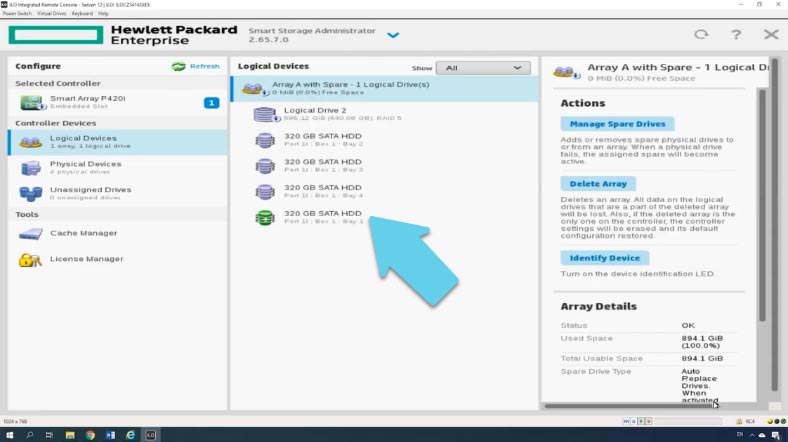
Now, if one of the drives breaks down, the controller will rebuild this RAID with the spare drive, and display a warning to let you know that one of the drives should be replaced.
To exit the application, click the Close button, and you’ll be redirected to the Intelligent Provisioning screen. In this window, click the power button in the upper right corner, and then the reboot button.
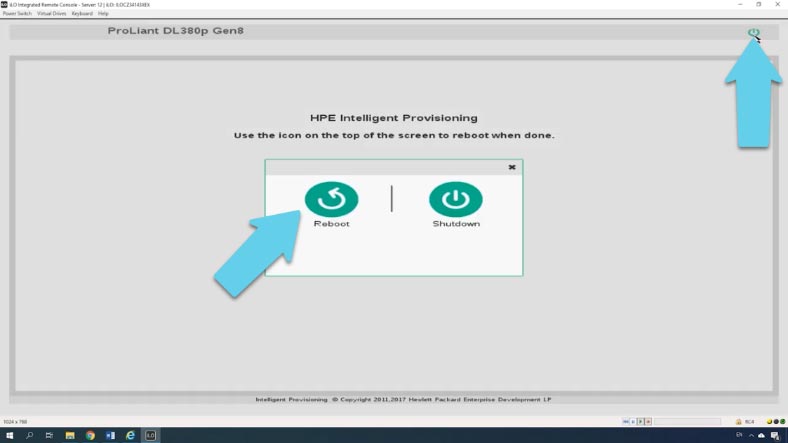
After that, boot the operating system and partition the disk.
How to install an operating system onto a RAID array?
If you need to install an operating system, use another integrated utility, Intelligent Provisioning Preferences. To start it, press the F10 key while the server is booting.
Choose “Configure and Install” – “Continue,” and select the operating system family from the drop-down list, then choose the installation method and specify the resource with the installation disk.
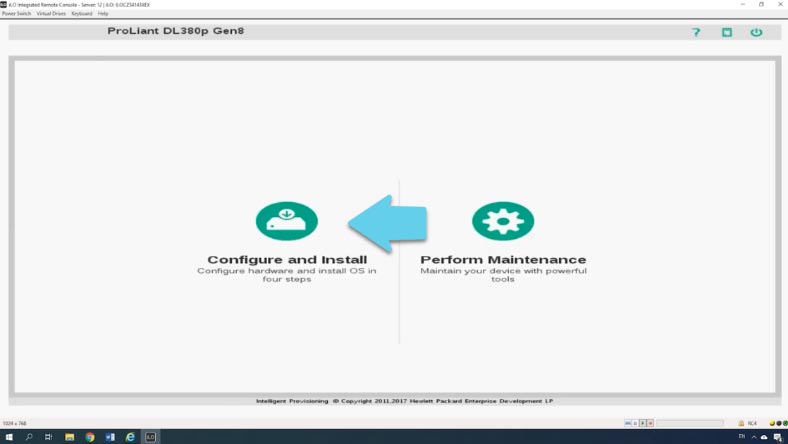
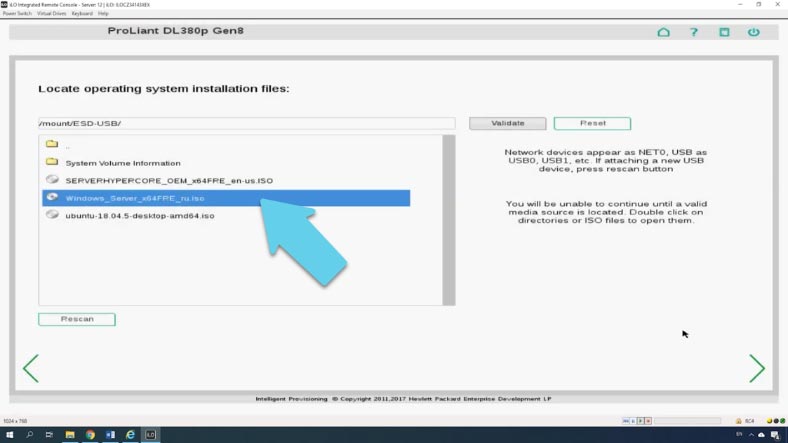
Give the path to the image of the operating system – “Continue” – choose your settings – give your login and administrator password. “Continue,” the system will warn you that all data will be lost. Click “Continue” and wait until the installation is over.
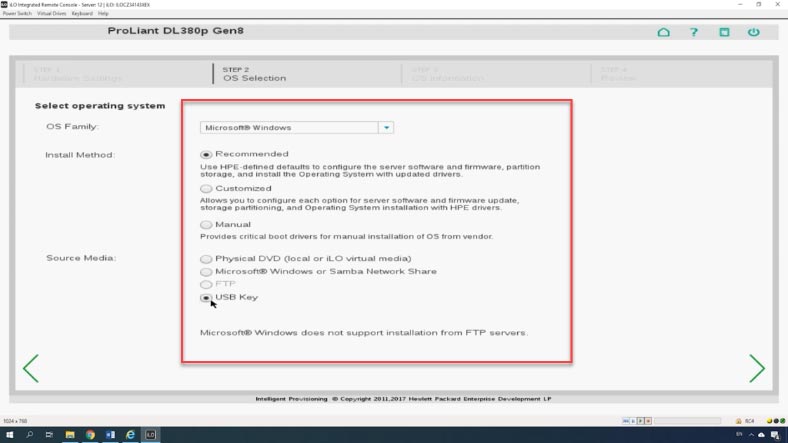
From the menu of this program, you’ll be able to start Smart Storage Administrator, update the controller’s firmware, and install an operating system. The standard installation process begins – just follow the wizard directions.

How to Install Windows 10 on a Computer or Laptop From a USB Drive or DVD in 2019 💽💻🛠️
Build a RAID with the help of Option ROM Configuration for Arrays
Also, with this server you can create a RAID array with the controller’s BIOS. In one of the videos on our channel, I showed how to create a RAID system based on an HP controller; this device type has a similar menu for configuring disk arrays. You can learn more by following the link in the description.
Press F8 to start ORCA, Click to create a logical drive (array), and set its properties.
| Step | Description |
|---|---|
| 1. Enter BIOS | During system boot, press the key to enter BIOS (usually Del or F2). |
| 2. Access Option ROM | Enable the use of Option ROM in the BIOS settings section if it is not already activated. |
| 3. Select RAID Controller | After rebooting the system, press the appropriate key (e.g., Ctrl+I or Ctrl+R) to enter RAID configuration. |
| 4. Create New Array | In the Option ROM menu, select to create a new RAID array (option Create Array or similar). |
| 5. Select RAID Level | Select the required RAID level (e.g., RAID 0, RAID 1, RAID 5, etc.) depending on the number of available disks and your needs. |
| 6. Select Disks | Select the disks that will be used to create the RAID array. |
| 7. Set Stripe Size | Choose the stripe size for the RAID array. This affects performance and storage efficiency. |
| 8. Confirm Settings | Review the settings and confirm the creation of the array. The disk will be initialized, and the RAID will be ready for use. |
| 9. Exit and Reboot | Save the changes and exit the Option ROM menu. Reboot the system to apply the settings. |

📚 RAID Systems: Definition, Types and How to Create One 💽
Data Recovery
Method 1. Recover data from an array based on P420i
When the RAID or one of its drives breaks down, the operating system crashes, or some data is removed accidentally, the information can be safely recovered with the help of a specialized software tool like Hetman RAID Recovery.
In the case of accidentally removing data, just install this program to the server running a Windows operating system, scan the disk array and restore the deleted files.
Right-click on the disk and open it, select the scan type and wait until it’s over. Select the deleted files and click Recovery. Choose the folder where you’d like to save the files and click Recovery again. When the recovery process is complete, you’ll see all the files in that folder.
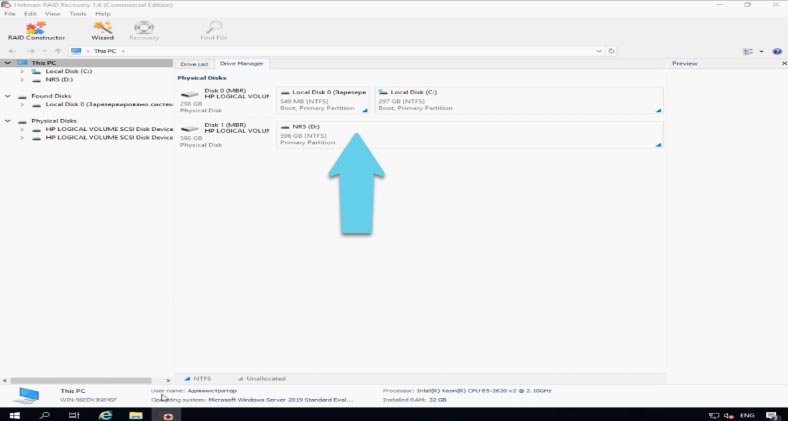
If the operating system on the disks within the array is damaged, you won’t be able to extract the data so easily. Connect the drives directly to the motherboard of a Windows computer and download the program. It will scan the drives automatically, read all the necessary information and rebuild the array. The last step is to scan it and recover the necessary files.
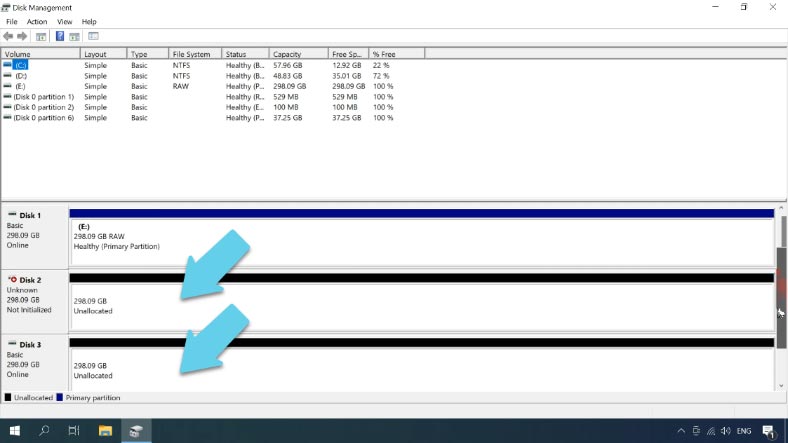
Method 2. Manual rebuild in the RAID Constructor
If the program failed to rebuild the RAID system or it rebuilt the array in the wrong way, you can always do it manually. If you know the order of the disks that were included in the array, the block size, block order, and other important data, just open RAID Constructor and build it according to this information.
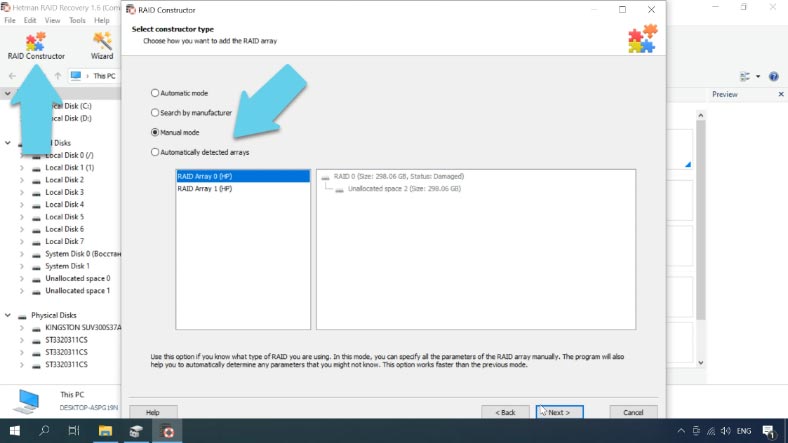
To rebuild an array manually, open RAID Constructor, choose Manual mode and give all the RAID settings you know. RAID type, block order, block size, the number of disks in the array, then add the disks and specify their order.
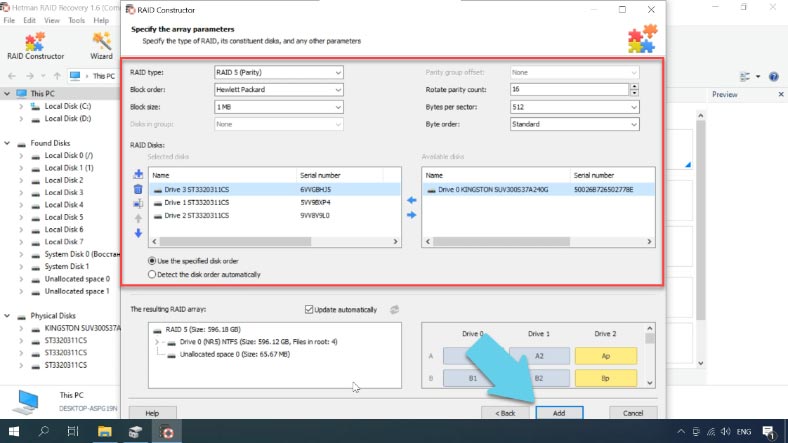
When you filled in every field, click Add and the array will appear in the Drive Manager. Now the easy part: scan it and recover the files.
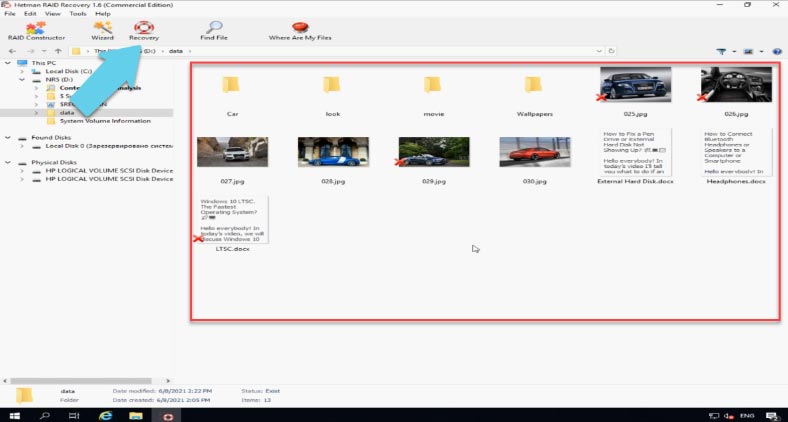
The program lets you recover deleted files even if one drive is missing (and if your specific array type can remain operable after losing one of its drives).
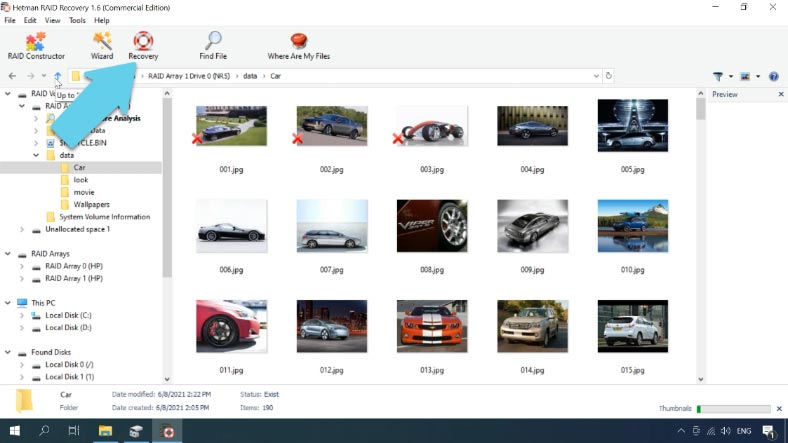
In my case, the program managed to find all the data in spite of one disk missing – just because this is RAID 5.


