Replace Dead RAID Controller Without Losing Data: Easy Guide!
Need to replace a dead RAID controller without losing data? Our comprehensive guide has got you covered! Learn step-by-step instructions and expert tips for successfully replacing your RAID controller without risking data loss. Say goodbye to data loss worries and hello to a seamless replacement process!
- Method 1. How to replace a RAID controller without losing anything
- Method 2. How to replace your RAID controller with a similar model from a different manufacturer
- How to recover data when the controller is dead
- Conclusion
- Questions and answers
- Comments
In a modern IT environment, there could be several reasons why system administrators would like to change from one RAID controller to another. With the growing amounts of data to process, sooner or later you will have to expand the disk array, but often you cannot do it because of the old controller, and sometimes controllers may just fail. Whatever happens, there is one question to answer: can you migrate to a new device without losing data?
Fortunately, there are a few ways of doing that:
- The difficult one, which requires you to make a backup copy of data, reconfigure the array and recover data from the backup.
- and the simple one, where you just connect the drives to the new controller and import the external configuration.
The second option involves a certain risk of data loss but lets you save a lot of time instead. Unfortunately, the varying methods used to store RAID configuration data make it impossible to transfer data between storage systems of different manufacturers without data loss. The RAID configuration data is stored on the drives that make up the array. This information is located in the first or last sectors of each drive and is known as metadata. This metadata is written to the drives by the RAID controller’s firmware when the array is created. This configuration is duplicated on each of the drives, and all the service data is absolutely identical, except the drive number.
When the drives are connected to a different controller, it should identify the old configuration and import it without losing data or reconfiguring partitions or arrays. RAID controller manufacturers use different approaches to storing this information. First of all, let’s find out how to select a proper replacement for your old controller.

How to Replace a RAID Controller without Losing Data
Method 1. How to replace a RAID controller without losing anything
The first thing to remember is this: if you make changes to metadata or replace the adapter (or expansion) card, there is always a risk of data loss. To secure yourself against losing data from the RAID system, perform a full backup and check it before you start the migration process.
To replace a dead controller, it’s better to choose a device of the same model; if that is not possible or your model is outdated, you can choose a controller of the same brand but with a newer configuration. There should be no difficulties in replacing an expansion card with a device of the same model: the only thing you may have to do is to update its firmware.
When replacing an older model with a new generation device from the same manufacturer, visit its official website to make sure if the new card supports the technologies used in the old one. The manufacturer’s website should contain a list of interchangeable and supported devices.
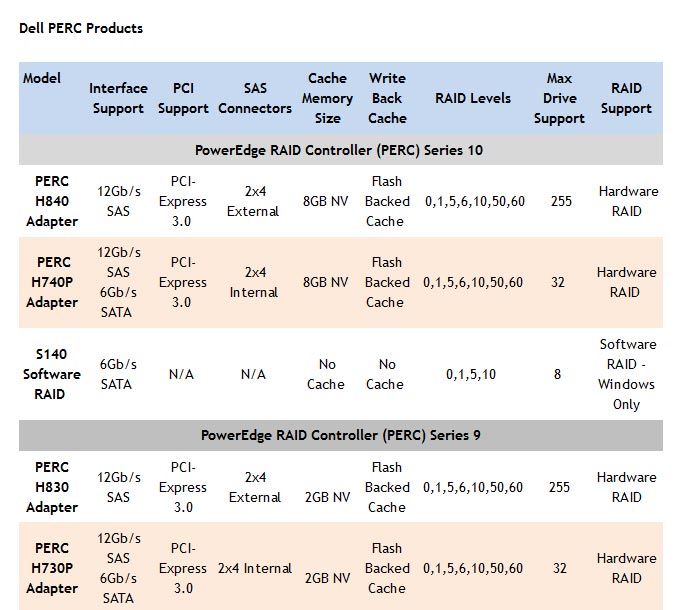
For example, https://www.dell.com/learn/us/en/04/campaigns/dell-raid-controllers?c=us&l=en&s=bsd
I have a RAID 5 system consisting of three drives and based on a Dell controller, model PERC H310. For illustration, I’ll show you how to replace it with another device of the same manufacturer, model H710.
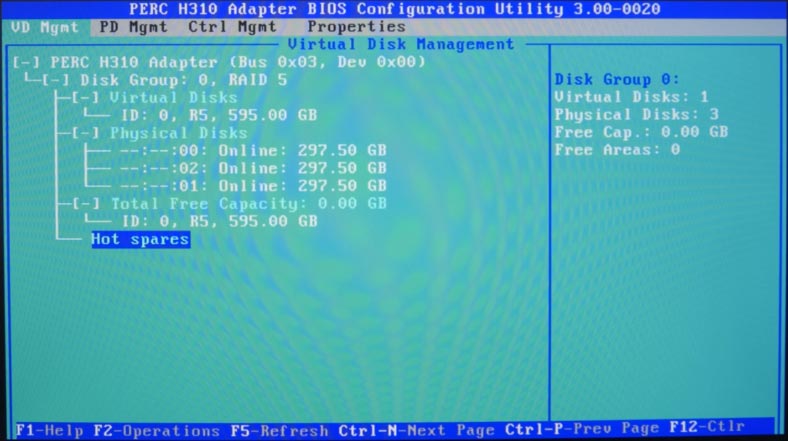
There are several possible scenarios of how the storage system may behave after the installation of the new controller.
The first case is that the device imports the disk array automatically. When booting, the system will display the notification that a foreign configuration is found and that you need to press a certain key to import it; in my case, that key is F.
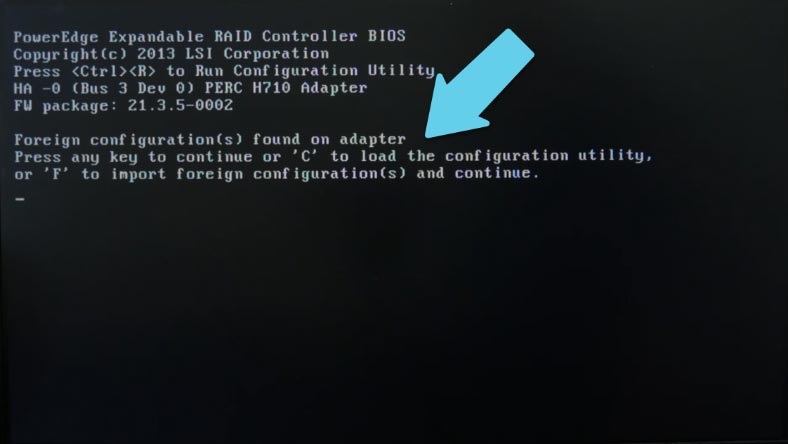
After that, the controller will automatically identify and load the previous configuration, and when the operating system has booted, you will find all the data just where it used to be.
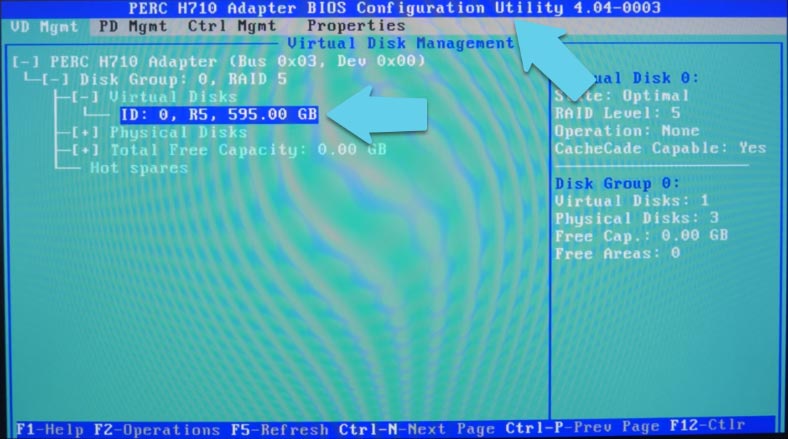
In the second scenario, you’re going to see a notification saying that the system found a foreign configuration, but it failed to load it automatically, and you can configure it by opening the controller’s BIOS. Do it by pressing the key shortcut (С key or Ctrl + R).
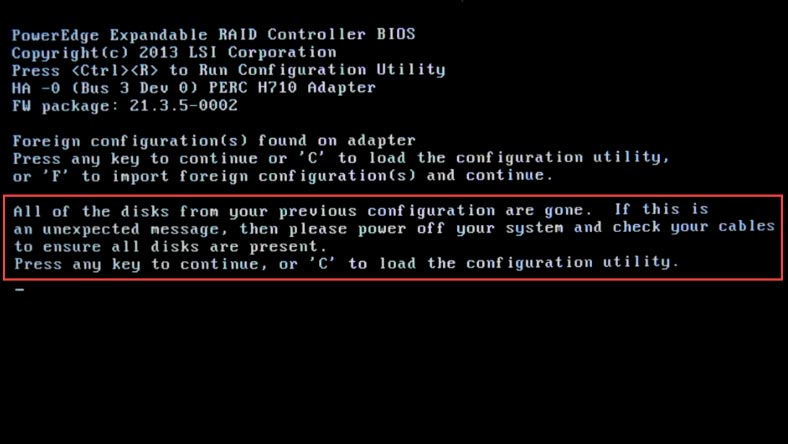
In the window that opens, select the upper line and press F2 for configuration, select Foreign Config and press Enter, and in the submenu that opens select Import to import an external configuration, or Clear to remove it. Of course, we select Import.
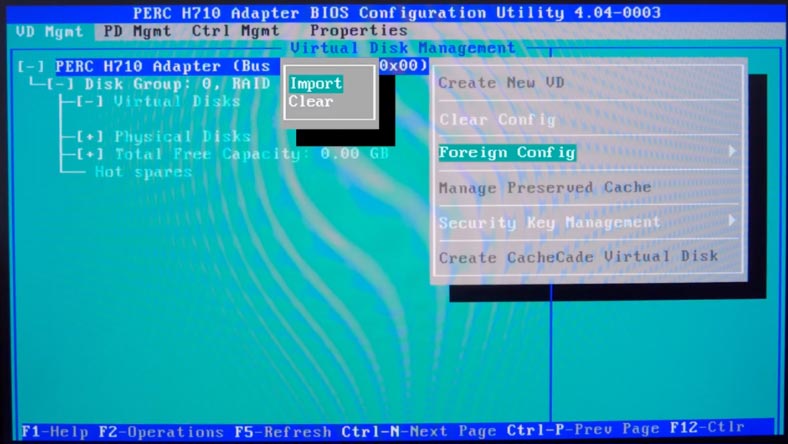
It may take a few minutes before the configuration is processed, and after that, the utility should display a list of virtual drives that used to be configured for this system. This is the end of the controller replacement procedure, and after you boot the operating system you can make sure that no information is lost, and all files are still on the disk.
There is an important thing to keep in mind. When connecting the drives to the new controller, make sure you connect them in the proper order. Some controllers can import the configuration regardless of the order in which the disks are connected, but many don’t, so it is recommended to connect them in the same way they were connected to the old controller. If they were connected to the zero port of the old controller, with the new controller they should be connected to the same port, otherwise, an attempt to import will end in failure and all files will be lost.
Also, you may have to change the controller firmware to the version used with the old controller or update the firmware.
Method 2. How to replace your RAID controller with a similar model from a different manufacturer
RAID controller manufacturers use different approaches to storing service information on the disks, so if you plan to replace the dead controller with a different model from another manufacturer, there are a few things to take into consideration.
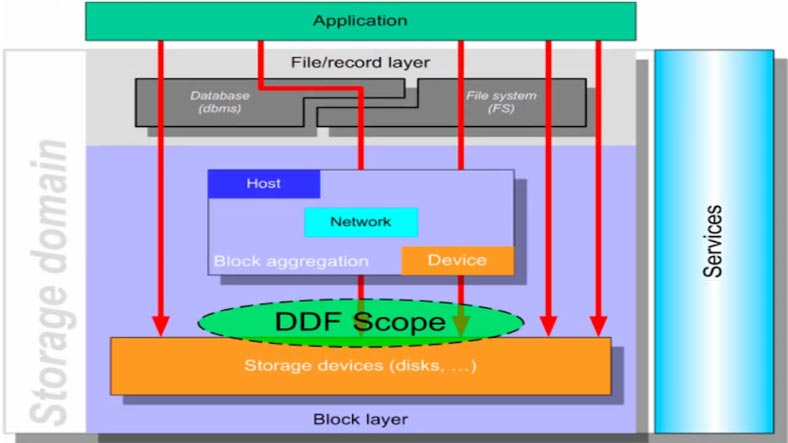
You need to know if the new controller supports the general format of drive data (DDF), which DDF version it supports, and what order is used to write bytes and store information in the disk array.
DDF (Disk Data Format) is the structure of formatting data in drive groups within a RAID system.
It provides a basic level of interaction between various RAID vendors. The general DDF structure in RAID is very important because it ensures data migration between storage systems from different manufacturers without losing data.
At the moment, it is available in two versions – 1.2 and 2.0. Various controller models and brands may support the first version, the second version, or both, so this is an important thing to find out when looking for a replacement.
Another feature to pay attention to is the order or sequence of writing bytes.
In computing, all information is represented in sequences of bytes. If a certain figure cannot be represented as one byte, it really matters in which order bytes will be written to the computer’s memory. With the exception of mixed and inverted orders, there are two main ways to write bytes, Big Endian and Little Endian.
The first one, Big Endian, will write bytes left to right (it looks like this: the figure 123 is written as 1,2,3).
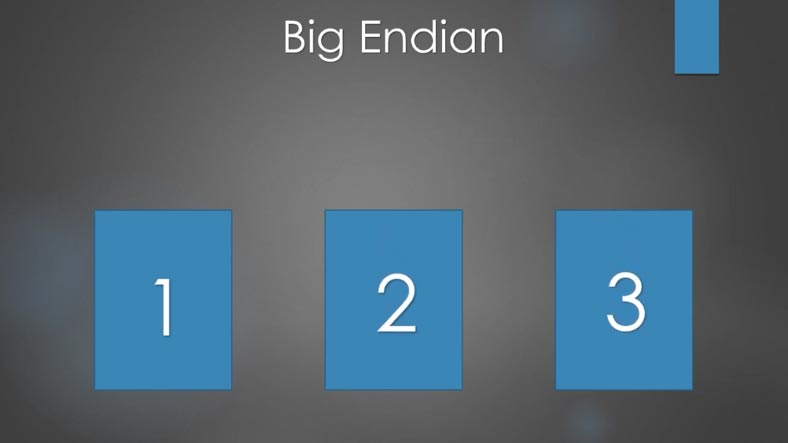
The second order (Little Endian) will write bytes in inverse order, and the same figure 123 will be written as 3,2,1. You can see it in detail with the help of a Hex editor.
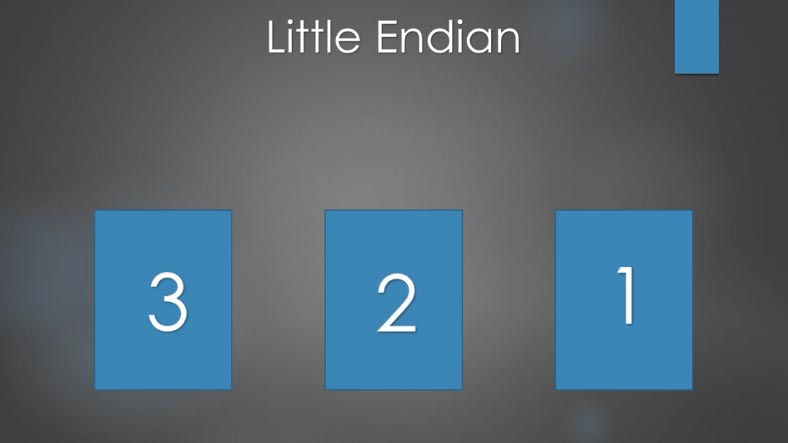
If the controller used to build a RAID system and write its data works with the first order of writing bytes, and then you replace it with a controller using the second order, you may have difficulties with importing the configuration. The import operation will either fail or the controller will be unable to identify the foreign configuration.
In the course of testing, we managed to import an external configuration with the following Dell PERC controller models: H310, H330, H710, H830, so these devices can be replaced interchangeably without risking the loss of data.
With RAID 5 based on Dell PERC H310, we managed to import the external configuration without loss of data to various models of the same manufacturer.
As to third-party vendors, a controller Fujitsu D311 with LSI firmware detected the external configuration on the drives and suggested importing it during the first boot.
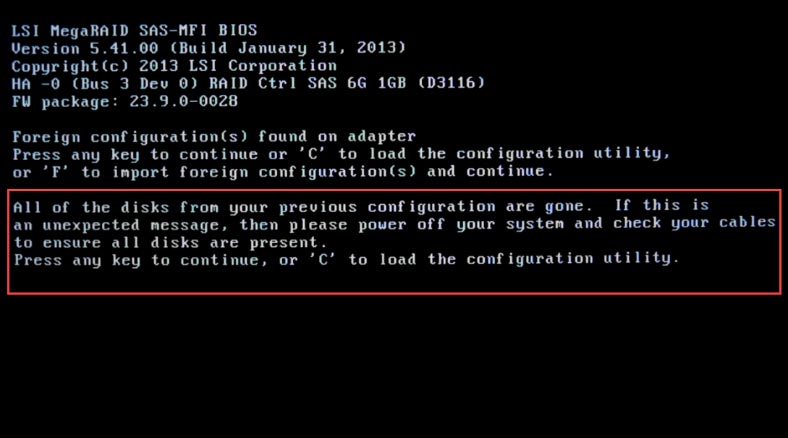
Opening the controller’s BIOS we could see that the previous configuration has not changed, and after the operating system booted, all the files in the disk array remained intact.
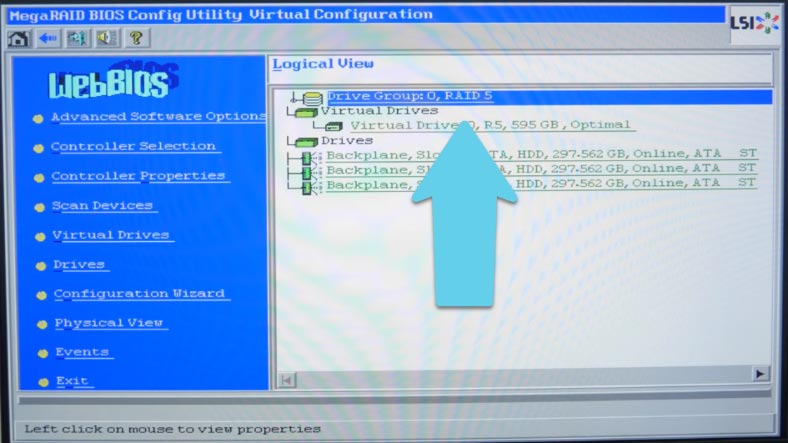
However, in the case with a similar controller on LSI firmware, IBM ServeRAID M5016, we failed to import the external configuration, because the controller could not identify the foreign configuration properly.
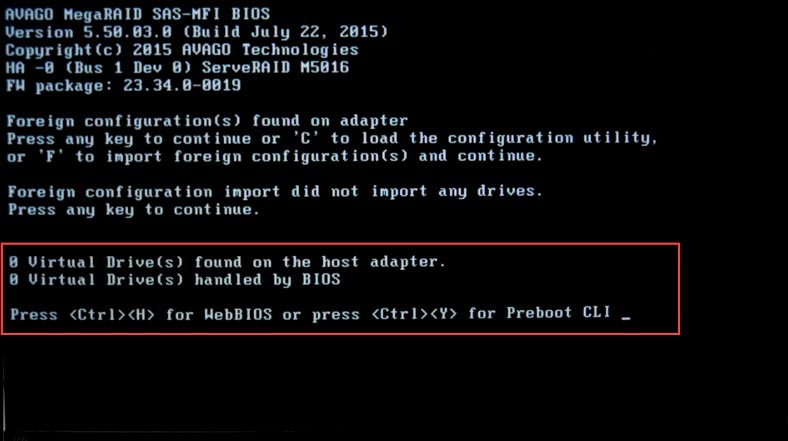
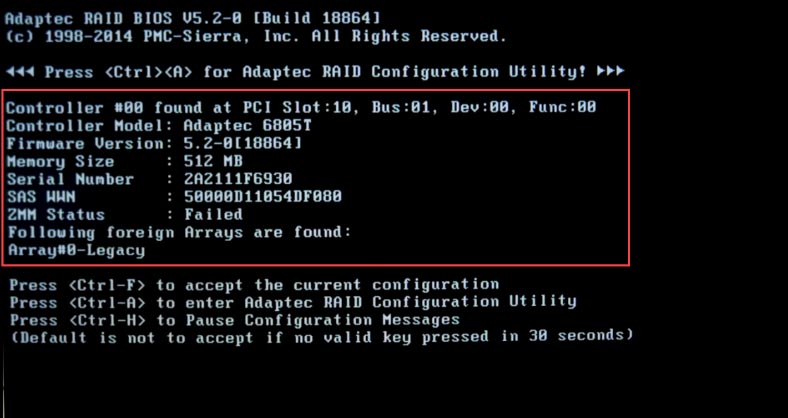
When we tried to import a configuration from the controller Dell PERC H310 to the controller Adaptec ASR 6805T, the second controller encountered an error, and importing the configuration without losing data became impossible. If we compare their features, we can see that the Adaptec device supports DF version 2.0 and has a different write order for bytes, which is most likely the main reason for failure to import the configuration.
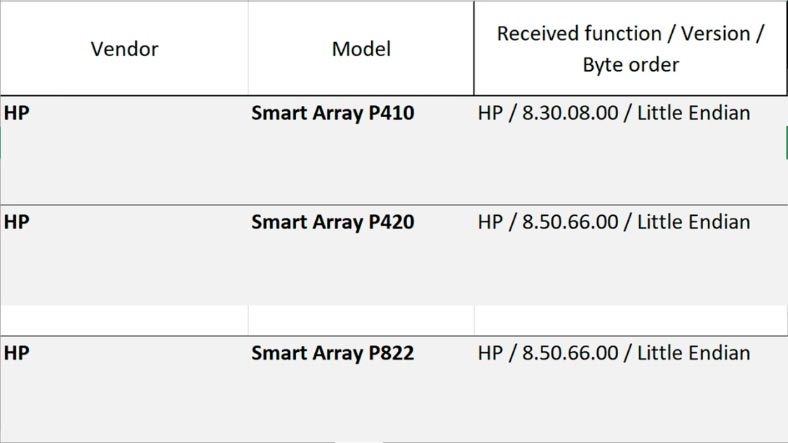
Controllers produced by HP have their own structure of building RAID systems and writing data to the drives in the array. That is why there are little chances of success if you try to replace an HP controller with a controller of a different brand.
If the disk array is a bootable one, and you replaced its controller with a different model, you may have to install an operating system driver for the new device, otherwise the whole system may refuse to boot.
Also, you should take into account that not all RAID levels can be migrated to a different controller model; this applies to multilevel arrays like RAID 10, 50, 60 which include several groups of disks. If you are trying to import an external configuration and encounter an error, this could be caused by your RAID being a multilevel one.
How to recover data when the controller is dead
If you failed to find a replacement for a dead controller, but you still want to extract some important data from the drives, use a specialized tool to recover data from RAID systems.
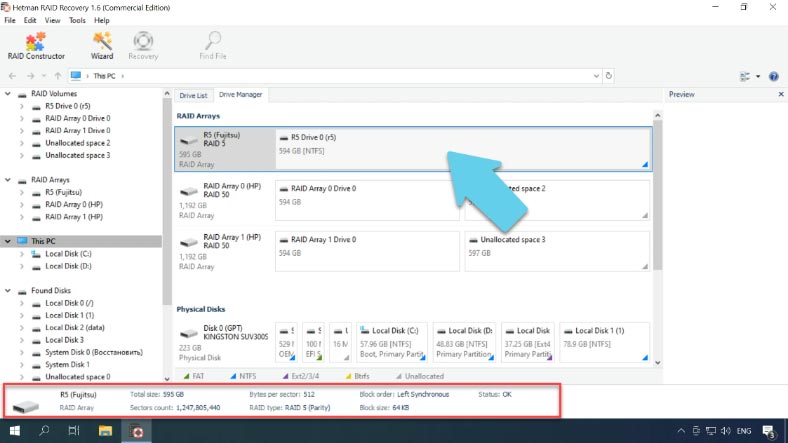
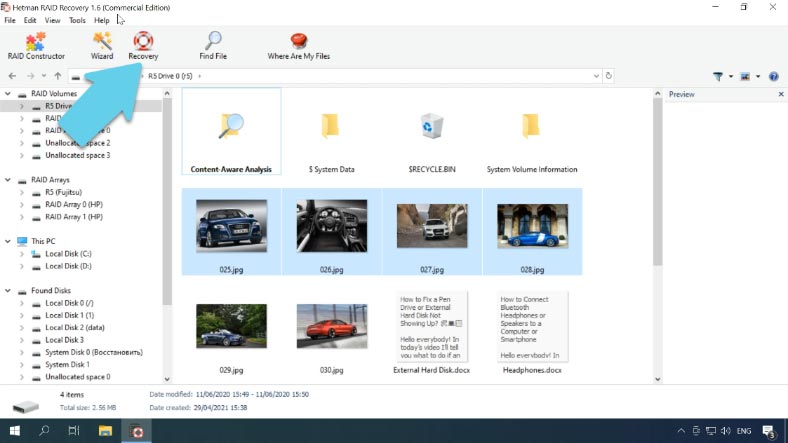
Hetman Recovery can restore data from disks of a RAID system even if the controller is missing. The utility reads from the storage system all the information about the controller, the motherboard, or the software used to create a disk array, and then rebuilds the damaged RAID.
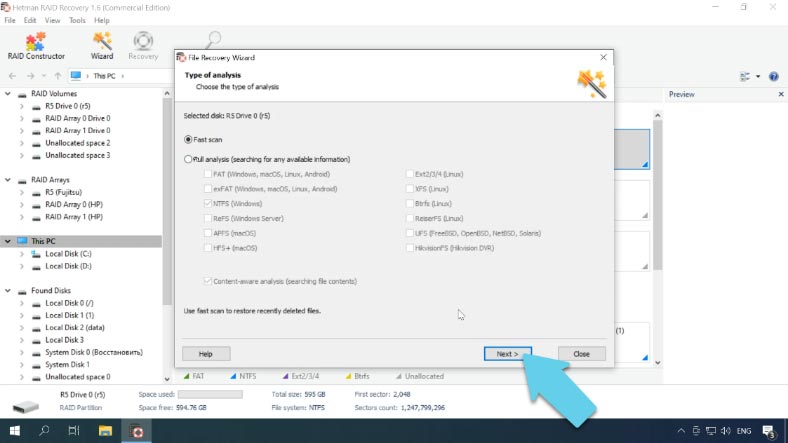
After that, you’ll be able to scan it and recover the critically needed information.
Conclusion
The Drive Roaming feature or options to import an external configuration can be found in almost all modern controllers. That is why we may suppose that replacing one controller model with the other model by the same manufacturer should not cause any problems. If the device in question is pretty old, you should first check its compatibility by visiting the manufacturer’s official webpage. However, the best method should be to transfer the information with the help of a backup copy – in that case, success is virtually guaranteed.
| Characteristic | Description |
|---|---|
| Function Name | Drive Roaming |
| Purpose | The ability to change the connection ports of hard drives in the RAID array without data loss or performance degradation |
| Supported RAID levels | RAID 0, RAID 1, RAID 5, RAID 10, and others |
| Main Advantages | Provides flexibility in reconfiguring the RAID array, without requiring manual disk reassignment in the BIOS |
| Performance Impact | Does not affect RAID array performance |
| Usage Scenarios | Rearranging drives to different RAID controller ports or changing the physical locations of drives |
| Risks | Incorrect drive reconnection may result in data loss if instructions are not followed |
| Compatibility | Depends on the RAID controller model and firmware |


Essentially, the controller board is the brain of the hard disk, on which all components are highly dependent
The controller adds additional checksum blocks to the drives
Some boards are capable of importing an array even if you connect the media differently, but not all, so it is advisable to connect them in the same order.