ReFS Data Recovery: Top Tools to Rescue Your Data
Here Are the Top Tools to Recover Data from ReFS Drives! Accidentally lost data from your ReFS (Resilient File System) drives? In this article, we’ll introduce you to the top data recovery tools specifically designed for ReFS drives. Whether you’ve experienced data loss due to accidental deletion, formatting, or system crashes, these tools can help you retrieve your valuable files and documents with ease. From user-friendly interfaces to powerful recovery algorithms, we’ll explore the features and capabilities of each tool to help you make an informed decision. Don’t let data loss ruin your day—watch now and discover the best tools to recover your data from ReFS drives!
- Introduction
- Benchmarking data recovery tools
- Test 1. Removing a part of data
- Test 2. Volume Header Main removed
- Test 3. Volume Header Copy removed
- Test 4. All superblocks removed
- Test 5. All checkpoints removed
- Conclusion
- Questions and answers
- Comments
Introduction
Resilient File System (aka ReFS), codenamed “Protogon,” is a new Microsoft file system designed to ensure maximum availability of data, effective scalability with large volumes of information at various workloads, and provide data integrity based on better resilience to damage.
| Feature | Description |
|---|---|
| Full Name | Resilient File System |
| Initial Version | Windows Server 2012 |
| Main Features | Data recovery, damage protection, optimization for large data volumes |
| Metadata Support | Integrated integrity control, automatic error correction |
| Disk Volume Support | Works with large volumes and files (up to 35 PB) |
| Journaling | No traditional journaling, uses block-level change copying |
| Intended Use | Used for servers, storage, and handling large data |
| Compatibility | Not supported by most older Windows operating systems |
The main structural elements of the new file system are B+ trees. All elements of the file system structure are of single-level type.
The main structural element of the file system is the “Directory” presented in the form of a B+ tree with the key as a number of the folder object.
“Leaf” directories are typified records. For a folder object, there are three main types of records: a directory descriptor, an index record and a nested object descriptor.
Further in the directory, you can find the so-called index entries: short structures with the data on the elements contained in the folder. The last elements are directory items’ records. For folders, these elements contain the name of the folder as well as the folder identifier in the “Directory” and the structure of the “standard information”. For files, the identifier is missing but instead, the structure contains all the basic data about the file including the root of the B+ tree and file fragments. Hence, a file can consist of almost any number of chunks.
Although ReFS is characterized by improved security and efficient data storage features, it can’t protect important information entirely from accidental deletion, virus attacks, or other things that may cause a data loss. You have to consider the probability of such issues in the future, and get ready with a reliable utility that would be able to fix problems with deleted files.
The best solution for such cases should be a specialized data recovery tool.

🔝 Top Tools to Recover Data from ReFS Drives in 2021 💽
Benchmarking data recovery tools
Let’s test a few of the top data recovery tools to see how they deal with ReFS drives.
For our benchmarking assessment, we have selected several popular data recovery tools such as Hetman Partition Recovery, RStudio, EaseUS Data Recovery Wizard and UFS Explorer. Initially, we were planning to test more products, but after studying them more closely, it appeared than only a few of them support ReFS. That is why we had to dismiss tools like Recuva (one of the most popular user choices), DiskDrill, Stellar and Ibeesoft.
As it turns out, they can’t handle ReFS volumes.
All right, let’s begin. There’s a computer with Windows Server installed on it, and we’ve created a test disk with ReFS file system. Let’s copy some data there – for example, photos, videos, documents. Remove some of the files and shutdown the computer.

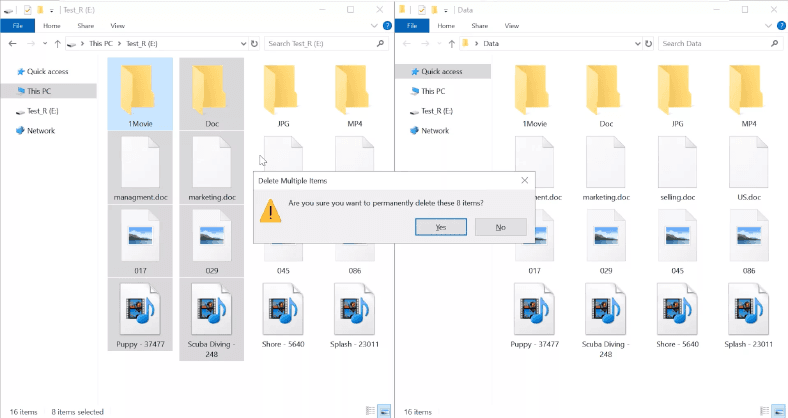
We will perform the tests on another computer running Windows 10. Let’s connect the ReFS drive there and start the testing with the first tool on the list, Hetman Partition Recovery.
By the way, Windows 10 is able to recognize ReFS without any extra software or drivers.
Test 1. Removing a part of data
Testing Hetman Partition Recovery
Let’s start the first program for the test, Hetman Partition Recovery. It can recognize the disk, detect its file system and display its name properly.
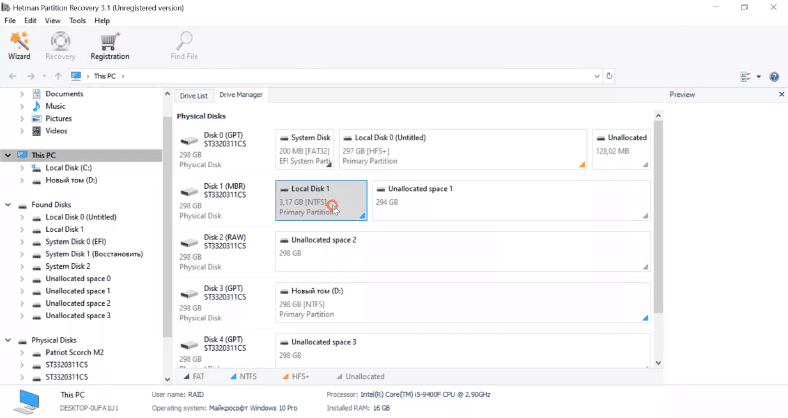
In this case of a simple deletion, a fast scan will suffice.
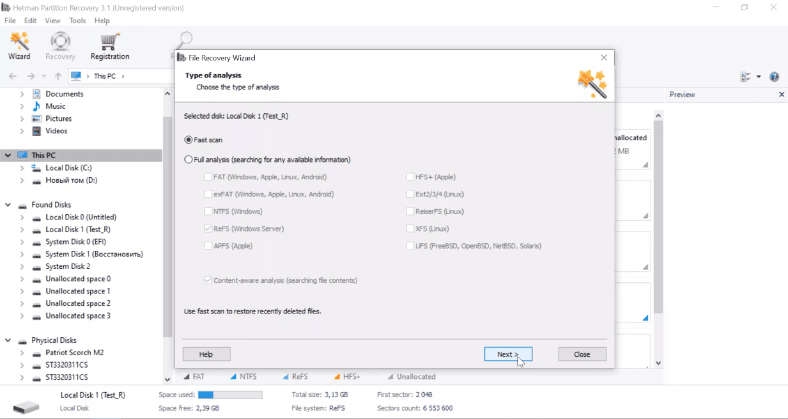
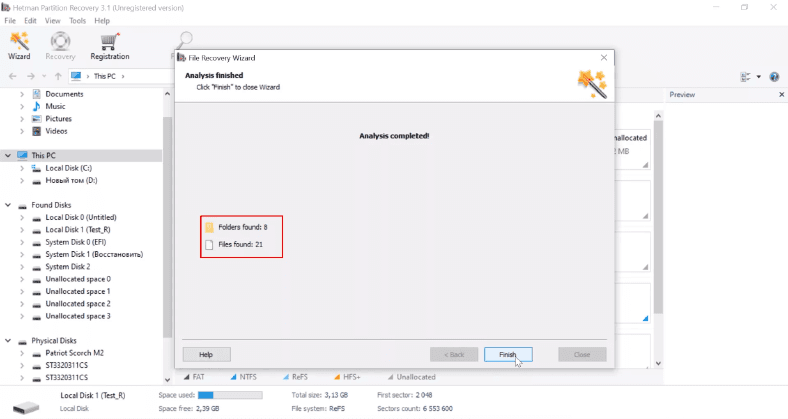
Let’s check the results. 8 folders and 21 files are found.
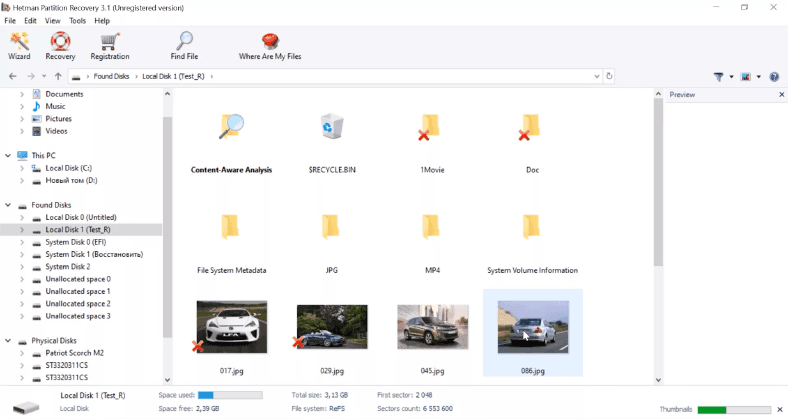
The program has displayed all files and folders. The ones that have been removed are marked with a red cross. All the files can be previewed and recovered without effort. The disk structure is retained, so all files and folders can be located easily. The program has completed this test successfully.
Testing RStudio
The second tool to be tested is RStudio.
It also recognizes the test disk, detects its file system and displays its name properly.

The program managed to find the deleted files and folders, and marked them with a red cross. Deleted photos, videos and documents are not displayed in the preview window. With quick scan, this program cannot display the contents of the deleted files.
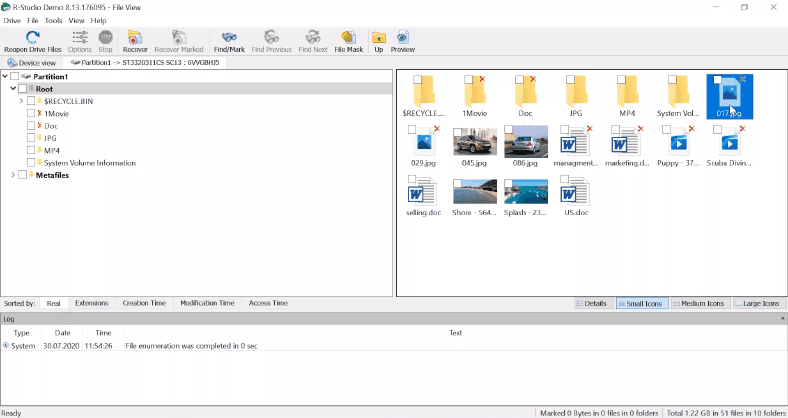
That is why we have to run a regular scan, Which is going to take a little more time.
The regular scan gives us a completely different picture, with all files available for preview.
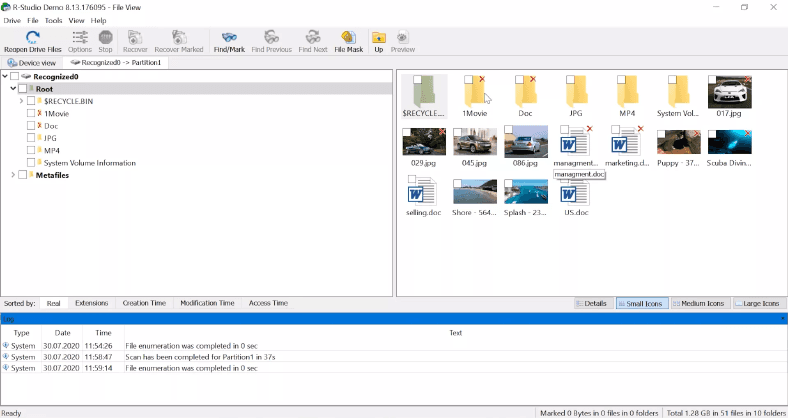
This program has also passed the test, though it took more time.
Testing Easeus Data Recovery Wizard
The next program in the test is EaseUS Data Recovery Wizard.
The program displays the disk but without showing its name or file system type. We were only able to find it by the size.
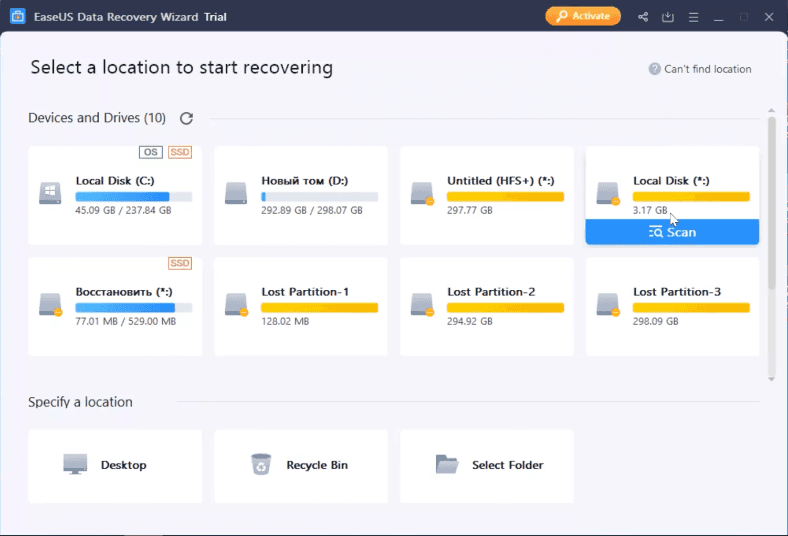
There is no option for a quick scan in EaseUS: as soon as you try to open the disk, it triggers an advanced scan. Here is the result – 17 files.
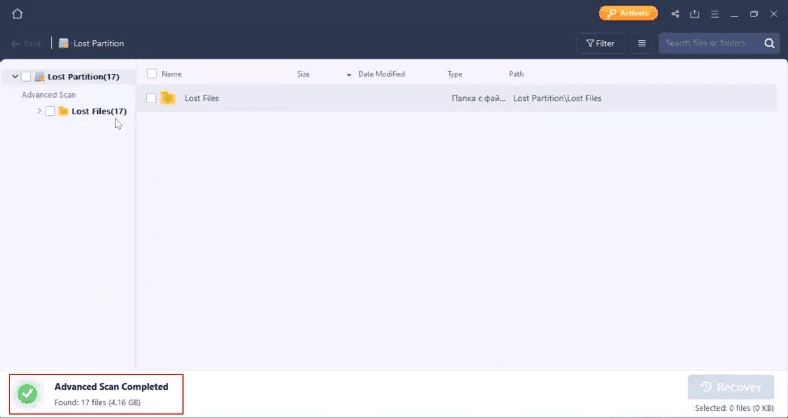
The program can’t represent the disk structure and file names, and the files are only sorted to folders by file type. Judging by the result, we may suggest that the program seems to be checking the disk with in-depth analysis, so it’s going to take a long time if you’re working with high-capacity drives.
Unfortunately, the deleted files have no markings to distinguish them from the files which are still on the disk.
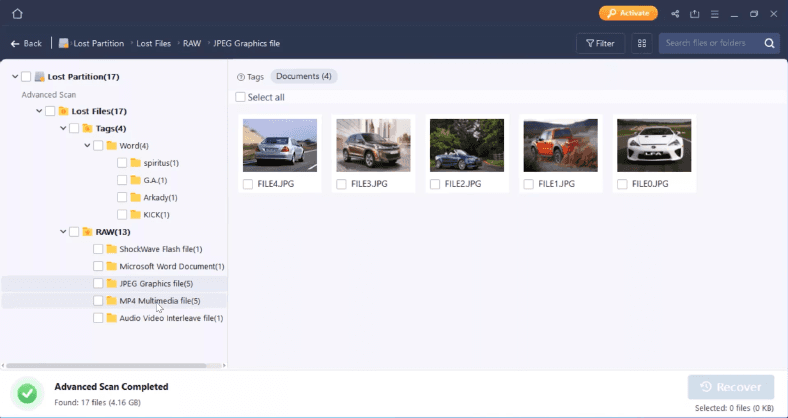
The only way to tell if all files are present is by counting them. As you can guess, finding the file you need is going to be quite a challenge when there are many of them on the disk, and it will take a long time to view every file.
Anyway, the program has found all the deleted data; the only serious disadvantage is that it lacks a quick scan option, and running an advanced scan takes more time, so EaseUS has completed the test too.
Testing UFS Explorer
The last tool to be tested is UFS Explorer.
The program can recognize the test disk, but it displays it as faulty. The file system type and disk name cannot be identified.
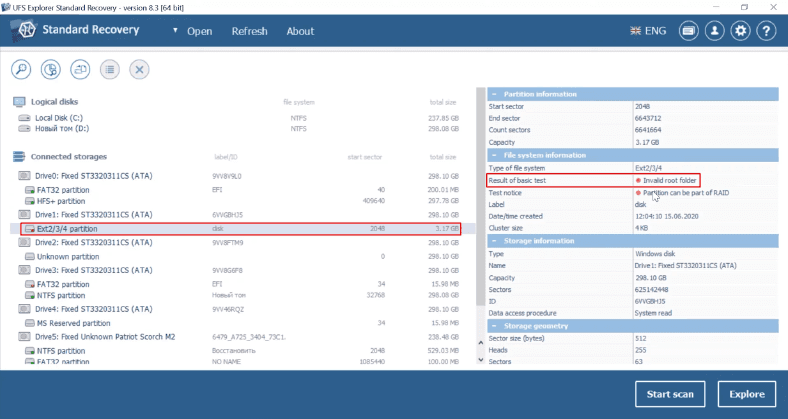
There is a way to run a quick scan.
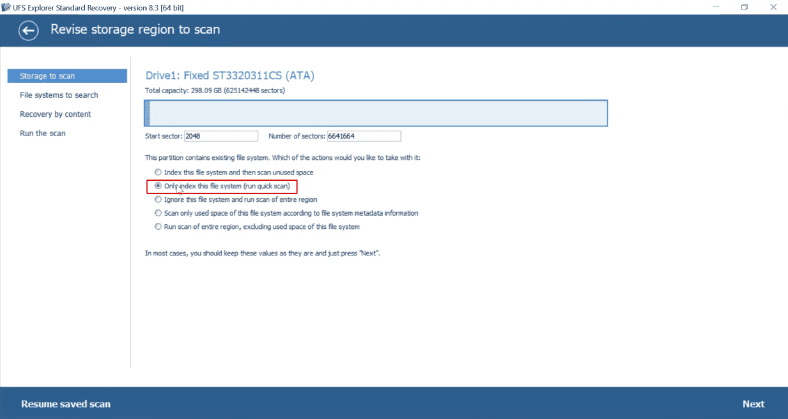
The quick scan turns out not so fast as we expected; it takes longer than full scan in RStudio and advanced scan in EaseUS.
The final result is not impressive either: the program couldn’t find disk contents.
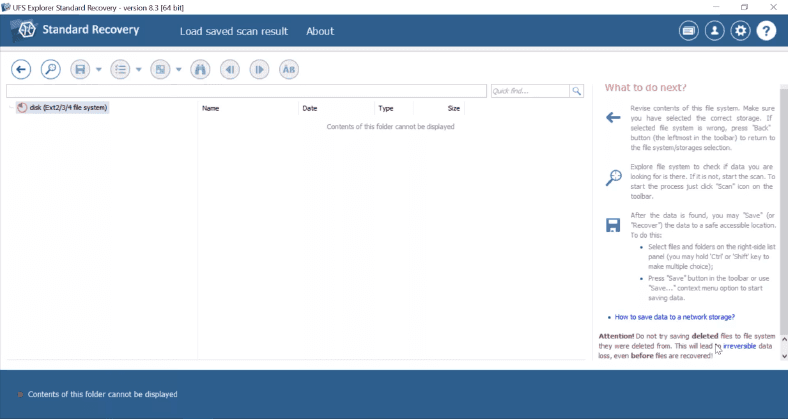
A regular scan gives no result either.
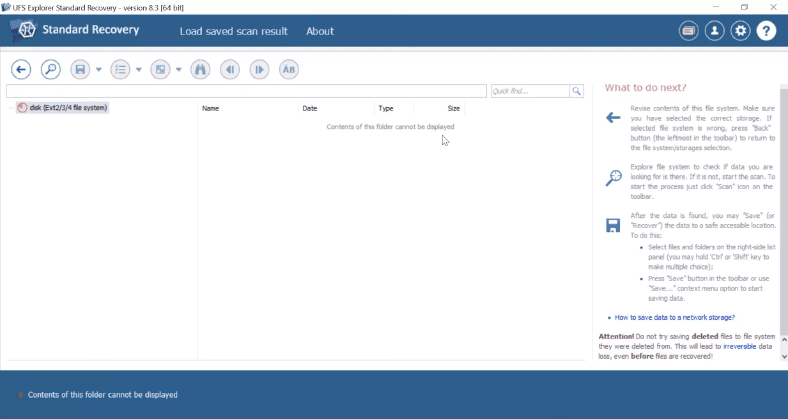
The program has failed the test as it couldn’t find disk contents, though the company’s website promises full support for ReFS.
From now on, our test involves only three tools: Hetman Partition Recovery, EaseUS and RStudio.
In the next part of the test, we’re going to erase main elements of the file system structure, one after another: Volume Header and its copy, all superblocks, and for the final test, we will remove all checkpoints.
Even if all links of the file system structure are erased, out product will find the data, because its algorithm only looks for B tree leaves which contain the information.
Hetman Partition Recovery allows us to analyze the disk space with the signature analysis algorithm. Analyzing the storage device sector by sector, the program finds certain byte sequences, skips lost elements of the chain, and represents the data to the user. If the entire file system structure is erased but level 0 folders are still there, data recovery is still possible and our program will do its best to display and recover it.
Now let’s check how it works in practice: erase Volume Header Main.
Test 2. Volume Header Main removed
Testing Hetman Partition Recovery
After Volume Header Main is removed, Hetman Partition Recovery displays the disk but without showing its name, and identifies its file system type as NTFS.
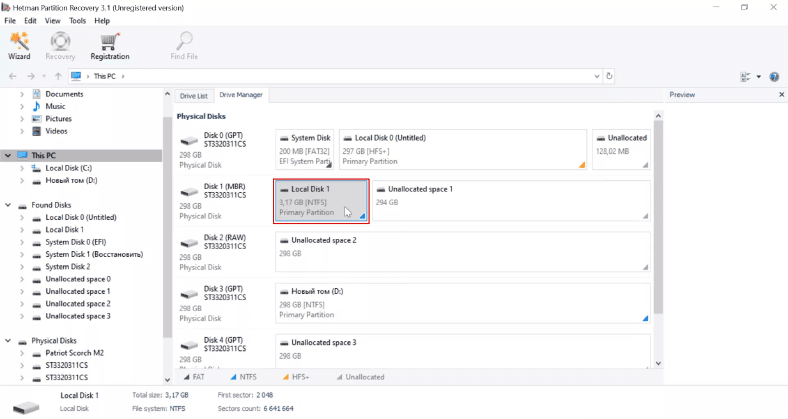
With fast scan, the program cannot find any data.
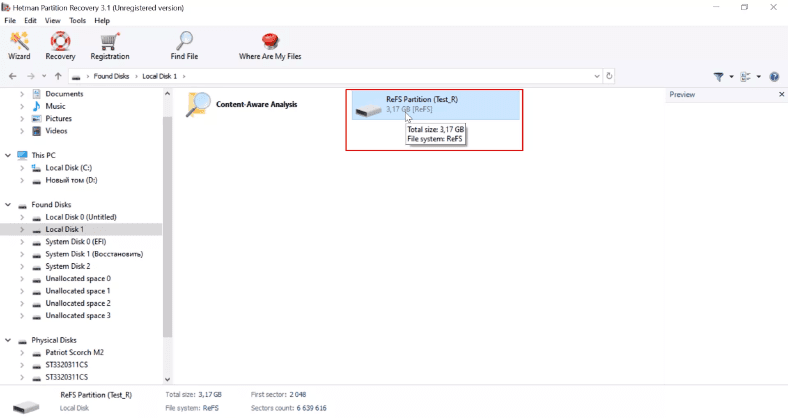
Here is what full analysis gives us: 1 disk, 8 folders, 21 file.
The program displays the disk, identifies its file system type and name.
Opening the disk, we can see that all data is available and can be previewed. The disk structure and file names are retained, the only step left to take is to save them to another disk.
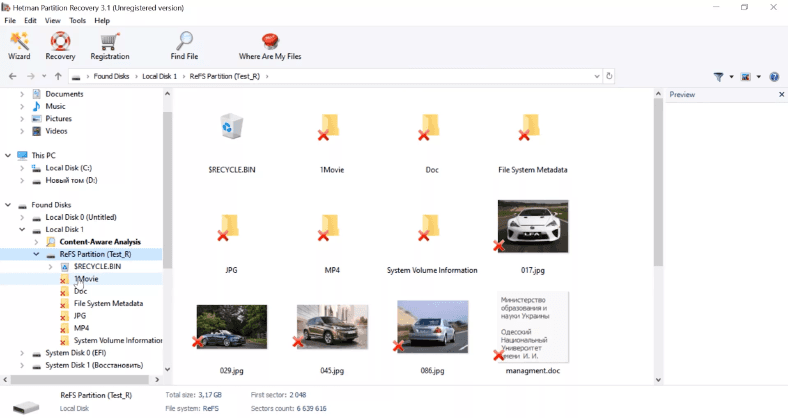
The program has completed the second test successfully.
Testing RStudio
After removing Volume Header Main, RStudio can also recognize the disk, but without its name and file system type.
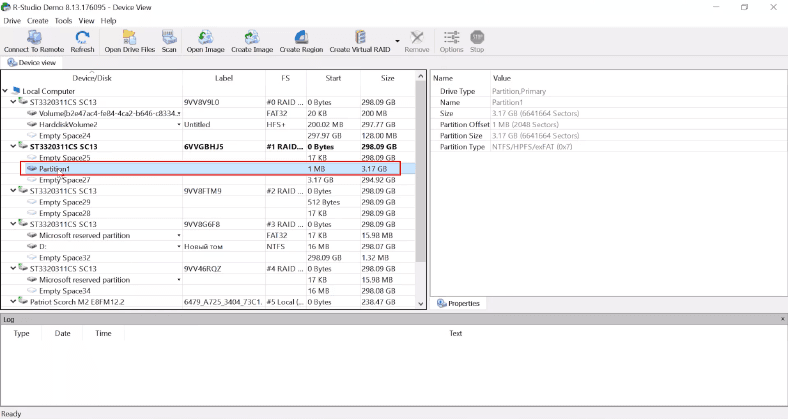
In the first test involving this tool, the quick scan was unimpressive, so we go for full scan at once.
The program managed to recognize the disk name and file system.
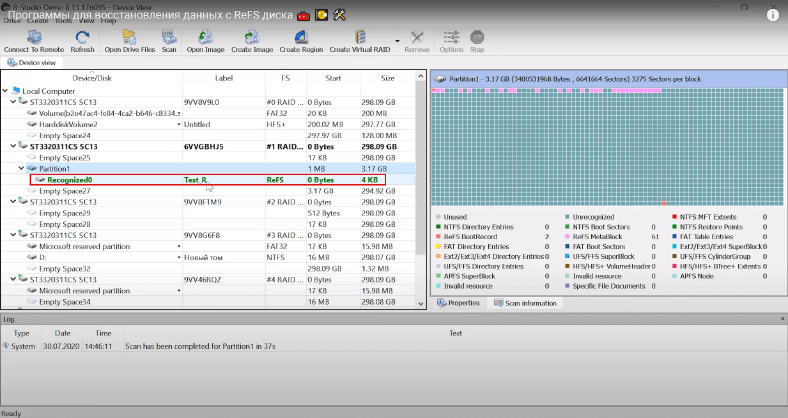
The disk structure is retained, all data is present, and available for preview.
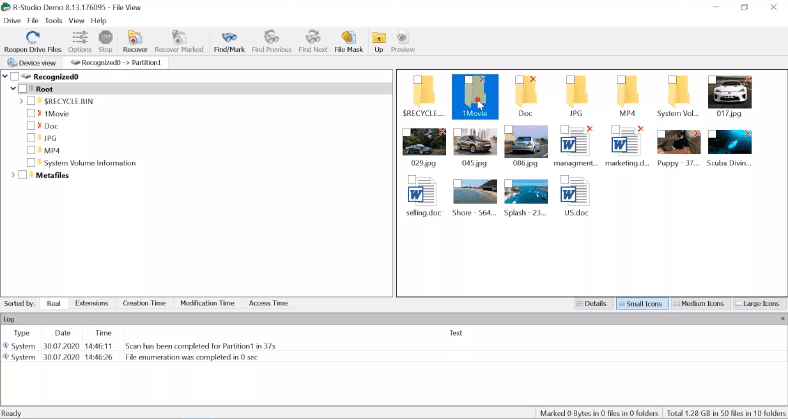
RStudio has completed the second test successfully.
Testing EaseUS
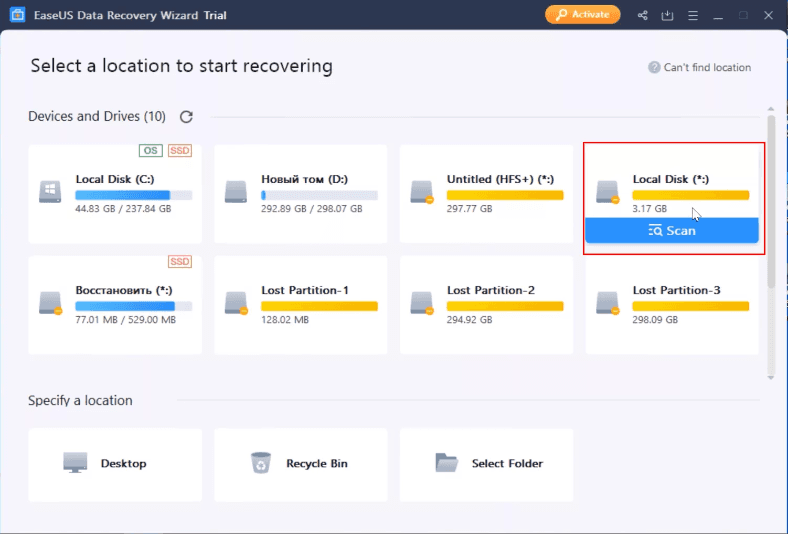
Now we’re going to see how EaseUS can handle this task.
The program can recognize the disk as well, but just as before, it can’t display its name and file system.
When we scan it, we can see similar results as before: files are sorted to folders by type, the disk structure is missing, file names are lost, all files seem to be present, one document and one video are not available for preview.
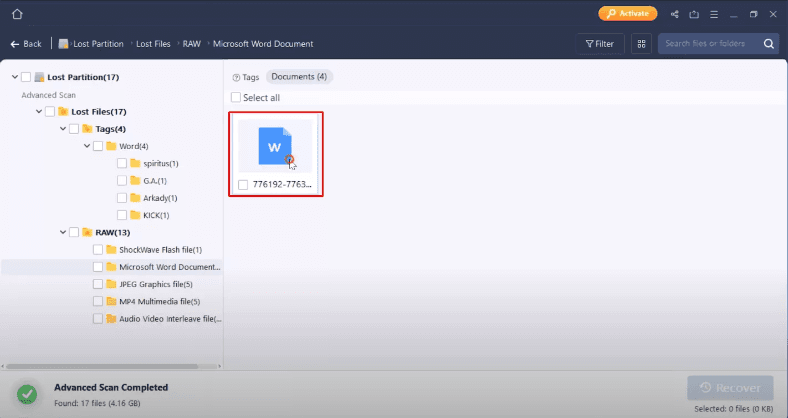
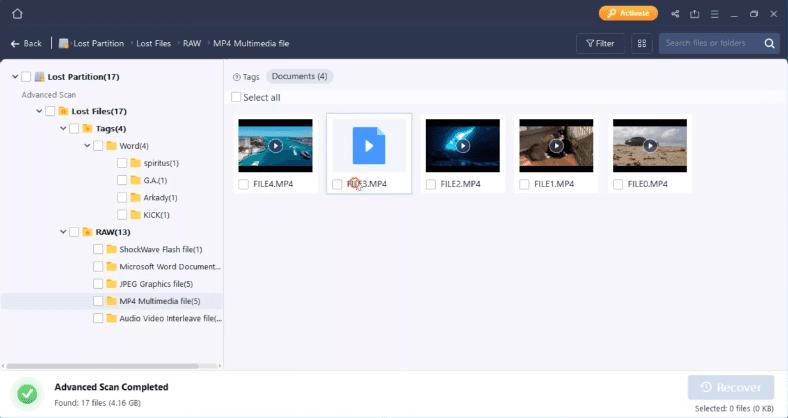
Most likely, they couldn’t be restored. By results of the second test, EaseUS ranks third in our benchmark.
Now let’s erase Volume Header copy.
Test 3. Volume Header Copy removed
Testing Hetman Partition Recovery
With Hetman Partition Recovery, the result is the same as in the previous test – the program can recognize the disk with NTFS file system.
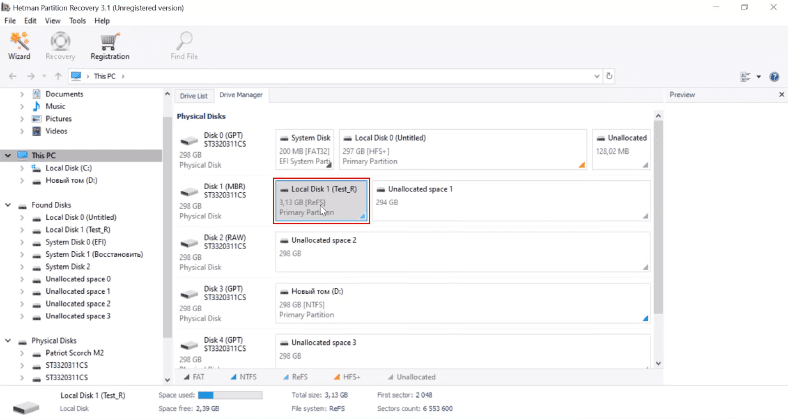
Here is what full analysis can do: 1 disk, 8 folders, 28 files. The program managed to recognize the disk name and file system type.

The disk structure and file names have been retained, all elements are in their directories and available for preview, and the last step to take is to save them to another disk.

Hetman Partition Recovery has successfully completed the test after removing Volume Header Copy.
Testing RStudio
RStudio gives the same result as before – no file system, no disk name.

After scanning, the program recognizes the file system type and displays disk name.

The disk structure and file names are retained, all data is available for recovery.

Testing EaseUS
The result is similar to what we’ve seen before. The disk without a name and file system type.

The program has found 17 files, but 1 document and 1 video are unavailable.


In the next test, we have erased all superblocks on our ReFS test disk.
Test 4. All superblocks removed
Testing Hetman Partition Recovery
The program can recognize the disk, just as in the previous test.

Here is what full analysis is down to: 1 disk, 8 folders, 21 file. The file system type and disk name are displayed as well.

The disk structure and file names are retained, all data is present and available for recovery.

Testing RStudio
With RStudio, the disk is recognized, just as in the previous test.

After the scan, the program managed to recognize the disk name and file system type.

All data is available.

Testing EaseUS
EaseUS shows only the disk itself and its size.

Here’s the scan result – 17 files. 1 document and 1 video are unavailable.


In the last test, we have erased all checkpoints in addition to other elements we removed before.
Test 5. All checkpoints removed
Testing Hetman Partition Recovery
Hetman Partition Recovery can recognize the disk, but without indicating its file system type and name.

After full analysis, we can see 1 disk, 8 folders, 21 file. The name and file system type are also detected.
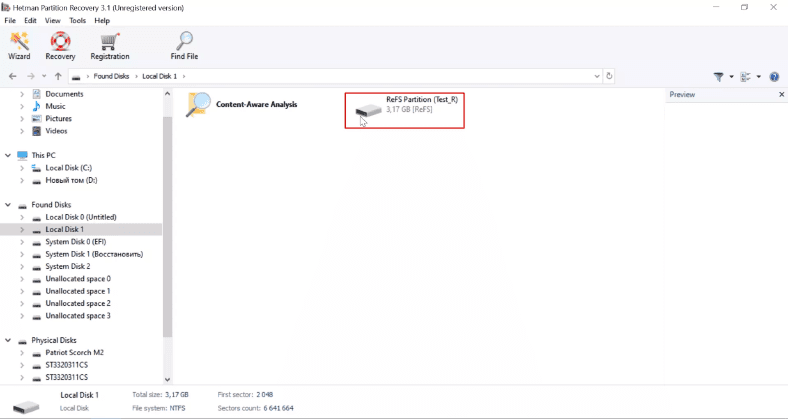
The disk structure and file names are retained, all data is present and available for further recovery.

Testing RStudio
RStudio also fails to display the disk name and file system type.

After scanning, the program recognized the file system type and displayed disk name.
When we open the disk, we can see the program couldn’t find disk contents. The disk is empty, and there are only some log files.
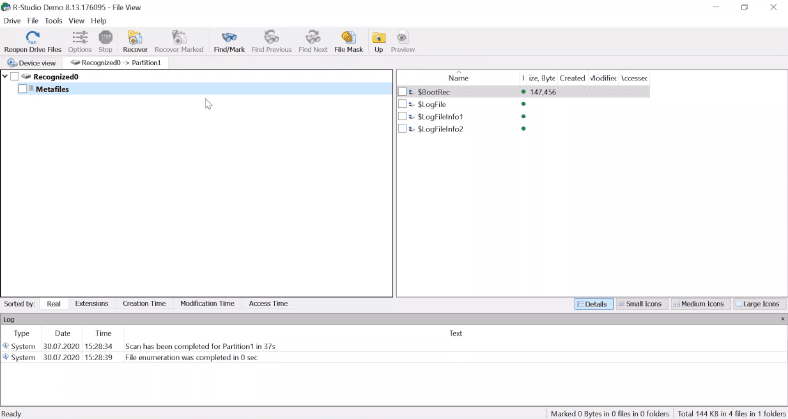
Unfortunately, this program has failed the last test. If the file system structure on your disk is damaged partially, this tool won’t be able to recover data in such a scenario.
Testing EaseUS
EaseUS has the same result as in every test we have taken before. The program doesn’t display the disk name, file system type, disk structure or file names.

Deleted files are not marked in any way.

1 document and 1 video are unavailable. However, the program managed to find the other data that the disk used to store.


Most likely, EaseUS uses in-depth analysis when scanning the disk, because the files are sorted into folders by file type. Such type of analysis requires a lot of time and fails to retain the file names and folder structure, which makes searching for specific data more difficult. Finding the file you need is going to be quite a challenge when there are many of them on the disk.
Conclusion
Now let’s draw the bottom line. There are two tools that have passed all the tests – Hetman Partition Recovery and EaseUS Data Recovery Wizard. EaseUS ranks second because it was much better than RStudio, which did well, though it failed to find the disk contents in the last test. On the other hand, EaseUS couldn’t display the contents of 1 document and 1 video file.
Hetman Partition Recovery deserves the top position in this benchmark, as it has coped with all tests successfully and was able to recover all the files.
| Successful recovery Yes/No (+/-) | Data removed partially | Volume Header Main removed | Volume Header Copy removed | Superblocks removed | Checkpoints removed | Partial data loss |
|---|---|---|---|---|---|---|
| Hetman Partition Recovery | + | + | + | + | + | – |
| EaseUS Data Recovery Wizard | + | + | + | + | + | + |
| RStudio | + | + | + | + | – | + |
| UFS Explorer | – | – | – | – | – | + |
Choosing the right tool for the job is entirely up to you, and there is only one thing we’d like to add – the algorithm used in our product allows to retain the folder structure and file names which makes it easier to search for certain data and saves your time. In addition, our program lets you create a disk image and then recover data from there, which is the industry standard for dealing with faulty drives. Another favorite, EaseUS, has very good results but doesn’t offer this option. As I have already said at the beginning of this video, the algorithm used in our product lets you recover data even if the entire structure of the file system is erased, and if the disk has at least some level 0 nodes, Hetman Partition Recovery can restore them and display them to you thanks to using signature analysis.

How to Recover RAID 6 Data After Three Disks Fail, the Controller Breaks Down, or the Array Rebuilt


