Troubleshooting Foreign RAID Disks: Quick Fixes
In this article, we explore step-by-step solutions to tackle this issue effectively. From understanding the root causes to implementing troubleshooting techniques, we cover everything you need to know to resolve the “foreign” status of your dynamic RAID disk. Whether you’re a novice or an experienced user, this article provides valuable insights to help you overcome this challenge and ensure the optimal performance of your RAID system.
- What is a “foreign” disk?
- What can be done if the operating system identified a disk as “foreign”?
- Questions and answers
- Comments
What is a “foreign” disk?
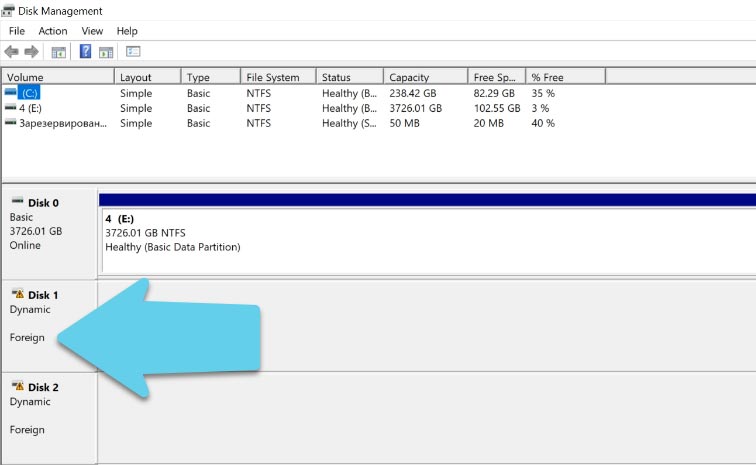
Basic disk is a disk that contains partitions, such as primary partitions and logical drives, and every logical drive corresponds to a specific area on the actual physical hard disk. Their partitions cannot be used in such operations as mirroring, combining into one volume, backing up file allocation table, and so on.
Dynamic disk is a special set of volumes developed to create RAID systems and storage spaces. That is, only dynamic disks can support all functions and operations required for disk arrays.
So when does Windows assign the foreign status to a disk?
- If you removed a disk from the RAID system or disk space and then connected this particular disk directly to the motherboard. The operating system won’t be able to “recognize” the whole array, so this disk will be assigned the “foreign” status.
- If you have several operating systems installed on your PC. A group of disks created in one operating system and then moved to another operating system or computer will be assigned this status, and it can’t be used properly.
- When one or several disks in a RAID system are broken, the operating system won’t be able to read all properties and settings of the array, so the remaining disks may be marked as “Dynamic Foreign”.
- Also, such problems may take place if something is incompatible with the current operating system. For example, when a disk created in Windows 7 is connected to Windows 10 or Windows 8.1.
What can be done if the operating system identified a disk as “foreign”?
Case 1. You removed a disk from the array and plan to use it as an ordinary hard disk.
You connect the disk directly to the motherboard, and it receives the status “Dynamic Foreign”.
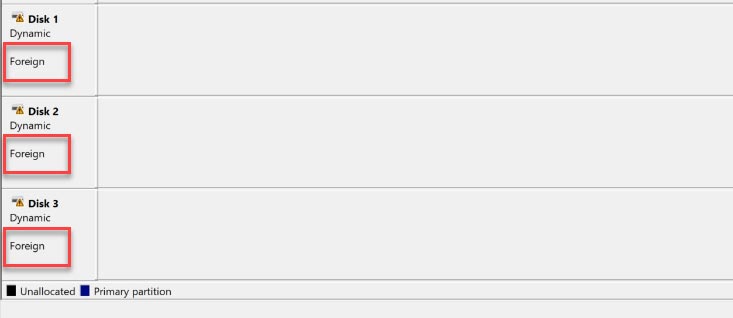
As the information stored on that disk is not important, you should import the disk with the “Disk Management”.
Right-click the necessary disk, select “Import foreign disks”, and click OK for the warning saying that all data will be lost. Now the disk receives the “basic” status, and it can be partitioned and used like any other disk.
Case 2. The disk is incompatible with another operating system
If you took a disk from one computer to another, but the data it contains is very important. In this case, you need to convert the “dynamic” disk into “basic” and have all information preserved. Use a specialized tool to do it, for example, TestDisk or Acronis Disk Director.
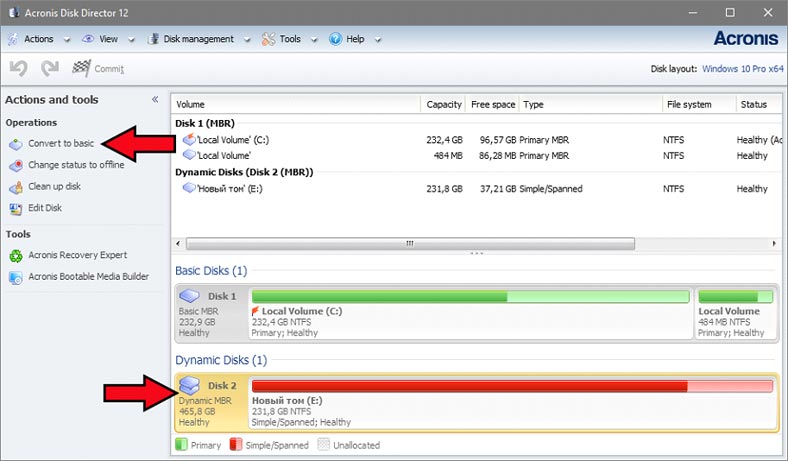
Start Acronis Disk Director, find the necessary disk on the list, right-click on it and select “Convert to basic”. After that, click “Commit pending operations”. Now the disk has been converted into “basic”, and all of its partitions and data are preserved.
Case 3. You moved a group of disks to another operating system or computer
When a group of disks is moved to another computer or added to a new operating system on the same PC, it will be marked as “foreign”. It can’t be used in full until you import it into the operating system. It should be imported exactly as it is with names preserved.
It is very important to import a whole group in one go; if you add only one disk to the operating system, you won’t be able to preserve the information.
Open “Disk Management”, right-click on one of the disks and select the option “Import Foreign Disks”.
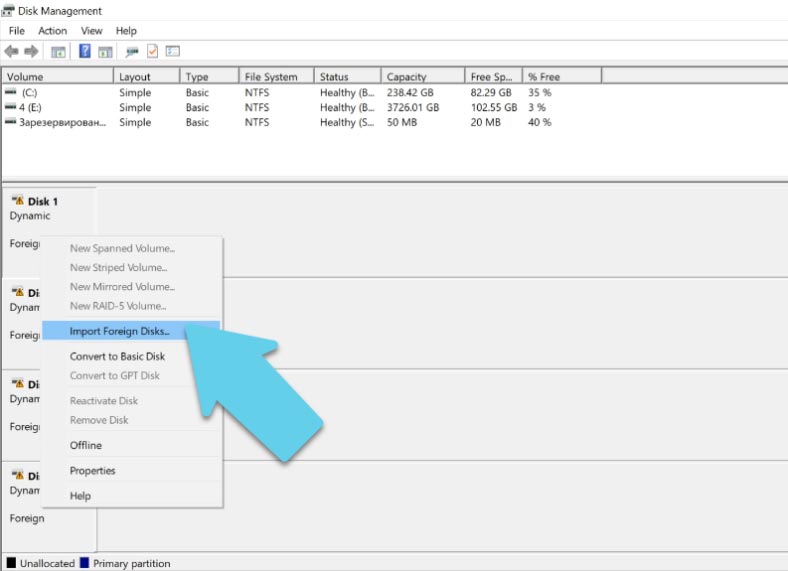
The new window will list all disks to be added, and the information on volumes to be imported. The data on partition status will help you understand if all disks from the group will be imported. If the import operation is performed properly, the partitions in these disks will have the status “Healthy”. If you see any other status different from “Healthy”, it means that not all disks from the group have been imported.
Case 4. When one or several disks in a RAID system are broken
If one or several disks break down, it will be impossible to import a disk group properly into the new operating system. At first, you should try to recover the disk group on the original PC or controller by replacing the faulty disk with an empty one and rebuilding the array. If there is no chance to do that, you can import the disks with integrated features of your operating system, but all the information will be lost.
To recover data from such disks, you’ll need specialized software tools able to rebuild the array or group of disks and extract all the data that is still intact.
Our product Hetman RAID Recovery will read the data from the damaged array automatically, or let you rebuild the array manually with the help of its RAID Constructor. You can watch a special video to see how to do it.

💽 Recovering RAID Volumes in Windows Storage Spaces (Parity, Striped, Mirrored, Composite) 💽



If you notice that a dynamic disk is marked as offline or missing you can take the following steps to enable it again:
Right-click on the Start menu and select Disk Management.
Right-click on the dynamic disk and choose Reactivate Disk. After that, the disk should be marked as Online.