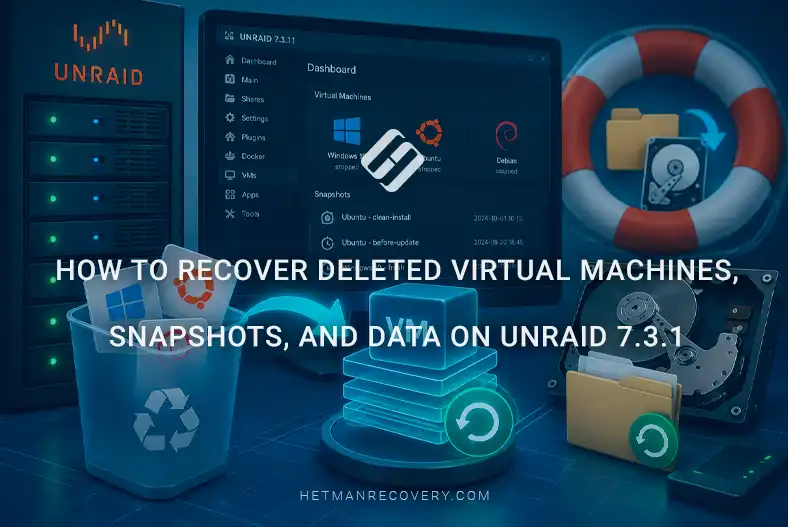
How to Recover Deleted Virtual Machines, Snapshots, and Data on Unraid 7.3.1
-
Author:
Vladimir Artiukh

-
Editor:
Oleg Afonin



In this article, we will examine typical scenarios of information loss on servers running Unraid OS, namely reliable software recovery of deleted virtual machines, their snapshots, and files from inside guest operating systems.
- Virtual machine and data storage features in Unraid
- Connecting Unraid array disks to a PC for recovery
- How to recover data
- Conclusion
- Frequently Asked Questions
- Comments
Deleting a virtual machine in Unraid 7.3.1 does not always mean irreversible data loss. Along with the virtual machine configuration, virtual disks, snapshot files, and other guest operating system data may remain physically unwritten and therefore still recoverable.
Virtual machines in Unraid can use different disk formats, including RAW, QCOW2, and IMG, and their data may be stored on array disks, cache drives, or other storage devices. Therefore, after accidental deletion of a virtual machine, it is important not to rush into creating a new virtual machine, formatting disks, or performing operations that may overwrite free space.
In this article, we will examine where Unraid stores virtual machine files, what happens to their disks and snapshots after deletion, and how to locate and recover guest operating system data. We will also walk through the process of finding virtual disks and recovering data from them using specialized data recovery tools.

How to Recover Deleted Virtual Machines, Snapshots & Guest OS Data on Unraid 7.3.1
Virtual machine and data storage features in Unraid
The data storage architecture in Unraid differs significantly from that of traditional arrays. Each drive in the system is fully independent and most often uses the XFS file system. This means that all hypervisor and virtual machine files are written entirely to one specific disk rather than distributed across all storage devices. This feature is a major advantage when recovering data.
By default, all virtual machine data is stored in a special system share named domains. This is where the hypervisor stores configuration files and the virtual disk images themselves.
Depending on the initial configuration, these may be fixed-size disks in .raw or .img format, or the widely used dynamic .qcow2 disks.
| Characteristic | .RAW | .IMG | .QCOW2 |
|---|---|---|---|
| Format type | Raw disk image | Raw disk image | QEMU Copy-On-Write 2 |
| Structure | Sequential copy of sectors | Sequential copy of sectors | Structured image with block tables |
| File extension | .raw | .img | .qcow2 |
| Whether the format is standardized | Yes, as the raw disk image format | No — .img is a generic image file extension | Yes, the format is defined by QEMU |
| Space allocation | Usually occupies the full specified size | Usually occupies the full specified size | Can be dynamic |
| Dynamic expansion | No | No | Yes |
| Snapshots | Not supported by the format itself | Not supported by the format itself | Supported |
| Copy-on-Write | No | No | Yes |
| Backup convenience | High, simple structure | High | Higher complexity due to internal structure |
| Performance | High | High | Usually slightly lower due to an additional abstraction layer |
| Overhead | Minimal | Minimal | Higher |
| Resistance to structural corruption | High — no complex metadata structure | High | Lower: metadata corruption may complicate access |
| Ease of data recovery | Very high | Very high | Depends on the state of metadata and the snapshot chain |
| Suitable for byte-by-byte analysis | Yes | Yes | Requires consideration of the QCOW2 structure |
| Snapshots and backing files | No | No | Yes |
| Usage in Unraid | Can be used as a VM disk format | Can be used as a disk image | A popular format for VMs and QEMU/KVM |
| Main advantage | Simplicity and performance | Versatility | Space savings and advanced features |
| Main disadvantage | Large size when the disk is created | There is no single .img specification | More complex structure and greater dependence on metadata |
The Hetman RAID Recovery program is ideally adapted to this specific environment. This allows us not only to locate and recover an accidentally deleted virtual disk file from the underlying XFS volume. The utility can automatically mount the found image directly in its interface, recognize its structure together with existing snapshots, and analyze their contents. This makes it possible to retrieve lost files directly from guest operating systems without first restoring and launching the virtual machine on the server.
Connecting Unraid array disks to a PC for recovery
Before starting the search for lost virtual machines and files, you must physically connect the drives from the server to your workstation.
- The best method is to connect the data disks directly to the motherboard through standard SATA ports. This will provide maximum read speed and stability during recovery.
- If there are not enough ports or you are using server-grade SAS drives, install the appropriate HBA expansion card. Be sure that it is set to IT mode so the operating system detects each disk as a separate device.
- As an alternative, you can use external USB enclosures or docking stations. However, keep in mind that the lower bandwidth of the USB interface may significantly increase the total time required to scan your volumes.

Working with disk images
There are situations in which it is physically impossible to connect all required drives at once because the computer lacks free ports. In such cases, you can use the sector-by-sector image creation feature. This is also a standard safety measure when working with disks that show signs of hardware failure.
An image is an exact byte-for-byte copy of your physical disk, saved as a regular file on another storage device with sufficient capacity.
You can connect the server drives one by one, create images from them, and then simply load all resulting files into Hetman RAID Recovery. The program will work with them exactly as it does with real physical devices.
To create such an image, launch the program, select the required drive, and click Save disk on the top toolbar. Then specify the save location.

It is important to remember that the size of the resulting file will fully correspond to the total capacity of the source drive regardless of how much data is stored on it. Make sure you have sufficient free space available.
After the save process is complete, open the main menu and select Mount disk.

From the available options, choose Raw disk images and open the files you just created. They will immediately appear in the general list of available devices.

The program is now fully ready to work with your data.
How to recover data
METHOD 1. Guest OS data recovery
In many cases, data loss occurs directly inside the guest operating system, for example due to accidental file deletion by a user or accidental formatting of a virtual disk. Recovery of such data usually requires complex manipulation of the virtual machine itself.
However, with Hetman RAID Recovery, you do not need to assemble the entire server array in advance or necessarily connect the parity disks. Because the virtual machine is stored as a folder containing image and configuration files, the program can analyze the underlying XFS file system and extract the required data directly from a single connected physical Unraid drive.
To begin, simply run Fast scan on the physical data disk connected to your computer where the virtual machine was stored in the XFS file system.

After locating the required directory, use the Recovery option and be sure to save the entire folder of your virtual machine, which contains the virtual disk images, snapshot files, and configuration files.

After successfully saving this data to a local drive on your computer, use the Mount disk function and mount the saved folder as a whole using the QEMU option. The program will process its contents and open the virtual disks for further access.


To find lost files inside the guest system, select one of the recovered virtual disks that was previously created and attached to this virtual machine, and run Fast scan on it. This quick algorithm is usually sufficient for fast detection and recovery of deleted objects. Wait for the analysis to complete.

The program will reconstruct and display the familiar directory tree of your guest system. Navigation here is straightforward: go to the required folder on this virtual disk, select the accidentally deleted user files, and use the Recovery function.

For safety, be sure to specify a save path on a separate secure local hard drive on your computer.
METHOD 2. Recovering data from snapshots
The snapshot creation mechanism is an extremely useful feature for safe operation of virtual machines in the Unraid environment.
It is important to understand that the system creates external snapshots, that is, so-called delta files. They are stored directly in the working directory of your virtual machine, record all new changes, and work in tight conjunction with the main virtual disk images.

Since we have already analyzed the disk and fully saved our virtual machine folder in the previous step, we can proceed directly to recovery from the snapshot. To do this, use the Mount disk function with the QEMU option on the toolbar.

For the program to read the structure correctly and take into account the technical relationships between the base disks and the delta files, select and mount the saved folder with all files as a whole. The program will process its contents and display the list of available virtual storage devices.

As you can see, there are base images and three corresponding files of our single snapshot, since it was created simultaneously for three virtual disks of this machine. Select the snapshot file you need from these three and start scanning it.

After the analysis is complete, you only need to open the found structure, locate the data that was current at the time the snapshot was created, and recover it successfully to a secure local drive.
METHOD 3. Recovering deleted virtual machines
Complete deletion of the virtual machine itself is the most critical data loss scenario.
Most often, this happens due to simple human error: accidental deletion through the Unraid web interface or careless actions by an administrator while working directly through the server console or terminal.
As a result of such actions, large virtual disk files disappear and are often heavily fragmented. In such cases, recovering the image file itself, such as .qcow2, as a single whole may be ineffective. However, Hetman RAID Recovery offers a much more reliable approach. Since the user data still physically resides on the drive, the program can locate it directly, bypassing the damaged structure of the virtual container.
To do this, select the required XFS volume on your server and immediately run Full scan.

When configuring the parameters of this deep analysis, you must select the file system of your guest OS. Since our deleted virtual machine was running Windows, we focus on searching for the NTFS structure and keep it enabled. With this setting, the algorithm will thoroughly analyze the disk space, find remnants of the guest system file table directly among the XFS blocks, and allow the required information to be extracted. This process may take some time depending on the size of the drive, so you should wait until the scan is fully complete to obtain the most accurate result.

After the analysis is complete, the program will reconstruct the intact directory tree of your deleted virtual machine. The recovered structure will be displayed in a familiar and understandable form, which greatly simplifies finding the required data. You only need to open the appropriate folders, select the important user files, and use the Recovery function to save them safely to another local drive on your computer.

Conclusion
Deleting a virtual machine in Unraid 7.3.1 does not necessarily mean permanent data loss. Even after a VM is deleted, its virtual disks, snapshots, and configuration files may remain on the drive until the corresponding space is overwritten with other data.
During recovery, the first priority is to stop any write operations to the storage where the virtual machine files were located. Do not create new VMs, format drives, or run processes that may alter the data structure. The less new data is written to the disk, the higher the probability of successful recovery.
Special attention must be paid to the virtual disk format. RAW and IMG have a simple structure and can be analyzed directly as disk images. QCOW2 has a more complex structure, supports dynamic space allocation, Copy-on-Write, and snapshots, so its internal metadata and possible dependencies between files must be taken into account during recovery.
Specialized recovery software can be used to search for lost data by analyzing physical disks, virtual disks, and guest operating system file systems. The success of the procedure depends on whether the data has been overwritten, how damaged the file system is, and whether the required virtual disk metadata has been preserved.
To minimize the risk of data loss in the future, it is recommended to regularly create backups of virtual machines, important VM disks, and snapshots, and store them on separate media. For mission-critical systems, the 3-2-1 rule is appropriate: three copies of the data, on two different types of media, with one copy stored separately from the primary system.
Therefore, after accidental deletion of a virtual machine on Unraid, the main priority is not to write new data to the source storage, correctly identify the location and format of the VM disks, and perform recovery to a separate drive. This maximizes the chances of restoring the virtual machine, its snapshots, and guest operating system data.