How to Recover a MySQL Database After Deleting Files or a Partition in Ubuntu: RAID 6 and LUKS2
-
Author:
Vladimir Artiukh

-
Editor:
Oleg Afonin



Deleting files or an entire disk partition in Ubuntu can lead to critical data loss, especially if a MySQL database is running on the server. The situation becomes much more complicated when the storage system is built on a RAID 6 array and the data is additionally protected with LUKS2 encryption. In such conditions, standard recovery tools do not always produce the expected result, and careless actions may permanently destroy the information. In this article, we will review possible data loss scenarios, the specifics of working with RAID 6 and LUKS2, and the process of recovering a MySQL database after accidental deletion of files or a disk partition.
- Preparing the test environment and MySQL database
- Connecting the drives for analysis
- How to recover a deleted MySQL database from RAID 6 + LUKS2
- STEP 1. Automatic detection of RAID 6 and LUKS partitions
- STEP 2. Unlocking and recovering deleted files
- STEP 3. Restoring the database from an SQL dump
- STEP 4. Restoring the database from physical MySQL files
- STEP 5. Restoring table structure from ibd files
- STEP 6. Attaching the recovered ibd files
- Conclusion
- Frequently Asked Questions
- Comments
MySQL database files and their backups on a Linux server can become inaccessible for various reasons: accidental file deletion, formatting or deletion of a partition, file system corruption, RAID array failure, disk failure, or RAID controller failure. The situation becomes even more complicated if the data is stored on an encrypted LUKS2 partition.
Hetman RAID Recovery helps reconstruct RAID array structures, locate lost partitions, unlock LUKS2 if the password is available, and recover database files and SQL dumps.
We will demonstrate the program on a computer running Windows. However, Hetman RAID Recovery is also available for Linux and macOS.

How to Recover Oracle Database 26ai from LVM RAID 6 + LUKS2 via SSH
Preparing the test environment and MySQL database
For testing, we used a Dell PowerEdge R710 server with a PERC H700 controller.
| Parameter | Specification |
|---|---|
| Server model | Dell PowerEdge R710 |
| Form factor | Rack 2U |
| Processor | Up to 2 × Intel Xeon 5500/5600 series |
| RAM | DDR3 ECC, up to 288 GB (18 slots) |
| RAID controller | Dell PERC H700 |
| RAID type | Hardware RAID |
| Supported RAID levels | RAID 0, 1, 5, 6, 10, 50, 60 |
| Array configuration | RAID 6 |
| Drive interface | SAS/SATA, up to 6 Gbit/s |
| Number of drive bays | Up to 6 × 3.5″ or 8 × 2.5″ depending on the configuration |
| RAID controller cache | 512 MB or 1 GB (depending on the model) |
| Cache protection | BBU — battery-backed cache protection |
| Operating system | Ubuntu Server |
| Data encryption | LUKS2 (at the Linux level, not on the RAID controller) |
| Database management system | MySQL |
| RAID 6 fault tolerance | Allows simultaneous failure of up to two disks |
| Diagnostic tools | Dell OpenManage, MegaCLI, StorCLI (if compatible) |
To provide the operating system with direct access to each physical disk, six single-disk RAID 0 arrays were created on the controller — one for each disk. Ubuntu Server 24.04 was installed on one of them, and the other four were combined into a software MD RAID 6 array through Cockpit.
A GPT partition table and three partitions were created on the array, with ext4 as the file system and LUKS2 encryption selected for each one.

The mysql-data directory was placed on the third partition and contained data from the test company_db database, system files, and MySQL logs. MySQL version 8.0.46 was used.

The database itself contained the customers, products and orders tables, as well as a view, a stored procedure, and a function.

The database backup was created in MySQL Workbench as an SQL dump and saved in the mysql-backups directory.
Before testing, the mysql-data and mysql-backups directories were copied from the third partition to the second. Then the second partition was deleted through Cockpit, and the database files and SQL dump were deleted from the third partition using Shift + Delete, bypassing the Recycle Bin. This prepared two scenarios: recovering files from a deleted partition and recovering deleted files from a preserved partition.

Connecting the drives for analysis
In our case, the disks participating in RAID 6 were connected to a Windows computer through a USB dock station, and Hetman RAID Recovery was launched for analysis.
In addition to working with physical disks, the program supports analysis of full byte-by-byte disk images. Such images can be created directly in Hetman RAID Recovery using the Save Disk function and stored on another healthy drive.

This is especially useful if the disk is unstable, has bad sectors, or produces read errors. Creating an image preserves the readable data and allows the copy to be scanned later, reducing the number of repeated accesses to the problematic disk.
If the disks remain on the Linux server and are readable, they can be analyzed remotely. To do this, connect to the server via SSH in Hetman RAID Recovery and gain access to its block devices.
How to recover a deleted MySQL database from RAID 6 + LUKS2
STEP 1. Automatic detection of RAID 6 and LUKS partitions
Immediately after launch, Hetman RAID Recovery automatically detected the MD RAID 6 configuration and reconstructed its structure for analysis.

The right panel displays the array’s main parameters: RAID type and state, block order and size, as well as the list of participating disks with their sequence, offsets, and sizes.

On the assembled array, the program detected three partitions, including the previously deleted second one, and identified LUKS encryption on all three. Before entering the password, their file systems are not displayed — the partitions must be unlocked for further analysis.
The second partition is shown in the interface as unallocated space marked LUKS. This means the program recognized the metadata of the encrypted container in the location of the deleted partition.

STEP 2. Unlocking and recovering deleted files
To start the analysis, double-click the required partition. Since it is encrypted with LUKS2, the program will prompt you to enter a password or specify a key file. Enter the password and click Unlock.

First, select Fast Scan. Wait for the scan to complete, after which the program will open the structure of the found directories. In our test, the quick scan found the required files on the deleted partition.
If the required data is not found in your case, return to the analysis type selection and run Full Analysis, specifying the EXT2/3/4 file system.

Review the scan results. In our case, the program displayed the SQL dump backup1.sql, the company_db directory, and the MySQL table files with the .ibd extension. The contents of the SQL dump can be checked in the preview window.

Select the files and folders you want to recover, then click Recovery. Choose a save method, specify another physical disk, and keep the option to restore the directory structure enabled.
Do not save the found files to the same drive from which they are being recovered, to avoid overwriting other lost data.

STEP 3. Restoring the database from an SQL dump
The simplest way to restore the database is to use the recovered SQL dump. It contains commands to create the database structure and restore the data as of the time the backup was made. If the appropriate export options were selected, the dump will also include views, procedures, and functions.
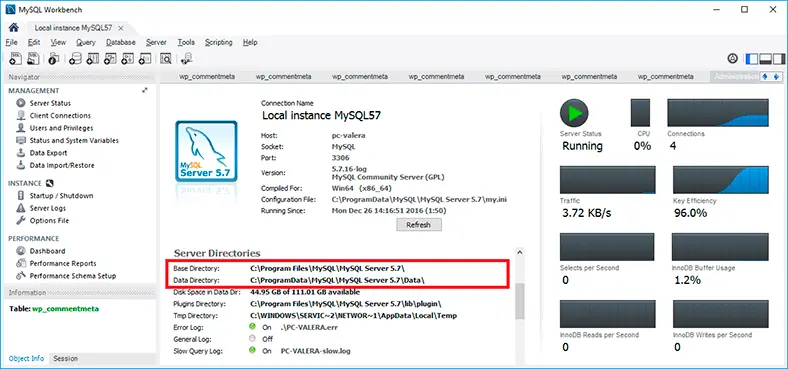
Launch MySQL Workbench and connect to the MySQL server. Open the Server — Data Import menu, select Import from Self-Contained File, and specify the recovered SQL file.

If the entire mysql-data directory with MySQL system files was lost, you must first restore the server’s functionality or prepare a new MySQL instance. Only then can the dump be imported through Workbench.
Select the target schema or create a new company_db database, then click Start Import. Wait for the operation to complete and check the log for errors.

Refresh the schema list. The database should now contain the customers, products, and orders tables. Open them and verify the records.

STEP 4. Restoring the database from physical MySQL files
If there is no suitable SQL dump, but Hetman RAID Recovery managed to recover the database directory with table files, you can attempt a physical recovery.
In our case, the company_db directory retained the customers.ibd, products.ibd, and orders.ibd files. Each of them contains the data and indexes of the corresponding InnoDB table.

Simply copying these files to the MySQL directory is not enough. The new server does not yet have definitions for the corresponding tables in the data dictionary. Therefore, recovery consists of two stages: first, you need to recreate the table structure, and then attach the recovered .ibd files to it.
To recover, prepare a working server with the same MySQL version. Connect to it through Workbench and create an empty database.

If the original SQL script with the structure is preserved, run the CREATE TABLE commands from it. The tables must exactly match the original ones, including column types, keys, indexes, collation, and row format. There is no need to run the data insertion commands — at this stage, the tables must remain empty.
STEP 5. Restoring table structure from ibd files
If the original SQL script is not available, you can attempt to recover the table structure from the .ibd files. In MySQL 8.0, they contain SDI — the data dictionary metadata. The ibd2sdi utility is used to read it.
Run it for each recovered file and save the results in JSON format. In our case, we obtained metadata from customers.ibd, products.ibd, and orders.ibd, and then used jq to inspect the definition of the customers table.

The metadata can include the table name, MySQL version, storage engine, collation, and tablespace parameters. It also contains the column definitions. Information about primary and unique keys, secondary indexes, and relationships with other tables is stored separately.
The resulting JSON can be analyzed manually in a text editor. Based on the detected parameters, special scripts and converters can automatically generate preliminary CREATE TABLE commands. For a large number of tables, this significantly speeds up structure recovery.

STEP 6. Attaching the recovered ibd files
In Workbench, temporarily disable foreign key checks and execute the ALTER TABLE … DISCARD TABLESPACE command for each created table. This detaches the created empty tablespace and prepares the table for attaching the recovered file.

After that, copy the corresponding .ibd files to the database directory on the prepared server. After copying, do not forget to assign the mysql owner to the files and set the required access permissions.

Return to Workbench and run ALTER TABLE … IMPORT TABLESPACE for each table. Warnings about missing .cfg files are not critical: MySQL will continue the import without automatic structure validation. MySQL will register the recovered tablespaces and attach the data and indexes to the previously created table definitions.

After a successful import, re-enable foreign key checks. Refresh the schema list and verify the number and contents of records using SELECT queries.

The .ibd files make it possible to restore tables, their data, and indexes. However, views, procedures, and functions are not stored as separate files in the company_db directory. If they are not included in the SQL dump, these objects must be recreated manually.
After verifying the restored database, we recommend creating a new backup in SQL dump format.
Conclusion
Using Hetman RAID Recovery, it was possible to automatically reconstruct the structure of Linux MD RAID 6 and detect and unlock LUKS2 containers using the known password. A quick scan found the required files both after their deletion and after the deletion of an entire partition.
The recovered SQL dump can be imported through MySQL Workbench, restoring the database structure and data to the state at the time the backup was created. If no suitable dump is available, individual InnoDB tables can be recovered from .ibd files by first recreating their structure.