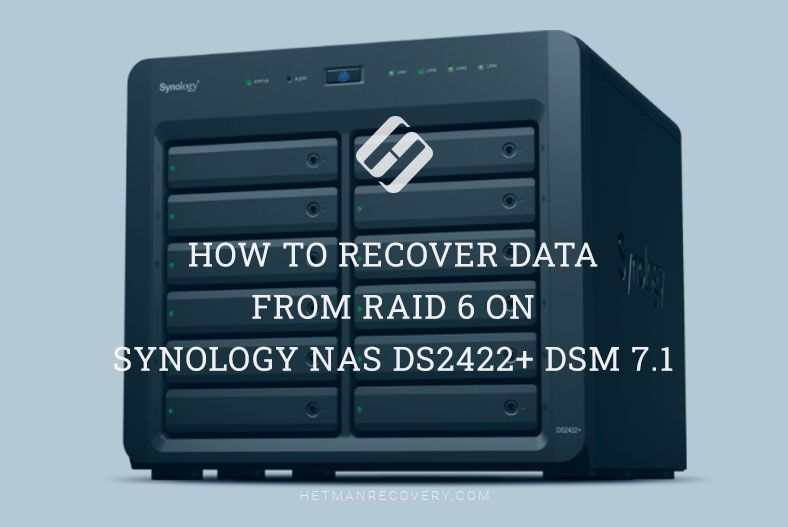
Pro Tips: Synology NAS DS2422+ DSM 7.1 RAID 6 Data Recovery Guide
Discover effective methods to recover data from RAID 6 on Synology NAS DS2422+ running DSM 7.1 in this comprehensive guide. Whether you’re encountering data loss due to RAID failure or seeking proactive measures, this tutorial provides expert insights and practical solutions. From diagnosing issues to implementing recovery strategies, we’ll equip you with the knowledge and tools necessary to retrieve your valuable data and mitigate downtime effectively.
- How to create a RAID or change RAID level on a Synology device
- How to recover data from the recycle bin of the shared folder
- How to recover data from Hyper Backup
- How to recover data from RAID 6 on inoperable NAS Synology DS2422+
- Conclusion
- Questions and answers
- Comments
Synology is a well-known manufacturer of NAS storage systems. Typically, such devices as Synology DiskStation and RackStation NAS are easy to use and can be found in various RAID configurations, including RAID 0, RAID 1, 5, 6 and RAID 10. They also support their own storage configurations, SHR and SHR-2.
In the work of any network-attached storage, there may be certain issues that could result in loss of data. Quite often, users may accidentally remove important files, or there can be various problems that block access to data or cause data loss. Possible scenarios also include hardware breakdowns, wrong configuration, firmware issues and so on. If you lose access to files, the first rule is to stay calm and not to panic. Any wrong action at this stage often leads to losing all the information.
As is the case with any NAS, recovering data is never easy. To restore accidentally removed information or retrieve files from an inoperable NAS, you need a specialized software tool.
| Number | Program Name | RAID 6 Support | Advantages | Disadvantages |
|---|---|---|---|---|
| 1 | Hetman RAID Recovery | RAID 6 |
– High data recovery rate – Automatic RAID configuration detection – Support for various RAID configurations – User-friendly interface |
– Trial version has limitations on recovered data volume |
| 2 | R-Studio | RAID 6 |
– Support for many file systems – High recovery accuracy |
– Complex interface for beginners |
| 3 | DiskInternals RAID Recovery | RAID 6 |
– Specializes in RAID recovery – Good support for RAID configurations |
– Lack of support for some rare RAID configurations |
| 4 | UFS Explorer RAID Recovery | RAID 6 |
– Support for various storage systems – Good support for RAID and virtual machines |
– High price for home users |
| 5 | EaseUS Data Recovery Wizard | Not supported |
– Easy to use – Support for various data storage devices |
– Limited RAID configuration support |

How to Recover Data from RAID 6 on Synology NAS DS2422+ DSM 7.1
How to create a RAID or change RAID level on a Synology device
For starters, let’s explore how to create a RAID and how to change its level on this specific network storage device. The process of building it will help you understand the working principle behind RAID and it will make the recovery process easier.
When new hard disks are connected to NAS, you should install the operating system and run initial setup.
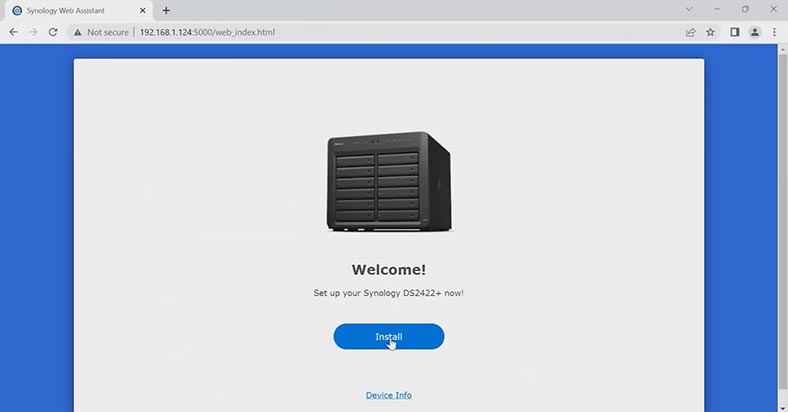
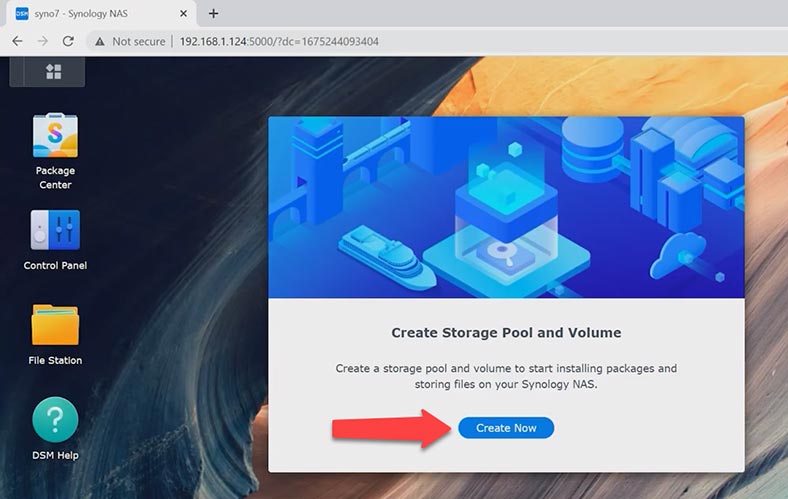
After installation and startup, the operating system will suggest configuring the settings for a new storage pool.
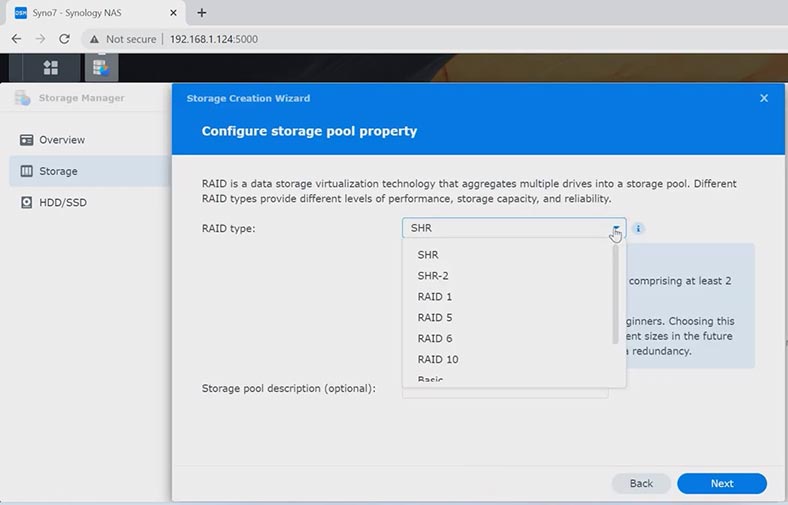
At this stage, choose your RAID level.
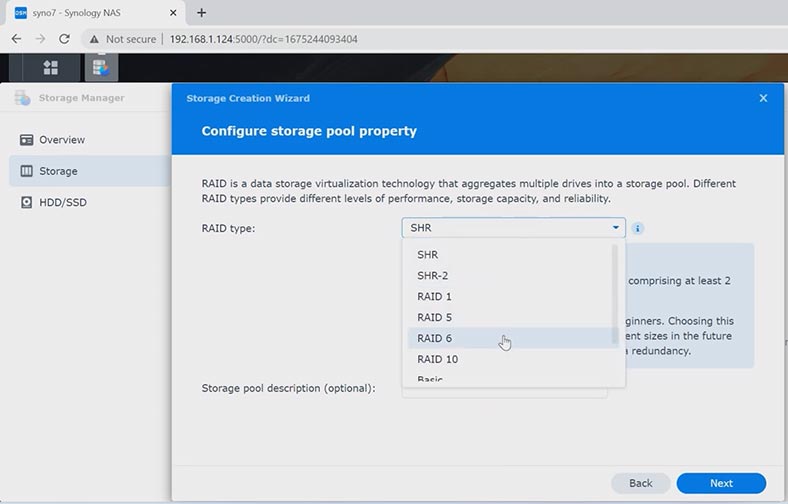
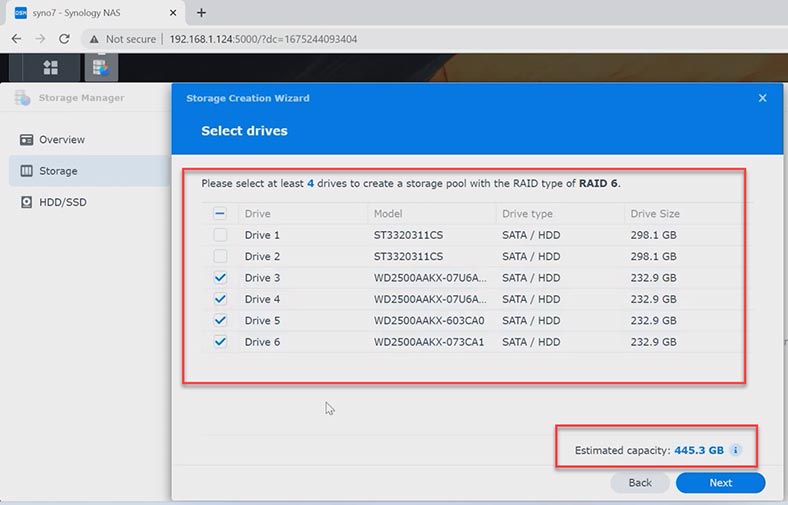
You should choose the RAID level, select the disks to include into the new array, the capacity of the new storage, and the file system.
Check all the settings and click Apply to confirm them.
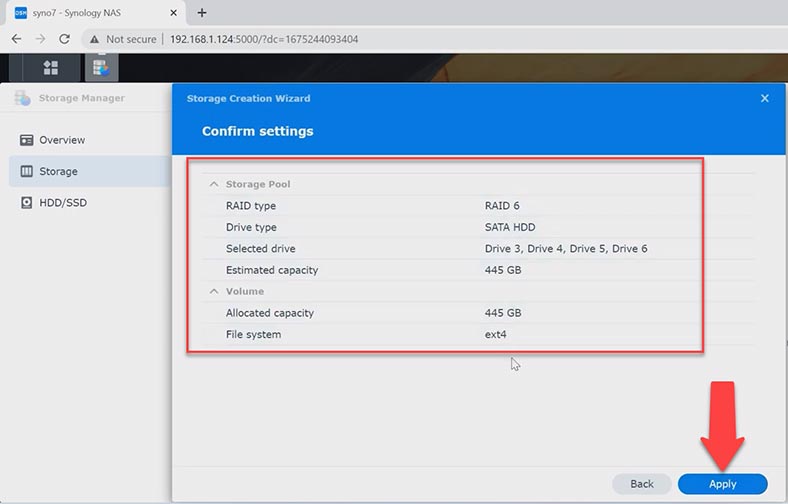
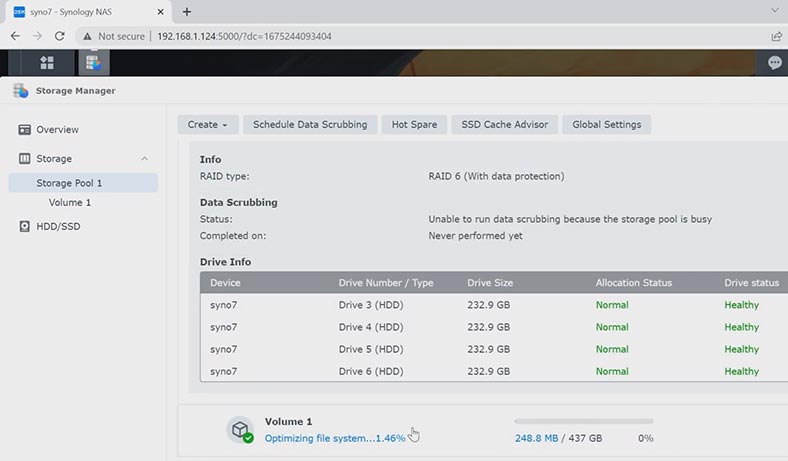
After that, the process of building and optimizing the array begins. When it’s over, you will get a new volume with the size you have set.
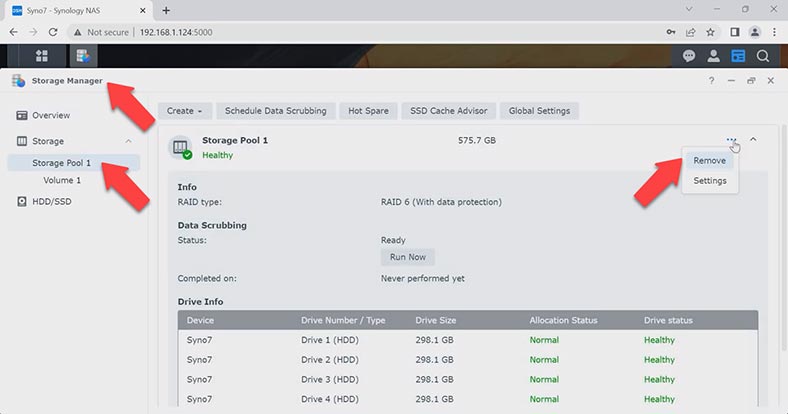
To change the RAID level, you need to remove the existing volume. As a result, all data will be erased from the disks, because a disk array cannot be rebuilt without formatting its hard disks. To do it, open the menu – Storage manager – Storage pool. On the right, click on the three-dots’ button and choose Remove, and then confirm the action. This will delete both the pool and the storage volume, as well as all files from the hard disks.
After that, click Create and Start to create a new array. When you do it, choose the required RAID level, click Next, select the disks, capacity and file system, then click Next and Apply.
As a result, you’ll get a new volume. Now you can create a shared folder, configure access permissions, and add your data.
How to recover data from the recycle bin of the shared folder
If you accidentally deleted important data from the shared folder, you can recover it from the recycle bin. By default, the recycle bin option is activated when you create a new shared folder. It will help you restore accidentally deleted files without using any additional software.
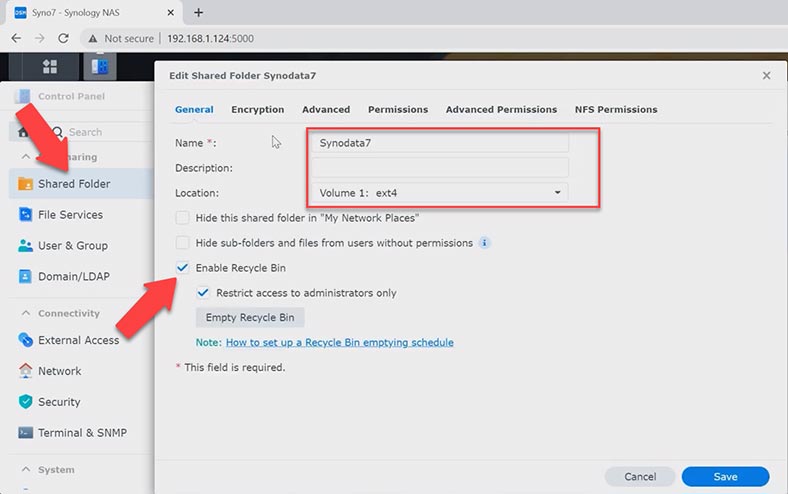
To see if this option is enabled, open Control Panel – Shared folder, select the folder from which the files were deleted and click on the Edit button. Make sure that the box next to Enable Recycle Bin option is checked.
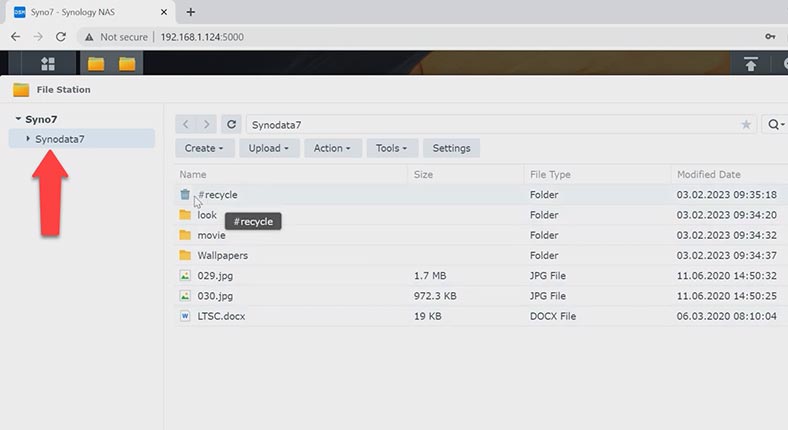
To restore your files from the folder, open File Station and browse to the folder from which important files were removed. After that, open the #recycle subfolder.
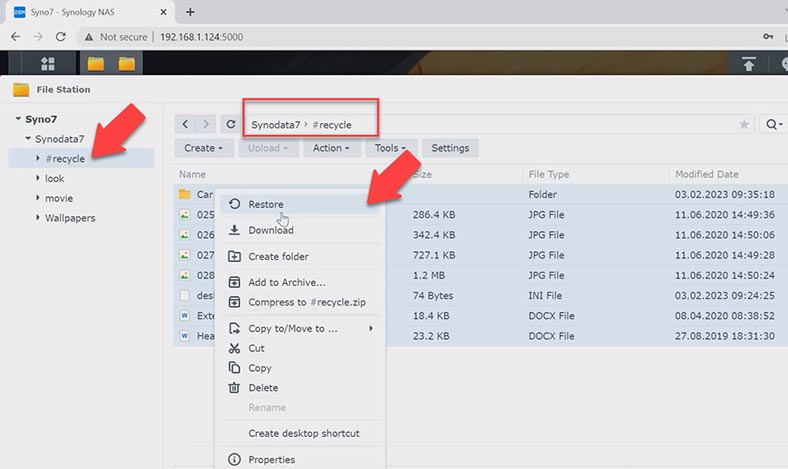
Find the items that were deleted, right-click on a specific file or folder and choose – Restore and overwrite, and all the files will be restored to their previous locations.
How to recover data from Hyper Backup
If the recycle bin option is disabled for this shared folder, try recovering the deleted data from a backup. By default, the backup tool is not installed. If you have already installed and configured the backup utility, you can use it for recovery. In the Package Center, you can find lots of backup apps. I’ll show you how to configure backup and restore deleted files with the tool called Hyper Backup.
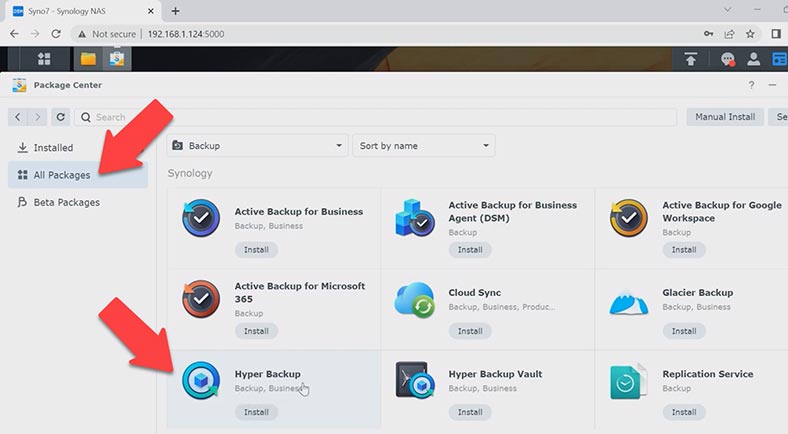
This utility lets you back up various types of data on Synology NAS, such as system configurations, apps/packages and shared folders, and do it either on schedule or manually. Data backups are stored in their own database which can be easily viewed, restored or downloaded. With Hyper Backup, you can recover package settings and data as of some previous date.
If you have already configured backup, you can restore the required data from a backup file. To do it, go to the DSM menu and run Hyper Backup. In the program’s window, click Restore. Select Data from the list.
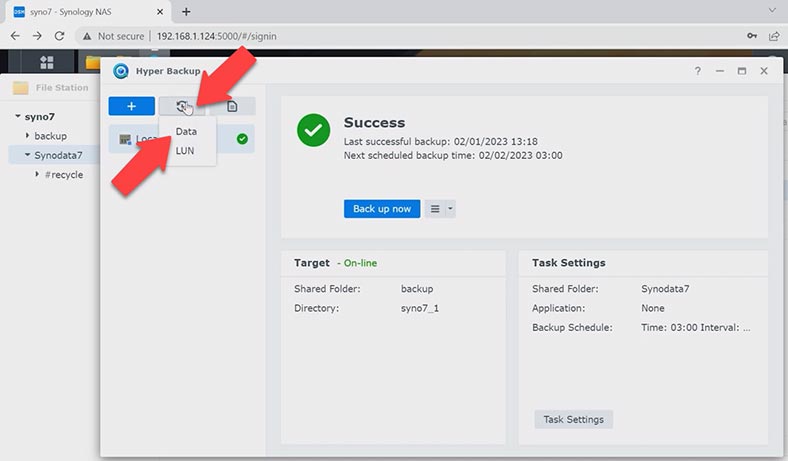
Now choose a backup and where you want to restore the data. When the process is over, the folder status will change to the status it had on the date of the backup.
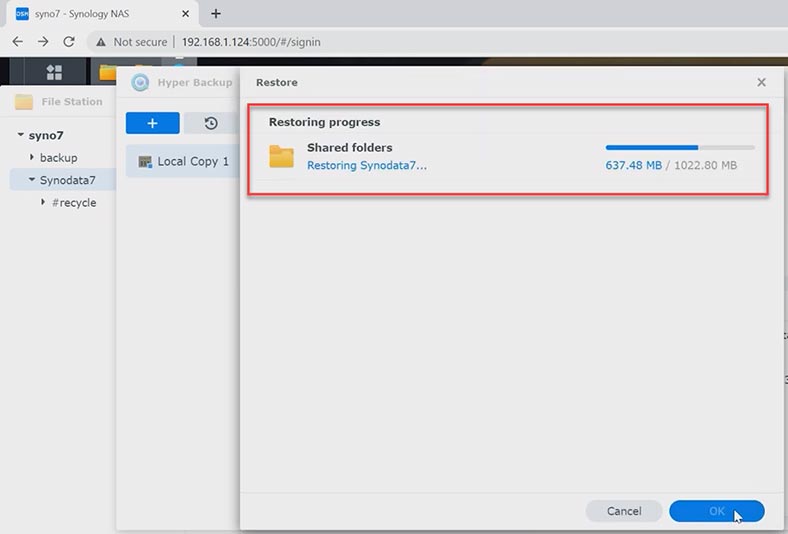
How to recover data from RAID 6 on inoperable NAS Synology DS2422+
If the recycle bin option is inactive on your device, if the backup schedule is not configured, if there is no access to the hard disks within the array, or if the RAID is damaged because your NAS is down, you can still have your files back as long as you use a data recovery tool. Instead, download, install and run Hetman RAID Recovery. It will rebuild the damaged RAID with the available hard disks, so that you’ll be able to retrieve the remaining data.
To start the recovery process, take the drives out of the storage device and connect them directly to the motherboard of a Windows computer. If your motherboard lacks SATA ports to connect all the disks, or you have a similar problem with power connectors, you can solve the problem by using special expansion cards and adapters.
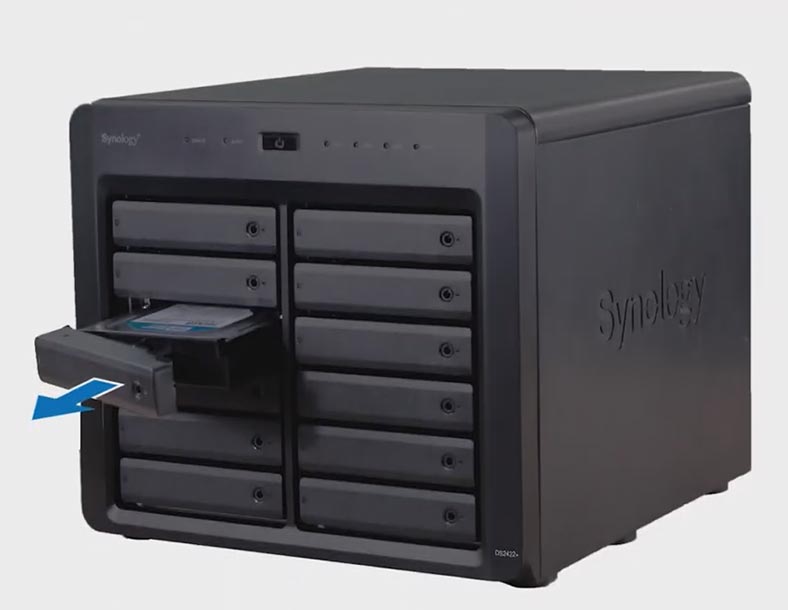
When taking the hard disks out of the NAS, don’t forget to mark them with numbers so that you will put them back into your NAS in the same order they used to have. Also, you will need some space to save the data – and it should be of the same capacity as the data you’re trying to recover. Hetman RAID Recovery supports all popular file systems and RAID types. It doesn’t matter if your Synology NAS uses a conventional RAID or a Synology Hybrid RAID configuration, the recovery tool supports both types.
The operating system may suggest initializing of formatting the hard disks for further use when they are connected to the computer. Never agree to that. If you do, there is a high risk of losing any remaining information, and it can make the recovery process much more complicated, either.
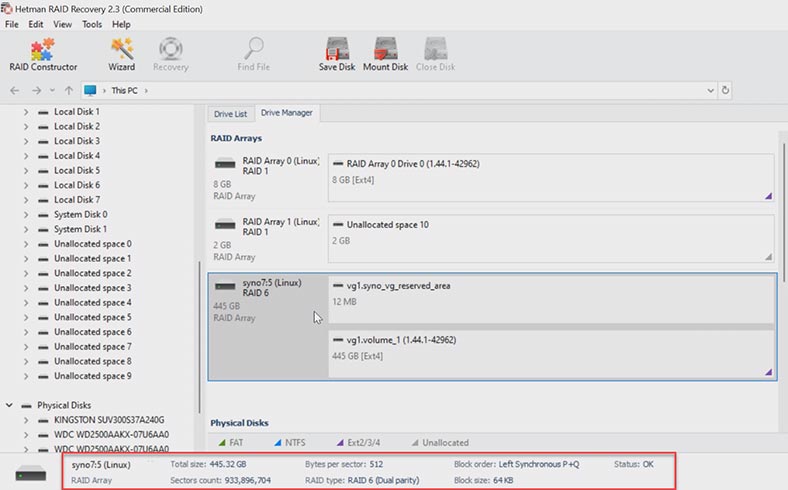
To have your files back, start disk analysis. Right-click on the volume and choose Open. After that, choose the scan type – Fast scan or Full analysis. If the NAS is down, but the program manages to rebuild the RAID correctly, a Fast scan is enough.
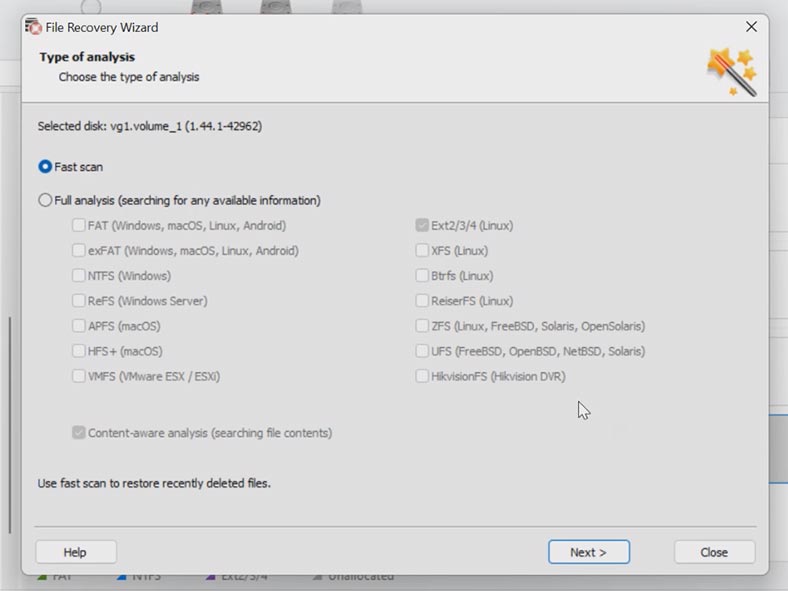
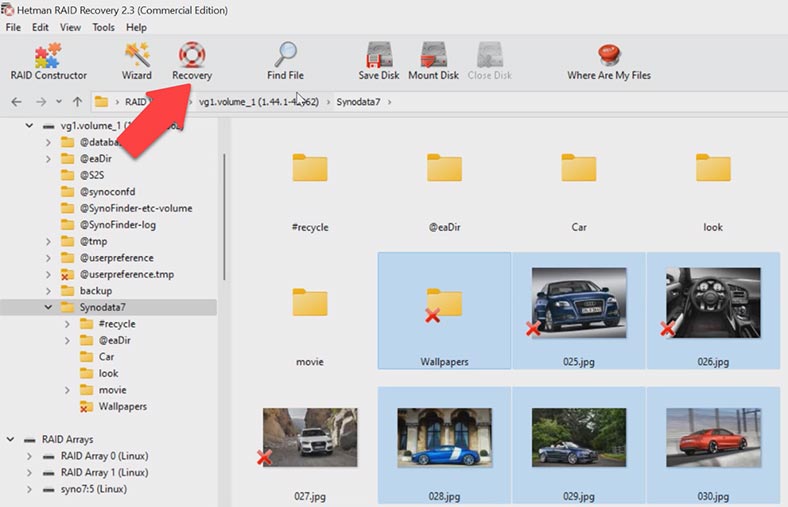
When the scan is over, open the folder where the lost files were stored. Previously deleted files are marked with a red cross. You can use the preview window to see the contents of all files, including videos and documents. Select all the items you want to recover and click the Recovery button. Choose the directory where you want to save the files (the disk and the folder), and click Recovery again. In the end, you will find the recovered files in the folder you have chosen.
To ensure more safety for working with damaged drives, this program has a feature to scan disk images instead of actual HDDs. This will reduce the disk load and extend their lifespan.
Conclusion
Summing up, if you have a backup file at hand, you can easily recover accidentally deleted files, but if your storage device is down, there’s Hetman RAID Recovery to help you.


