File History in Windows: How to Use and Recover Data
Discover the essential guide to recovering data from File History in Windows in this comprehensive tutorial. If you’ve encountered data loss or need to retrieve files from a File History backup, don’t worry. We’ve got you covered with expert solutions and step-by-step instructions to recover your data effortlessly. We walk you through the process of recovering data from File History in Windows and ensuring the safety of your valuable files.
- File History
- What directories are included into File History
- Where File History can be stored in Windows 10
- How to switch on File History in Windows 10
- Advanced settings of File History
- File recovery in Windows 10 with File History
- Questions and answers
- Comments
File History
Yet in fact this is not a solution to organize classic-style data backup but rather a service of keeping track of user’s file history (as we can see form the name), and the users who need to save an entire system image still can use Windows Backup). When elaborating the technology of File History, Microsoft developers wanted to simplify and automate the process of creating backup copies and restoring user data as much as possible.Theoretically, a user would just click a magic button and an automatic backup of all his data would start without his interference.

How to Set Up and Configure File History in Windows 10, 8 📝📁💻
The new system service, File History Service, is in charge of File History operation. It should be noted that general performance of File History is rather high, because instead of complete scanning of all files and directories for changes (as it is the case with most backup products), the service just addresses the NTFS change journal and lists the modified files which need to be copied.
In this article, we will find out how to turn on and adjust the function “File History” in Windows 10, and will learn a method to restore files from a backup copy.
What directories are included into File History
File History copies automatically the following directories:
- All libraries;
- Desktop;
- Contacts;
- All bookmarks (Favorites);
- Contents of Microsoft SkyDrive (if adjusted).
Unnecessary libraries or folders (for example, with films) can be excluded from File History in order to save space in the backup storage.
There is a naturally expected question: can I add a directory of my own to the list of the directories for backup? Curiously enough, the answer is no. So you will have to organize your data into libraries (create new ones or add directories to the already existing libraries), or store everything in your profile.
Further on, according to the set schedule and in the background mode, the service File History starts backup copying of selected elements and check files for changes, and if there are some changes, it will record them to a backup copy onto an external device. I.e. the archive receives only modified data and directories, instead of copying everything every time (because this is inexpedient).
Where File History can be stored in Windows 10
In Windows 10 backup file copies can be stored in the following storage types:
- Internal hard disk – storage is possible in another partition of the same disk where the system is installed, or in any partition of another internal hard disk (it is more preferable in terms of data safety in case the main hard disk fails);
- External hard disk;
- USB drive/disk;
- Network folder – for example, a directory in a server or a home-based NAS.
How to switch on File History in Windows 10
The function File History in Windows 10 is switched off by default, that is why to begin the process of data backup the service File History should be activated. Naturally, we need a device where the data will be backed up to (see the variants above). Connect the selected device to a computer with Windows 10.
- Go to File History in Control Panel;
- Click Turn on.
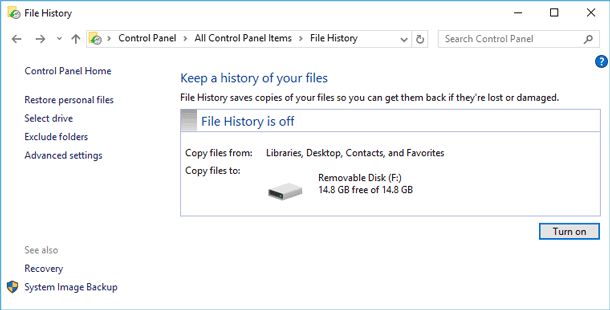
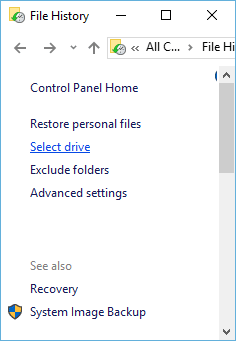
If there is a dedicated NAS or just a network folder in a server, it can also be used for storing backup copies. To do it, in the left panel choose the item Select Drive and in the window that appears click the button Add Network Location, where you specify UNC path to the network folder where the backup copy should be stored.
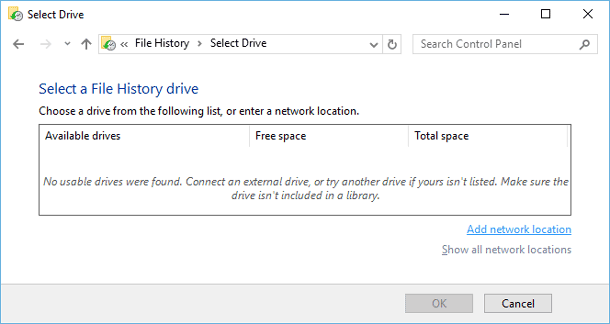
Immediately after activation of the function, backup copying of user data will begin (by default, it is performed every hour).
Advanced settings of File History
You can run a finer adjustment of data backup in advanced settings of File History, which you can access by clicking Advanced Settings in the left panel.
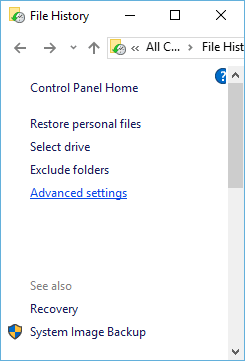
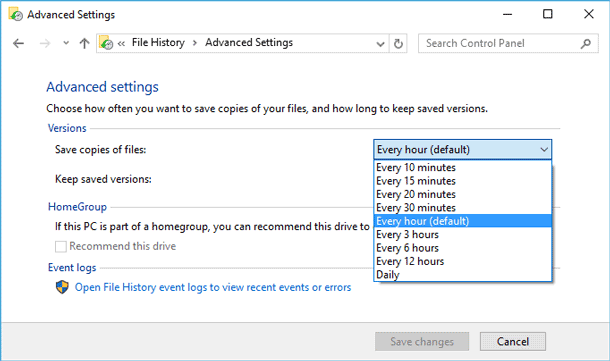
There, you can set:
- How often backup should be performed – Save copies of files;
- The size of offline cache – Size of offline cache – the default figure is 5%, which means that if an external storage is not available, the interim storage for File History will be the user profile, and for that purpose, no more than 5% of the system volume can be used (the minimal limit is 2%, and the maximal limit is 20%);
- How long old file versions should be kept – Keep saved versions.
File recovery in Windows 10 with File History
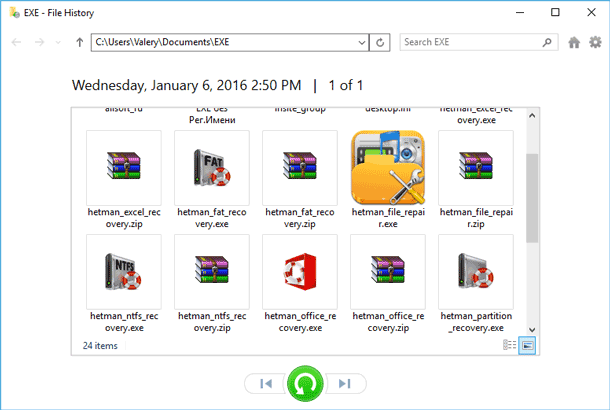
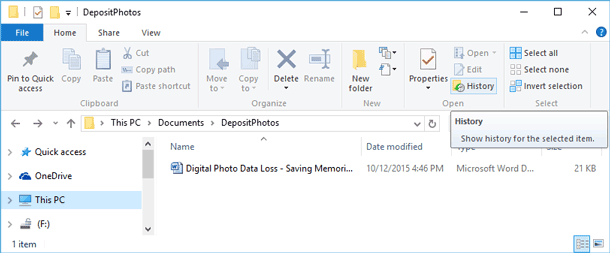
After the function File History is activated, backup of personal data begins in the background mode and automatically, in accordance with the set schedule. If you delete accidentally an important file or you wish to return to an older version, you will be able to restore it easily. With the help of Windows Explorer go to the directory where the file for restoration used to be, and in the upper panel click on History (the same can be done by going to Control Panel -> File History and clicking Restore Personal Files in the right panel).
In the window that opens, all files (directories) from the last available copy will be represented, and with the help of navigation arrows you can go to a specific time/date of creation of a certain backup copy.

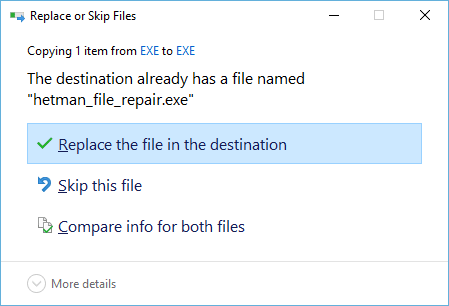
Select the file or folder you want to restore. Then click a big green button below or right-click on the file and select the item Restore from the contextual menu. As a result, the file will be restored to an original directory, and if there is already a file there with the same name, there will be a question if you want to overwrite it. If you need to restore data to a different directory, choose the item Restore To in the contextual menu.
Another convenient function of File History in Windows 10 is the opportunity to preview the recovered document right in the recovery window.
When storing backup copies of data on an external device, file compression is not used: it allows accelerating navigation and viewing the elements, but with a number of frequently modified files, requirements to capacity of the device used for storing file history become rather high.
So, today we have got acquainted with one more function of Windows 10, File History, which allows performing easy backup and restoration of user’s personal data. This feature of Windows 10 is very useful and reliable.
Unfortunately, the reliability of it depends on type of storage to be kept a backup copy of your data. After all, external hard drive or USB drive can also be damaged. The internal hard disk backup data can become a subject of virus attack or backup data can be accidentally or intentionally deleted. The most reliable way of storing backup data is a network drive, but there may be a different situation too.
Even in cases listed above, your data can be recovered. Contemporary data recovery software intended for use in such cases as well. If you find loss of a backup of your data, you can scan the storage which keeps a history of your files using Hetman Partition Recovery.
Hetman Partition Recovery – this is software that recovers data of all formats and from any tape of storage.

Restoring a Deleted Folder from Recycle Bin, Archive or with Specialized Software 📁⚕️👨💻




Yes, there are several alternative data recovery methods that can be used in conjunction with file history. These include: