How to Recover Partitions Deleted From Hard Drive or SSD?
Looking for a way to recover information from a formatted hard disk, external drive, pen-drive or memory card? Accidentally formatted or repartitioned the disk? Can’t access the disk with a system error or receiving the “This disk must be formatted” message? To get started, download and install the program.
Select a Drive for Data Recovery
If everything is all right with the hard drive and you simply deleted some files, select the corresponding drive letter to begin. If, however, you are dealing with a formatted or inaccessible disk, or if you’re recovering the entire partition, pick the corresponding physical device or use the “Disk Search” function.
Virtual Drive Images
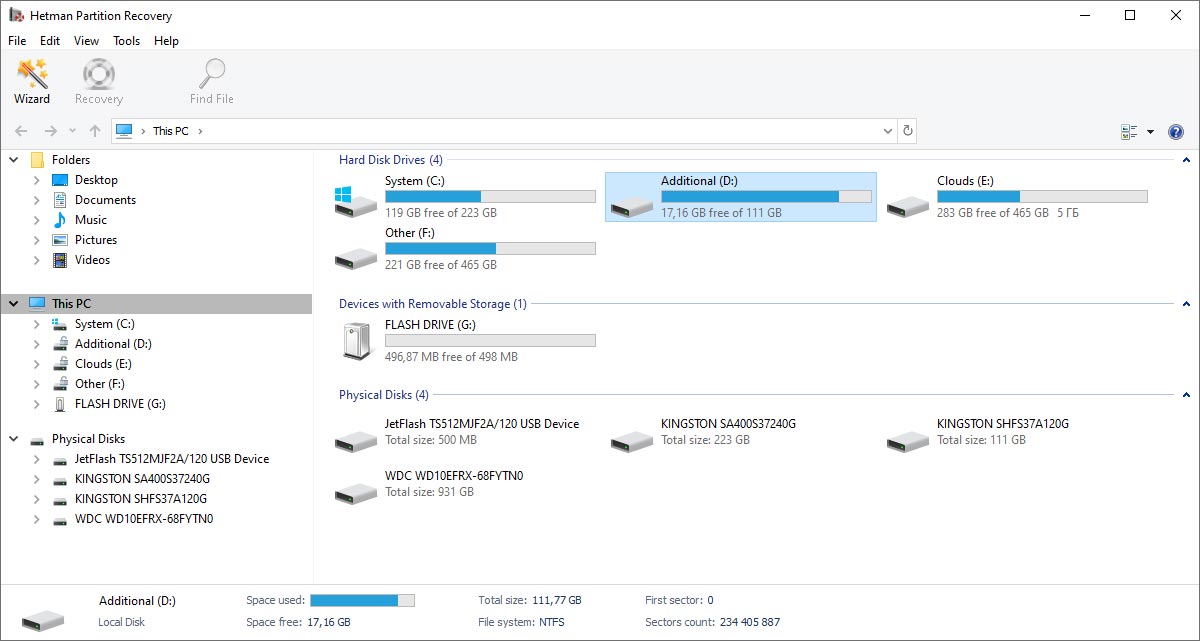
Virtual drive images are indispensable when you want the safest recovery experience possible. By creating a virtual disk image, you’ll be capturing the content of the entire disk or partition in a single “read” operation, avoiding excessive movements of disk heads and minimizing potential risks of further data loss. By recovering data from a copy of actual information, you’ll be working in the safest conditions possible.
Creating a Drive Image
To create a virtual drive image, use the Tools – Create Virtual Drive command from the main menu. You can capture the content of the entire storage media or use expert options, specifying initial offset and volume size. In addition, you can choose the compression option to compress the content of the disk being acquired on-the-fly. Specify the complete path to the image being created, and click “Create”.
Using a Drive Image
In order to use the drive image to recover data, use the Tools – Mount Disk command from the main menu and select the image file. The tool will automatically add the image to the list of devices available for recovery. You can now choose this disk for analysis and discovery of deleted information. Note that you can easily use the image to recover information on a different computer than the one it was captured on.
Searching for Deleted Partitions
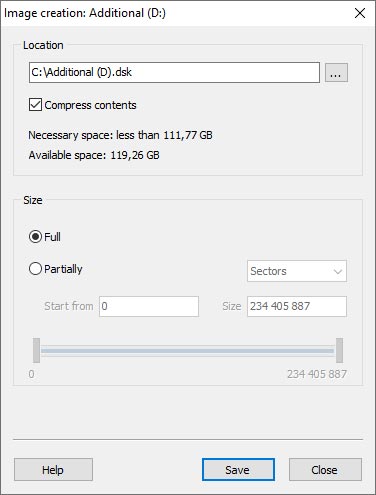
In cases of repartitioned, corrupted and inaccessible storage devices, you may want to discover available volumes (partitions) first before performing the actual recovery. This approach saves considerable time, and generally returns much better results by analyzing the file system(s) being discovered in addition to low-level content.
To start partition lookup, select a physical device in the folder tree and use the Tools – Find Partitions command in the main menu. If you know which file system(s) were used on the device, you can specify the file system, as well as the volume’s approximate location on the device. The recommended configuration, however, is automated search for all supported file systems.
By default, the system performs a quick scan for available partitions. If the quick scan does not discover the particular volume, or if no partitions are found, you can perform comprehensive analysis to discover more volumes. All discovered partitions are added into the folder tree, and become available for further analysis and recovery.
Restore Data of a Virtual Hard Disk (The Hard Disk of a Virtual Machine)
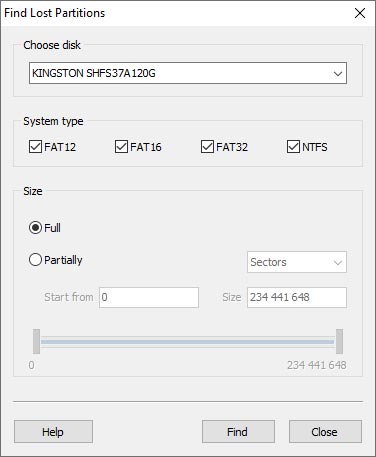
To restore data from a virtual hard disk (the hard disk of a virtual machine), select «Tools» – «Mount Disk» and specify the full path to the disk file.
The utility will add the virtual disk to the folder tree, and this will create the new list entitled «Mounted Disks». You’ll be able to select it for analysis and search for deleted files.
Recover data from there just like from any other media (an external or internal HDD, flash drive or memory card).
Choose a Disk Analysis Method
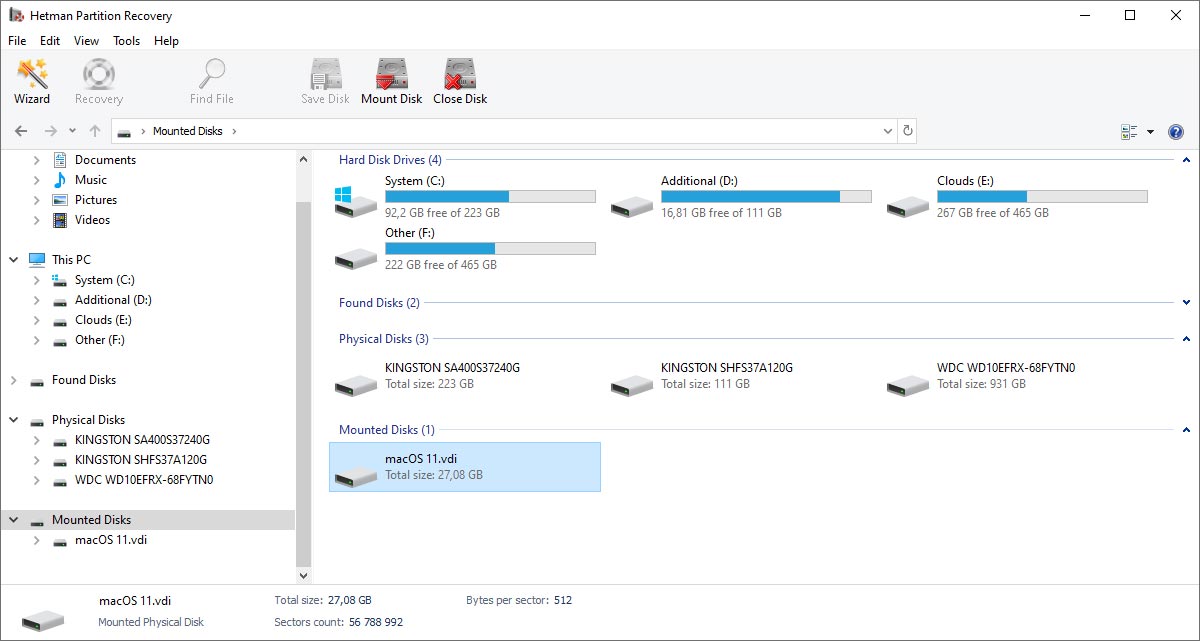
The tool comes equipped with two analysis modes. They differ substantially, so it’s worth knowing their strengths and weaknesses before settling on any one in particular.
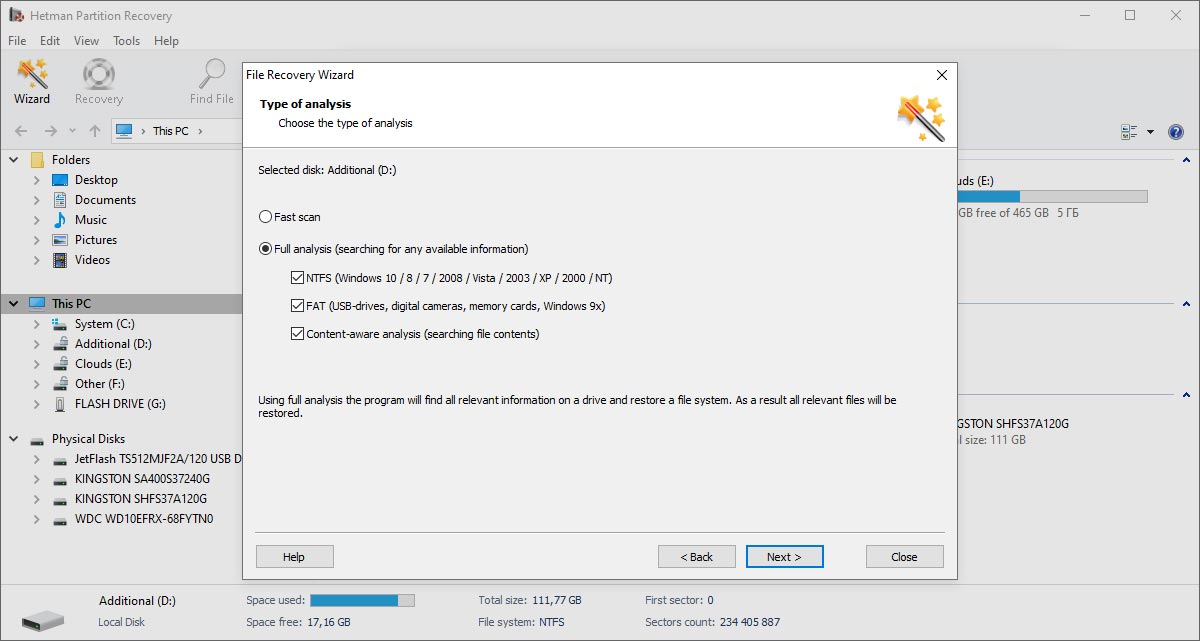
Quick Scan
In “Quick Scan” mode, the tool will complete the analysis in a matter of seconds. In this mode, you can quickly recover deleted files such as those deleted with Shift + Delete or removed from the Recycle Bin just recently. The “Quick Scan” mode is so fast that it’s always worth a shot before resorting to the big guns: even if the particular file is not found in this mode, the analysis is so fast you’ll be barely noticing. The “Quick Scan” mode only deals with records in the file system and does not touch the actual disk surface, which makes this mode blazing fast but less than perfectly comprehensive.
Full analysis
Full analysis employs highly intelligent content-aware algorithms allowing recovering information no matter why, when or how it was lost. You pay for this intelligence with reduced analysis speed: this mode can be painfully slow, especially on larger disks. However, if you simply must get that data back, there is nothing in this universe that can do a better job. The Full analysis allows recovering data from formatted disks, repartitioned hard drives, unreadable and inaccessible storage media (if it still works on a physical level, that is). The Full analysis mode engages all available data recovery algorithms.
Save analysis data
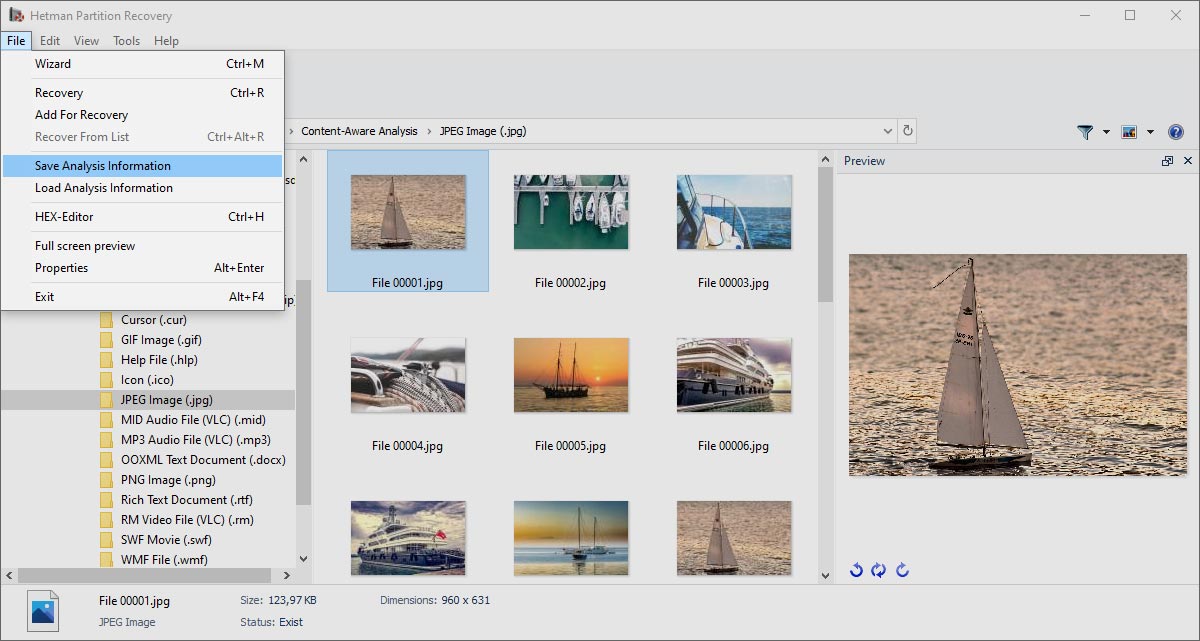
If you are recovering data from a high-capacity disk and you don’t have an opportunity to complete data recovery now, then you can use the option «Save Analysis Information».
To save the information on disk analysis, go to the menu File / Save Analysis Information, and save the file containing the analysis data (*.dai).
To load the previously saved information on disk analysis, go to the menu File / Load Analysis Information, and load the file containing the analysis data. After that, save the data recovered from the hard disk.
Wait For The File Recovery Process To Complete
At this point, the tool is already searching for recoverable files. You can sit back and relax. The tool will display estimated completion time, and list the number of discovered disks, files and folders. Wait until the analysis is complete and click “Done”.
Analysis process
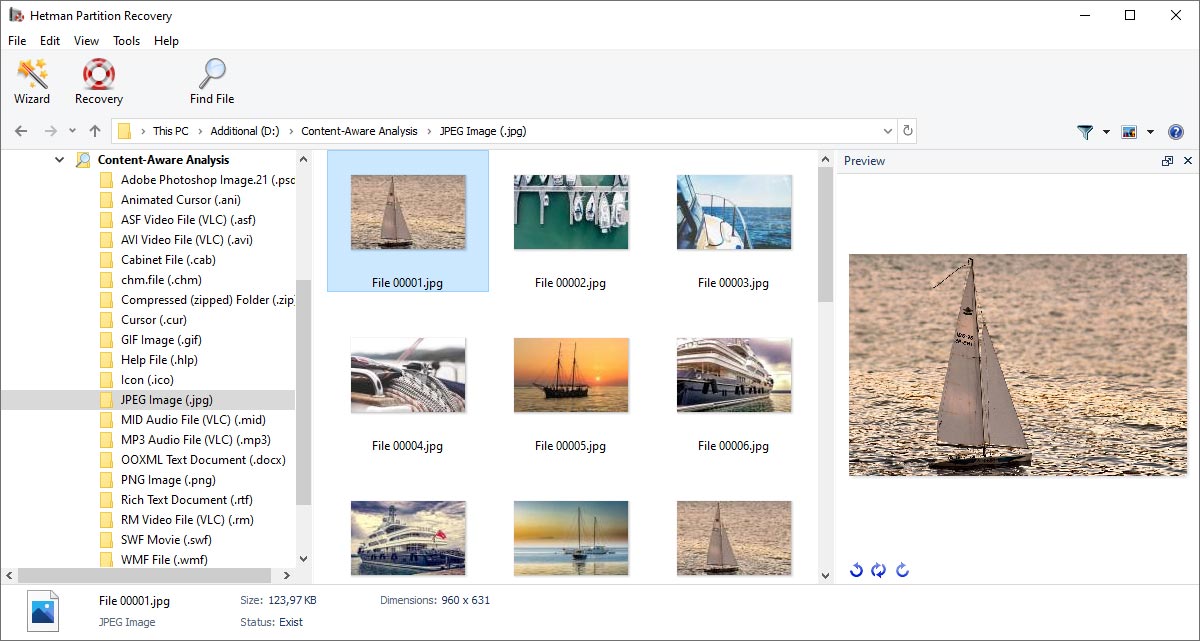
After completing the analysis, the tool will display every file and folder discovered on the disk. The files will be displayed in their corresponding folders; if you know the original path to a particular deleted file, you can find it right there. Deleted files will be marked with a red “X”.
The tool can display the files in one of the many views: list or table view, tiles, large or small icons. You can easily sort files by their name, size, creation date etc.
After the analysis completes, you’ll be able to search through the files by the name, size, create or modify dates.
“$Lost and Found” и “$Content-Aware Analysis”
The “$Lost and Found” folder contains files and folders that can’t be properly located in the original folder structure. If you’re not seeing a file where it should have been, make sure to check this special folder – the file may just be sitting there, waiting to be recovered.
Content-aware analysis enables the tool to analyze the entire disk surface and not just the file system. Files discovered with content-aware analysis will be placed to the “$ Content-Aware Analysis” folder. Content-aware analysis accesses the disk in low level, matching information it reads off the disk against a comprehensive database of known file formats. To give an example, all PSD files begin with an «8B PS» signature, which makes it possible to locate them even if the file system lacks any record of these files.
List of files
Files and folders available for recovery are displayed in a window that looks extremely similar to Windows Explorer. You can browse to a particular deleted file or folder by navigating in the usual manner. You can choose to restore everything found or just recover certain files or folders.
Pre-Recovery Preview
The trick with pre-recovery preview is not just the ability to view what’s inside of a particular file or document. The tool can display the content of more than 200 formats including pictures, archives, documents, spreadsheets, and even audio and video files without loading any third-party applications. Besides, what you see during the pre-recovery preview is exactly what you’ll get after the recovery. If you can view a file and it looks all right, then it’s guaranteed to be recovered in the same state when you register the product!
Selecting Files to Recover
If you want to save files from a certain folder, simply navigate to that folder as if you were using Windows Explorer. Select those files you’re about to recover and launch the File – Recover command from the main menu.
When recovering files from multiple folders, drag and drop them into the “Recovery Bin” at the bottom-right part of the window. When you’re finished selecting files, click the “Recover” button located in the same corner.
Save Data Recovered From The Hard Drive
Hetman Partition Recovery allows choosing the most convenient option to store information being recovered. Remember, you can not save data being recovered onto the same disk holding deleted files! You may choose another drive letter or a different device, use a USB flash drive, burn a CD or DVD, or create an ISO image. Sometimes the amount of information is just too huge for those types of media, so there are options for using a remote network location or uploading the files onto an FTP server.
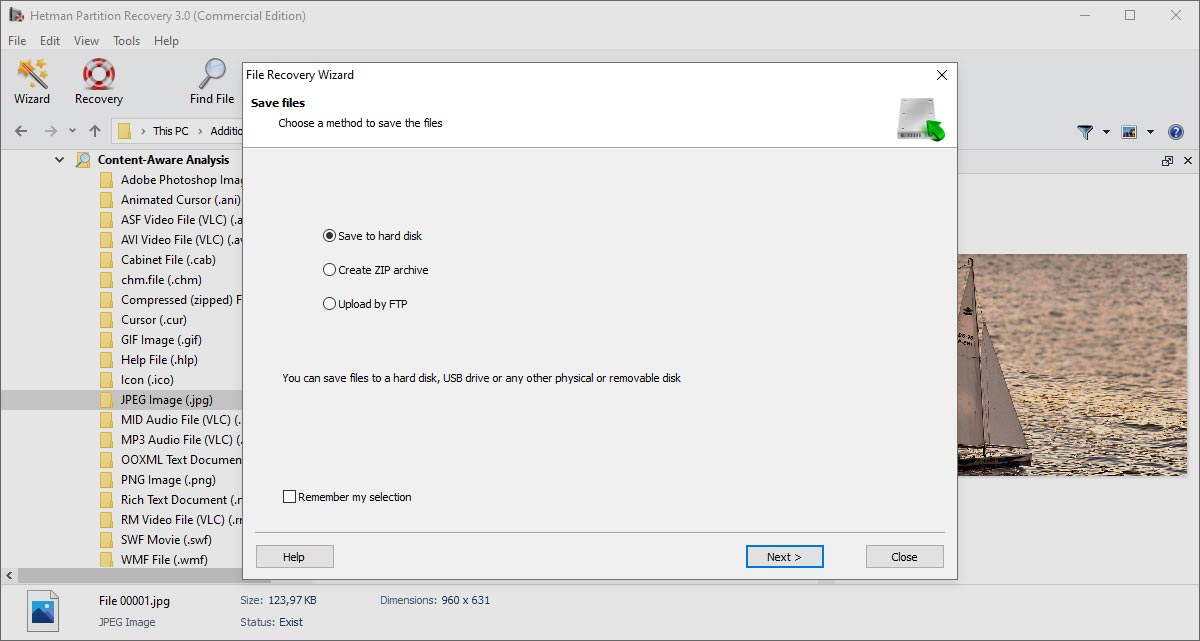
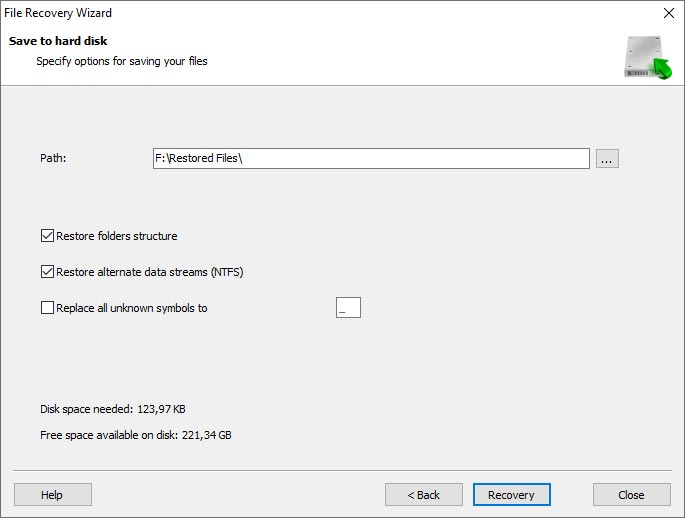
Recovering To a Hard Drive
This is the fastest and easiest way. To save recoverable data onto a disk, make sure to select a different drive letter or a separate physical device. Select a location on that disk to store the files to, and specify whether you’d like to restore the original folder structure by checking the corresponding option. If you choose a network location such as a mapped network drive, the files will be automatically uploaded onto the network server.
Note that the tool will automatically keep NTFS Alternate Data Streams and substitute any lost characters in the file names (FAT-specific).
Creating an ISO Image
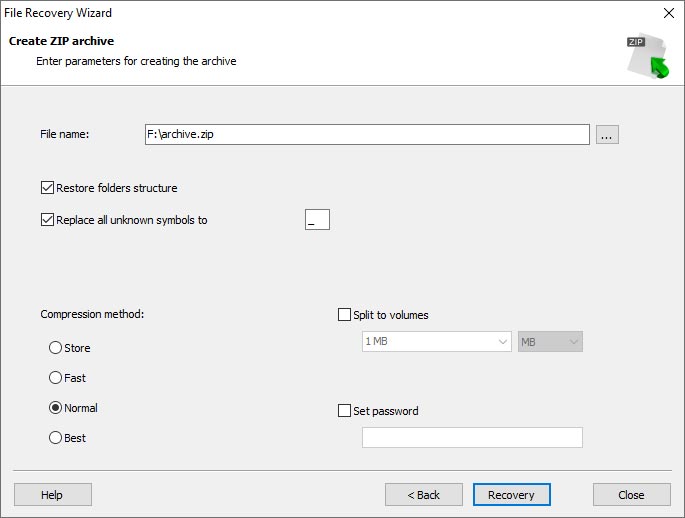
When recovering information, you can opt to create a set of burnable disk images in the ISO format. If you’d like to recover data into an ISO image, choose this option, specify the path to the image file, set volume label and specify the file system. As in all other cases, you’ll have the options for substituting lost characters in the files’ names and keeping the original folder structure.
At this point, the tool allows previewing files and folders selected for recovery one more time. You can now rename files if needed. Click “Create” to finalize the process.
Uploading Files onto an FTP Server
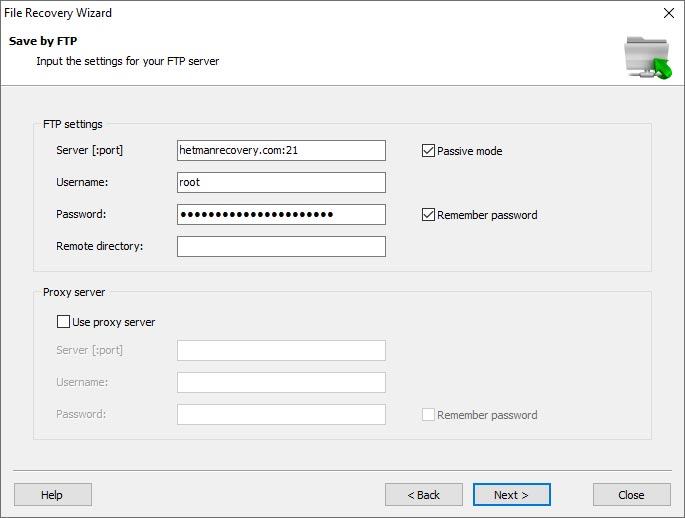
FTP upload comes handy when you have more data to recover than any locally available storage can fit, or if you’re performing a data recovery job for a remote client. You can configure the tool to automatically upload recoverable information onto a remote server over the FTP protocol. You can set an option to automatically restore the original folder structure or simply upload all files into a single folder.
In order to begin FTP upload, specify the correct server name and FTP port number, login and password, then select the remote location to store recoverable data. There is an option for storing the password, enabling automatic login the next time you use this feature.
Quick Start
Want to get your files back as soon as possible? Our tools are extremely easy to use. The “Data Recovery Wizard” will guide you through the whole process one step after another, allowing you to recover missing information in just a few minutes. Get yourself comfortable with the tool’s interface by watching the video.
-
How does the file system type influence the opportunity to recover data from deleted partitions?
File system type has certain influence on the opportunity to recover data from deleted partitions:
- Data structure and metadata: Each file system has its own unique data structure and metadata used to organize and store information on the disk.
- Support for recovery tools: Some file systems have limited support for recovery tools and data recovery software.
- Degree of fragmentation and data breakup: The degree of file system fragmentation may affect the opportunity to recover data completely.
- Software support for certain file systems: Many data recovery applications are specialized to support specific file systems.
-
How can I partition a disk without losing data?
Here are several free tools for disk partitioning without loss of data:
- MiniTool Partition Wizard Free
- EaseUS Partition Master Free
- AOMEI Partition Assistant Standard Edition
- Paragon Partition Manager Free
- Macrorit Partition Expert Free Edition
- Partition Logic
- GParted (for Linux)
-
What should I do if a disk doesn’t show up in This PC?
If a disk doesn’t show up in This PC, try the following steps:
- Check disk connection: Make sure that the disk is properly connected to the computer, and power / data is supplied without interruptions.
- Check Disk Management: If the disk is shown as “unallocated” or missing a drive letter, you’ll have to assign one, or create a new volume.
- Disk initialization: If the disk is new and has never been used before, it may be uninitialized yet. In Disk Management, right-click on the disk and choose Initialize Disk.
- Check BIOS to see if the disk is recognized. If it isn’t, there might be a problem with the disk or its connection.
-
Files won’t open after recovery. Why?
There are several causes why files won’t open after data recovery:
- File damage during recovery: recovery tools may recover files only partially or recover them in a damaged condition.
- Recovery of incomplete files: files were overwritten partially or some part of data is missing.
- Incorrect file structure recovery: Some tools can recover files without restoring their correct structure or metadata required for them to open properly in editors or specific applications.
- Files damaged before being lost: If files were damaged or unreadable before loss of data, their recovery doesn’t guarantee that they will be fixed.
-
In the preview window, a file is shown as a HEX editor icon. Will it be recovered?
If a file is shown in the preview window as a HEX editor icon, there are high chances that this file is damaged and won’t open after recovery.
If you have used Fast scan before that, we recommend to run Full analysis that uses a more complicated algorithm and can recover that file.
Post a testimonial
Read user reviews of Hetman Software programs or share your experiences. Your review will be published after being moderated. We value your opinion! Total reviews: 210. Average ratings: 4.8.


Recommended tools
We recommend that you familiarize yourselves with the opportunities offered in other Hetman Software utilities. You can significantly save on the purchase or buy a program with the features that best suit your needs.
