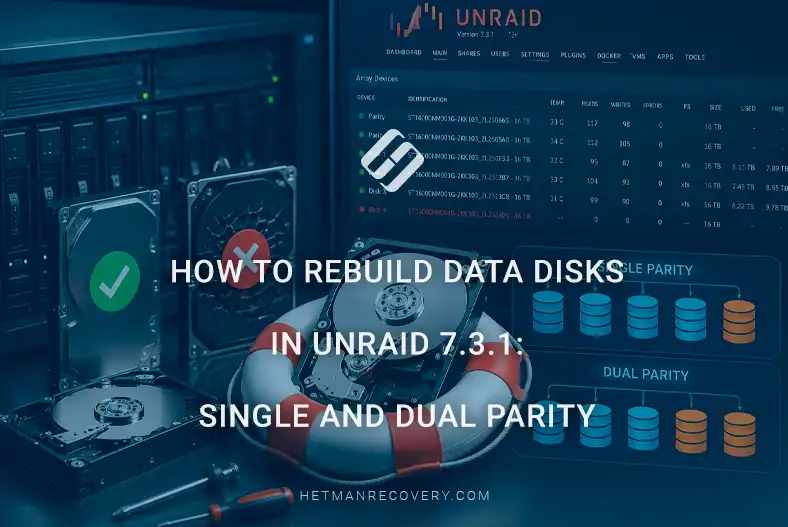
How to Rebuild Data Disks in Unraid 7.3.1: Single and Dual Parity
-
Author:
Vladimir Artiukh

-
Editor:
Oleg Afonin



In this article, we will examine critical data loss scenarios on servers running Unraid OS, specifically reliable data recovery from Single Parity and Dual Parity array configurations. We will look at how to correctly connect the server’s physical drives directly to a computer and prepare them for safe scanning. We will apply specialized approaches to reconstructing damaged arrays and recovering files depending on the number of functioning disks remaining.
- How Single Parity and Dual Parity Work in Unraid
- STEP 1. How to Connect Data Disks and Parity Disks to a PC
- STEP 2. How to Create and Mount Disk Images
- STEP 3. Data Recovery Without Rebuilding the Array
- STEP 4. How to Determine the Offset Using a HEX Editor
- STEP 5. How to Reconstruct Single Parity When One Disk Is Missing
- STEP 6. How to Recover Dual Parity When Two Disks Are Missing
- Conclusion
- Frequently Asked Questions
- Comments
The Unraid operating system is a flexible and powerful tool for building network storage systems.
Of course, access to the array may sometimes be lost due to hardware failures of the server, an unexpected change in disk identifiers by the disk controller (SAS/HBA), or damage to the bootable USB flash drive containing the system configuration, which causes the disks to stop mounting.
In such situations, Hetman RAID Recovery comes to the rescue. All of this can be done in the Windows, macOS, or Linux environment of your choice.

How to Recover Data from Unraid | Single & Dual Parity Recovery
How Single Parity and Dual Parity Work in Unraid
The architecture of arrays in Unraid differs fundamentally from classic RAID systems:
In a traditional RAID array, data is split into blocks and distributed across all disks simultaneously. In contrast, Unraid writes each file in full to one specific drive while using standard file systems such as XFS, EXT4, or BTRFS. This means that each data disk in the array is fully independent and can be read on any other computer with the appropriate operating system without the need to assemble the entire array.
To provide fault tolerance, Unraid uses dedicated parity drives:
- In a Single Parity configuration, the system allocates one disk to store parity information, which makes it possible to recover data if any one drive fails.
- A Dual Parity configuration uses two parity drives, providing protection against the simultaneous loss of two drives.
It is important to note that parity drives do not contain a file system or the files themselves; they store only the information required for mathematical reconstruction of lost data.
This storage architecture significantly affects the approach to software-based data recovery. If the server fails but the data disks themselves are physically intact, Hetman RAID Recovery can scan them as separate XFS volumes and extract all required files. If one or two data disks are completely failed, the utility will use the parity drives to virtually reconstruct the array and recover the lost information as if those disks were still connected to the system.
| Characteristic | Single Parity | Dual Parity |
|---|---|---|
| Number of parity disks | 1 | 2 |
| Minimum number of disks | 2 disks: 1 data + 1 parity | 3 disks: 1 data + 2 parity |
| Protection against disk failure | Protects against failure of one disk | Protects against simultaneous failure of two disks |
| Number of data disks | All disks except one parity disk | All disks except two parity disks |
| Operating principle | Parity information is used to recover data from one lost disk | Two sets of parity information make it possible to recover data when two disks are lost |
| Parity type | One parity set is used | Two independent parity sets are used |
| Data protection | High in case of failure of one disk | Higher, especially for large arrays |
| Disk space usage | The capacity of the largest disk is used for parity | The capacity of the two largest disks is used for parity |
| Recovery after failure | Recovery of one lost disk is possible | Recovery of two lost disks is possible |
| Parity disk requirements | The parity disk must not be smaller than the largest data disk | Both parity disks must meet Unraid capacity requirements |
| Write performance | Usually higher than with Dual Parity | May be slightly lower due to the calculation of two parity sets |
| Recommended use | Small and medium arrays where protection against the failure of one disk is sufficient | Large arrays and systems where protection against the simultaneous failure of two disks is important |
| Main advantage | Lower disk space overhead for protection | Double protection against disk failure |
| Main disadvantage | Loss of a second disk before recovery is complete may result in data loss | Requires an additional parity disk and more disk space |
STEP 1. How to Connect Data Disks and Parity Disks to a PC
Before starting the recovery process, you need to remove the drives from the server and connect them to your workstation. For a complete reconstruction of the Unraid array, both data disks and parity disks are required.
The best and most reliable method is to connect the drives directly to the motherboard via SATA ports. This approach provides maximum read speed and ensures stable operation during analysis.
If you are using server drives or do not have enough ports, you may need to install an additional SAS or HBA expansion card in your PC slot — обязательно switch it to IT mode so that the operating system sees each disk individually.
As an alternative, you can use external enclosures or docking stations via USB. However, keep in mind that USB port bandwidth is significantly lower. This can greatly increase the total time required for scanning and recovering your files.

STEP 2. How to Create and Mount Disk Images
There are situations in which it is physically impossible to connect all required drives at once due to a lack of available ports on the computer. In this case, you can use the sector-by-sector image creation feature. This is also the gold standard for safety when working with disks that show signs of hardware failure.
Image is an exact byte-for-byte copy of your physical disk, saved as a regular file on another storage device with sufficient capacity.
You can connect the server drives one by one, create images from them, and then simply load all the resulting files into Hetman RAID Recovery. The program will work with them exactly the same way as with real physical devices.
To create such an image, launch the program, select the required drive, and click the Save disk button on the top toolbar. Then simply specify the save location.

It is important to remember that the size of the resulting file will fully correspond to the total capacity of the source drive, regardless of how much data is stored on it. Make sure there is enough free space available.
After the save process is complete, open the main menu and select Mount disk. From the available options, choose Raw disk images and open the files you just created.

They will immediately appear in the general list of available devices. The program is now fully ready to work with your array.

STEP 3. Data Recovery Without Rebuilding the Array
The Single Parity configuration allows safe data recovery in the event of the complete absence or failure of one disk, while Dual Parity ensures data preservation even without two drives.

An important nuance when working in the program: the main thing is that the parity disks are placed at the top of the device list. The subsequent order of the data disks is not as critical for successful data reading.
For demonstration purposes, we connected three disks from a Single Parity array. As you can see, the data disks are automatically recognized by the program as standard drives with the XFS file system. The parity disk does not have its own file system, so it is displayed differently.

If your data disks are physically intact and you have only lost access due to a logical failure or Unraid configuration issues, you do not need to rebuild the entire array. It is sufficient to run Fast scan directly on one of the connected data disks. This will quickly analyze the intact volume and find all lost files.

After a short scan, the program will display the entire found directory structure. You can easily navigate through the folders and locate your shared user directories. All that remains is to select the required files and click the Recover button.

Be sure to save them to another safe local hard drive on your computer to avoid any risk of overwriting the original data on the XFS volume.
STEP 4. How to Determine the Offset Using a HEX Editor
In Unraid array architecture, the physical start of the disk often does not match the start of the file system. Due to corruption of service data, the program may not detect this offset automatically. Therefore, the offset value (Offset) must be specified manually during array reconstruction; otherwise, the directory structure will remain inaccessible.
To calculate the offset accurately, use the built-in HEX editor.

The XFS file system has a unique signature at the beginning of its service structures. In hexadecimal format, this is the sequence 58 46 53 42, which corresponds to the text XFSB.
Select the required disk and press Ctrl + H. In the HEX editor window, start the Find text or value search.

Enter the value 58 46 53 42 and обязательно switch the mode to Search for HEX-value.

To speed up the process, set the parameter to Begin of sector. The position of the found marker is your exact offset value.

In addition, you can see the offset value directly in the main program window: simply click the corresponding data disk, and the information will appear on the right in the detailed view pane.

Keep in mind: in most cases, the XFS offset value in bytes on Unraid data disks is exactly 32768. This is the value we will use as the main reference point.

STEP 5. How to Reconstruct Single Parity When One Disk Is Missing
If one of the data disks has completely failed or is physically missing, we will use the built-in RAID Constructor tool in Hetman RAID Recovery.

Launch it and select Manual mode.

For successful array reconstruction, it is critical to follow the correct order of the remaining drives. The main rule is that the parity disk must be placed first in the list.

Moreover, for correct array assembly, the subsequent order of the working data disks is also critical and must exactly match their original order in Unraid. An empty slot must be added in place of the missing drive.
Next, configure the technical parameters in the manual mode window: select the array type, block size, and specify the previously found offset value.

If you have forgotten or do not know the original drive order in Unraid, use the Detect disk order automatically option. When enabled, the program will automatically select the correct configuration based on the available data.

After applying the settings, the assembled Single Parity array will appear on the main screen of the program as a regular physical device. Click it and start Fast scan.

Using the saved information on the parity disk, the algorithm will fully analyze the XFS file system structure and virtually reconstruct the lost files. Once the analysis is complete, you will see the found directory tree.
Navigation here is as simple and clear as possible. Find your shared user folders, select the required data, and click the Recover button. Be sure to save the files to a separate safe local drive on your computer.

STEP 6. How to Recover Dual Parity When Two Disks Are Missing
The situation becomes more complex if your array used a Dual Parity configuration and two data drives have failed or are physically unavailable. In this case, we again use the RAID Constructor tool in Hetman RAID Recovery and choose Manual mode.

As in the previous case, it is extremely important here to reproduce the exact sequence of all connected drives. Both parity disks must occupy the first two positions in the list, followed by the working data drives, strictly preserving their original order in the system. Empty slots must be added in place of the two lost drives.
Then specify the required array configuration parameters: type, block size, and the offset calculated earlier.
If you do not remember the original structure in Unraid, the Detect disk order automatically option can help by attempting to determine the correct configuration independently.

After confirming the settings, the reconstructed Dual Parity array will appear in the main window of the utility.

Next, start Fast scan. The program will use the dual parity blocks to quickly analyze the XFS volume architecture and virtually recover the lost information.

When the scan is complete, the recovered directory structure will open before you. Use the convenient navigation to browse folders and identify the required data. In the final step, simply select the contents of your shared folders and click Recover.
Be sure to save the results to a separate working hard drive on your computer.
Conclusion
Data recovery from disks in Unraid 7.3.1 depends on the array configuration and the number of failed disks. Single Parity provides protection against the failure of one disk, while Dual Parity makes it possible to survive the simultaneous failure of two disks. Parity information makes it possible to recover the contents of a lost disk without the need to keep a copy of every file on another drive.
If the disks are physically intact but have become inaccessible due to file system corruption, configuration errors, or other issues, do not rush to format them or perform operations that may alter the data. In such cases, it is important to first determine the condition of each disk, check the Unraid configuration, and, if possible, create copies or images of the problematic drives.
Special attention should be paid to situations where problems occur with multiple disks at the same time or parity information is damaged. In such cases, standard Unraid recovery may be insufficient, and specialized software may be required to analyze the array structure and recover files.
The best way to avoid data loss is not to rely solely on Single or Dual Parity. Parity is not a backup, so for important files it is recommended to maintain a separate backup following the 3-2-1 rule. This is especially important before replacing disks, rebuilding the array, or performing any recovery operations.