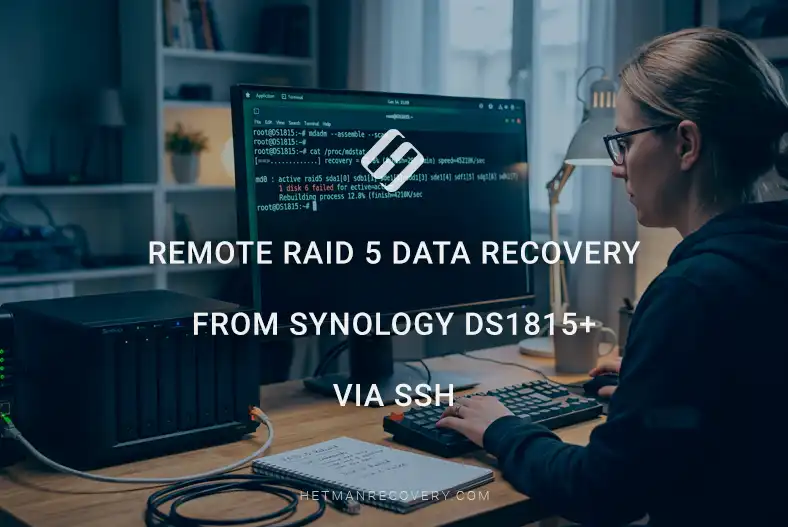
Remote RAID 5 Data Recovery from Synology DS1815+ via SSH
-
Author:
Vladimir Artiukh

-
Editor:
Oleg Afonin



In this article, we will demonstrate the process of remote data recovery from a RAID 5 array on a Synology DS1815+ running DSM version 6.2.4. For efficient operation, it is strongly recommended to use a high-speed network connection. We will perform the data recovery process using Hetman Partition Recovery and Hetman RAID Recovery, which work successfully on Windows, Linux, and macOS platforms.
- Synology DS1815+: key specifications
- Remote connection to the NAS
- Deleted data recovery
- Conclusion
- Frequently Asked Questions
- Comments
In the event of a hardware or software failure, the NAS array becomes inaccessible, even though your files remain physically stored on the disks. It is often the case that the device powers on, the drives are detected, SSH works, but the native system does not mount the storage or assembles the RAID incorrectly.
Such consequences are most often caused by an interrupted RAID rebuild, damaged metadata due to a sudden power loss, drive failure, or an incorrect replacement. In addition, access to data may be lost due to changes in drive order in the bays, migration to another NAS device, loss of the pool after a firmware update, or issues with access permissions and network protocols.
If you cannot remove and connect all drives directly to a computer, we will consider the concept of remote recovery. For efficient operation, it is strongly recommended to use a high-speed network connection. We will perform the data recovery process using Hetman Partition Recovery and Hetman RAID Recovery, which work successfully on Windows, Linux, and macOS platforms.

Remote RAID 5 Data Recovery from Synology NAS via SSH | DS1815+ Recovery Guide
Synology DS1815+: key specifications
Synology DS1815+ is an eight-bay network storage device equipped with a quad-core Intel Atom C2538 processor clocked at 2.4 GHz and 2 GB of DDR3 RAM, expandable up to 6 GB.
The device supports 3.5-inch or 2.5-inch SATA drives, hot swapping, and various RAID configurations, including RAID 5. The internal storage uses the EXT4 file system, and supported network protocols include SSH, which makes it possible to access the NAS remotely via the command line. The DS1815+ also has four Gigabit Ethernet ports, enabling link aggregation and providing network access to the storage.
Below are the main technical specifications of the Synology DS1815+ that are relevant when working with RAID 5 and restoring data access via SSH.
| Specification | Synology DS1815+ |
|---|---|
| Device type | NAS / network storage |
| Release year | 2014 |
| Processor | Intel Atom C2538 |
| Number of cores | 4 |
| Clock speed | 2.4 GHz |
| Architecture | Intel Avoton |
| AES-NI | Yes, hardware encryption acceleration |
| RAM | 2 GB DDR3 |
| Maximum RAM | Up to 6 GB |
| Number of bays | 8 |
| Supported drives | 3.5″ or 2.5″ SATA |
| Drive interface | SATA II |
| Hot Swap | Yes |
| Maximum internal capacity according to the original specification | 48 TB (8 × 6 TB) |
| RAID | Basic, JBOD, RAID 0, RAID 1, RAID 5, RAID 6, RAID 10, Synology Hybrid RAID |
| RAID 5 | Supported |
| SHR protection | Up to 2-drive fault tolerance |
| Network ports | 4 × Gigabit Ethernet |
| Link Aggregation | Yes |
| Failover | Yes |
| USB | 4 × USB 3.0 |
| eSATA | 2 × eSATA |
| Internal drive file system | EXT4 |
| External file systems | EXT4, EXT3, FAT, NTFS, HFS+ |
| Network protocols | CIFS/SMB, AFP, NFS, FTP, WebDAV, iSCSI, Telnet, SSH, SNMP, VPN, etc. |
| SSH | Yes |
| Expansion | Supports Synology DX513 |
| Maximum number of drives with expansion | Up to 18 drives |
| SSD cache | Supported |
| Dimensions (H × W × D) | 157 × 340 × 233 mm |
| Weight | 5.29 kg |
| Power supply | 100–240 V AC, 50/60 Hz |
| Operating temperature | 5–35 °C |
| OS | Synology DiskStation Manager (DSM) |
Remote connection to the NAS
It is worth emphasizing that, in addition to the remote method, you always have the option to remove the drives and work with them directly by connecting them to a computer. If you choose recovery over the network, before taking any action, you must perform several important steps to protect your data from being overwritten.
Immediately stop using the array for writing new files. Disable all automatic Backup tasks, stop background processes such as File Indexing or Data Scrubbing, and make sure to restrict access to the Shared Folder for other users. This is critical to avoid overwriting lost information with new data.
Next, you need to prepare the NAS for remote connection. If access to the DSM web interface is partially preserved, go to the Control Panel and open the User section.

Find the default admin account. It is usually disabled for security reasons, so it must be temporarily enabled by clearing the corresponding checkbox in the Edit settings, and you must also set a password for this account.

After that, you need to enable terminal access to the server file system and block devices. In the same Control Panel, go to the Terminal & SNMP section.

In the Terminal tab, check Enable SSH service and save the changes by clicking Apply.

You should also pay attention to the network equipment. Since we will work with the drives over the network, for a stable and comfortable connection during recovery, it is advisable that the user’s computer, the NAS itself, and the local network support data transfer speeds of 1 Gbit/s or higher. This will significantly speed up the array analysis and the copying of recovered files.
Deleted data recovery
METHOD 1. Recovering deleted files and shared folders
Let us consider the first scenario, where your array is functioning normally and the volume is accessible over the network, but you accidentally deleted important files or folders.
In this case, there is no need to disassemble the NAS; it is sufficient to use a remote connection in Hetman Partition Recovery.
Open the utility, click the Tools tab in the top menu, and select Connect via SSH.

In the connection window, enter the IP address of your NAS in the Remote server field and specify Port 22. Below, in the Credentials section, select the Authentication method, then enter your login and password. If necessary, you can check Save server details and Save authentication data to store these credentials. Click Next.

After successfully connecting to the NAS, the next window will display the connected physical drives and assembled logical arrays. To correctly choose the volume containing your data, use its total size as a reference.
Please note that the small partitions of about 2 and 2.5 GB are system volumes that store DSM operating system files, so they are not needed here.

It is also very important not to select individual physical drives, because the program will not be able to assemble them into a single RAID array.
Select the final logical volume of the RAID 5 array. Click Next to add it to the program, and start the scanning process by selecting Fast scan.

After the analysis is complete, the program will display the found files while preserving the original folder structure. Select the required data, click Recovery, and specify a safe path for saving it on your computer’s local drive.

It is strictly forbidden to save recovered files back to the same network volume to avoid overwriting.
METHOD 2. Automatically rebuilding RAID 5
Now let us consider the recovery process in Hetman RAID Recovery.
This automatic recovery method should be used when the NAS device itself has failed. For example, in the event of a motherboard or power supply failure, or when there has been a critical DSM operating system failure that caused the array to “break apart,” even though the disks and their metadata remain physically intact.
This function is also indispensable in situations where the NAS powers on, the drives are physically detected, and SSH access works, but the native DSM system does not mount the storage or the Storage Pool has changed to the Crashed or Missing state.
This most often happens if you started an array rebuild and the process was unexpectedly interrupted, leaving some disks with the new array state and others with the old one. A similar problem occurs during migration, when you add drives from another NAS device, but the new system is unable to assemble an array from them and import the data.
In addition, automatic recovery helps if the array “broke apart” after the accidental removal or incorrect replacement of the wrong drive, or in the case of simultaneous failure of multiple disks.
The program also effectively handles conflicting RAID metadata after a failed pool expansion or in cases where DSM automatically assembles an incorrect disk set, blocking access to your files.
After a successful SSH connection, the process of which we discussed in detail earlier, the Select Disks to Add window will open immediately, where you need to select the drives. Our NAS contains 8 physical disks, so we select all of them and click Next to mount them.

Unlike the previous case, where we were working with an already assembled network volume, here we are dealing with a situation where the array itself is not mounted or is destroyed. That is why you must not select the final volume in this window, since the native storage manager is damaged or unavailable and the program will not be able to reconstruct the structure correctly through it. Instead, you need to select all physical disks separately so that Hetman RAID Recovery can automatically assemble the array directly from the block devices.
The program will automatically read the metadata and begin searching for LVM and RAID structures. After processing is complete, the main screen will show the connected physical disks with partitions, as well as the automatically assembled RAID 5 array.


Pay special attention to how the program displays the structure of the assembled array in the right pane in detail. It clearly shows all key array parameters and the full list of member disks included in it.

After that, select the volume containing your data and start the analysis process. After scanning, you will be able to view and save both existing files and those that were accidentally deleted before the system failure.

METHOD 3. Manual RAID 5 construction
This was an example of automatic recovery, which works successfully in most cases. However, sometimes the program cannot assemble the array on its own. This usually happens due to severe logical corruption, complete overwriting of the array’s metadata, or damaged and conflicting metadata on the disks.
Another common reason is the physical failure of one or more disks combined with damaged metadata on the remaining healthy drives. Manual intervention is also required if the array rebuild process was interrupted by a failure or power loss: in that case, some drives retain the updated information, while others remain in the old state. In such complex situations, we use the built-in RAID Constructor tool for manual assembly.
To assemble the array correctly, we need to determine the file system start offset, called the Offset.
Before searching for it, it is important to understand the typical disk layout in a NAS: drives usually contain several service partitions (small system partitions for the operating system and a swap partition) and one large main partition for user data.

To find it, we intentionally select the largest data partition on the first disk, excluding the system partitions. For this purpose, open the built-in HEX Editor and search for the LABELONE marker on the corresponding volume.

Note that this marker must be searched for on the first disk, since it is not present on the other drives in the array.

After finding this marker using the search function in the HEX Editor, determine the previous sector offset value and add to it the First sector value of the partition on which the marker was found, as shown on the main screen in bytes.
The resulting number, 4832886784 bytes, will be the exact Offset value.

Next, enter the default Synology array parameters; for most models they are as follows:
- Block order – Left Synchronous;
- Block size – 64 KB (in some models this is sometimes 512 KB);
- Bytes per sector – 512.

Next, move the disks from the Available disks field to the Selected disks field and enter the calculated Offset for each one. Then click Next.


If you do not know the correct drive order manually, you can use the convenient Detect disk order automatically option. The program will analyze the blocks and reconstruct the correct RAID 5 configuration.

After successful manual assembly, the array will appear on the main screen. You only need to scan it and find all the data that was stored on the disks before the critical system failure.

When the scan is complete, be sure to use the preview function. It allows you to open photos, videos, and documents directly in the program window so that you can verify their integrity before recovery. After verification, simply select the required files or entire folders and save them to any other safe disk or storage medium.

Conclusion
Remote data recovery from Synology DS1815+ in a RAID 5 configuration via SSH can be useful in situations where access to files through the standard DSM interface is lost, but the NAS itself and the installed drives remain accessible. The DS1815+ supports RAID 5 and provides SSH access, which makes it possible to work with the storage at the system level.
During recovery, it is especially important not to perform operations that may change the RAID structure or overwrite data on damaged drives. Before starting work, it is advisable to determine the condition of each disk, check the RAID and file system configuration, and, if possible, create copies or images of the problematic drives. If the array is in a degraded state, keep in mind that RAID 5 is designed to tolerate the failure of only one drive.
Using SSH provides access to the NAS command line and allows diagnostics to be performed without removing the drives from the enclosure. This is particularly important in remote work scenarios where physical access to the equipment is limited. At the same time, complex cases of RAID corruption, file system damage, or multiple drive failures require careful analysis, as careless commands may complicate further recovery.
Thus, remote RAID 5 recovery via SSH is one possible way to access data on the Synology DS1815+ without immediately removing the drives. Proper diagnostics, minimal-intervention operation, and preserving the original state of the disks help reduce the risk of permanent data loss and create safe conditions for further data recovery.