Save or Restore Facebook Messenger Access & Data
Learn how to save or restore Facebook Messenger access and data with ease in this comprehensive guide. Whether you’re using Android or PC, discover step-by-step instructions and essential tips to seamlessly manage your Messenger data. Dive deep into Facebook Messenger access and data save/restore techniques and explore insider strategies to maximize your control over your Messenger account.

How to View User’s Logins and Passwords Saved in a Browser for Facebook, Twitter, Instagram 🕵️🔍🔐
Previously, nobody would think about it too much as all information was kept safely in Facebook website. However, times have changed and now the Messenger is offered in special versions for smartphones and personal computers.
In this article, we will have a look at how to save and backup user’s message history in the Messenger to prevent its permanent loss, how to create a copy of all user account data, and also how to recover user’s access to the Messenger for Windows.
- How To Recover Access To The Messenger For Windows
- How To Save a Backup Copy Of The User’s Entire Message History in Facebook
- How To Archive Messenger History For Android
- Where are pictures sent by Messenger for Android kept?
- Questions and answers
- Comments
How To Recover Access To The Messenger For Windows
The Messenger for Windows (Messenger for Desktop) has largely simplified the way that Facebook users exchange messages. Now if you need to send a message, you don’t have to open the social network: start Messenger on your PC in just one click.
Facebook Messenger user registration data on a certain computer is saved to a cookies file which can be found in the folder:
C:\Users\UserName\AppData\Roaming\Messenger for Desktop
Having this file, users do not need to sign in, enter their password and e-mail address every time they start the application. All they need is to sign in once when they start the application for the first time.
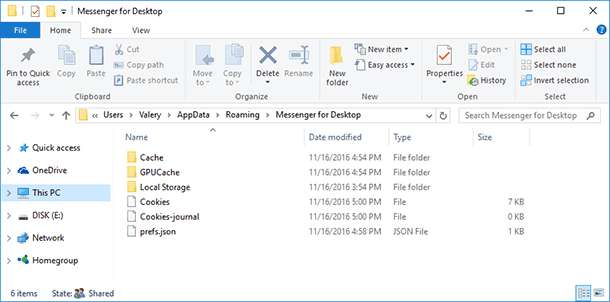
If for some reason the user lost access to the Messenger on PC (reinstallation of the application or the operating system, a system failure), it can be restored by recovering the file Cookies of the version of such application with an already registered user and by using it to replace the similar file of the freshly installed application.
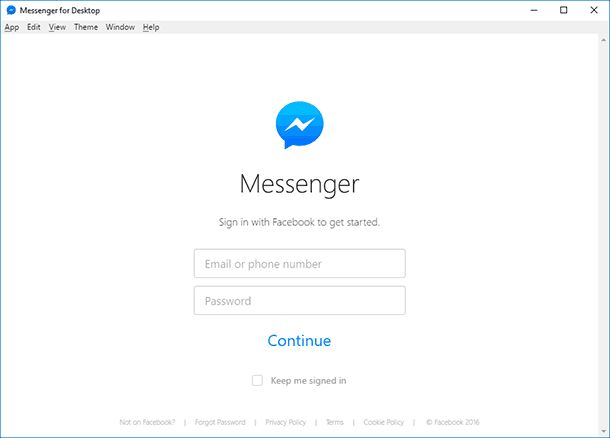
To do it:
-
Run Hetman Partition Recovery and scan drive C in your computer.
The tool recovers data from any devices, regardless of the cause of data loss. -
Using the program, go to the folder
-
C:\Users\UserName\AppData\Roaming\Messenger for Desktop
and find the file Cookies.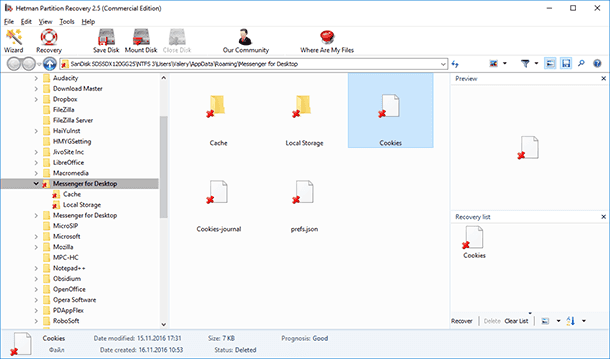
-
Recover this file
-
Use it to replace the file with the same name in the folder specified above.
-
Start Messenger for Desktop and the application will start with teh user who is already registered.
How To Save a Backup Copy Of The User’s Entire Message History in Facebook

How to View Browsing History for Google Chrome, Mozilla Firefox, Opera, Edge, Internet Explorer 🌐⏳💻
All message history of a Facebook user, no matter if it was made from the website of this social network, with the Messenger for PC or for Android, is always transferred through a Facebook account and saved there.
To enable users to ensure safety of their account data, Facebook provides the opportunity to save a copy of entire user information including uploaded pictures and videos, contact information, names of Facebook accounts of user’s friends, and the most important – complete message history.
In order to save a copy of Facebook data:
-
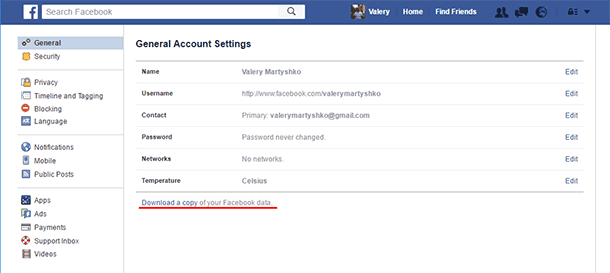
Go to your Facebook account from your computer and then go to the menu Settings / General account settings

-
At the bottom of the window that opens, click on the link «Download a copy of your Facebook data» (your information on Facebook)
-
Choose «Download Archive» in the next page, and after entering your account password, the archive will start downloading to your computer.
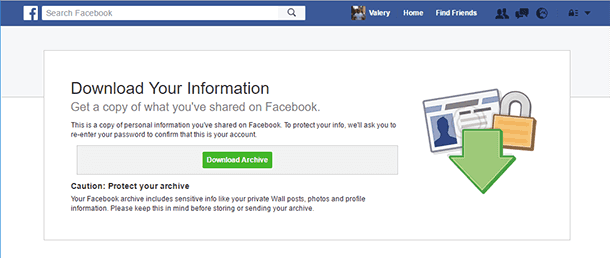
Note. Sometimes, before downloading the archive you may need to confirm your download with a registered user’s e-mail address to which a link for downloading the archive will be sent.
-
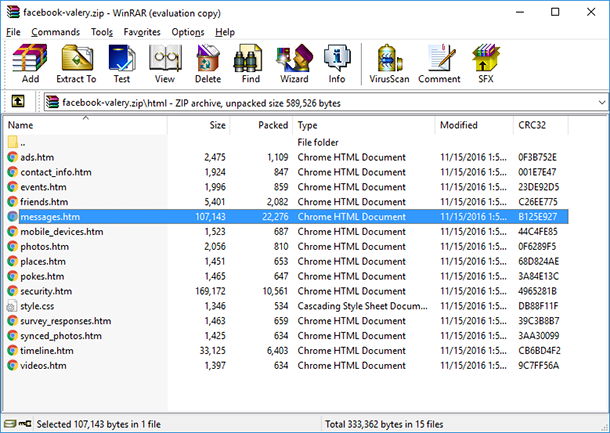
As a result, an archive containing all Facebook account data will be downloaded to your computer.
When you open it, you can see folders with pictures and videos in full scale. There is also a separate folder «html» containing .htm files that keep the entire account data including the file messages.htm with a copy of chats. You can view all messages in a chronological order by opening the file messages.htm.
How To Archive Messenger History For Android
In Facebook Messenger there are two ways of taking messages away from the history – by deleting or archiving them. If deleted, the chat will be lost forever, and if archived – the entire message history with a certain user will be restored after a message is received from him or sent to him (it doesn’t matter where, on an Android device or on PC).
To archive a chat with a certain user in Android, start Messenger and find the chat you need to archive. Click on such chat and hold until a context menu appears.
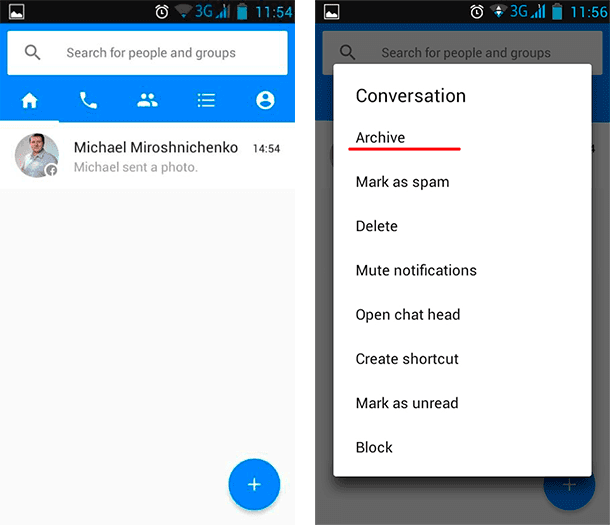
Choose the line «Archive» and the message history with this user will no longer be visible in the list of your chats because it will be archived.
It can be restored both at Facebook website and in the Messenger of your smartphone.

Backup Options for Android (Cloud, Google Account, Apps For PC) 📱💻☁️
Where are pictures sent by Messenger for Android kept?
By default, all photos and pictures sent via Messenger are not saved to the smartphone’s memory. They are just shown in the application and they can be viewed, but it is not possible to use them for other purposes in your device.
Nevertheless, in Messenger for smartphones you can set up automatic saving of all photos and pictures sent to your Android device. To do it:
-
Start the Messenger on your smartphone
-
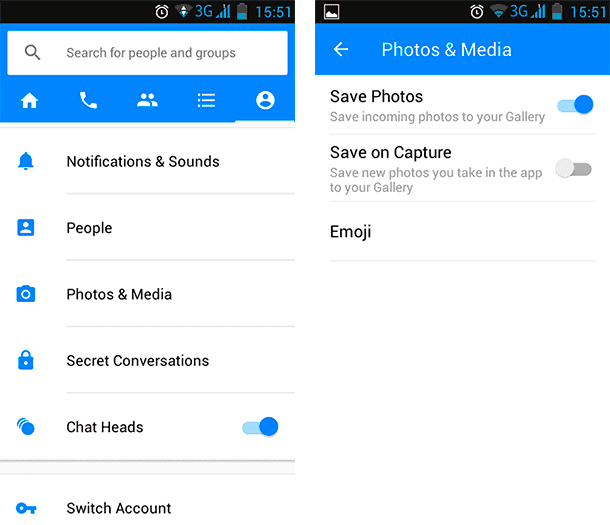
Go to the Settings menu and select the item Photos & Media
-
Enable functions «Save Photo» and «Save on Capture», and all images received or taken with the use of an application will be automatically saved to the smartphone’s memory. To be more exact, in the folder: Pictures / Messenger
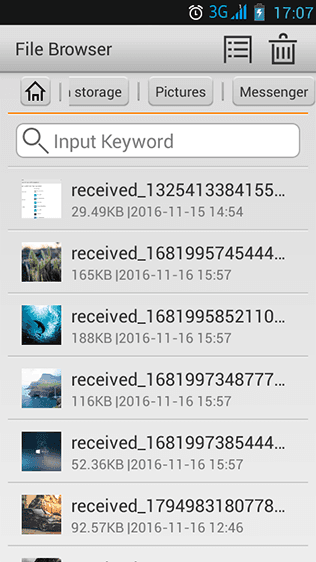
If the application is uninstalled or fails, such pictures will still be stored in the memory of your device.
If there is no need to save automatically all images received via your Messenger, you can save them one by one (when and as necessary). To do it, go to the chat that you need to save messages from and click on the necessary image by holding your finger on it.
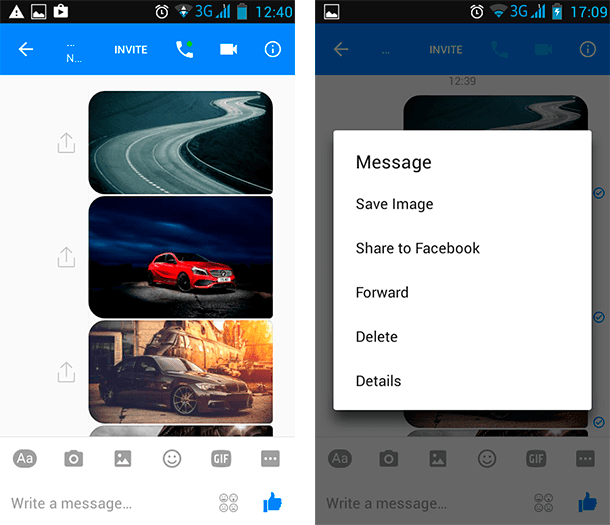
In the menu that opens, choose «Save Image» and it will be saved to the same folder: Pictures / Messenger.


