Data Recovery After Windows Defender Deletion: Can You Rescue Files?
Lost important files due to Windows Defender deleting them? In this article, we uncover the methods and techniques to recover files deleted by Windows Defender. Our experts share valuable insights, tips, and solutions to help you retrieve those crucial files. Whether it’s false positives, quarantine actions, or other issues caused by Windows Defender, we’ve got you covered. Learn how to rescue your valuable data!
- Windows Defender Security Center
- Manage isolated elements and exclusions in Windows Defender Security Center.
- Conclusion
- Questions and answers
- Comments
One of the latest updates issued and available under Windows 10 assessment program is Windows 10 Redstone 5. It adds a lot of newest and most important functional improvements to the Windows operating system.
If the system works all right and the new functions receive popular user approval, they are included into official system updates and become available for all Windows 10 users across the globe.
Windows Defender Security Center
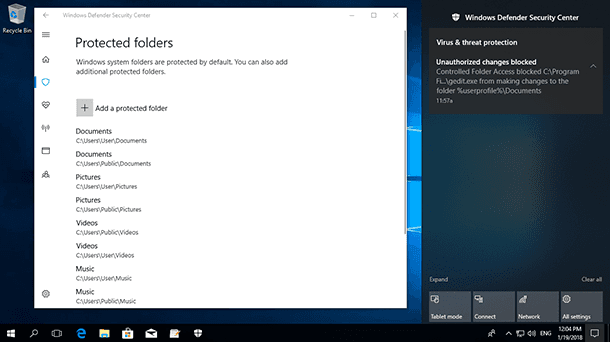
Beginning with Windows 10 Creators Update 1703, the new Windows Defender icon fashioned as a white shield is displayed in the System Tray or in the hidden icons panel. When you click on it, the system will open Windows Defender Security Center to make it easier for you to view and control the selected protection measures and have a better understanding of the security functions which are already guarding your device working under Windows 10 operating system.
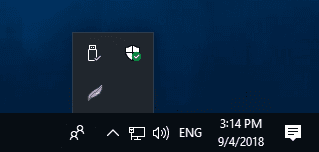
The security center will act as the single panel for all defensive functions including third-party security tools to deliver a clearer picture of all risks your computer may face while working. It was specially designed to simplify and unify all the Windows security settings in one place.
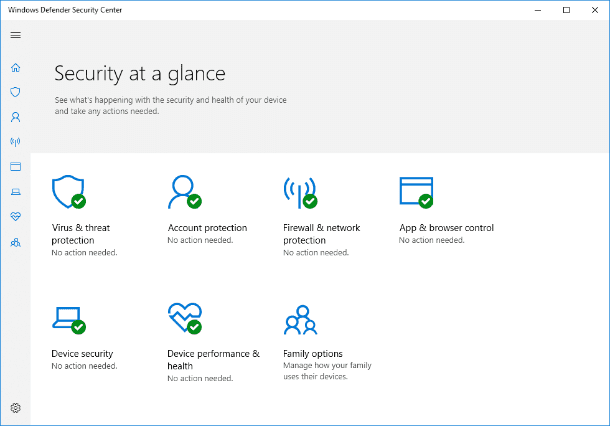
This tool will include the following seven sections to provide users with full control over their device’s security and operability.
Feature 1. Virus & threat protection
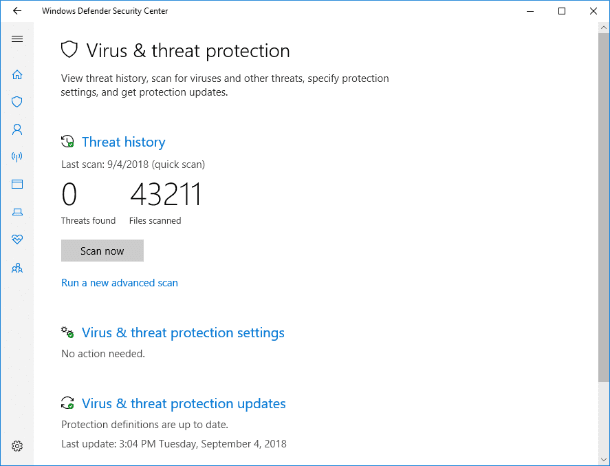
The first page of the security center displays complete information on the status of protection provided for your device by Windows Defender and a third-party antivirus app. Users can see the information on current threats, the last scan and have a look at the list of detected threats. Compared to the previous versions of this operating system, the security center has got extra settings: a wider range of antivirus protection, security settings against ransomware, controlled access to folders to protect them and corresponding memory sectors on your device from unauthorized modification by malware etc.
If there is a problem that requires your attention, an exclamatory mark inside a yellow triangle will appear on the Windows Defender icon in the System Tray.
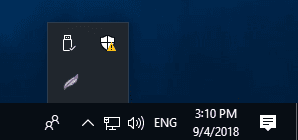
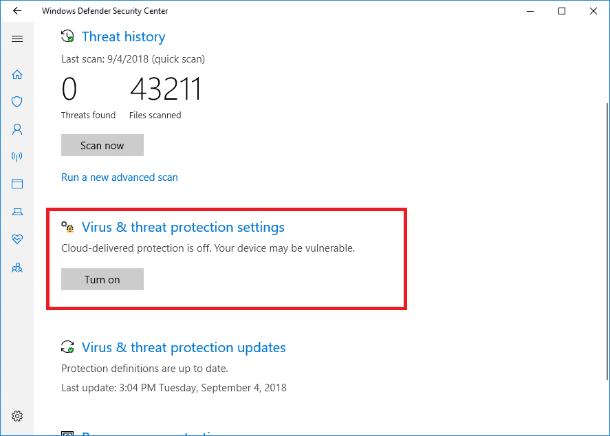
The detected problem will be displayed in the corresponding page of the Windows Defender Security Center and a method to solve the issue will be suggested.
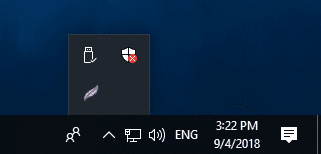
If the problem is so serious that it requires urgent action, the Windows Defender icon in the System Tray will show a red circle with a white cross inside it to bring your attention to the importance of a new threat.
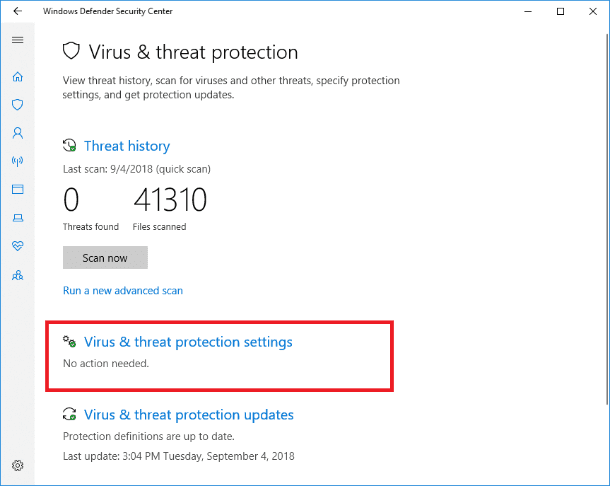
In the corresponding section of Windows Defender Security Center you will be able to learn more about the problem and choose how to tackle it.
Feature 2. Account Protection
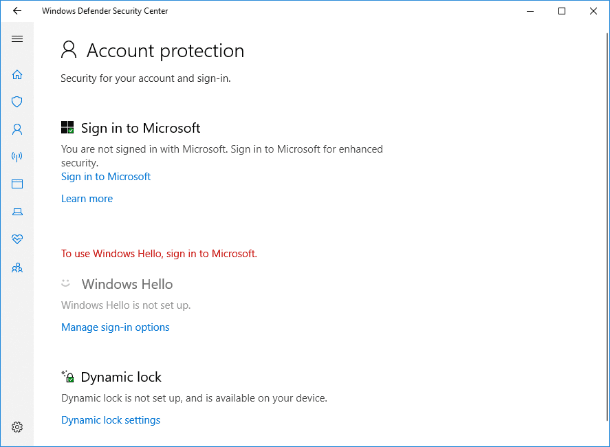
This page contains Windows Defender settings that ensure complete protection for user accounts and extra privacy settings along with cloud storage backup. Additionally, the security center provides control over «Windows Hello», a popular and well-known biometric function within Windows 10, which allows quick and safe sign-in to Windows 10, making payments, connecting to applications and services in a number of ways including face recognition and fingerprint use.
The Dynamic lock system deserves special attention; its settings allow the Windows 10 Defender block devices if their actions go beyond the allowed limits.
Feature 3. Firewall & network protection

How to Adjust or Disable Windows 10 Firewall ⚙️🛡️💻
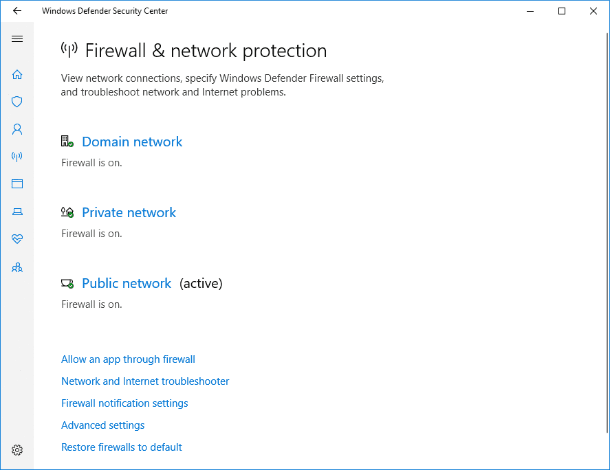
The next page manages Windows Firewall settings and ensures uninterrupted defense for your device when connected to various networks. Additionally, there are links to network and Internet troubleshooter, firewall notification settings, advanced security settings with explanation of security policy rules and an opportunity to configure Windows Firewall for inbound and outbound connections. Besides, there is also information on local networks reflecting main settings in Network and Internet section of the Settings app.
Feature 4. App & browser control
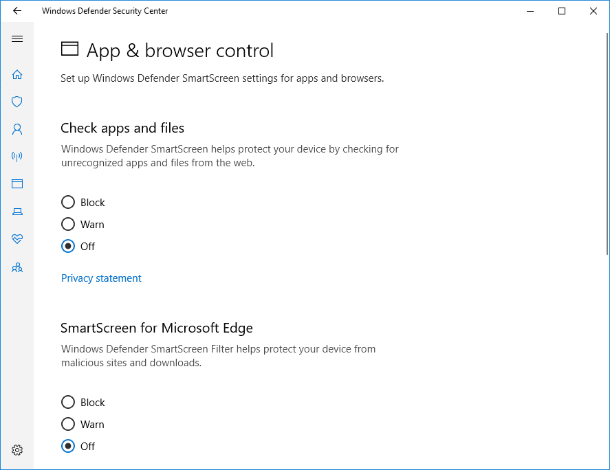
This page of the security center deals with app protection and security when on the Internet. For this purpose, there are settings for Windows Defender SmartScreen. The «SmartScreen» in Windows 10 operating system, as well as in its previous version, Windows 8.1, prevents your computer from running suspicious (or evidently dangerous) programs and websites, blocks them immediately and uses pop-up notifications to warn you of the danger.
When installing any application, opening a webpage in Microsoft Edge browser or using the application store Microsoft Store the SmartScreen filter will check them for compliance with security settings in the Microsoft database, and will immediately block a suspicious action or suggest the user to decide whether to perform such actions or consider them safe.
Feature 5. Device security
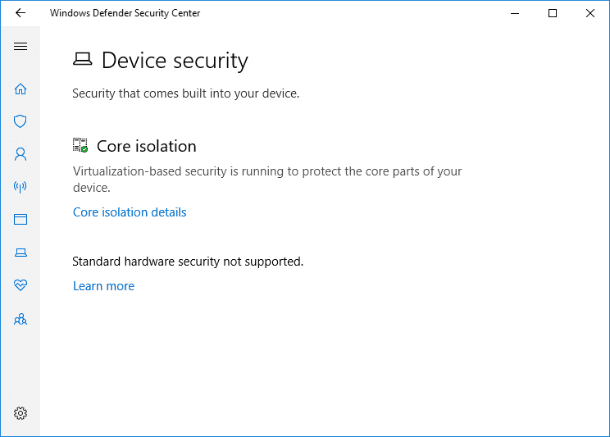
Every computer device has a kind of built-in equipment used by Windows 10 operating system to ensure additional security. In this page, users can see one of the three messages indicating additional security options for your device:
- Your device meets the requirements for standard hardware security – this message informs you that the device supports core isolation and memory integrity. Additionally, it means support of TPM 2.0 that ensures safe creation of encryption keys; secure boot mode; DEP technology to prevent running malicious code and run an additional system memory scan; UEFI MAT firmware interface (the latest replacement for BIOS).
- Your device meets the requirements for enhanced hardware security – this message means that in addition to standard hardware security requirements, your device has memory integrity enabled.
- Standard hardware security not supported – this message is shown if the device doesn’t support at least one of the listed standard security requirements.
Feature 6. Device performance & health

How to Check and Speed Up a Windows 10 Computer🥇 🏃 🚀
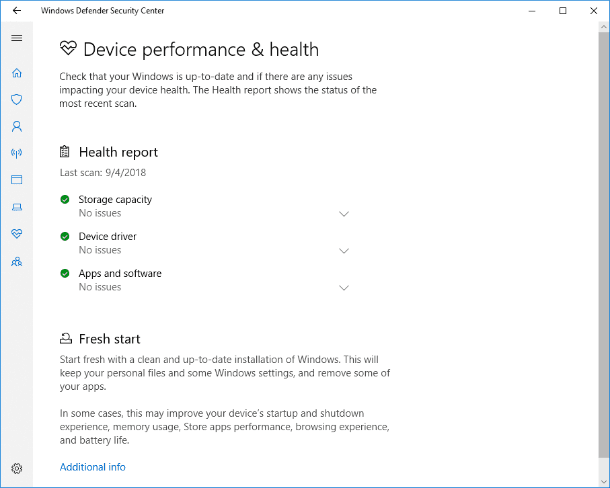
This page of Windows Defender Security Center shows a report on the status of software and Windows services including the information on the storage capacity, charge level, and hardware drivers. The system monitors device reliability and offers advice on troubleshooting in case of possible problems.
Additionally, users receive a full overview of Windows latest updates with the opportunity to start work again with the clean installation of the latest version of Windows. The Fresh start function allows to boost your computer’s performance by installing a clean version of Windows if your computer encounters performance issues, or if there’s a lot of unnecessary software installed.
Feature 7. Family options
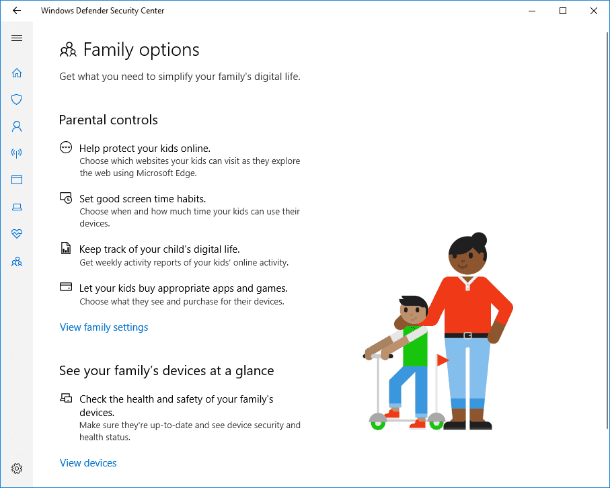
In addition, there are Family options to help you exercise centralized control over devices used in your family. In this page, you can configure parental controls and how your children spend their time with devices, manage their online activity or manage control elements, and restrict access to buying games and applications in the Internet from your family’s devices.
Feature 8. Settings
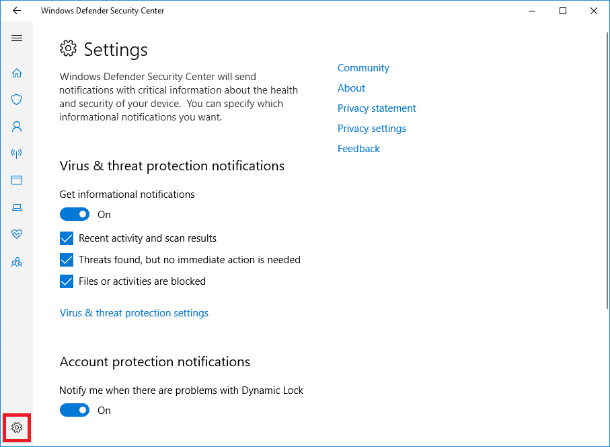
Clicking on the Settings icon shaped as a gear in the lower left corner of the Windows Defender Security Center window, you will open its settings where you can manage security providers and notification options.
Manage apps and services protecting your device (antivirus, firewall, online threat protection) and configure how you receive notifications from Windows Security service in situations that can affect reliability and security of your device.
Windows Defender Security Center by itself doesn’t add any new functions to Windows Defender. It just collects the many previously existing Windows security and privacy settings into one place and arranges them for your convenience. When everything is all right, its icon in the Taskbar shows a green circle with a white tick inside it. If the system encounters threats that require your attention, there will be a threat alert displayed as a red circle with a white cross in it.
Manage isolated elements and exclusions in Windows Defender Security Center.
After this brief overview of Windows Defender Security Center, let’s have a look at finding and restoring files deleted by the Windows Defender. You can learn more about Windows Defender Security Center settings in our video guide Windows 10 Security Center: Set Up the Free Antivirus Windows Defender.

Windows 10 Security Center: Set Up The Free Antivirus Windows Defender 💥 🛡️ 💻
Based on its own security settings, Windows Defender may mark some files as viruses and delete them. However, Windows Defender doesn’t delete all suspicious files literally, but isolates them and places into a special storage area, the Quarantine. Let’s find out where the Quarantine is located, how to clean it up or restore a file from there if it was deleted by mistake. We will also show you how to find and configure the Exclusions (?) section with Windows Defender Security Center in Windows 10 operating system.
Method 1. Deleting or restoring files from the Quarantine in Windows Defender.
Open Windows Defender Security Center by clicking on the corresponding button in the Taskbar and then go to the Virus & threat protection page.
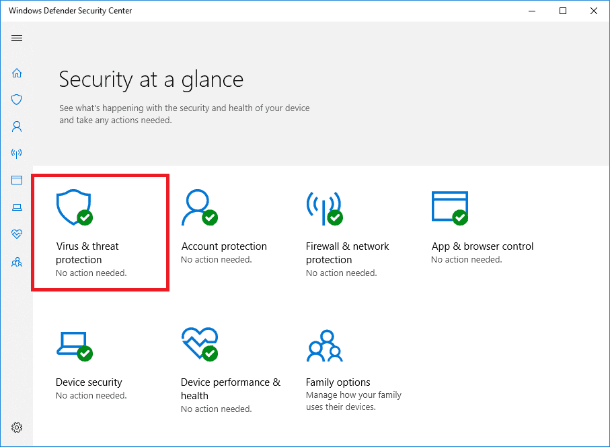
In the Current threats section click on Threat history link.
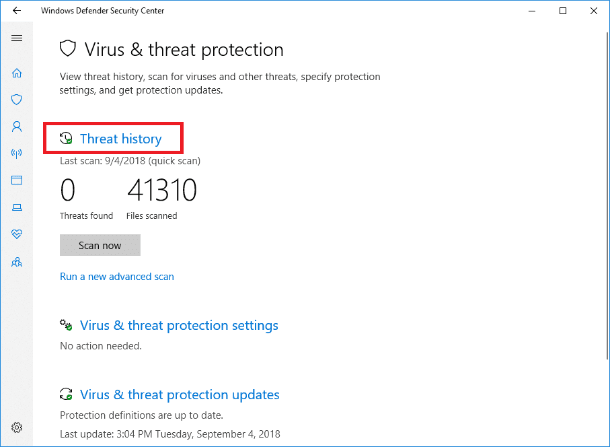
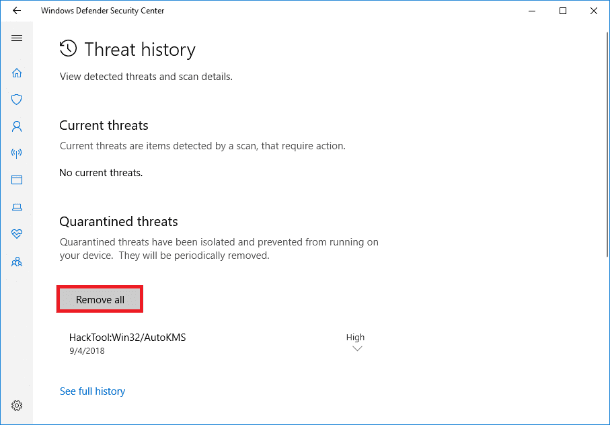
In the new page, Threat history, you’ll be able to see the information on scanning and detected threats. Drag the slider down until you find the line Quarantined threats. It displays all isolated threats blocked by Windows Defender.
You can view the entire list and permanently remove from your computer the listed files by clicking on Remove all button under the list of threats.
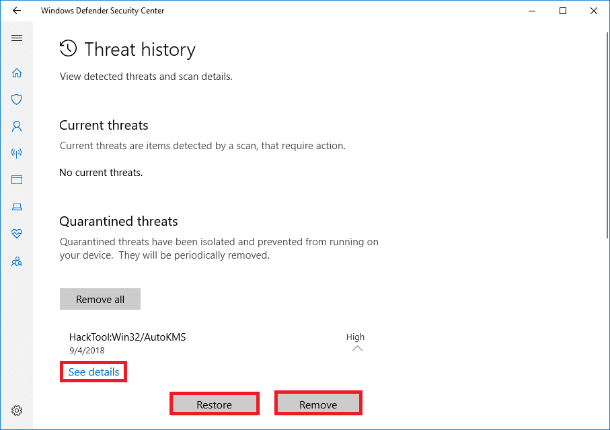
Otherwise, click on the selected threat in the Quarantine and open the menu. You can click on the See details link to view the entire information about the detected threat. If the file poses a real threat for safe work of your operating system, click on the Remove button to clean it. Yet if the file was placed into the Quarantine by mistake, click Restore to bring it back.
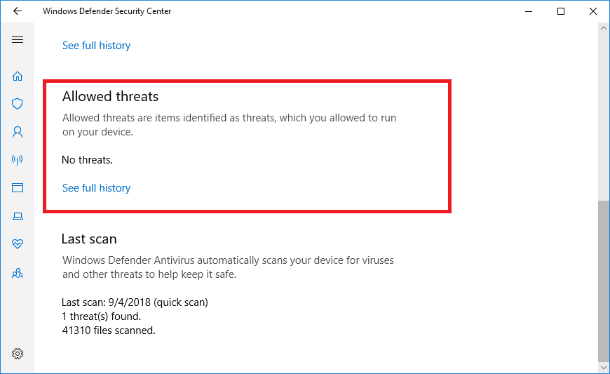
Method 2. Allowed threats
While you can remove or restore files and programs from the Quarantine, you can also add them to the Allowed threats section. Your device may contain certain programs or files which you trust but Windows Defender marks them as threats basing on its own database. This way, any file can be brought to this section, and then it will never be removed again. Remember that if you restored a file and didn’t add it to Allowed threats or Exclusions, such file may be placed into the Quarantine again and removed later. Working with infected files can be dangerous and expose the entire operating system to risk. You perform such actions on your own responsibility so always make sure you can check the file publisher and know if it’s trustworthy.
Method 3. Adding exclusions to Windows Defender Security Center
Windows Defender also features a function entitled Exclusions. This is a list of elements you don’t want to scan. The files marked as exclusions will be missed by the Windows Defender scanning. To add a file to exclusions, here’s what you have to do.
Open Windows Defender Security Center and then go to the Virus & threat protection page.

Find Virus & Threat Protection settings and click on the link.
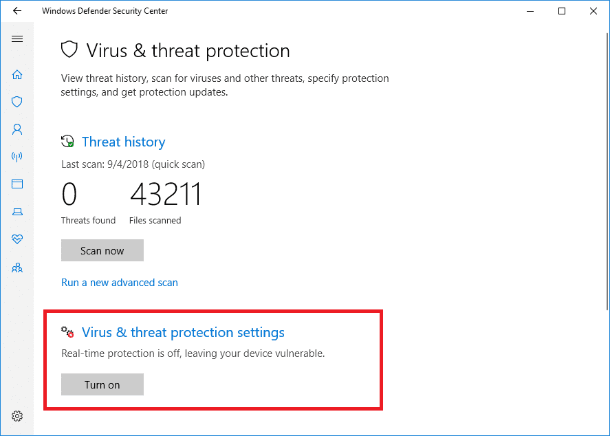
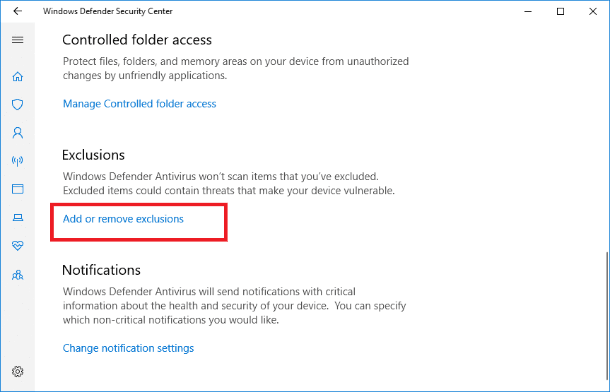
In the page that opens drag the slider down and find the Exclusions section. In this section, click on the link Add or remove exclusions.
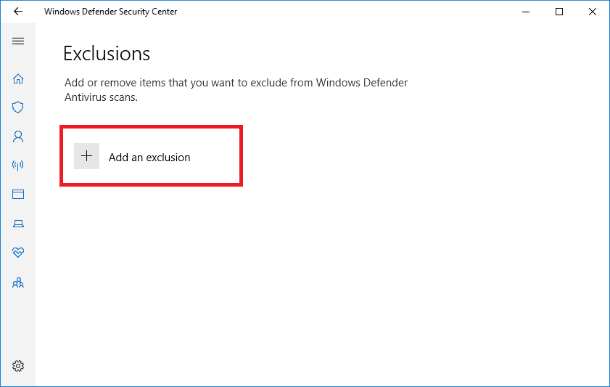
In the new page, add or remove the elements you want to exclude from the scan list of Windows Defender.
Use the + button to add exclusions.
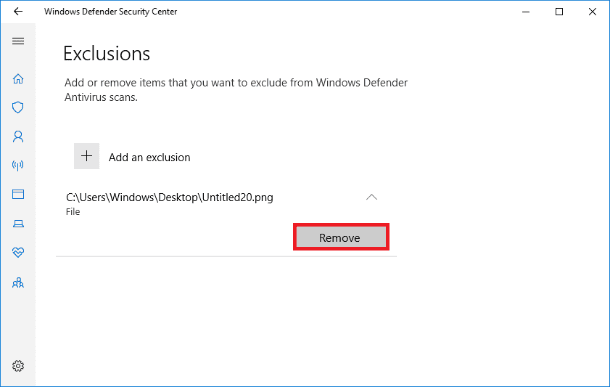
Or click on the line of the added exclusion and open the management menu, click on Remove to delete the file from the exclusions list.
Conclusion
In this article, we have described main actions you can perform with quarantined and excluded files in the new Windows Defender. All these steps are applicable to the Windows Defender Security Center represented in Windows 10 operating system beginning with Creators Update 1703.
If for some reason you need to disable or delete Windows Defender and remove its icon from the Taskbar, you can find all possible ways to do it in our video guide How to Enable or Disable Windows Defender in Windows 10 Creators Update (Build 1703).

How to Enable or Disable Windows Defender in Windows 10 Creators Update (Build 1703) 💻🛡️🚫
Send us your questions and advice, share your experience in comments below this article, and we will answer them without fail.


