Data Recovery from My-Ditto NAS RAID System: Step-by-Step Instructions!
Discover how to recover data from a RAID system on My-Ditto NAS with our essential guide. Whether you’ve encountered data loss due to hardware failure or other issues, this step-by-step tutorial will walk you through the process of recovering your valuable data from My-Ditto NAS RAID system with ease.
- How to build a RAID on My-Ditto
- How to recover data from a RAID based on my-Ditto NAS
- Conclusion
- Questions and answers
- Comments
Network storage devices by Dane-Electronic are marketed as NAS solutions that don’t need complicated configuration procedures. To improve data storage reliability, this NAS can build RAID 1 arrays. In this case, all data written to one hard disk will be copied to the other disk as well. This will protect your data against loss. Still, just like any other storage device, a NAS may break down sooner or later. As a result, all files still remaining on the disks will automatically become inaccessible.
When connecting disks to a PC, it is not always possible to see the data that which is stored on them due to a mismatch of the file system or the RAID data writing method. The operating system may not recognize the disks and when they are connected, it may suggest initializing of formatting them for further use. In this case, you’ll need a data recovery tool to read and recover your files from the RAID.

How to Recover Data from a RAID System on My-Ditto NAS
How to build a RAID on My-Ditto
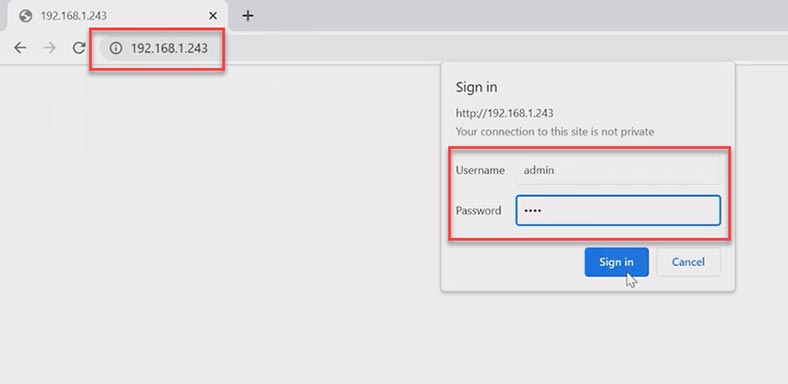
For starters, let’s explore how to create a RAID system on this storage device. To manage hard disks, you need to access the administration panel of the NAS device. Open a web browser and enter the IP address of your NAS. Type the default login and password – they are admin and 1234, respectively.
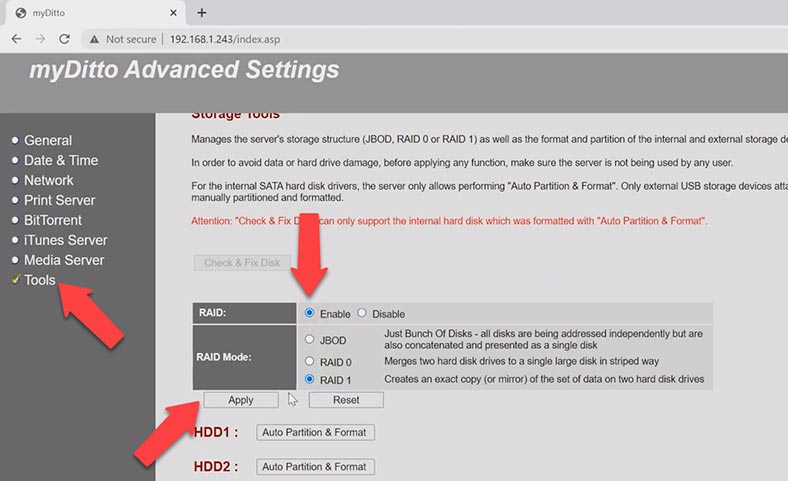
After that, go to the Tools section and find the tab Storage Tools. Check this option – Enable RAID, then choose the array type and click Apply to confirm.
As a result, you’ll see a warning saying that all data will be erased from the disks. Click Ok to continue. It starts the process of building the RAID, so you’ll have to wait a little until it’s over. In the Storage Status tab you can view the disk array status.
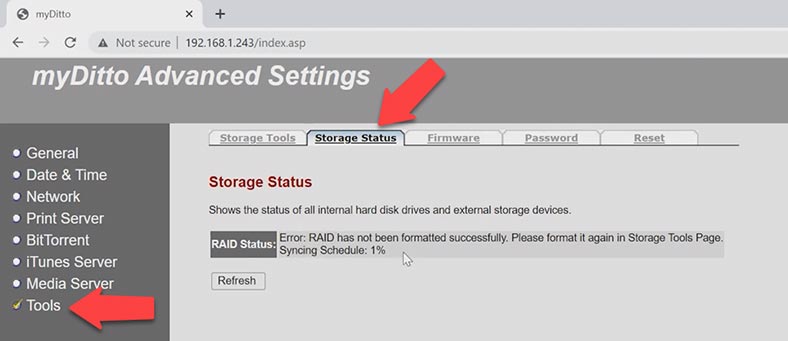
By now, you’re finished with the settings and the storage device can be used, so you can write files to the hard disks and so on.
How to recover data from a RAID based on my-Ditto NAS
If the storage device breaks down and you can’t access the disk array anymore, the RAID can still be rebuilt and files can be retrieved with the help of a data recovery tool called Hetman RAID Recovery.
| Feature | Description |
|---|---|
| RAID Types | JBOD, RAID 0, RAID 1, RAID 10, RAID 5, RAID 50, RAID 6, RAID 60 |
| Supported Devices | NAS, DAS, Servers, PCs |
| File Systems | NTFS, FAT, exFAT, ReFS, HFS+, Ext2/3/4, Btrfs, XFS |
| Functions | Data recovery after failure, deletion, formatting, file system corruption |
| Interface | Multilingual. Including Ukrainian, Russian, English, German, Polish, Spanish, Portuguese, French, and Arabic |
| Platforms | Windows 11, 10, 8, 7, Vista, Server |
| Operating Modes | Installation file, portable version |
| Additional Features | Support for remote connection for data recovery assistance |
In case of a NAS storage breakdown, the information stored on the hard disks remains intact, but if the disks are connected directly to a computer, the operating system may not recognize them. As a result, you won’t be able to access the files stored on the disks. That is why you will need a software tool capable of rebuilding the damaged disk array and retrieving your files.
Hetman RAID Recovery supports most popular file systems and RAID types. It will come in handy if you lose access to data stored on a network-attached device as a result of a hardware error, a controller failure or other hardware issues. It will help you recover data after a device breakdown, accidental removal, formatting, misconfiguration or NAS firmware issues.
To access the disks, they need to be taken out of the NAS device and connected to a computer directly. This computer has to be a Windows machine. If the operating system of this computer suggests initializing or formatting the disks, don’t do that because it will make recovery a lot more complicated.
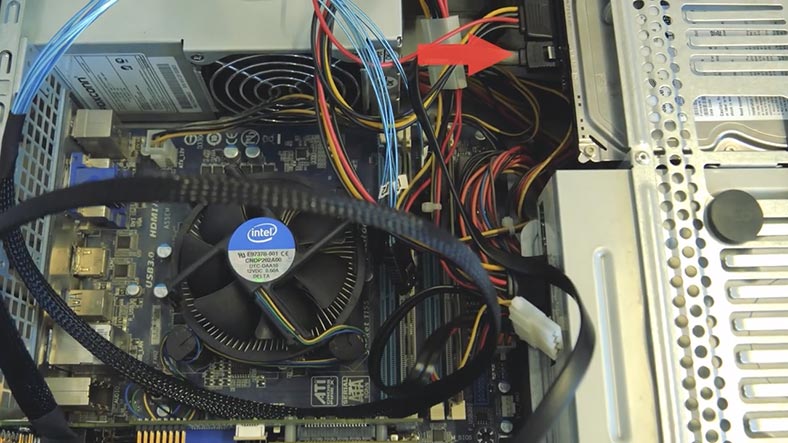
Instead, download, install and run Hetman RAID Recovery. When started, the program will automatically scan the disks connected to this computer, rebuild the damaged RAID system and display it in the main window. In my case, the program was able to detect the RAID type which was built with these disks.
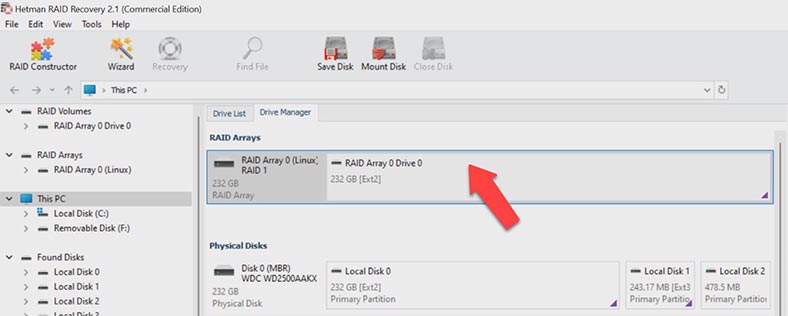
To search for files, right-click on the array and choose Open, then select the scan type. We recommend beginning with a Fast scan – this will take less time, and it works fine in most typical recovery scenarios.
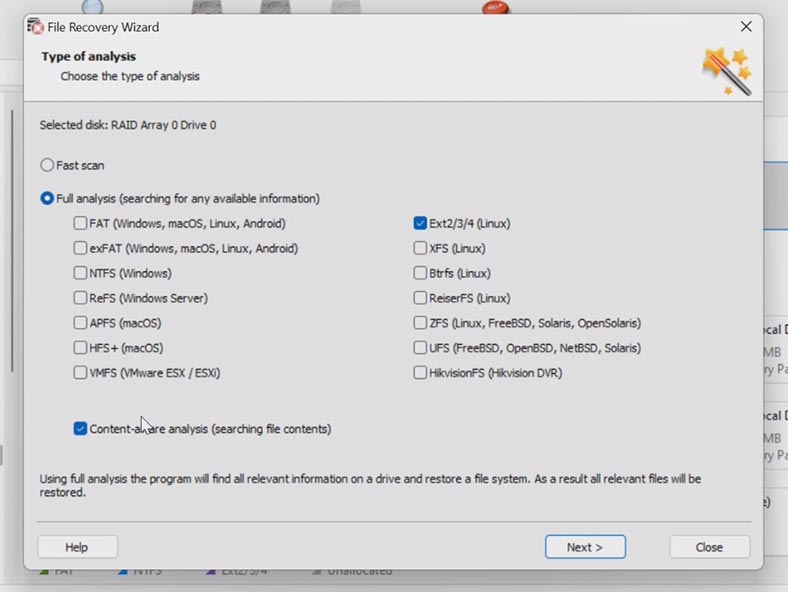
But if the program can’t find the missing files, then go for Full analysis. Go back to the main window, right-click on the disk and choose Analyze again, then click on Full analysis, select the file system for this disk, and click Next.
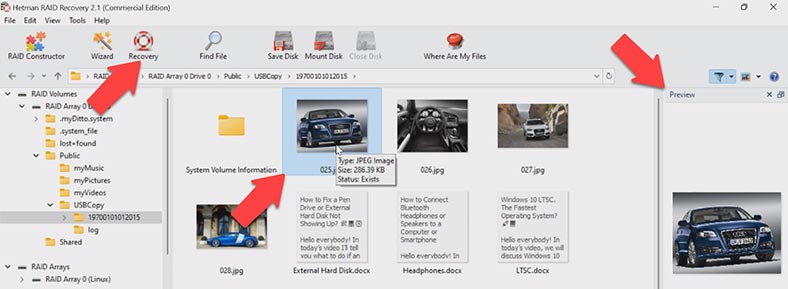
The program has easily found all the information that used to be stored on the disks. You can use the preview window to see the contents of all files. Select the files you want to restore, and click the Recovery button. Specify where to save the data (choose the disk and folder), and click Recovery again.
When the operation is over, you will find the data in the folder you have chosen.
Conclusion
Summing up, it’s not too difficult to recover data if your storage device is down. The most important thing is to understand what to do and choose a good software tool able to restore your files from the disks.


