Data Recovery from MicroNet Platinum Firewire 800 RAID: Step-by-Step Instructions!
In this article, we’ll find out how to recover data from a RAID based on MicroNet Platinum Firewire 800 with our essential guide. Whether you’ve experienced data loss due to hardware failure or other issues, this step-by-step tutorial will walk you through the process of recovering your valuable data from MicroNet Platinum Firewire 800 RAID with ease.
- How to create a RAID 5 system on MicroNet Platinum Firewire800
- How to recover data from a RAID based on MicroNet Platinum Firewire800
- Why NAS devices fail
- How to recover data from a damaged RAID
- Conclusion
- Questions and answers
- Comments
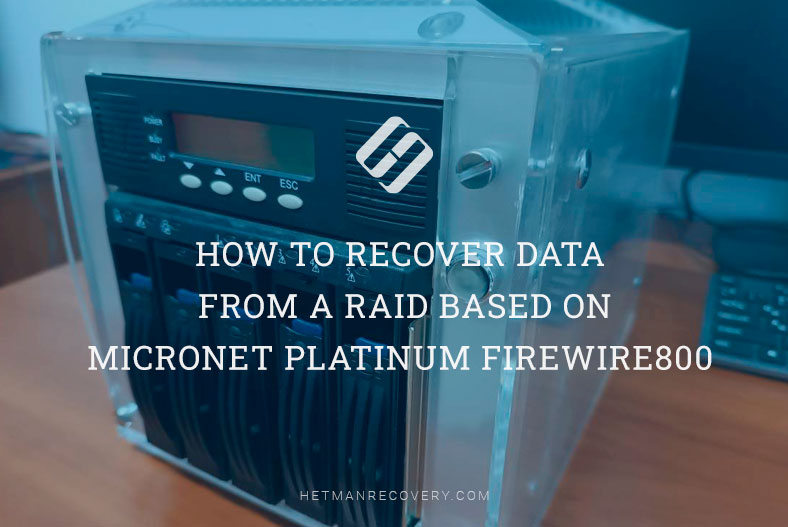
PlatinumRAID is a versatile and affordable data storage solution that can be used in a few different scenarios:
- As a local storage device;
- As a dedicated workstation connected to your server;
- And as a backup station.
Such storage solutions are popular since they offer a relatively cheap and reliable way to store data, while the RAID technology lets you turn a bunch of disks into one system and create a storage with improved resilience. Also, such RAID storage enables users to add more disks to expand the storage space or to replace a faulty hard disk without losing data.
However, storage devices may fail sooner or later, and you will lose access to all the information still remaining on their disks.
The RAID technology spreads parts of the data across all disks within the array, so if the storage system breaks down, you won’t be able to retrieve files from the disks without using specialized third-party software. In this case, you’ll need a RAID data recovery tool to rebuild the array and recover your files.

How to Recover Data from a RAID Based on MicroNet Platinum Firewire800
How to create a RAID 5 system on MicroNet Platinum Firewire800
For better understanding of how a disk array is built, let’s explore the process of creating a RAID 5 system on this device.
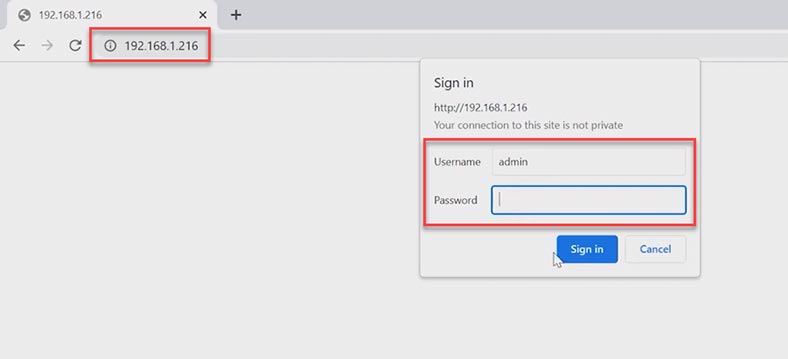
To create a RAID on this storage device, you need to access its administration panel first. Do it by opening any browser and go to the registration address of your device. Type the IP address of your NAS in the address bar. To sign in, type the login and password – the default login is admin and the password field should be left empty. After sign-in, you’ll see the storage administration panel.
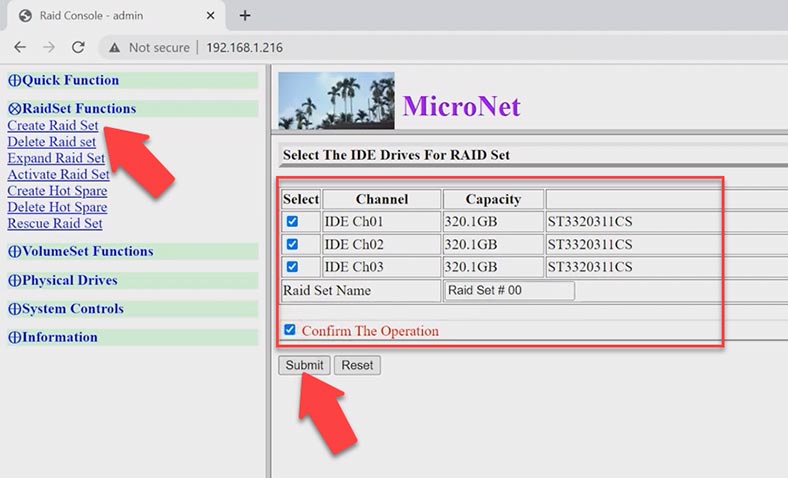
Now go to RAIDSet Functions – Create RAID Set. In the window on the right, select the disks to be included into this RAID, assign a name and check the box next to Confirm Operation, then click Submit. Now that the RAID system is created, you should create a volume.
Go to VolumeSet Function – Create Volume Set.
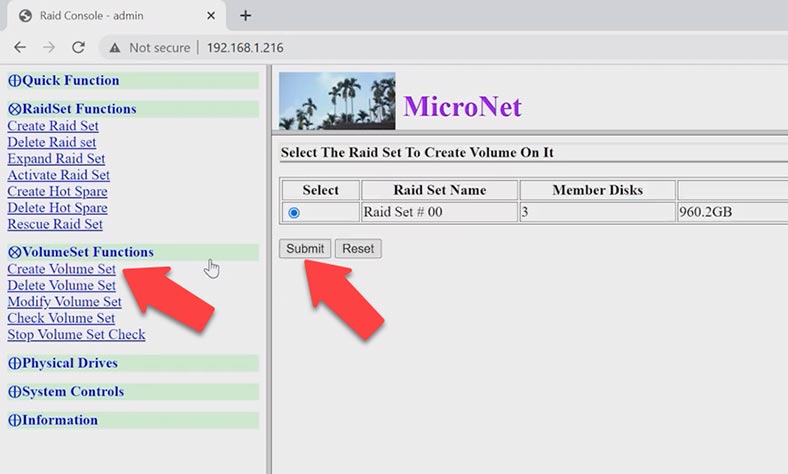
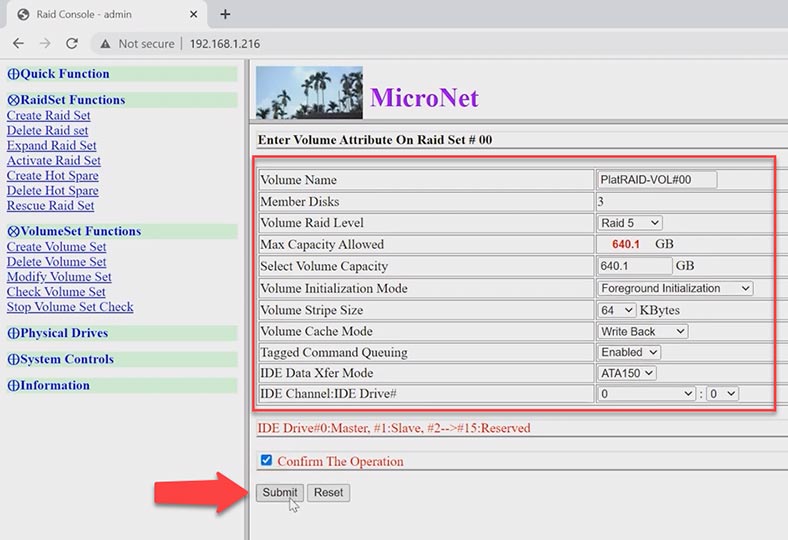
Choose your RAID – Submit, set the disk array parameters, assign a name, choose RAID type, and other options. Check this confirmation box and click Submit. The volume is created. Now you should wait until the initialization is complete, and then your RAID will be ready to use.
The final step is to partition the array in Disk Management. In this window, it is displayed as a separate physical disk.
How to recover data from a RAID based on MicroNet Platinum Firewire800
If you have accidentally deleted data from a MicroNet RAID system connected to the computer, and the RAID volume is still displayed in the Disk Management window, you can restore it with the specialized recovery tool – Hetman Partition Recovery. In case of simple removal from the array, you don’t have to physically take out the disks from the storage system and connect them to the motherboard of your computer. In this case, all you have to do is to start the recovery tool and scan the disk from where important data was deleted.
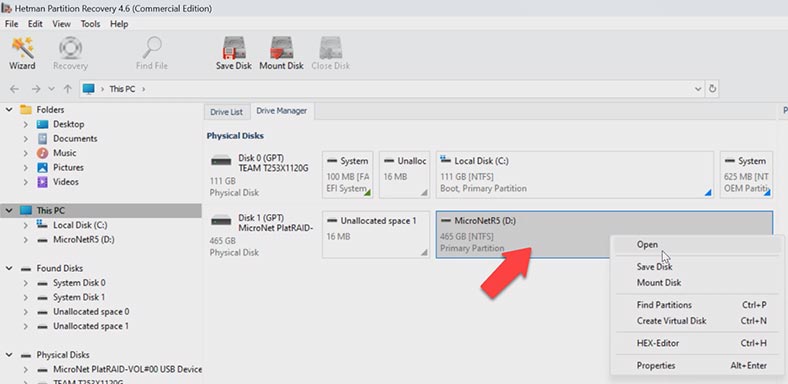
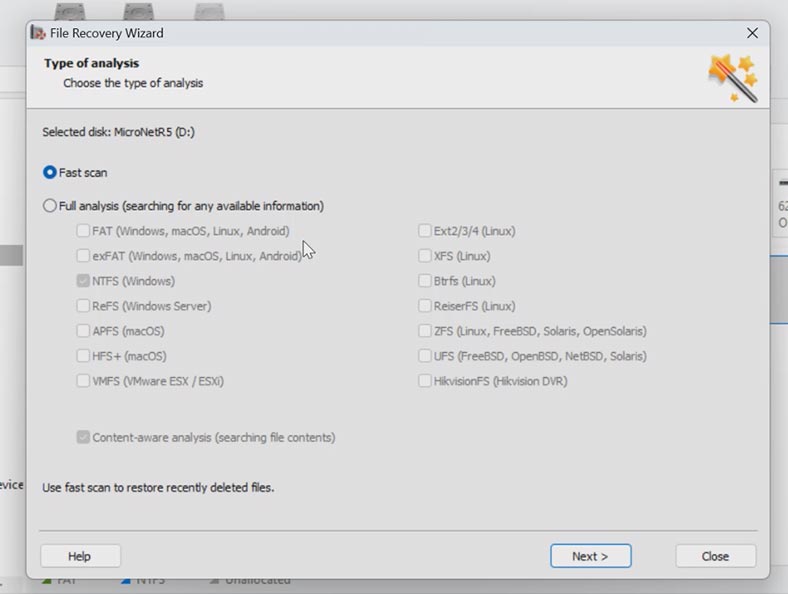
To start looking for deleted files, right-click on the disk and choose Open. After that, choose the scan type – Fast scan or Full analysis. We recommend beginning with Fast scan – it will take less time, and it works fine in most typical recovery scenarios.
After that, open the folder where the deleted files were stored. As you can see, in my case the program managed to find the deleted files without effort. They are all marked with a red cross; by clicking on them, you can see the file contents in the preview window.
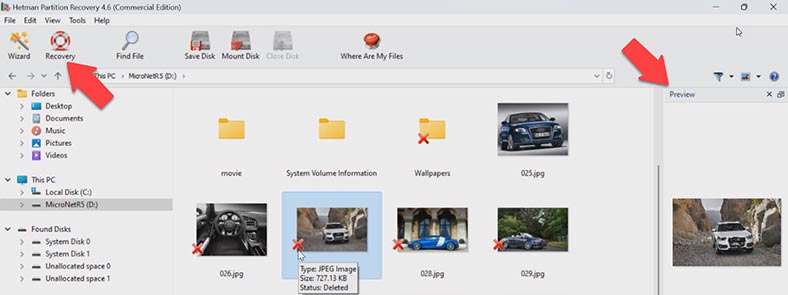
Select all the items you want to recover and click the Recovery button. Specify where to save the data (choose the disk and folder), and click Recovery again. When the process is over, you will find the recovered files in the folder you have chosen for saving them.
Why NAS devices fail
But what can you do if your storage device has broken down?
Well, typically RAID systems tend to fail due to several factors:
- A power failure or power surge
- Overheating or incorrect shutdown procedures
- A virus infestation or malware activity
- Incorrect configuration or user errors
- Operating system errors
- Hardware controller failures
- A system failure, a hard disk failure and so on.
A damaged or crashed RAID cannot be restored without formatting its hard disks. To have your RAID working again, it needs to be reconfigured, and it involves destroying all data stored on its disks.
How to recover data from a damaged RAID
If you lost access to RAID data because the storage device broke down, the RAID was misconfigured or rebuilt, just download the specialized RAID data recovery tool – Hetman RAID Recovery.
| Feature | Description |
|---|---|
| RAID Types | JBOD, RAID 0, RAID 1, RAID 10, RAID 5, RAID 50, RAID 6, RAID 60 |
| Supported Devices | NAS, DAS, Servers, PCs |
| File Systems | NTFS, FAT, exFAT, ReFS, HFS+, Ext2/3/4, Btrfs, XFS |
| Functions | Data recovery after failure, deletion, formatting, file system corruption |
| Interface | Multilingual. Including Ukrainian, Russian, English, German, Polish, Spanish, Portuguese, French, and Arabic |
| Platforms | Windows 11, 10, 8, 7, Vista, Server |
| Operating Modes | Installation file, portable version |
| Additional Features | Support for remote connection for data recovery assistance |
Before you start the recovery process, power off the RAID storage and take out all of its hard disks. Remember the order in which they were installed in the system case: to avoid confusion, we recommend marking them with numbers.
After that, connect all the disks to a Windows computer, using USB or SATA ports. If your motherboard lacks SATA ports or power connectors to use all the disks you need, you can add adapters or expansions cards to solve the problem.
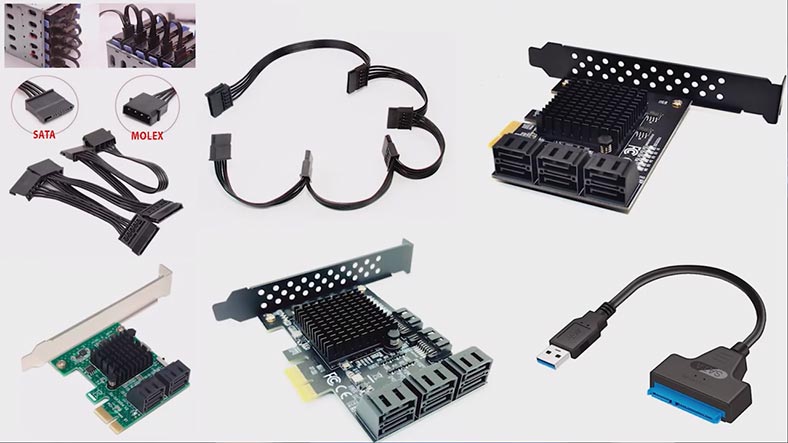
The most important thing is to connect all disks at the same time. The only exception is when you work with a RAID system that can remain operable when one or more hard disks are missing.
Hetman RAID Recovery supports all popular file systems and RAID types. It will scan the disks automatically and rebuild the destroyed RAID system. All information about the RAID system is displayed at the bottom of the screen, so you can check if the program identified this array correctly.
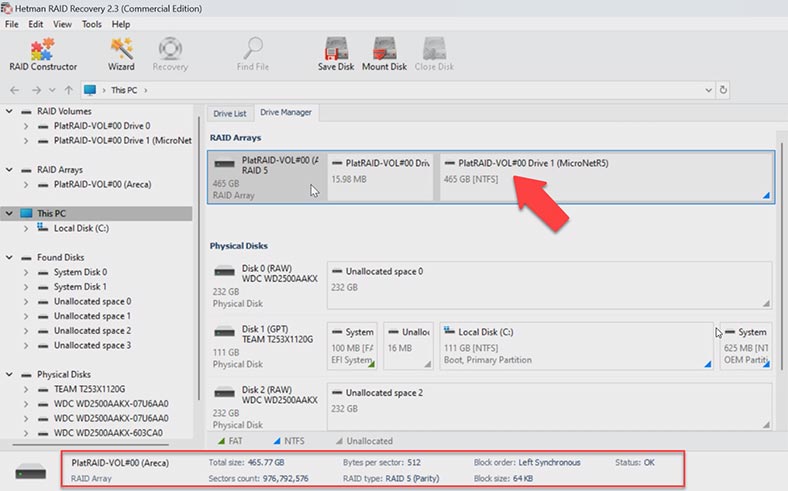
To start searching for files, right-click on the array and choose Open. Then choose analysis type. Just as before, we recommend starting with Fast scan.
Open the folder where the necessary information was stored, select the files you want to recover and click the Recovery button. Choose where you want to save them, and click Recovery again. When the recovery process is complete, you’ll see all the files in the specified directory.
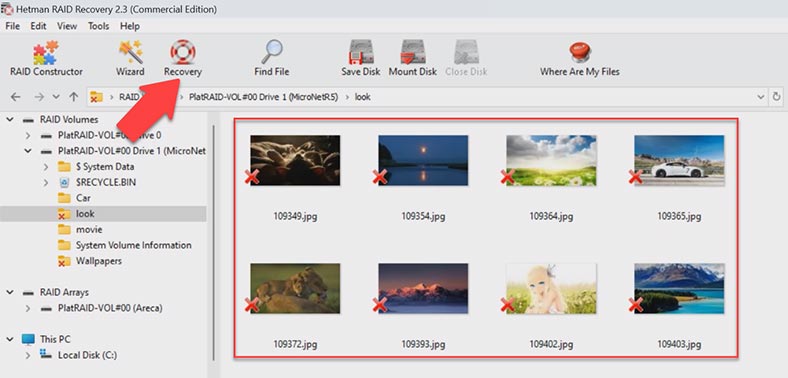
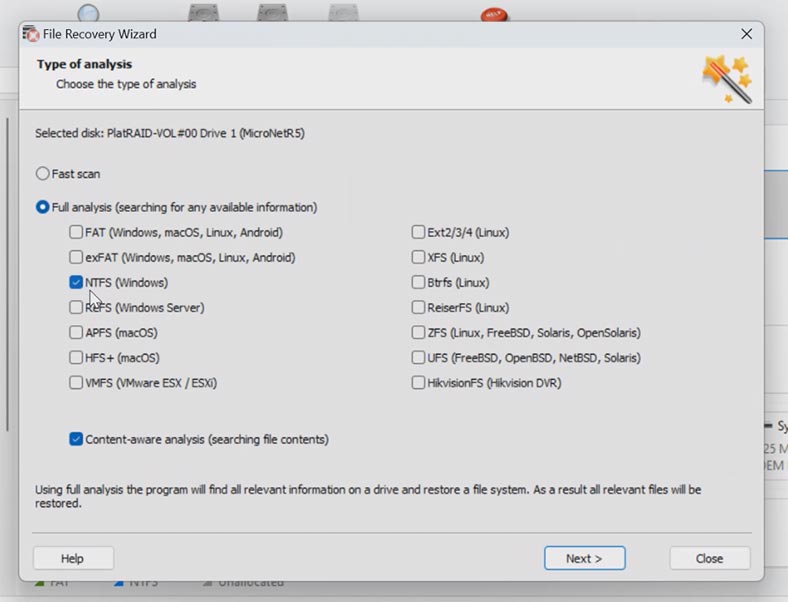
If the program can’t find the missing files, then go for Full analysis. To do it, return to the main menu, right-click on the disk and choose Analyze again – Full analysis Choose the file system type. You can uncheck the option for signature-based search, as it will make the process go faster.
Conclusion
Always remember: if you encountered an error and lost access to files, don’t try to rebuild or reconfigure the array. All further actions concerning the disk array may significantly reduce the chances for successful recovery of your data. An action that seems self-intuitive and natural may suddenly result in destroying the array completely and erasing the remaining data. In the end, recovery could become impossible. Instead, all you need is to take the hard disks out of the storage system and complete the required recovery steps. Only in this case you’ll be able to have your mission-critical data back.


