Disable or Remove Automatic Updates in Windows 10: Guide
Learn how to disable or remove automatic updates in Windows 10 with our essential guide. Automatic updates can be convenient, but they can also disrupt your workflow and consume bandwidth at inconvenient times. In this comprehensive tutorial, we’ll walk you through step-by-step instructions and expert techniques to help you take control of your update settings in Windows 10. Whether you want to temporarily disable updates or remove them entirely, we’ll cover all the essential methods to suit your needs. Don’t let automatic updates dictate your system’s behavior—watch our guide and regain control over your update settings today.
- Method 1. Do it with the Services tool
- Method 2. Try Local Group Policy Editor
- Method 3. Free utilities to disable automatic updates in Windows 10
- Method 4. How to remove the updates that have already been installed?
- Questions and answers
- Comments

How to Prevent Windows from Automatically Updating Your Windos 10 PC or Laptop 🔄🚫💻
Method 1. Do it with the Services tool
TThe first method works for Windows 10 Home, Professional and Enterprise.
Type Services in the search field (the magnifying glass icon on the taskbar) and run this system tool.

Find Windows Update service and open its properties.
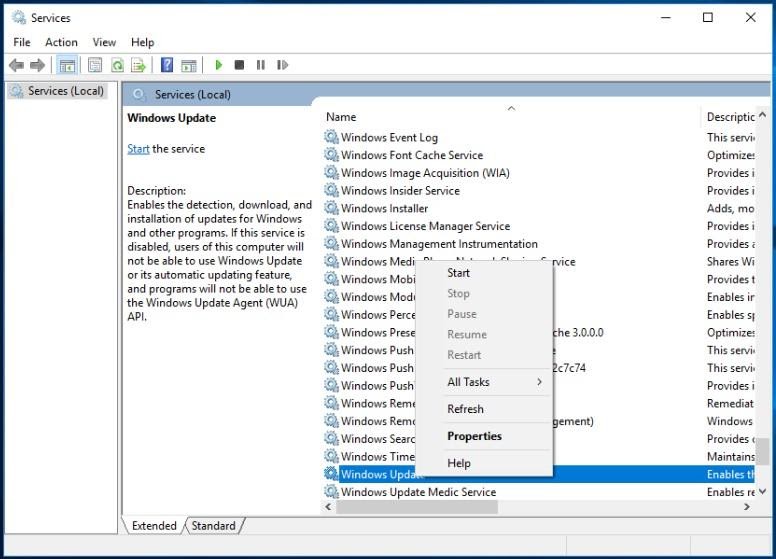
Click on Stop and select Startup Type – Disabled
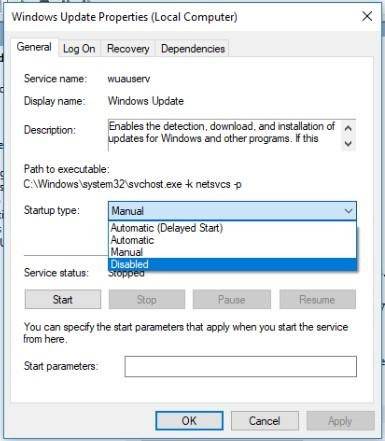
After these changes are applied and the computer restarts, Windows Update will not work anymore, so updates won’t be downloaded and installed automatically.
Method 2. Try Local Group Policy Editor
The second method is only good for Windows 10 Professional and Enterprise. As other versions of Windows lack such component as Local Group Policy Editor.
To start the Local Group Policy Editor, type gpedit.msc in the search field and press Enter.
gpedit.msc

When in the Editor, go to Computer Configuration - Administrative Templates - Windows Components - Windows Update.
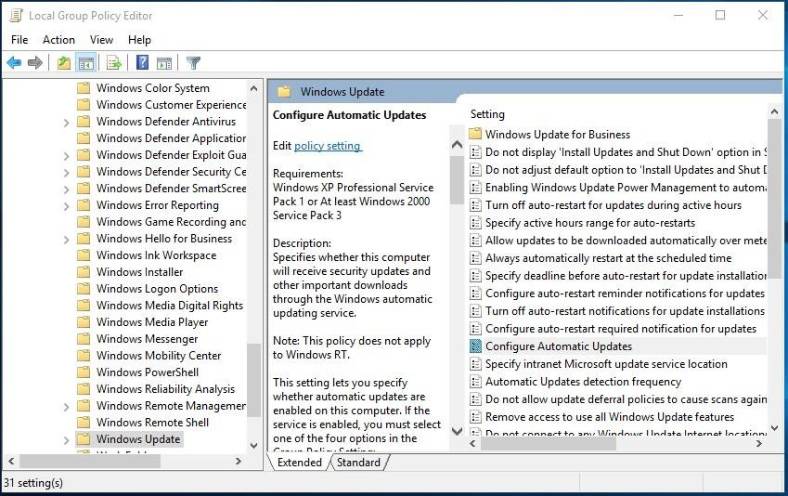
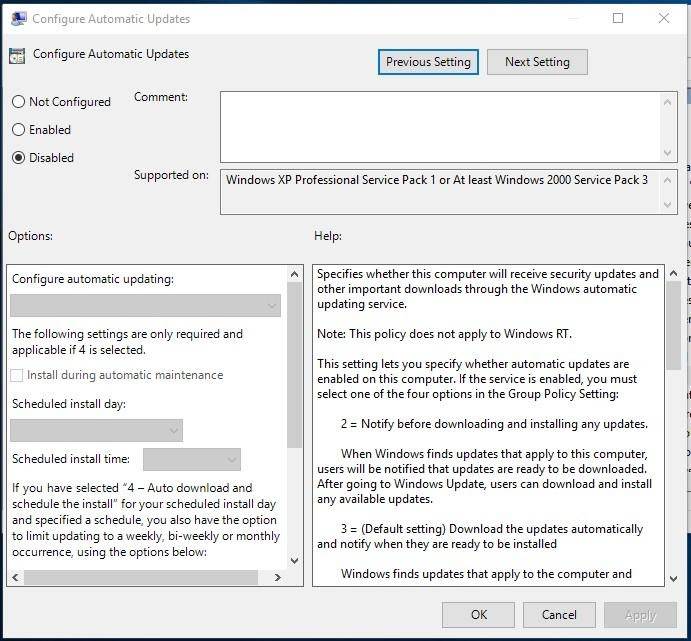
Find the policy Configure Automatic Updates, open it and set it to Disabled. Click Apply/Ok.
Method 3. Free utilities to disable automatic updates in Windows 10
Also, you can use free utilities to prevent Windows 10 from updating automatically.
| Program Name | Description | Main Features | Pros | Cons |
|---|---|---|---|---|
| Windows Update Blocker | A utility to disable automatic updates in Windows 10. |
- Enable/disable updates with one click - Protect settings from changes |
- Easy to use - Small program size - Free |
- Lacks additional features - Requires manual control |
| StopUpdates10 | A tool for blocking the Windows Update service. |
- Block Windows updates - Disable update notifications - Restore default settings |
- Compatible with the latest Windows versions - Simple interface - Free |
- Limited functionality - Requires periodic updates of the program |
| Win Updates Disabler | A program for disabling updates and other system services. |
- Disable Windows updates - Disable Update Center - Block Windows Defender antivirus |
- Supports multiple functions - Fast operation - Free |
- Not always effective on the latest Windows versions - Interface lacks localization |
| O&O ShutUp10 | A tool for managing Windows 10 features, including updates. |
- Full control over updates - Manage telemetry - Configure security and privacy settings |
- Extensive functionality - Regular updates - Free |
- Non-intuitive interface - Requires careful configuration |
As an example, we’ll show you Win Updates Disabler, but there are other tools as well.
Run the program, jump to the tab Disable to check the box next to Disable Windows Updates. After that, click Apply Now for the changes to take effect.
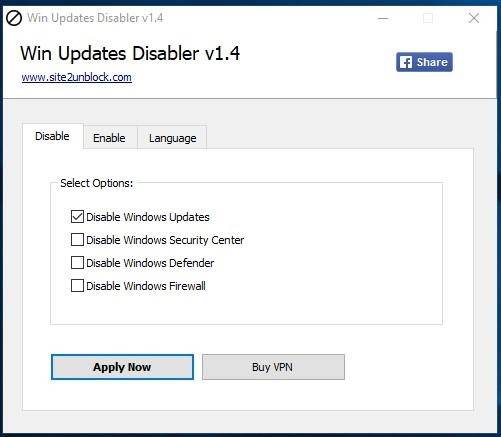
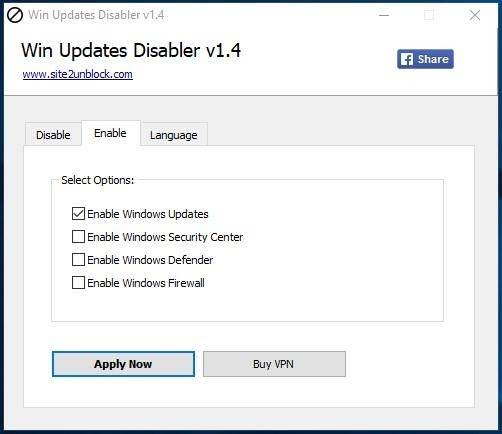
As seen from the screenshot, this program can also disable Windows Firewall and Windows Defender. If necessary, you can turn everything on again in the tab Enable.
Method 4. How to remove the updates that have already been installed?
If some updates were installed incorrectly, or you want to remove only particular Windows 10 updates, this is also possible.
To do it:
-
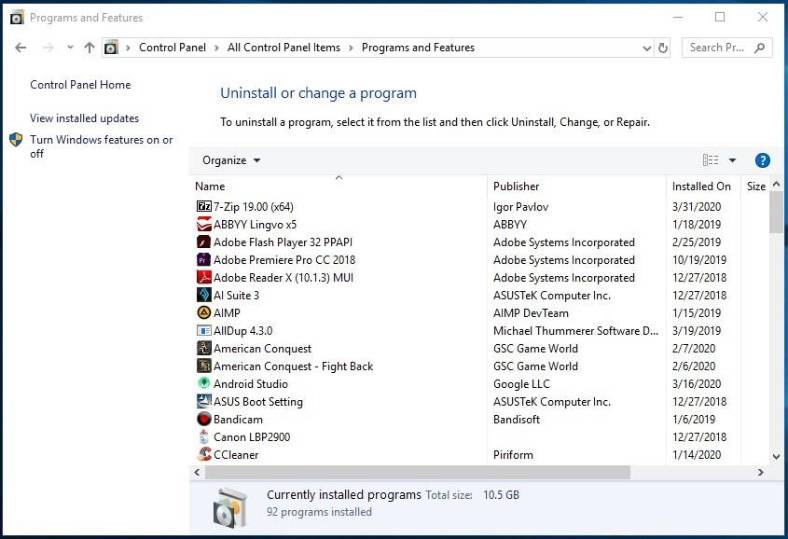
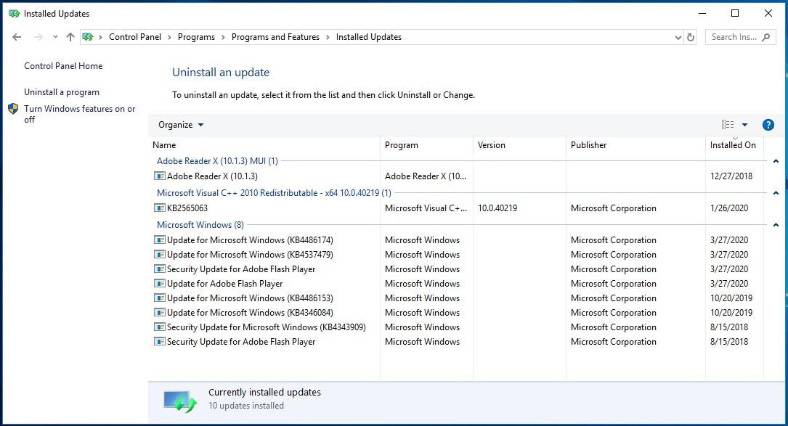
Go to Control Panel and select Programs & Features.

-
Jump to the tab View Installed Updates.
-
Sort them by installation date by clicking on Installed On.
-
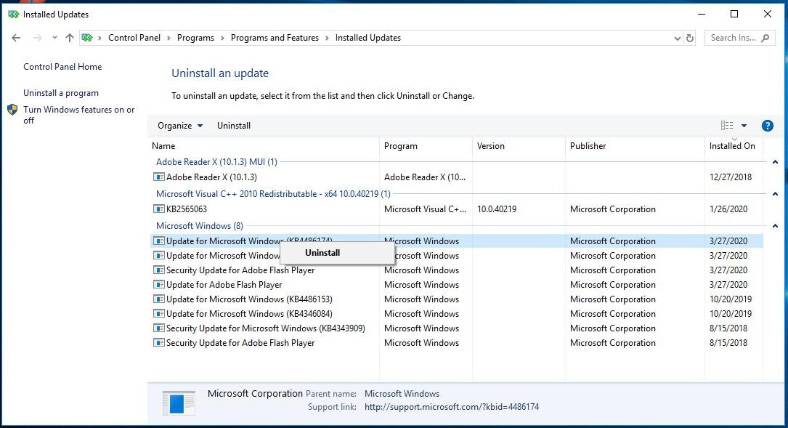
Right-click on one of the updates which you want to delete from the system and click Uninstall.
-
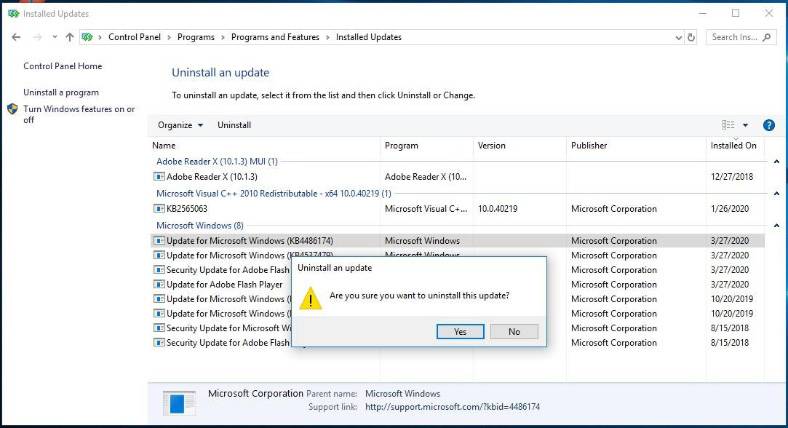
Confirm your decision and changes will take effect after the system restart.

Three Ways to Disable Automatic Driver Update in Windows 10, 8, 7 🔄🚫💻


