Change File System from FAT32 to NTFS
In this step-by-step guide, we’ll walk you through the process of changing your file system from FAT32 to NTFS with ease. Whether you’re looking to unlock advanced features, support larger file sizes, or enhance data security, transitioning to NTFS is a smart move. From understanding the differences between FAT32 and NTFS to safely converting your file system without losing data, we’ll cover everything you need to know to make the switch seamlessly.

Converting NTFS, FAT32 or exFAT USB Flash Drive, External Drive Without Losing Data
Overview of the Problem
First of all let us see what are the reasons to get a new file system, and why would anyone need it. Imagine that you want to download a file larger than 4 GB, for example, a film in high quality or a DVD disk image. You won’t be able to do it, though, because when saving the file to disk you will have an error message that FAT32 file system does not support files larger than 4GB.
Another advantage of NTFS is that it does not require such frequent defragmentation (partially, this feature was mentioned in the article on accelerating Windows), and it works faster, accordingly.
| Feature | FAT32 | NTFS |
|---|---|---|
| Full Name | File Allocation Table 32 | New Technology File System |
| Maximum File Size | 4 GB | 16 TB (theoretical), 256 TB (practical limit on most systems) |
| Maximum Partition Size | 8 TB (Windows), up to 16 TB (with other OS) | 256 TB |
| Compatibility | Widely compatible with most operating systems and devices | Mostly compatible with Windows and limited support in macOS/Linux |
| Performance | Lower performance for larger drives | Optimized for larger drives and better performance |
| Security | No file permissions or encryption | Supports file permissions, encryption, and security features |
| Fault Tolerance | Limited; prone to corruption | Better fault tolerance with journaling and recovery options |
| Usage | Best for USB drives, memory cards, and small partitions | Best for internal hard drives and modern systems |
| File Attributes | Basic attributes (Read-Only, Hidden, System, Archive) | Advanced attributes (compression, encryption, disk quotas) |
To change the file system, you can use two methods, with the loss of data and without it. Let us study them both.
Changing Your File System
Method 1. By Mere Formatting Your Hard Disk
This is the easiest thing to do. If there is no data on the disk or you don’t need it, you can just format the disk.
Go to This PC, right-click your mouse on the necessary disk and press Format. The only step left to take is to select the format type, e.g. NTFS.
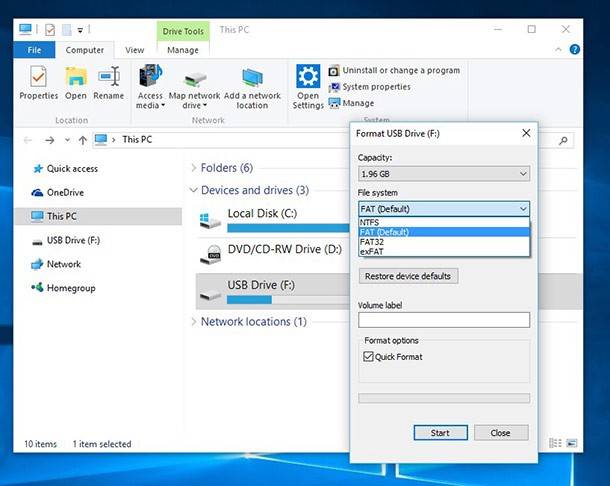
Method 2. Converting FAT32 File System Into NTFS
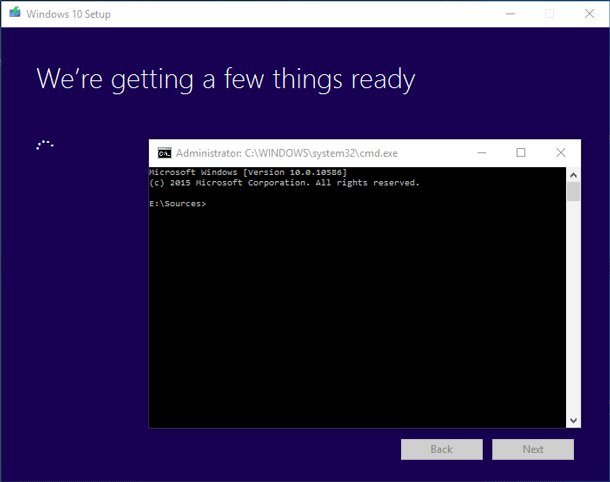
This procedure allows you to keep your files. i.e. they will all remain in the disk. You can convert the file system without installing any software but using only Windows tools. To do it, launch the command prompt and type in something like this: convert c: /FS:NTFS
convert c: /FS:NTFS
where C is the disk to be converted and FS:NTFS is the file system the disk will be converted to.

Important note! From my own experience, when converting from FAT32 to NTFS all file and folder names turned into unreadable symbols though the files by themselves were intact and could be used.Just they had to be opened and renamed which is quite a tiresome work to do. The process can take up much time (for a disk of 50-100 GB it took about 2 hours).
What is important to know? Whatever procedure you are using for conversion, save all important data. What if there is a failure? A power cut which is quite a frequent thing to happen? Software errors and the like?
If, for any reason, you failed to save your data before converting your file system or there was a notorious power surge and your data is now lost, don’t get upset – it can still be recovered. Depending on the file system of your data carrier you can use of the special programs for data recovery, such as Hetman Partition Recovery.

How to Recover Data After Formatting, Deleting or Creating Partitions in 2020 📁🔥⚕️
You can read about recovery of data lost due to a power surge or power cut in our article Recovering Data After a Blackout



Yes, there are a few disadvantages to using NTFS over FAT32.