Troubleshoot System Memory: How to Test for Errors in Windows
Encountering system issues on Windows 10, 8 or 7? Learn how to test your system memory for errors with this comprehensive guide. Discover expert techniques to diagnose and resolve issues for improved performance and stability!
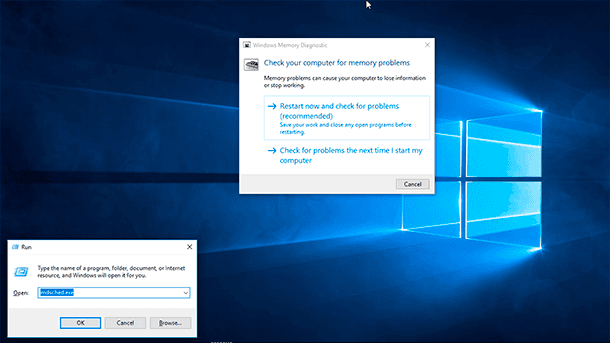
If programs work very slowly or with errors, if you see various glitches or freezes in Windows, if the system restarts suddenly, shows BSOD errors, it becomes a challenging task to find the root of the problem. Such errors can be cause by both software and hardware issues.
System memory is the component that you can check quickly and easily. In case there are problems with one of the memory modules, you should replace it immediately to restore your computer’s performance back to normal and avoid more serious problems connected to damaging system or user files.
In spite of third-party utilities for the same purpose available for download from the Internet, operating systems Windows 10, 8 and 7 have an integrated tool for checking the system memory. In this guide we will learn to use the Windows memory diagnostic tool to check if there are any problems with a memory module.

How to Find Out the System Memory Size, Check it, or Free it Up 🤖⚙️💻
How to Detect Memory Problems in Windows 10
To perform the following steps, you should restart the computer, so close all files which are opened and exit all running applications. Then:
-
Open Control Panel.
-
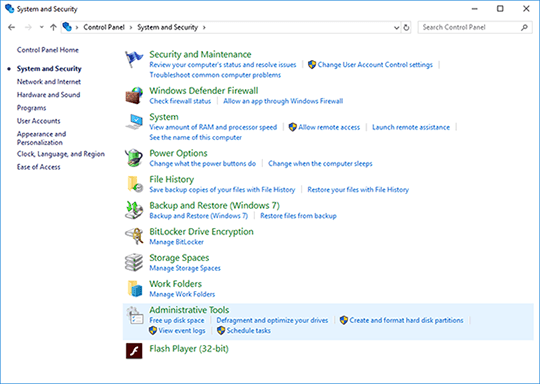
Choose System and Security.
-
Go to Administrative Tools.
-
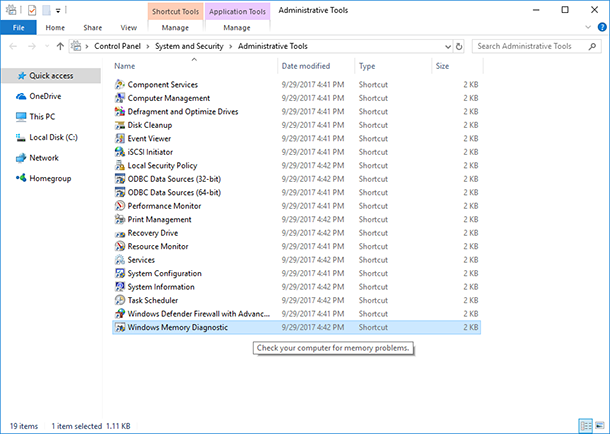
Double-click the Windows Memory Diagnostic shortcut.
An important note: As an alternative, you can use the keyboard shortcut Windows + R, then enter mdsched.exe and click ОК to run this tool.
-
Click the Restart now and check problems option. (The utility also offers to schedule a test after the next restart if you can’t close your applications and restart right now).
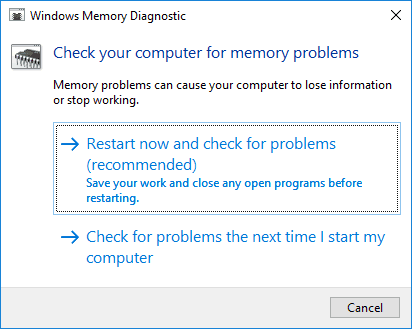
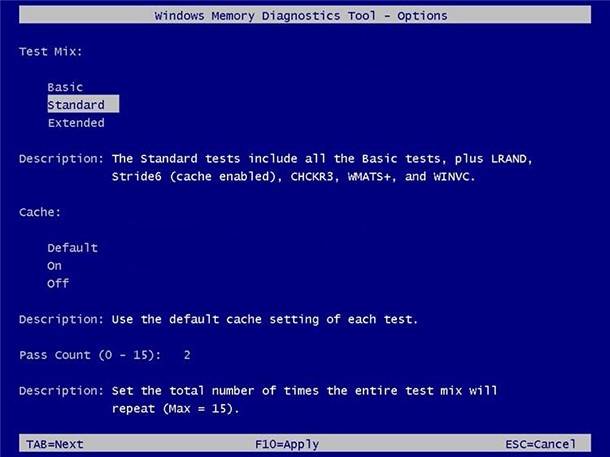
After the restart, the computer will automatically start in the Windows Memory Diagnostics environment and will run a standard test. The utility will run all tests available in the basic mode, as well as LRAND, Stride6 (cache enabled), CHCKR3, WMATS + and WINVC.
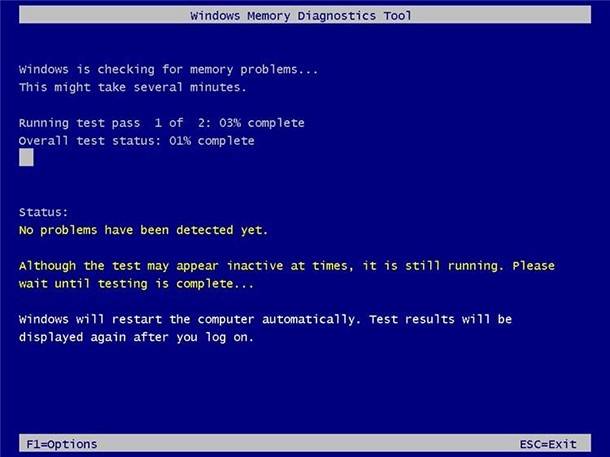
You can wait till the end of the Standard test, or you can press the F1 button to change the scan options.
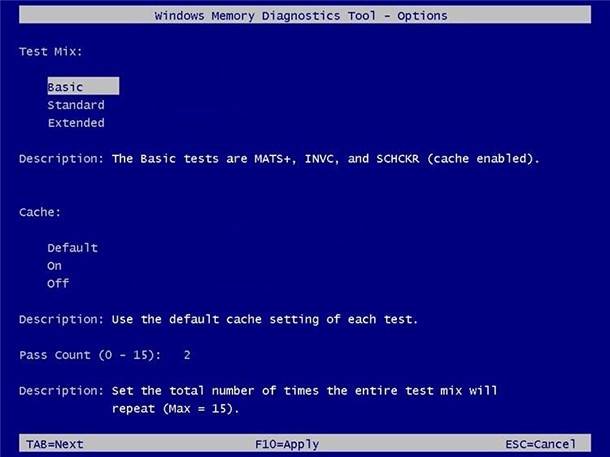
On the Options page, you can change the scan mode to Basic, which runs the MATS+, INVC, and SCHCKR (cache enabled) tests.
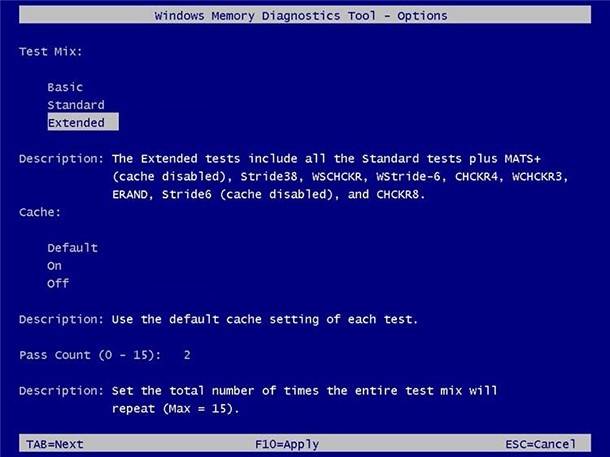
Alternatively, you can also select the Extended mode which includes all tests available in the Standard mode, plus MATS+ (cache disabled), Stride38, WSCHCKR, WStride-6, CHCKR4, WCHCKR3, ERAND, Stride6 (cache disabled), and CHCKR8.
If necessary, you can navigate the settings using the TAB key to change cache settings. If you disable cache, the utility will be able to address RAM data directly which ensures you run a comprehensive test. Besides, you can also set how many times the scanning will be repeated to test memory modules within your system.
Press F10 to apply the settings, go back to the main page and start a new scan.

Why Computer Runs into Blue Screen Errors and How to Fix BSOD 💻🛠️🤔
Checking Test Results
You can see the status while the scan is running, but as soon as the test is over, the computer will restart automatically. You will have to use the Event Viewer tool to see the test results and understand whether you have a faulty RAM module or not.
-
Click on Start.
-
Type in eventvwr.exe and press Enter to open Event Viewer.
-
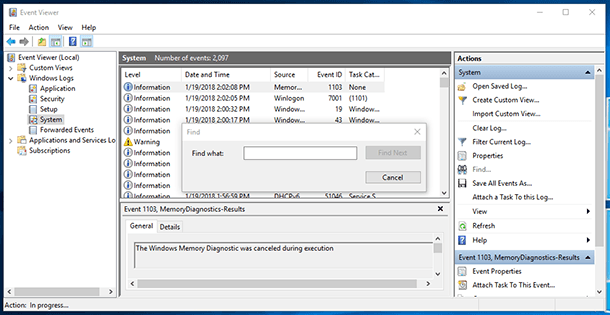
Go to the folder Windows Logs / System.
-
Right-click on System and select Find.
-
Enter MemoryDiagnostics-Results, and click the Find Next button.
-
Close the Find dialogue window.
-
In the Event Viewer, double-click on the MemoryDiagnostics-Results source, and view the message. If it says "The Windows Memory Diagnostic tested the computer's memory and detected no errors," then you can rest assured that memory is not the root of the problem.
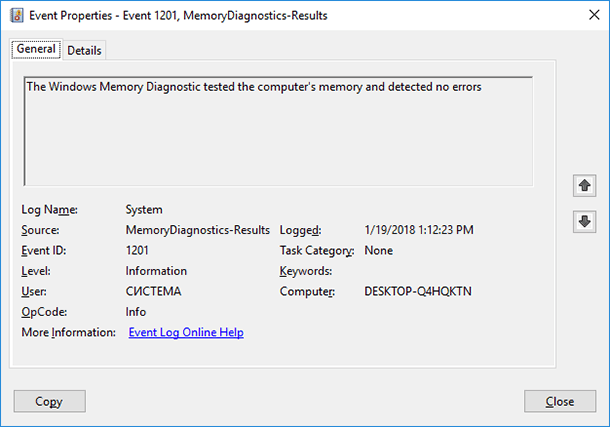
MemoryDiagnostics-Results
If the results show one or several errors, you can try running an extended memory test and check the results again. If you still see at least one error, then one of your RAM modules may be faulty and you might have to replace it.
Sometimes the tool can show you which memory stick has problems showing the results. However, if it cannot provide this information, you may have to remove and test your RAM sticks one by one to find the faulty one.
Though we use this guide for Windows 10, the Windows memory diagnostic tool has been around for many years, and it means you can use it in earlier versions of Windows as well, including Windows 8.1 and Windows 7.



In Windows 10, 8, and 7, you can access and use Windows Memory Diagnostic by following these steps: