System Restore Point in Windows 10: How-To Guide
Learn how to create and use System Restore Points effectively in Windows 10 with this comprehensive guide. Whether you’re facing system errors, software conflicts, or other issues, having a restore point can be a lifesaver. This tutorial covers everything you need to know about creating, using, and managing System Restore Points in Windows 10. Dive deep into step-by-step instructions and essential tips for ensuring system stability and recovery.
By default, Windows creates a new restore point when some changes are made to the computer, a driver or an application is installed etc.
- Working With Windows 10 Restore Points
- How to Create a Computer Restore Point Windows 10
- How to Delete a Windows 10 Restore Point
- How to Recover The Windows 10 From a Restore Point
- Where Are Restore Point Files Kept?
- A System Restore Point Won’t Generate. What Should I Do?
- How to Recover The Windows 10 From a Restore Point Using The Command Prompt
- How to Recover Restore Points Which Have Been Deleted?
- Questions and answers
- Comments
Working With Windows 10 Restore Points

How to Create or Delete Restore Point on Windows 10. Restoring Computer To an Earlier Date 📝🔄💻
How to Create a Computer Restore Point Windows 10
Method 1. Create a Restore Point Manually
-
Open Control Panel and go to Recovery / Configure System Restore.

-
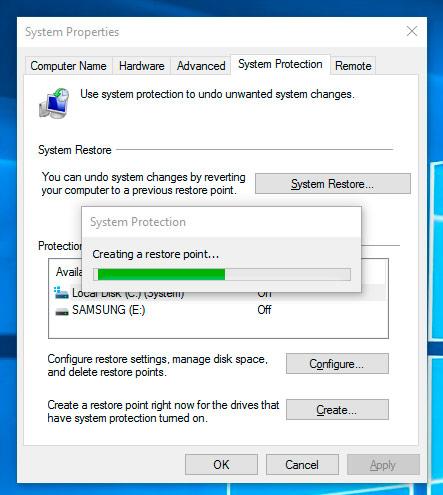
Click Create in the System Properties window that opens.

-
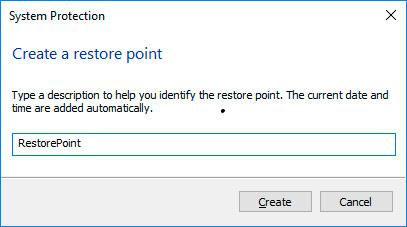
Add a description in the following window to identify the restore point. The current date and time of creating a restore point are added automatically.
-
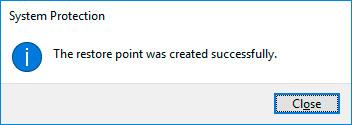
Click Create and wait for the process of creating system restore point to be over.
Method 2. Adjust Automatic Creation of System Restore Points
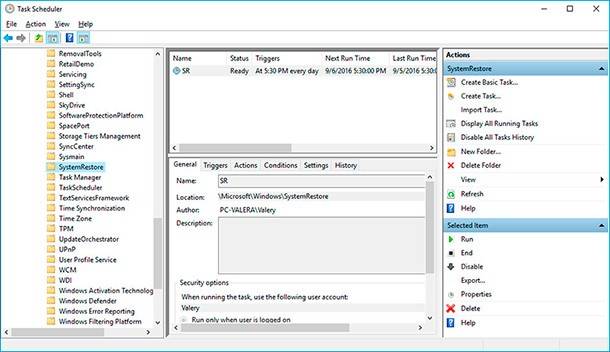
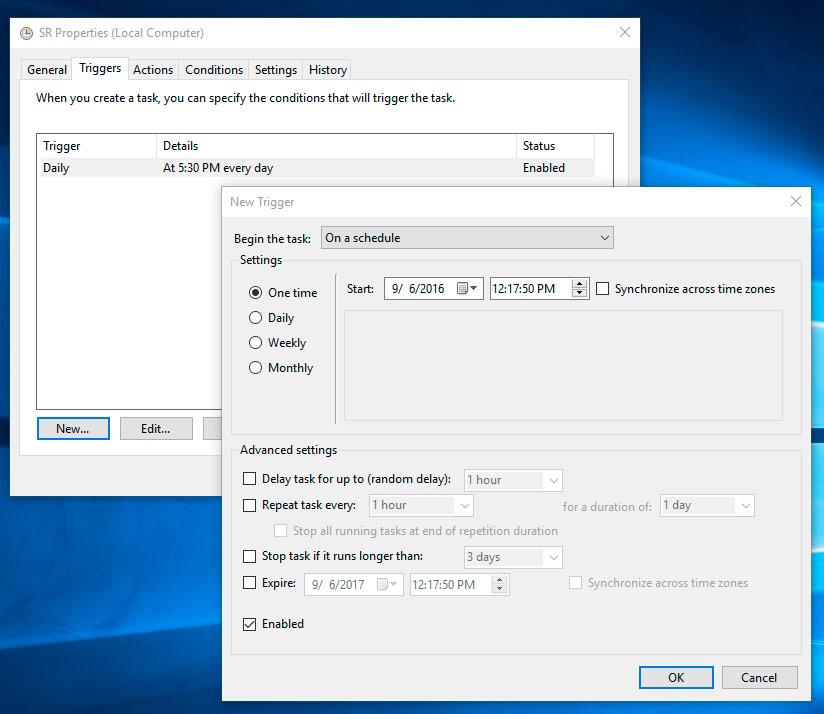
- Start Control Panel / Administrative Tools / Task Scheduler.
- In the left window, select Task Scheduler Library / Microsoft / Windows / System Restore.
- Right-click on SR file in the upper window in the middle of the screen and select Properties.
- Select the Triggers tab in the window that opens.
- Click Create and set the required time parameters to create a restore point.
How to Delete a Windows 10 Restore Point
The operating system saves restore points Windows 10 onto the hard disk. A certain part of its volume is allocated for this purpose; older restore points are deleted to make room for new ones as the free space in this area grows less.
The following functions are available for working with restore points:
Method 1. Deleting All Restore Points But The Latest
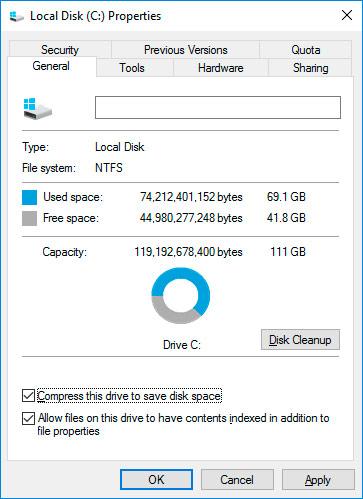
- Right-click on the disk where restore points are saved and select Properties / General / Disk Cleanup.
- Wait until the disk cleanup preparation process is complete. Click “Clean Up System Files” and wait until the disk cleanup preparation process is complete again.
-
Click Disk Cleanup, and then in the tab More Options, select System Restore and Shadow Copies.
Method 2. Deleting All Restore Points Including The Latest
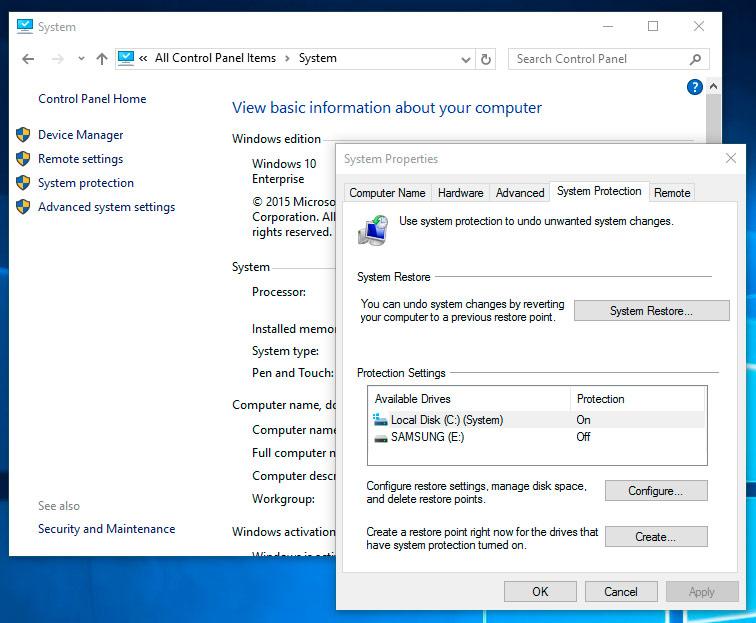
- Open Control Panel / System Properties / System Protection.
-
Select Configure in the System Protection tab (in the window System Properties).
-
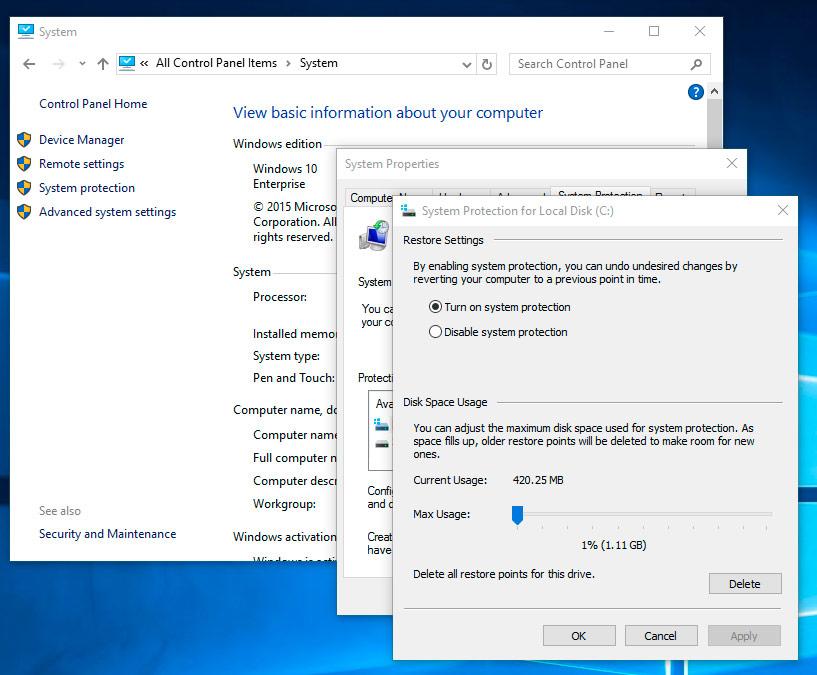
Click Delete next to «Delete all restore points for this drive».
How to Recover The Windows 10 From a Restore Point
Attention: recovering your Windows 10 from a restore point affects only system and software settings of the operating system. Using the restore point will delete all programs that have been installed after such restore point was created, but it will not recover files deleted previously.
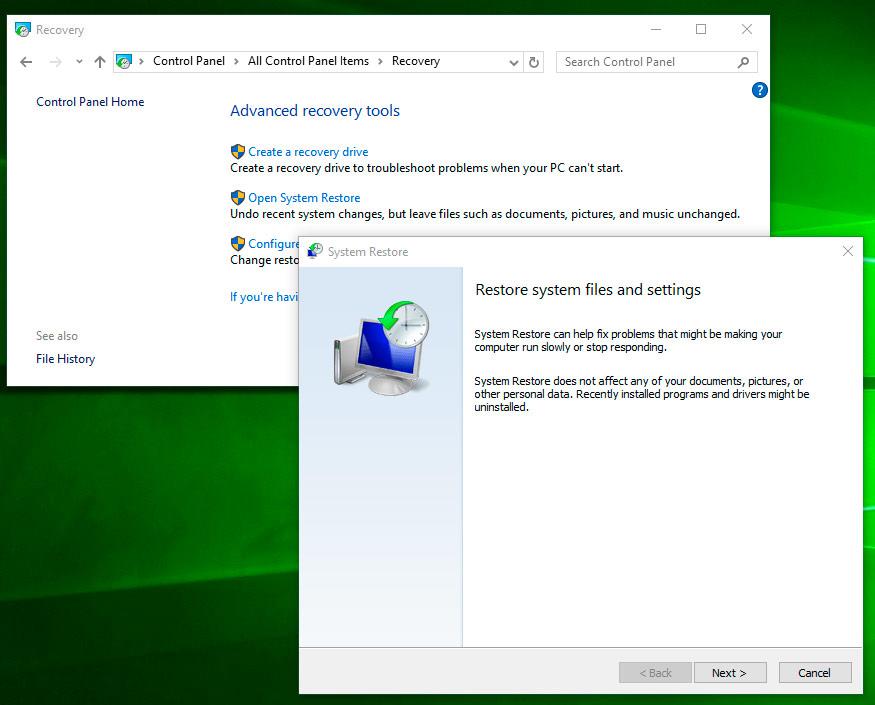
To recover Windows from a restore point do the following:
-
Open Control Panel / Recovery / Open System Restore and click Next.
-
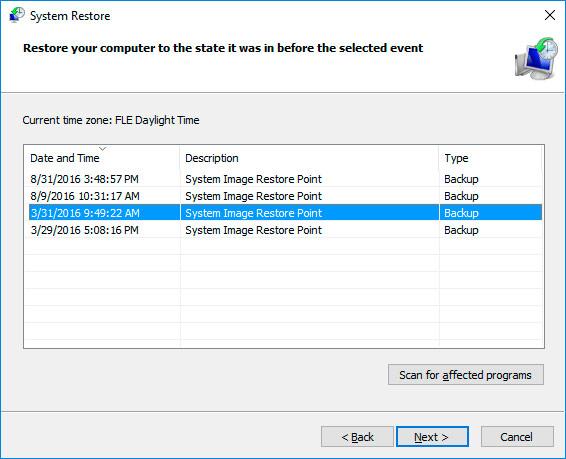
Select a restore point from the list and click Next.
-
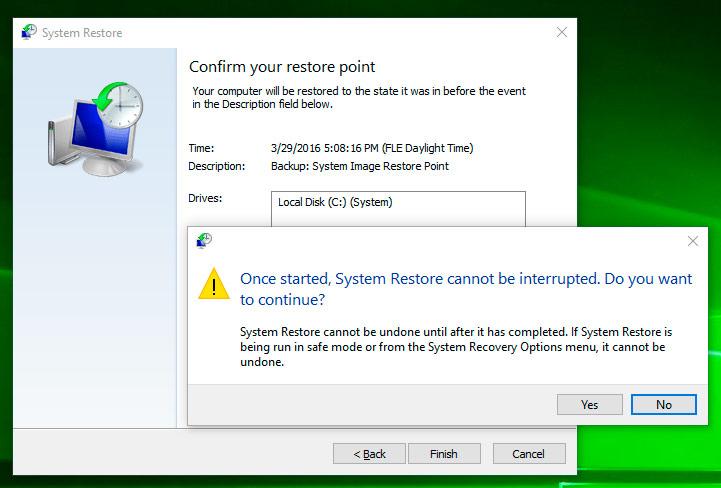
Confirm that you want to start system restore from the restore point and the process will start.
Where Are Restore Point Files Kept?
You can see all available restore points in Control Panel / Recovery / Open System Restore.

Physically, the system restore point files are located in the root directory of your system drive (as a rule, it is C:), in the folder System Volume Information. However, by default users don’t have access to this folder. To go to this directory, you should first make it visible, and then get special rights.
To do it:
-
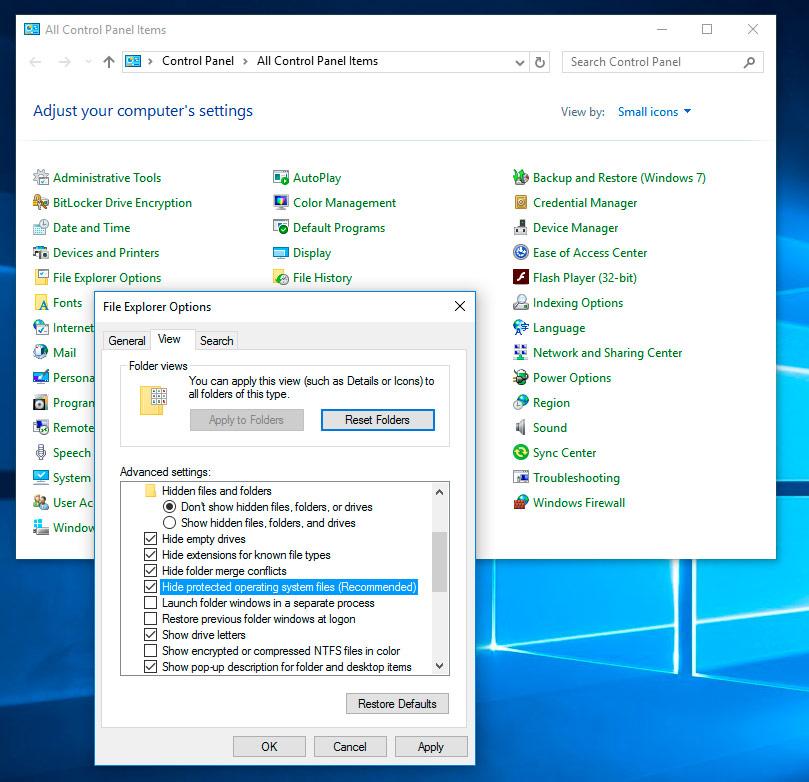
Open Control Panel / Recovery / File Explorer Options / Folder Views.
-
Uncheck the box next to «Hide protected operating system files» and click Apply. As you do it, the folder System Volume Information will appear in the root directory of disk C:, but access will be denied.
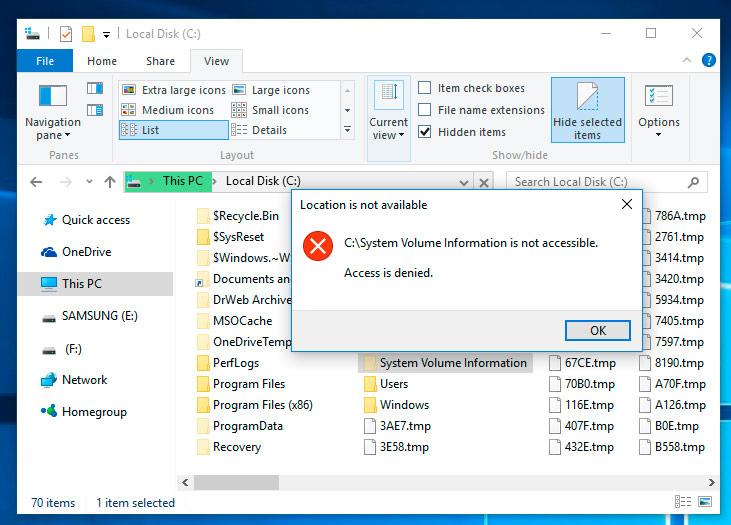
To get access to the folder System Volume Information do the following:
Right-click on the folder and select Properties / Security / Advanced.
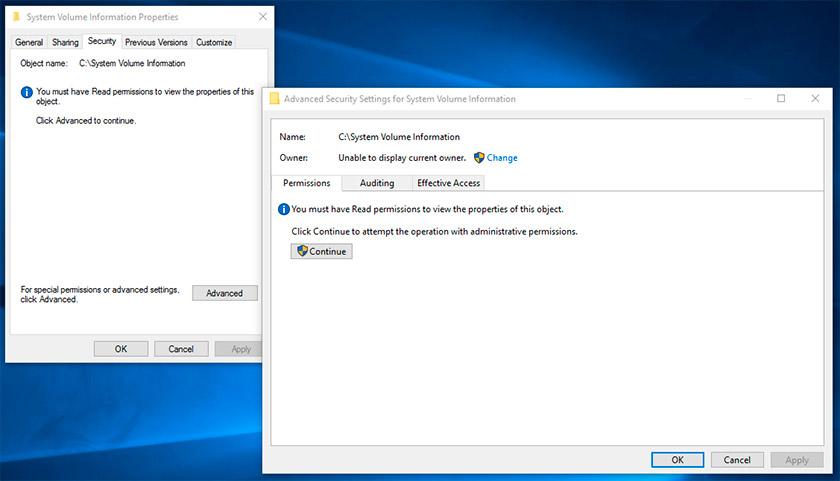
-
Click Continue to get access permission to Windows system folder which contains system restore point files.
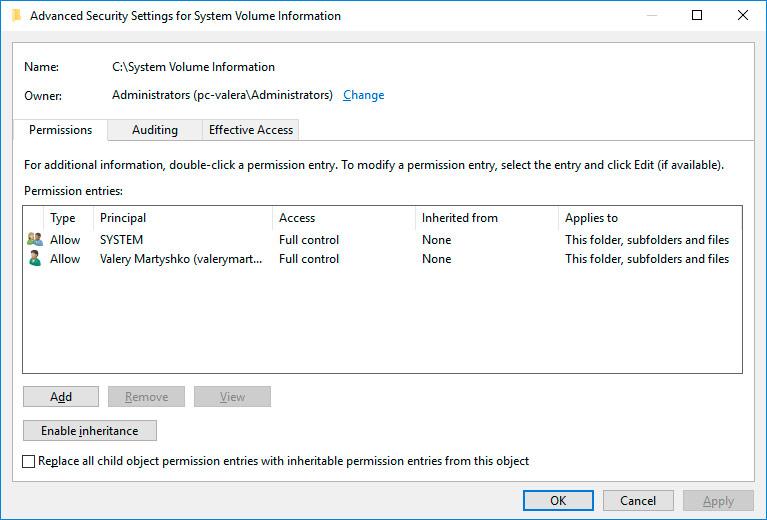
-
Click Add and enter the name of the user which should be granted access rights. Click OK.
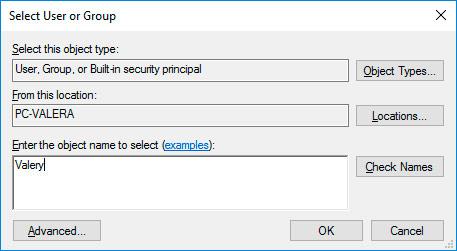
-
Check the box in Basic permissions next to «Full control» and click OK.
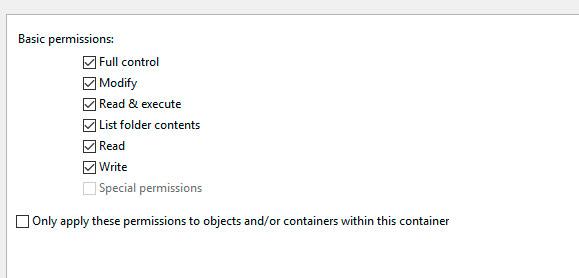
Now your user account appears in the Permissions list and you have access to the folder System Volume Information.
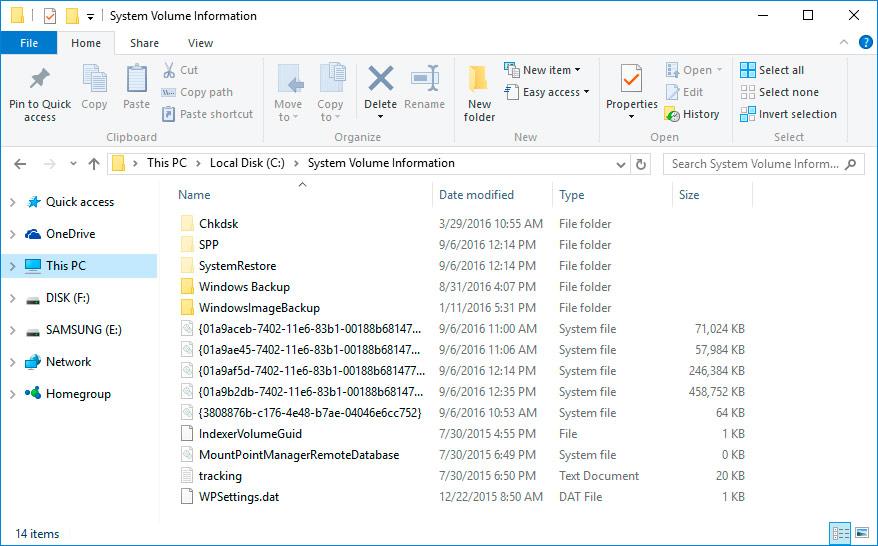
Files and folders in this location cannot be deleted manually because they are protected by the system. If you want to clean up the directory System Volume Information, use standard tools allowing you to delete Windows restore points.
A System Restore Point Won’t Generate. What Should I Do?
Check the status of the Windows service «Volume Shadow Copy». To do it, here is the way:
- Open Control Panel / Administrative Tools / Services.
- Find the service «Volume Shadow Copy».
- Start or activate it; set its startup type as «Automatic» if necessary.

System restore points may not be created on a computer where two operating systems are installed, or when the operating system is damaged by malware or viruses.
How to Recover The Windows 10 From a Restore Point Using The Command Prompt
If there are problems with starting your Windows 10 in the ordinary mode, you can bring your system back to normal by launching a restore point from the Command Prompt.

How to Boot Windows 10 in Safe Mode (All Methods) 👨💻⚙️🛠️
To do it:
Load Windows in «Safe Mode with Command Prompt»: while the operating system is loading, press F8 and select the corresponding line in Windows Advanced Options Menu.

- Type rstrui.exe in the command prompt and the System Restore windows will open.
Select the necessary restore point and click Next.

- Complete the restoration process by following the wizard instructions.
How to Recover Restore Points Which Have Been Deleted?
The operating system saves restore points Windows 10 onto the hard disk. A certain part of its volume is allocated for this purpose; older restore points are deleted to make room for new ones as the free space in this area grows less.
Restore points can also be deleted manually – see above to learn more about it.
Often, recovering Windows results in loss of important files. Restoring Windows with a restore point, rollback to a previous version of the operating system, resetting the computer, errors in backup software, damaged or overwritten system files, file system errors or HDD bad sectors are only some of the things to cause deletion of data.
Windows recovery will restore operability of the operating system but it can result in loss of user files. It is not always possible to restore Windows operability without a clean installation of the operating system which can also cause loss of files.
Download for free and scan your computer with Hetman Partition Recovery. Learn about the program functions and step-by-step guide.
Have you recovered your Windows 10 operating system from a restore point? Leave your feedback and ask questions in your comments.




Yes, there are several alternatives to using system restore points in Windows 10. Some of these alternatives include: