Rescuing Data: RAID 0 and RAID 1 on Inoperable NAS Plextor XStore
Learn how to recover data from RAID 0 and RAID 1 on the inoperable NAS Plextor XStore PX-NAS2X500L/PX-NAS2X750L/PX-NAS2X1000L in this comprehensive guide. Whether you’re dealing with data loss due to hardware failure or other issues, this tutorial provides expert insights and practical solutions. From diagnosing the problem to implementing recovery strategies, we’ll equip you with the knowledge and tools necessary to retrieve your valuable data and minimize downtime effectively.
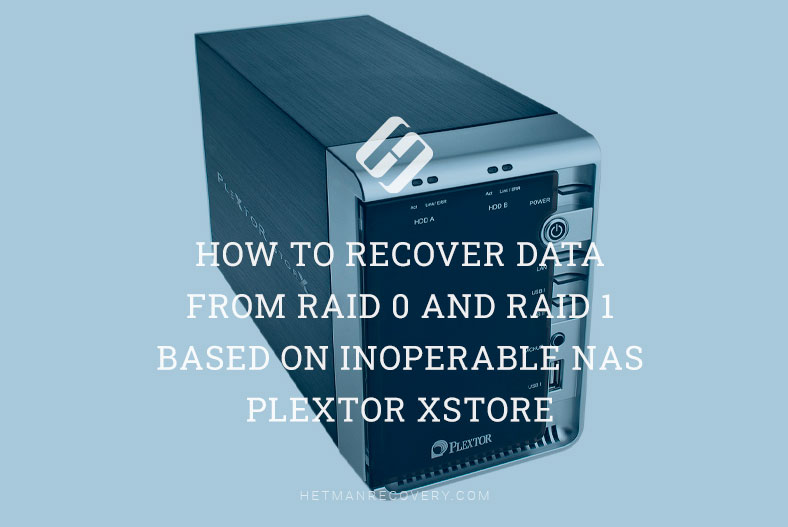

How to Recover Data from RAID 0 and 1 Based on Inoperable NAS Plextor XStore PX-NAS2X500L/750L/1000L
- How to create a RAID 1 and RAID 0 on Plextor XStore NAS
- How to create a backup
- How to recover data from a non-operable Plextor XStore NAS
- Conclusion
- Questions and answers
- Comments
As we know, two-disk storage devices only support RAID 0 and RAID 1 arrays, since other RAID levels cannot be created with only two HDDs. Just as all other storage devices, NAS systems are not immune to breakdowns or hardware issues. As a result, you will have a couple of disks still containing some data, but without access to it.
To retrieve the information from the hard disks, you will need a special tool to rebuild the RAID system and restore access to the files which are stored inside the disk array.
You might say: why should I need that special tool? The matter is that a NAS storage device uses its own operating system which builds the RAID in a certain way and then writes data to its disks. Even when the hard disks are connected to another storage device or computer, their condition cannot be restored.
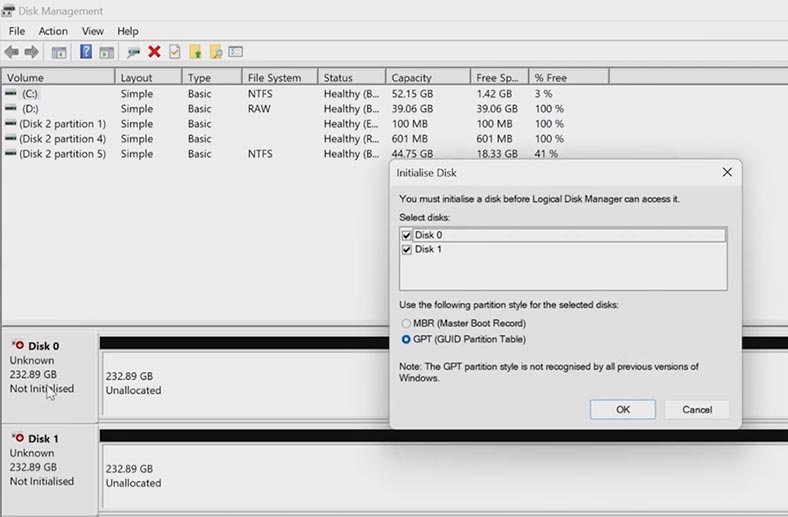
For example, when the disks are connected to a Windows computer, the operating system will suggest intializing them in the Disk Management app – which is going to erase all the data still remaining on the disks. So in the end, you are going to lose access to the files or even lose the files forever.
A Linux operating system is also unable to identify the main volume where the files are stored – although it is formatted in XFS file system which is supported by Linux. In addition, this volume cannot be mounted.
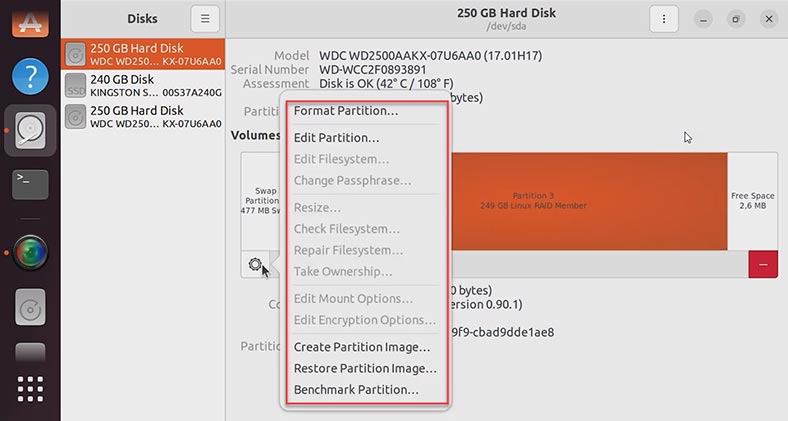
You should remember that if you choose to initialize the hard disks in Windows or modify the volume in Linux, this action can erase all the information, and it will make recovery very difficult. Never take any steps involving the hard disks unless you really know what you’re doing, since there is a risk of losing your data permanently.
How to create a RAID 1 and RAID 0 on Plextor XStore NAS
For general understanding of how the RAID technology works, let’s find out what disk array levels are supported by this device and how you can create an array with the hard disks you have connected to this NAS.
To create a RAID on this storage device, you need to access its management panel first. To do it, open any browser and type the IP address of your storage device into the address bar. You can find this address in your router settings. In the NAS manager window that appears, open the disk manager. Find the Disks tab – Management. To access the volume, you need to enter the administrator’s login and password; by default, they are admin and root. If you changed the login and password before, then enter your own sign-in details.
On the right, you will see a window entitled Hard Disk Utilities. Select the hard disks you want to use for building a RAID system, and move them to the right side of the window.
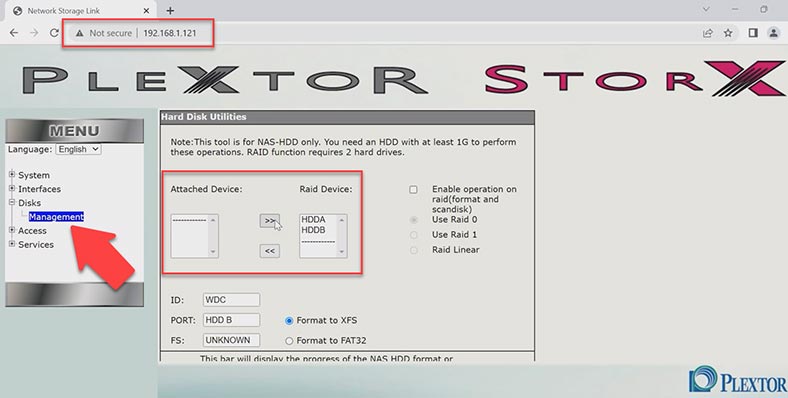
Then check the box to enable RAID and choose one type of the three which are available. RAID 0 – striping, RAID 1 – mirroring and linear. Linear RAID is a simple grouping of drives to create a larger virtual drive. After that, configure additional options and set the file system for the future virtual drive. Here, you can choose between XFS and FAT32.
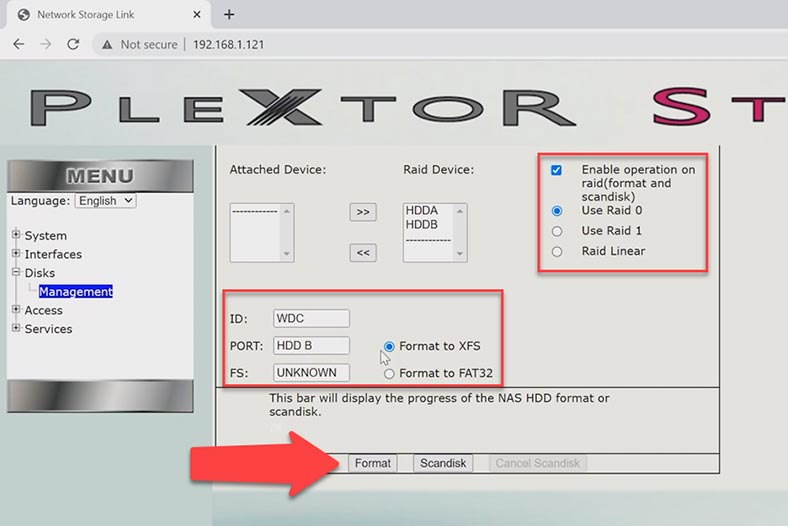
After you do that, click on the Format button, and then you will see a warning that all data on these disks will be erased, so click OKto confirm it. It starts the process of formatting the drives and building the RAID, so just wait until it is complete.
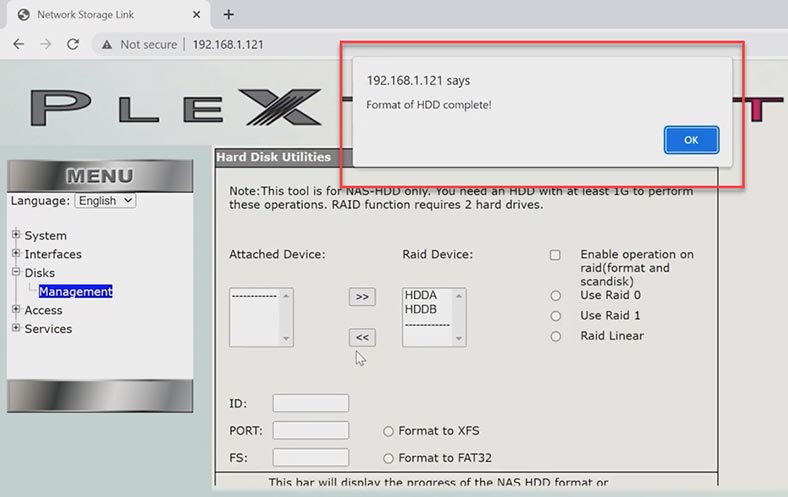
In the end, you will see a notification that the format operation is successful. If you are creating a RAID 1, disk initialization will begin immediately after formatting. To be able to use the disk array, wait for this process to be over.
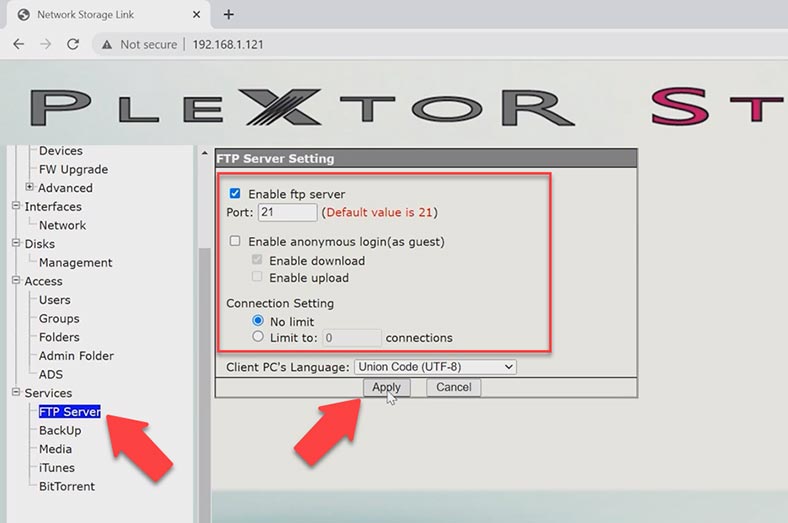
When you enable the FTP server, you can start adding data to the virtual drive.
How to create a backup
Your best precaution against data loss is to back up important data regularly. Such backup will enable you to restore accidentally deleted files.
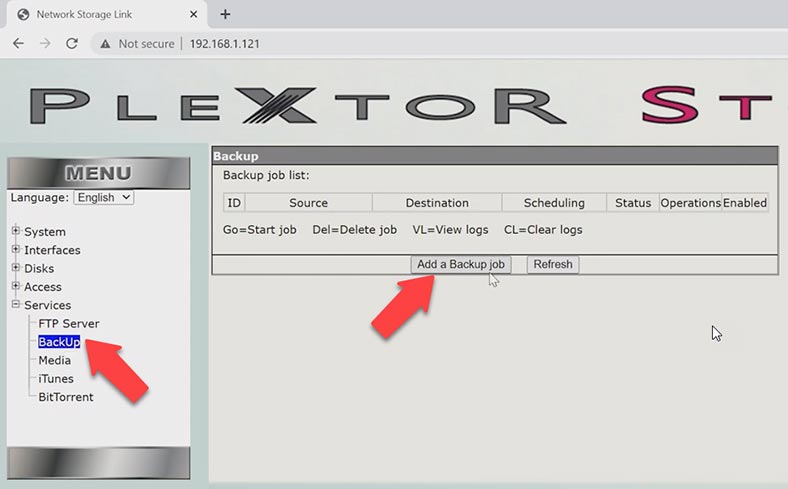
To create a backup, open the NAS management panel, go to Services – Backup, and click the button on the right – Add a Backup job.
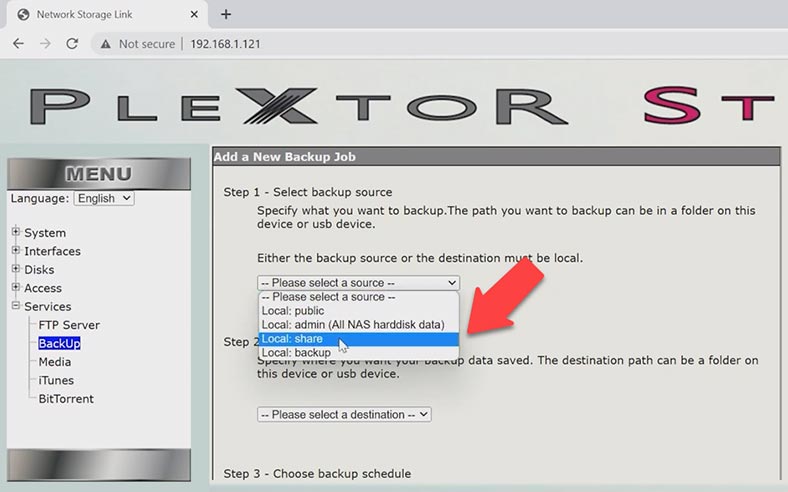
At the next stage, choose a folder which should be backed up, and specify the directory where to save the backup files.
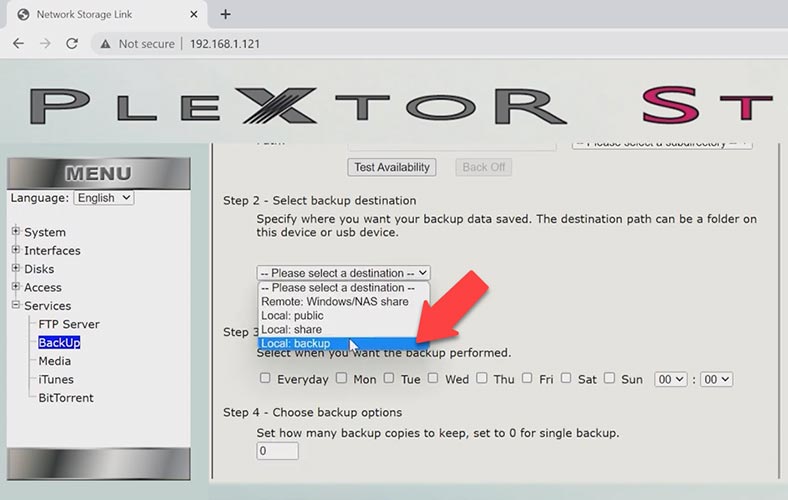
Below, specify the directory where the backup files should be saved.
Your next step is to configure backup schedule and choose how many backup copies should be kept – if it should be a single file, choose 0. When you finish with options, click Add.
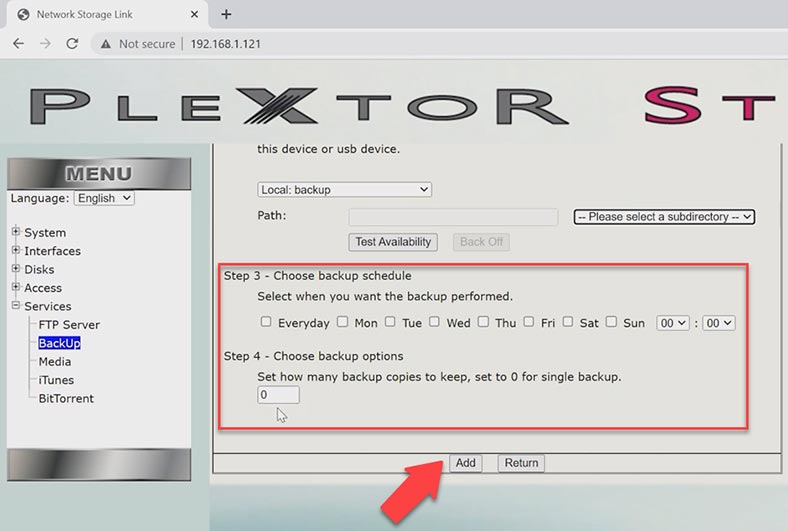
Now data will be backed up according to this schedule. Click on the Go button to start it.
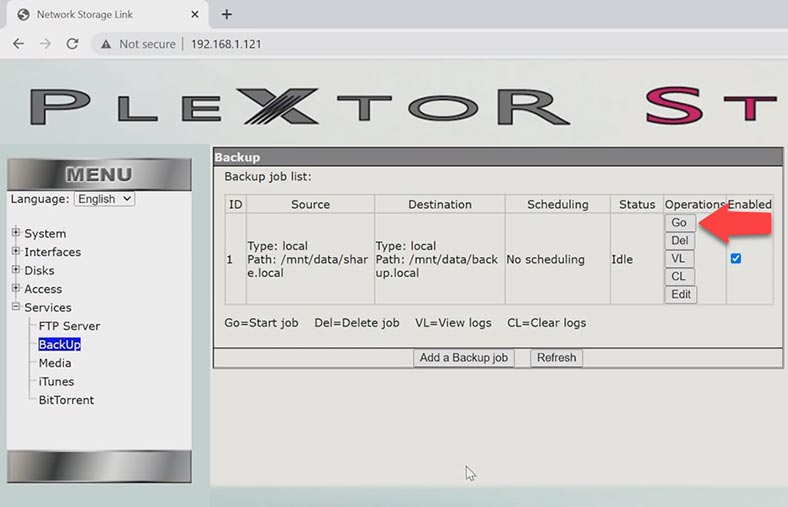
When the operation is complete, the backup will appear in the directory you have chosen. Now, even if a file is deleted accidentally,you will always be able to restore it from backup.
How to recover data from a non-operable Plextor XStore NAS
If there is no backup, the only way to have your files back is to use a data recovery tool. If you lost access to RAID data because the storage device broke down, the RAID was misconfigured or rebuilt, or if you deleted some files or accidentally formatted the hard disks – just download the specialized data recovery tool – Hetman RAID Recovery. This program supports all popular file systems and RAID types, and it will rebuild the damaged RAID with the available hard disks, so that you’ll be able to retrieve the necessary data.
To start the recovery process, take the drives out of the storage device and connect them directly to the motherboard of a Windows computer. If one of the hard disks breaks down, you can lose a part of your data, depending on the RAID level, and this data is impossible to recover.
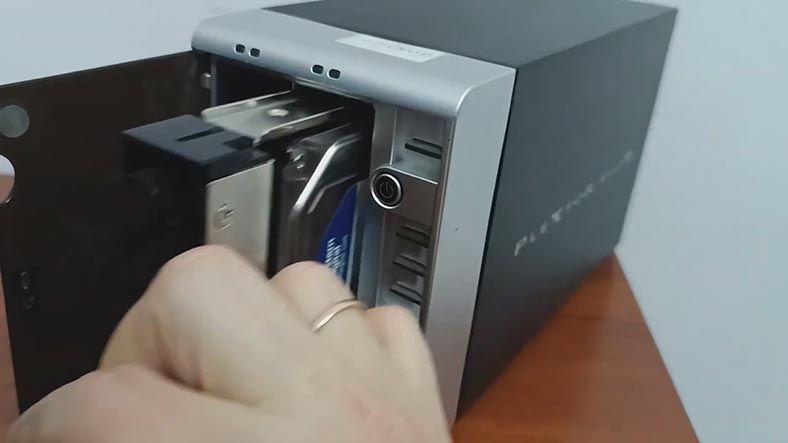
If you’re using RAID 0 and one hard disk is down, some information will be lost for good. The point is that this array type is meant for higher performance – which is achieved through striping. It means that data is written to either disk in parts which provides users with high input/output performance at a low cost. At the same time, though, it gives you no redundancy at all. So if that’s your case, be ready to face the bitter truth: you won’t be able to recover all your stuff.
When the hard disks are connected and the program starts, it will automatically scan the disks and rebuild the damaged RAID. When the array is selected, you can see its detailed information.
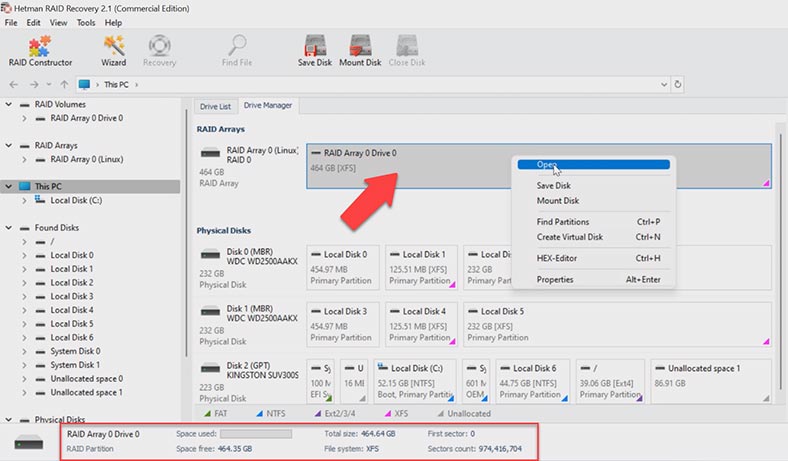
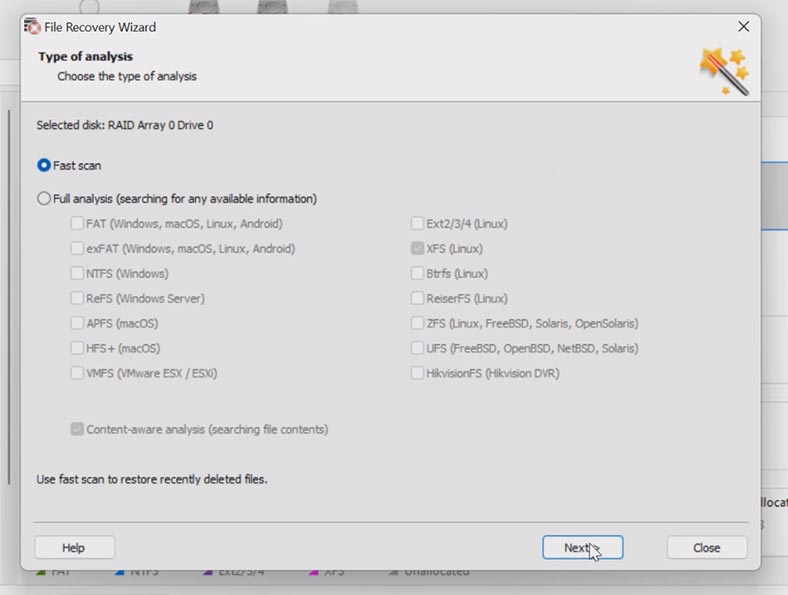
To search for remaining and deleted files, right-click on the disk and choose Open. Choose the scan type. We recommend beginning with Fast scan – this will take less time, and it works fine in most typical recovery scenarios.
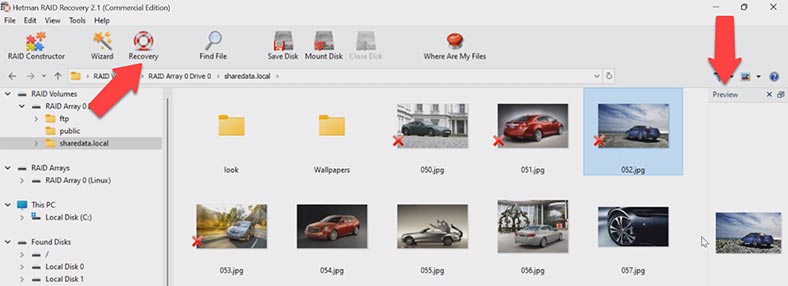
When the scan is over, open the folder where the lost files used to be. The program restores the entire structure of files and folders, including their names and locations. You can see the contents of every file in the preview window. This feature can even play videos. To save your time, use file search by name.
Select all the items you want to recover and click the Recovery button. Specify where to save the data (choose the disk and folder), click Recovery and Finish. All the files you have selected will be placed into to the folder you have chosen.
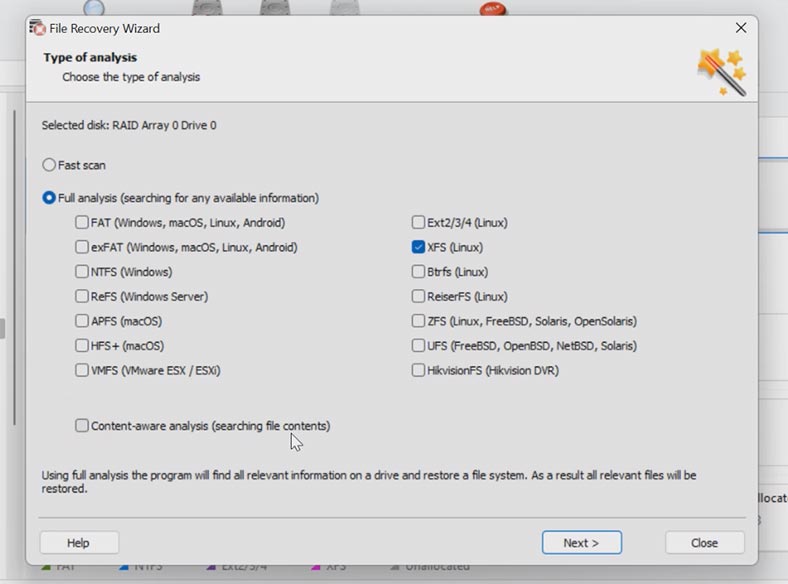
If the program can’t find the missing files, then go for Full analysis. To do it, return to the main menu, right-click on the disk and choose Analyze again – Full analysis. Choose the file system type. You can uncheck the option for content-aware search, as it will make the process go faster.
Conclusion
Here is one more important thing: if you lost access to the disks inside your array, don’t try to reconfigure it in order to restore its operability – this process involves formatting the hard disks, which means that all the remaining data will be erased, so the recovery process becomes very complicated or even impossible. In any doubtful situations, take the hard disks out of the storage device as soon as possible, and start the recovery process.
| Step | Description |
|---|---|
| 1. Situation Assessment |
|
| 2. Recovering RAID 0 |
|
| 3. Recovering RAID 1 |
|
| 4. Verification and Testing |
|
| 5. Creating Backups |
|


