Windows 10 Partitioning Tutorial: Tips and Tricks for Hard Disk Partitioning
Unlock the Power of Hard Disk Partitioning in Windows 10! Want to optimize your storage space or organize your data more efficiently? In this article, we’ll show you how to master hard disk partitioning in Windows 10. Whether you’re a beginner or an experienced user, partitioning your hard disk can help you better manage your files and improve system performance. From creating new partitions to resizing existing ones, we’ll walk you through the step-by-step process of partitioning a hard disk in Windows 10.
- Hard disk partitions
- Conditions
- Check how the information on disk partitions is stored
- Partition a hard disk
- Questions and answers
- Comments
Hard disk partitions
Your internal hard disk may already have two or three partitions, because an IT specialist has already done all the partitioning work for you. However, there are cases when you need to change the configuration of the existing partition or break it into two or more smaller parts.
It may sound like a very complicated process, but it’s not that difficult. Although partitioning a hard disk does require a great deal of attention and caution, it is easy enough for any competent user to cope with. Also, it does not require installing any additional software, which makes this procedure even more convenient for us ordinary users.
The Device Manager has an integrated feature called Disk Management, which lets you divide a disk into partitions, and it is quite easy to use. If you are using Windows 10 Creators Update or a newer version of Windows, you can apply the Disk Management feature to partition a USB drive or SD card. After all, though, in this article we will focus on partitioning a hard disk.
This way, you can use the described sequence of actions to partition an internal or external hard disk. If you have a solid-state drive (SSD), it can be partitioned just like that.

How to Partition an HDD, SSD, Memory Card or USB Drive
Conditions
In order to partition a hard disk in Windows 10, you should have administrator rights and access to the hard disk connected to your computer.
If you are going to partition an external hard disk, make sure it is conveniently positioned on a surface that prevents it from getting disconnected accidentally during the process of partitioning.
Keep in mind that there is a limitation for the number of partitions you can create. If your hard disk stores the information on partitions according to the MBR standard, you can create no more than four partitions. If your disk works with such information on the GPT principle, the number of partitions is unlimited.
Check how the information on disk partitions is stored
To find out how the information on disk partitions is stored, do the following. Run the Device Manager.

In the window that opens, select Disk drives. You will see the list of hard disks installed in your computer. Select the disk you need and right-click on it, then select Properties from the menu.

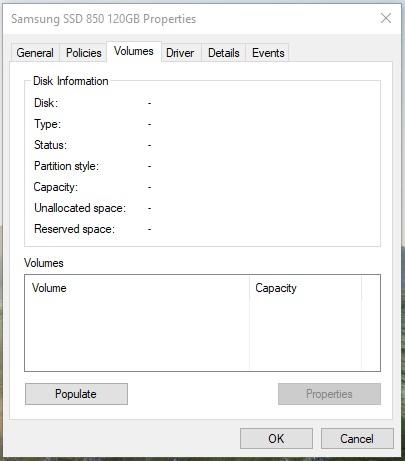
In the Properties window, jump to Volumes and click on Populate.
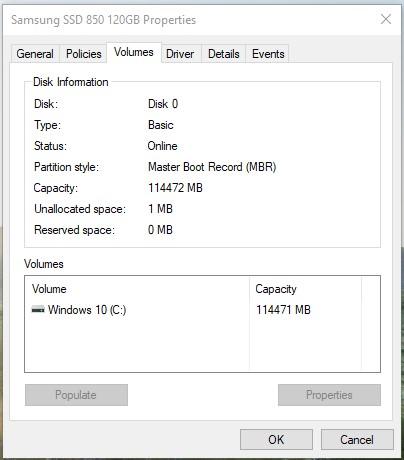
You will see all available data on your disk in the section Disk Information. View the line Partition style to find out what way of storing partition data is used by this disk.
Partition a hard disk
Start the Disk Management utility.
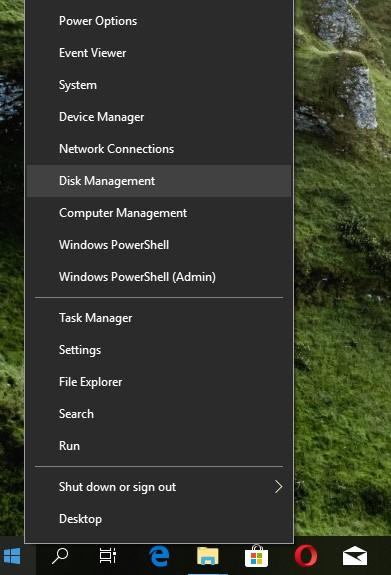
In the middle/bottom panel, you will see the list of all partitions in the selected hard disk.
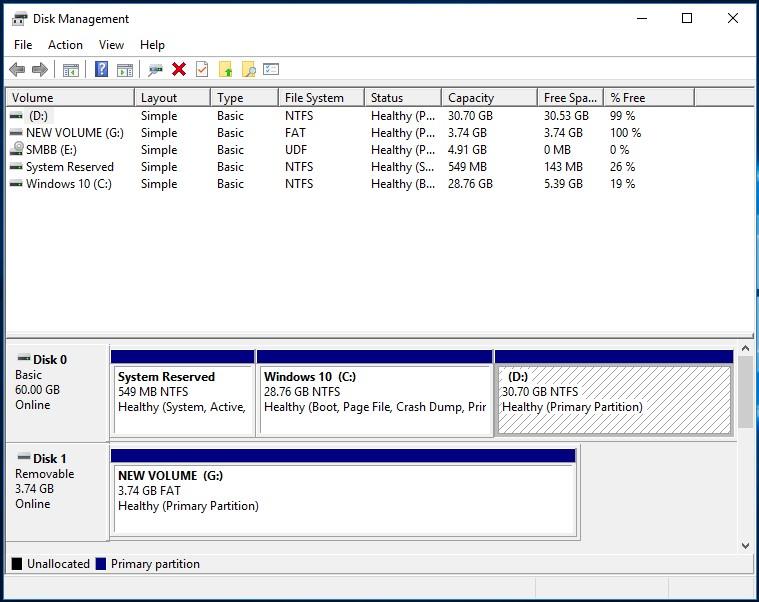
In our case, we will create a partition in partition D which already exists. If you have a disk without partitions, the sequence of steps will be similar.
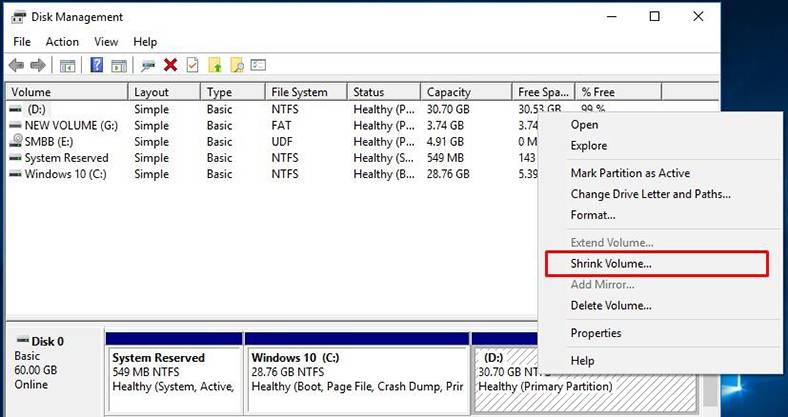
Right-click on the disk which is not partitioned yet (in our case, this is partition D) and select Shrink Volume.
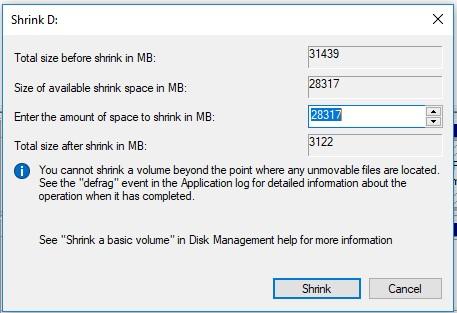
Windows 10 will check the maximal amount of disk space which can be used to create a new partition. This is done to ensure that none of your files should get lost after the partitioning process is complete. The new partition you will create is not going to contain any files.
For example, if you have a hard disk of 1 Tb with 800 GB occupied, you won’t be able to create two partitions of 500 GB each (and don’t even try that). Windows Disk Management can’t shrink the volume beyond the point where any unmovable files are located. That is why, as soon as you see the amount of space that can be shrunk, select the size of the future partition with account of the options that the operating system suggests. It’s better if you don’t have any files saved on the disk though it’s not always the way it is.
Be very attentive when choosing the partition size, as it is the only difficult part of the entire process. Make sure that the size of the new partition should not exceed the size given in the line Size of available shrink space in MB. The rest of the process is not so difficult – just click Shrink to start.
This is what you get. There will be two partitions in the disk, one of them displayed as an unallocated area.
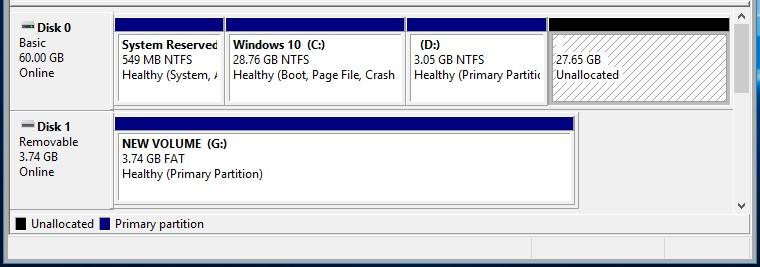
Create a new partition in an unallocated disk space.

Read the options attentively.
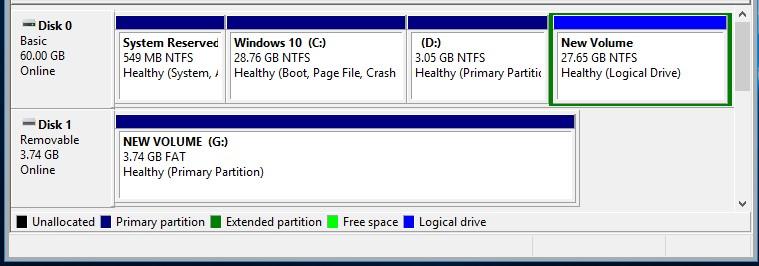
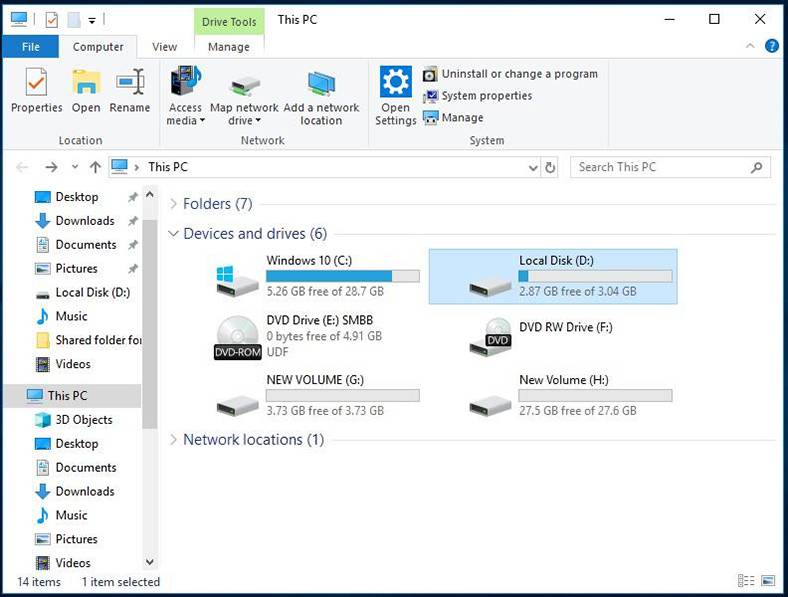
Now that’s the end of the partition process. If you wish, you can divide the disk space of your HDD into as many partitions as necessary. However, you should always remember that the number of partitions that can be created stands in direct connection with how data is stored by your hard disk (no more than four partitions for MBR and an unlimited number of partitions for GPT).
If you’re planning to install Windows and break the hard disk into partitions, the best method would be to use the integrated Windows feature for hard disk management. It makes the procedure of creating, dividing and formatting partitions in Windows much easier.
Follow the link to watch a video on recovering data from an unallocated disk space or after removing partitions:

💽 Nine Common Causes of Partition Loss, and Data Recovery Methods to Use 💽


