Essential Tips for Installing Windows 7 on a Computer or Laptop
Interested in installing Windows 7 on your computer or laptop but not sure where to start? You’re in the right place! In this фкешсду, we’ll provide you with an essential guide to installing Windows 7, walking you through the process step by step. From preparing your system for installation to completing the setup, we’ll cover everything you need to know to successfully install Windows 7. Whether you’re upgrading from an older version of Windows or installing it for the first time, this guide will help you get up and running in no time. Watch now and take the first step towards enjoying the features of Windows 7!

How to Install Windows 7 On a Computer or Laptop Keeping Your Programs, Drivers and Data 💽💻🛠️
- Step 1. How to create a boot disk with Windows 7
- Step 2. How to start a computer with a bootable pen drive
- Step 3. Installing Windows 7 step by step
- Step 4. How to recover data you have lost as a result of reinstallation
- Questions and answers
- Comments
Step 1. How to create a boot disk with Windows 7
To install the operating system, you will need a Windows 7 installation disk which can be bought – or created on your own.
I don’t see any point in describing how to create an installation CD/DVD. Installing Windows with a USB pen drive is much easier.
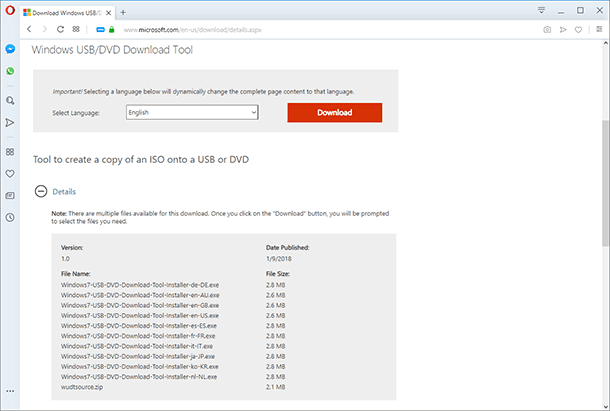
To create a bootable drive, you can use an official tool by Microsoft – Windows 7 USB/DVD Download Tool. It is free of charge and you can download it from the Microsoft official website. This app is also good for Windows 8 and 10.

How To Create a Bootable USB Drive to Install Windows 10, 8, 7 💽💻🛠️
Now,
-
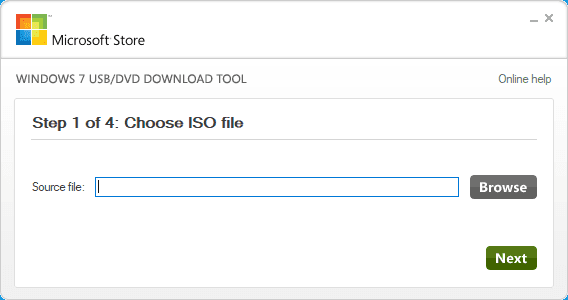
download and run it.
-
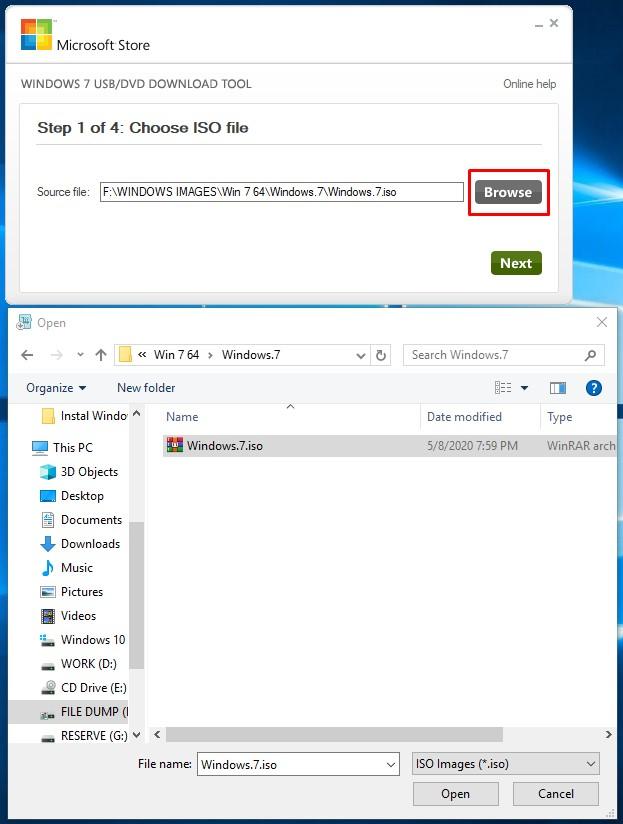
Select a suitable system image file and click Next.
-
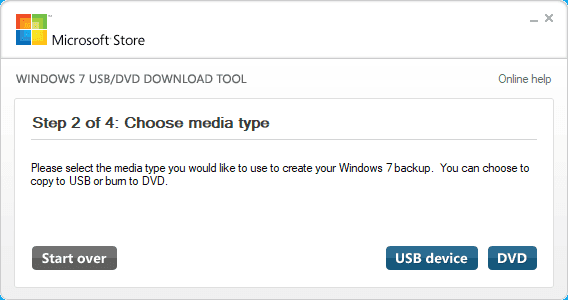
Now choose the media type, in this case USB device.
-
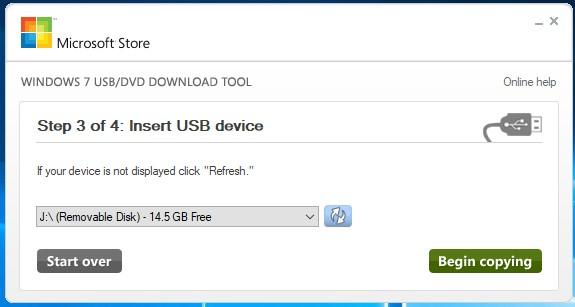
Select the necessary flash drive from the list of all devices in your computer (in my case, it is disk J) and click Begin copying.
-
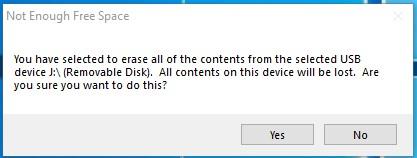
You will see a warning that all data in this flash drive will be deleted. If you don’t have any important files on this drive, click Erase USB Device.

-
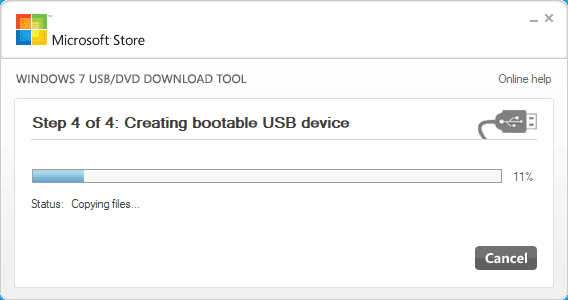
Confirm your decision to delete all files and wait until the files are copied to your USB drive.
-
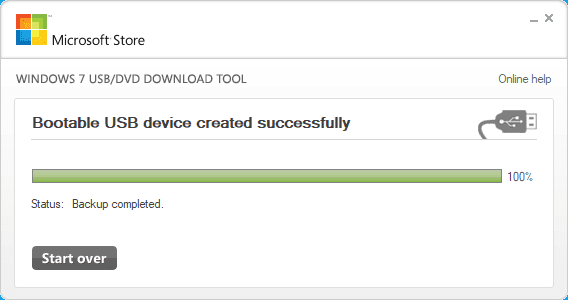
When it is over, you will see a message saying Backup completed, which means the bootable pen drive is ready to use.
Step 2. How to start a computer with a bootable pen drive
To start the installation, plug the bootable drive into the computer where you want to install the operating system, and make it boot from that pen drive.
The boot sequence – that is, the command for your computer to boot from a USB device is configured in BIOS or UEFI.
If you need advice on how to enter BIOS / UEFI and boot a computer from a USB drive or DVD, watch our video on this topic:

How to Enter BIOS or UEFI in a Computer or Laptop and Boot from a Flash Drive or a CD, DVD 💽🛠️💻
Step 3. Installing Windows 7 step by step
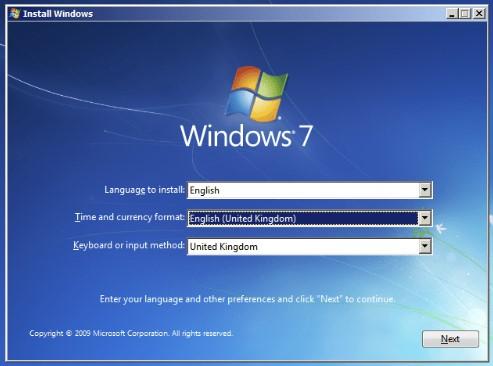
When the computer boots from the installation USB drive, this is what you are going to see.
-
Select preferred language and click Next.
-
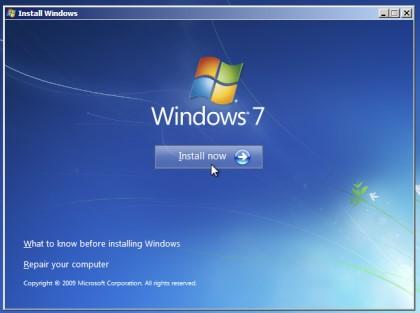
In the following window, hit Install now.
-
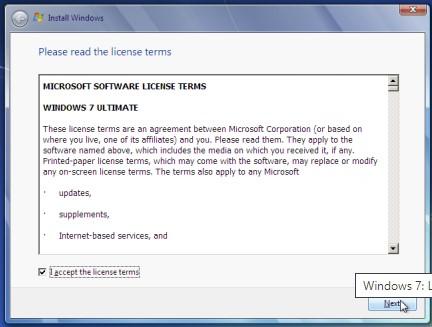
Accept the license terms.
-
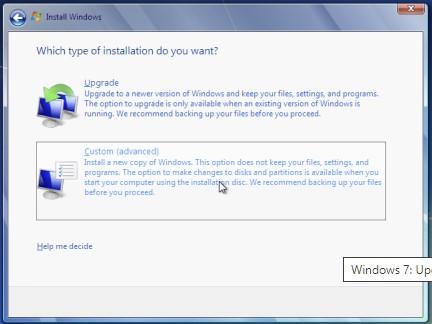
Select the installation type. If you mean clean installation like in my case, select Custom….
-
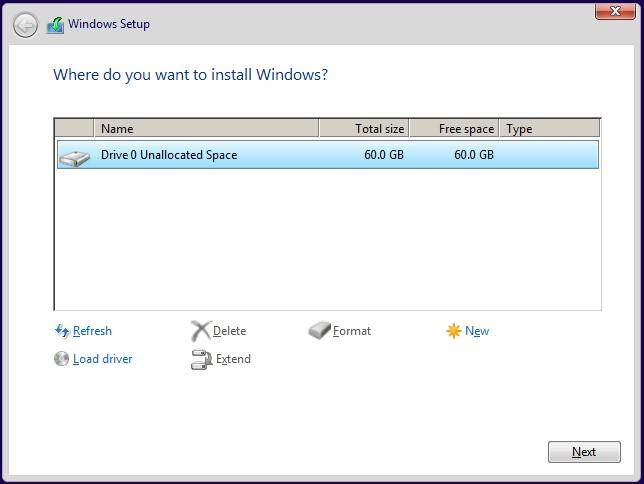
Specify, where exactly you want to install Windows. That is, select a disk for installation. If your computer has several disks, choose the one you wan to be the system drive. If your computer is limited to using one disk (like mine), just select it.
Please remember that all data from the disk where the operating system is installed will be erased.
-
The installation wizard will copy required files to the computer and launch the installation.
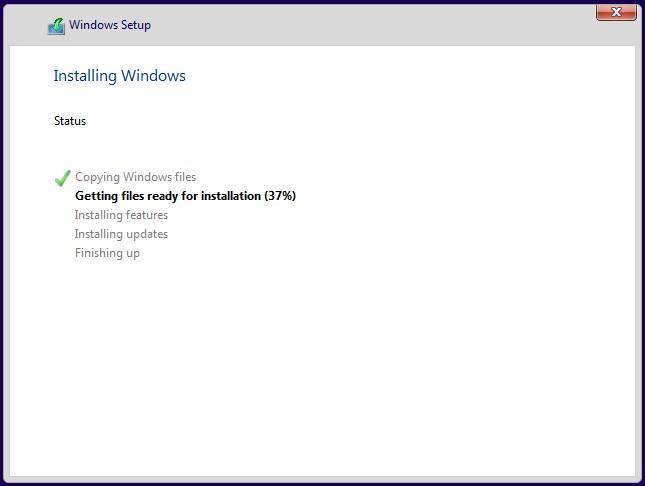
-
In the process, the computer will reboot several times. It is absolutely natural and supposed to be that way.
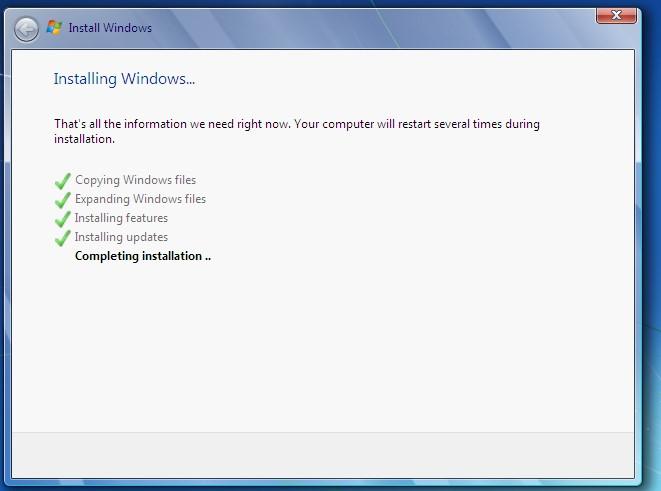
-
Select user name for your account as well as the computer’s name in network.
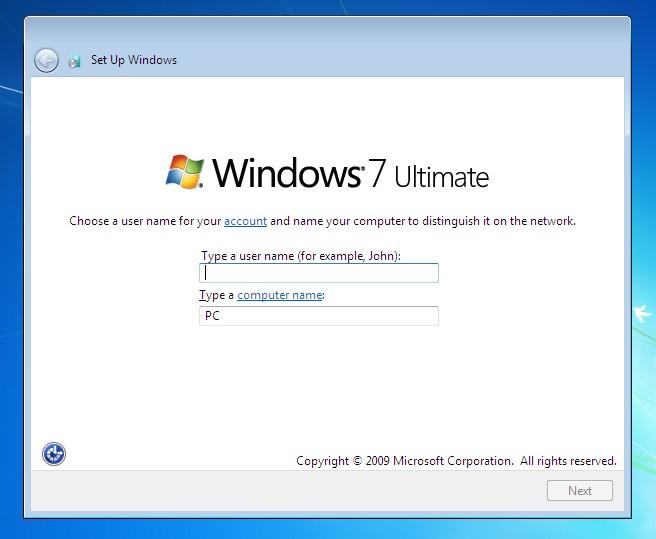
-
Set the password to protect your account. If you just click Next and don’t enter the password, the operating system will always boot directly to desktop, without asking for a password.
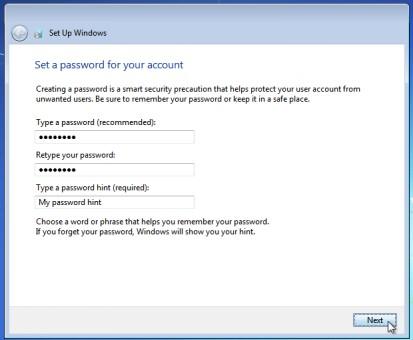
-
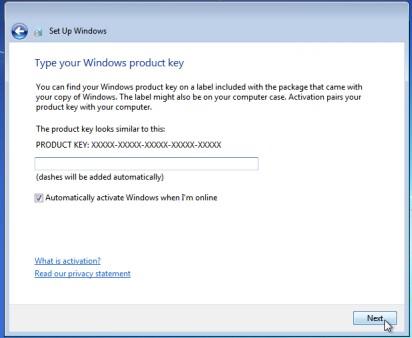
Enter the product key for Windows 7. If you do not have the product key at hand you can still click Next and proceed with the installation. You will be asked to enter the product key after Windows is installed.
-
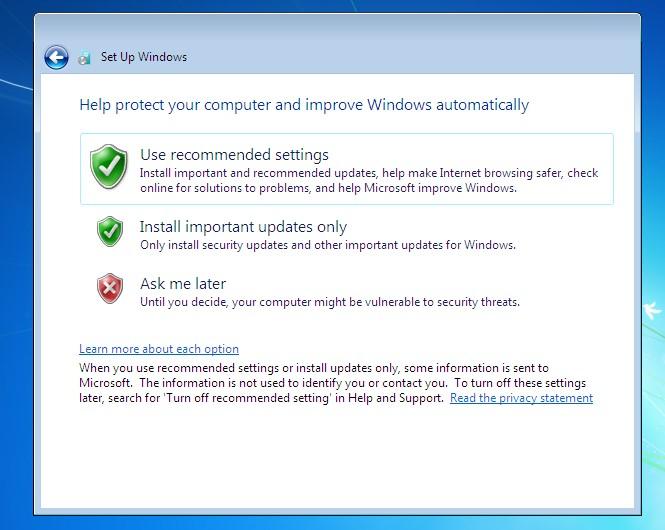
The system will offer you to deal with additional settings. You can postpone it and change settings later or use the recommended settings (if you are a beginner).
-
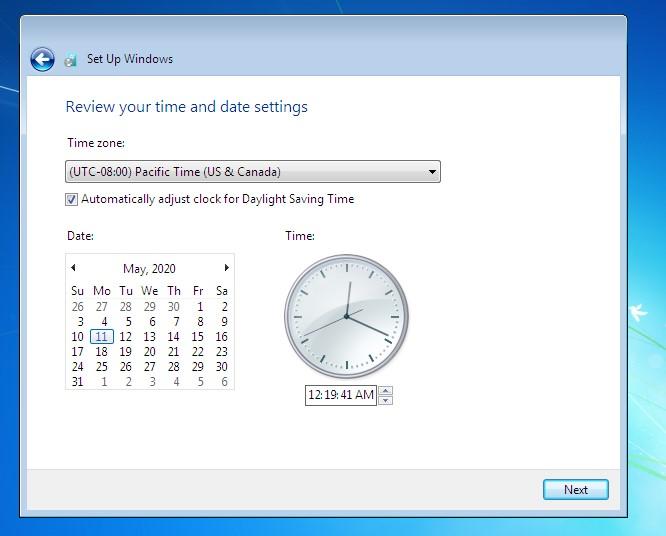
Select the time zone and click Next.
-
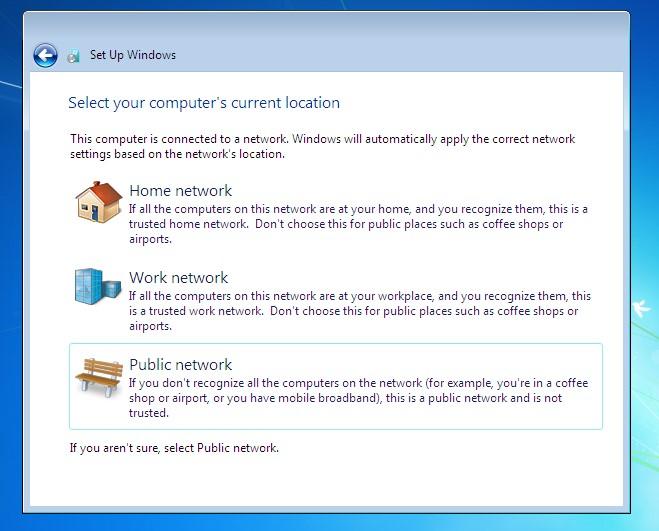
If your computer is connected to a network, Windows will also suggest selecting network settings. Select Home network.
-
After that, the operating system will apply the settings and finish the installation.
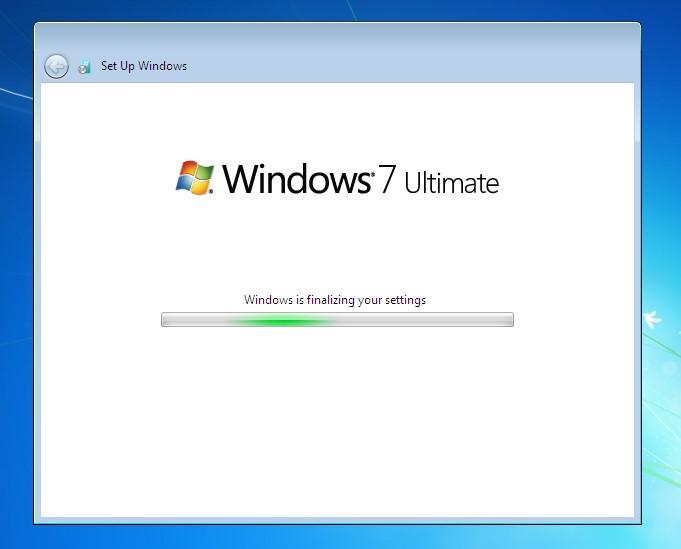
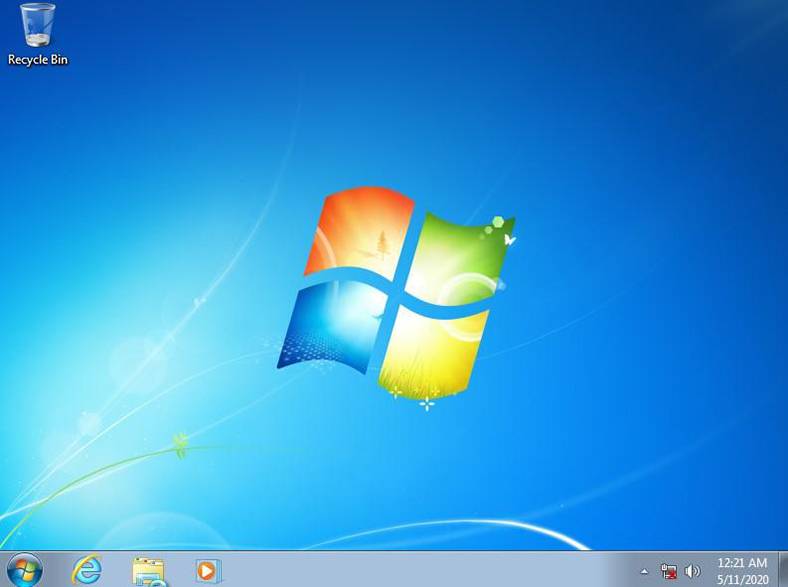
As a result, the computer will reboot and Windows 7 desktop will appear in the screen.
Step 4. How to recover data you have lost as a result of reinstallation
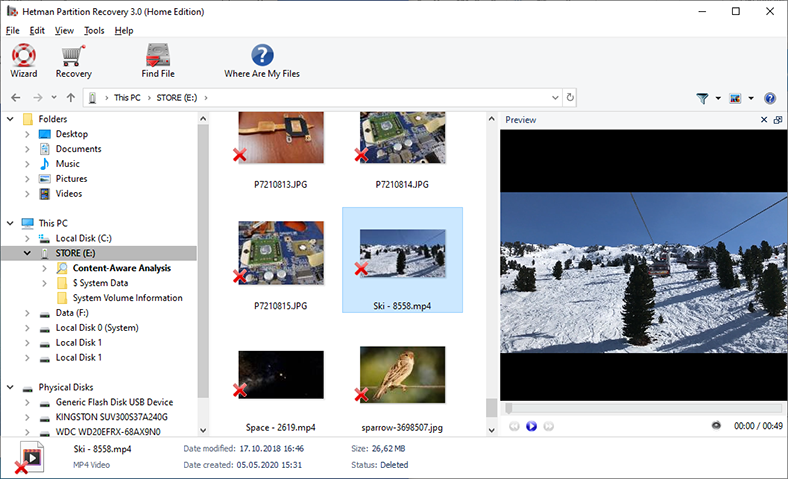
If you lost some files as a result of installing, reinstalling, updating or resetting Windows, you can bring them back with Hetman Partition Recovery.
| Parameter | Description |
|---|---|
| Name | Hetman Partition Recovery |
| Purpose | Recovery of deleted, damaged, and inaccessible data from hard drives, SSDs, memory cards, and USB drives. |
| Supported File Systems | FAT/exFAT, NTFS/ReFS, APFS/HFS+, Ext2/3/4, ReiserFS, XFS/UFS/ZFS, Btrfs, VMFS, HikvisionFS. |
| Operating Systems | Windows, MacOS, Linux |
| Device Types | Hard drives, SSDs, memory cards (SD, microSD), USB drives, virtual disks, and virtual machine disks. |
| Additional Features | – Recovery of deleted partitions – Creation of disk images – Data recovery from disk images – Preview of recoverable files before saving |
| File Formats | Documents, photos, videos, archives, emails, and other file types |
| Ease of Use | Step-by-step recovery wizard with an intuitive interface |
| License | Trial version with file-saving limitations |
| Interface Languages | Multilingual support |
If you have any problems, errors or question during the installation, feel free to ask us in comments.


