Windows 10 Tips: How to Change Your User Account Picture with Ease
Customize Your Windows 10 Experience: Learn How to Change Your User Account Picture! Want to personalize your Windows 10 user account? Changing your user account picture is a great way to do it! In this easy-to-follow tutorial, we’ll show you step-by-step how to change your user account picture in Windows 10. Whether you want to use a photo or an avatar, we’ll cover it all. From accessing the settings to selecting your new picture, we’ve got you covered. Read now and give your Windows 10 user account a fresh new look!
An individualized account picture is a user photograph or related image that is displayed in the «Windows» sign-in screen and in the main user menu, «Start». Initially, new user accounts in «Windows 10» are assigned the default account picture, but it can be replaced easily with any image that you prefer. In a minute, you will learn how to add more variety to your «Windows 10» and set a customized picture for your account.

How to Disable or Modify Welcome Screen or Lock Screen in Windows 10, 8 or 7 🖥️🖼️
Changing the default user account picture in «Windows 10»
If you are not using a «Microsoft» account with a particular image assigned to it, the operating system will show your account with the default «Windows» picture, that is, a human silhouette.
To change the default impersonal image, you need to use the system application «Settings».
Click the «Search» button on the «Taskbar» (you can find it in the lower left corner of the screen) to open the search panel. Type «Settings» into the search field. The «Best match» section will show you the app you are looking for. Click on it or on the «Open» button in the right panel, and the «Settings» app will be launched.

In the main «Settings» window, choose the tab «Accounts».
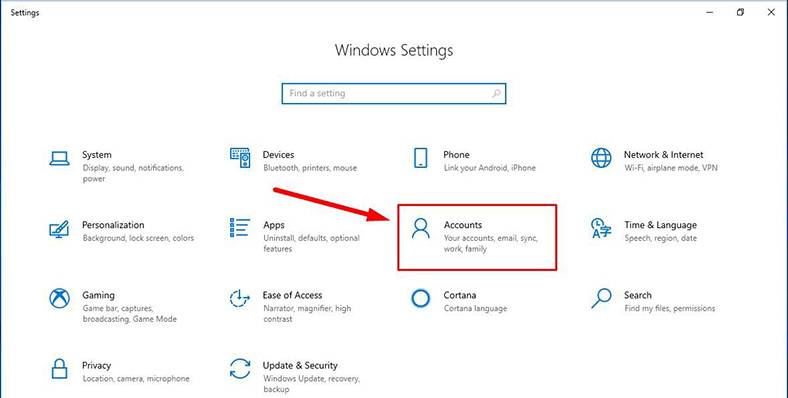
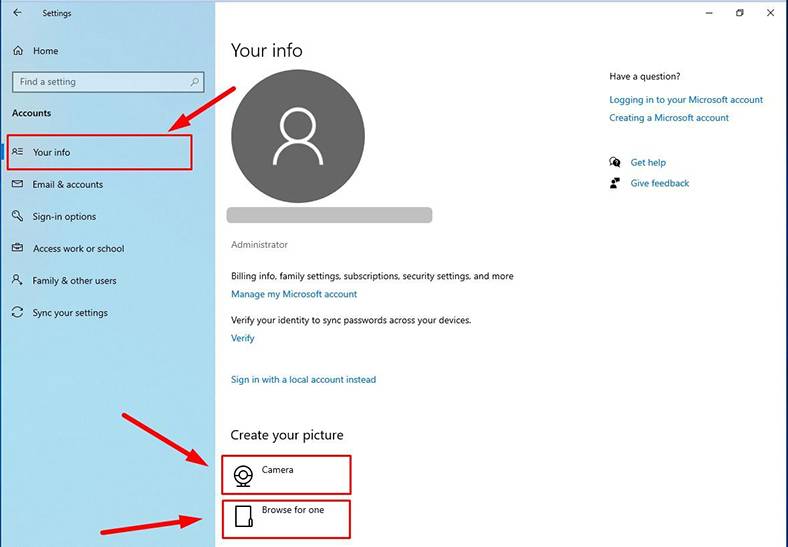
In the new page, look at the left side panel, find and select «Your info». In the right panel, use the scroll bar or the mouse wheel to find the section «Create your picture». There are two options to choose from. Click «Camera» to use the built-in or external camera and take a picture, or hit the button «Browse for one» to find a suitable image on your computer (the default «Windows Explorer» window opens to help you find the picture you need). In this example, we will use the second option and select a ready picture to be used as the account image.
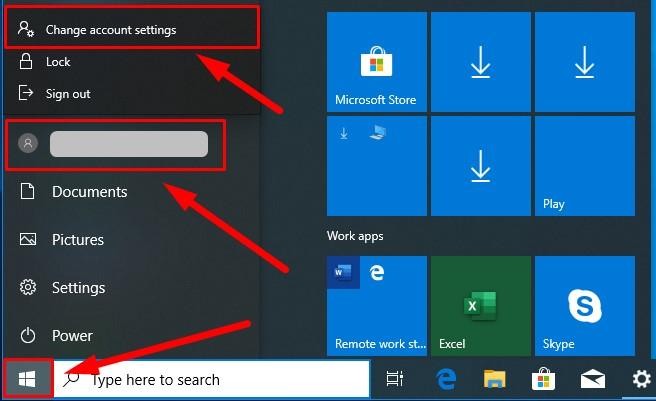
Note. There is a way to access this option directly without having to open the «Settings» app. Click on the «Start» button in the lower left corner of your desktop, on the «Taskbar». Then right-click on the account picture in the main «Windows» menu. In the context menu that appears, go for «Change account settings», and the corresponding settings tab will open.
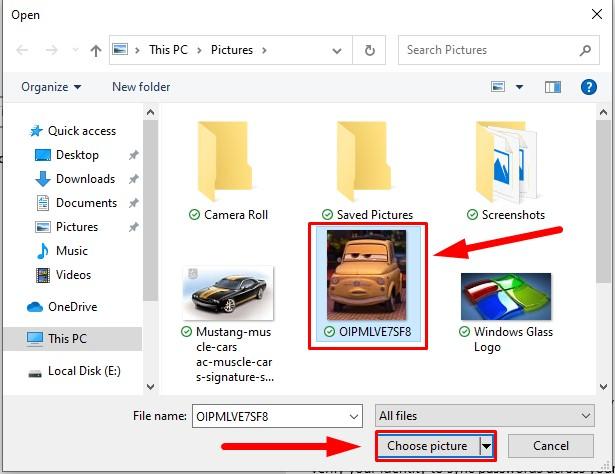
When you click on the button «Browse for one», the «Open» window appears to help you find the image you’d like to use for your account picture, and all you need to do after that is to click «Choose picture».
Please note that «Windows 10» will automatically modify the size of the picture you have selected and crop it according to the system-defined picture size limits. If the final result is not what you’d like to see, or you dislike the changes, you can try editing the picture on your own and change its size to the dimensions your operating system supports. By default, «Windows 10» uses a 448×448 pixels’ image for the sign-in screen.
If you need to go back to any of the previously used pictures after you changed the way your account looks, open the «Settings» in any way you prefer, select the «Accounts» tab, go to «Your info» section and click on the area to the right of the image currently used for your account. The image will be changed immediately. However, don’t forget that the «Settings» app only “remembers” the last three pictures you have used.
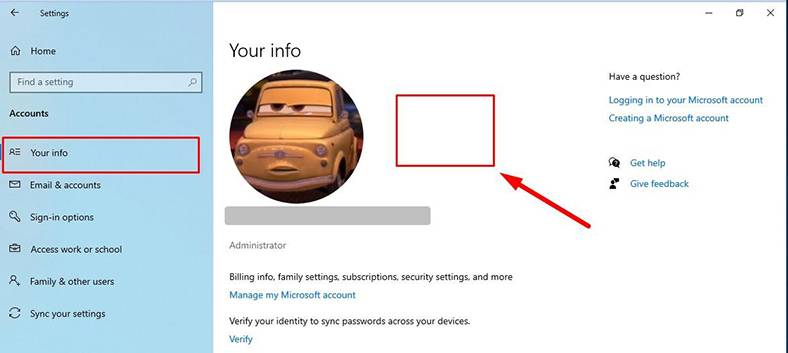
Now that is all you need to do for customizing your account picture, and «Windows 10» looks more personalized.
Conclusion
It is quite easy to change the account picture and you can follow this simple sequence of steps to modify or update the way your account looks as you wish. If necessary, you can go back to any of the previous choices in a single click.

How to Remove a User Account, Documents, Photos in Windows 10, 8 or 7 💻👪🚫


