RAID 0 vs RAID 1: Speed vs Data Protection
Learn how to create RAID 0 or RAID 1 arrays with ease in this comprehensive guide. Whether you’re looking to enhance operating speed or ensure data protection, this tutorial covers everything you need to know. Dive deep into RAID 0 and RAID 1 array creation techniques and explore insider strategies to maximize performance and safeguard your data. Don’t let the complexity of RAID arrays deter you – empower yourself with the knowledge to create them effortlessly!
In spite of this strange word, everything is simple: for example, RAID 1 is meant to protect your data on the dard disk from sudden loss due to a broken-down HDD. You may ask, how is data protected, if the disk itself is out of order? In fact, it is all very simple: two hard disks are installe in a computer, and during its work, one of the disks copies completely the contents of the other disk; if one of them breaks down, all the information is safe and intact on the other disk, because theer are very little chances of two hard disks to break down at the same time.
Besides RAID 1, there are also RAID 0, RAID 5, RAID 6, RAID 10, but for a home computer you can successfully use RAID 0. RAID 0 doesn’t protect your data but it doubles the operating speed of the disk! How is that? Just read this article to see.
- How To Create a RAID Array and What It Is For
- Creating a Program RAID 1 Array From Two Empty Hard Disks With Windows 10 Tools
- How to Create a RAID 1 Array If There Is Already Some Data on One of The Hard Disks
- Questions and answers
- Comments

💿 Data Recovery Tool for Damaged RAID Arrays 💿
How To Create a RAID Array and What It Is For
We have long planned to write about creating a RAID array in a computer. Though it seems complicated, it is very simple in fact, and after reading it many users would love to apply this useful and safety-related technology.
It is no secret that our information on a computer is almost totall insecure and is kept on an ordinary hard disk which can break down at the most inappropriate moment. It is a long-recognized fact that the hard disk is the weakest and the least convenient element in a system unit because of having moving mechanical parts. The users, who have lost important data because of a broken-down hard disk at least once, started thinking about avoiding the same situation in the future. The first thing coming to mind is creating a RAID array.
All the point of having a redundant array of independent disks is in saving your files on a hard disk in case if this disk breaks down! «How can I do it,» you ask me; it is very simple, you just need two hard disks (they can even be of different volume).
In today’s article we will use the operating system Windows 10 to create the simplest and most popular RAID 1 array out of two hard disks; it is also known as mirroring. The principle of mirror is that the information on both disks is duplicated (written in a parallel way) and the two hard disks are in fact the exact copies of each other.
If you copied a file to the first hard disk, then the same file appears on the other disk, and, as you have already realized, if one hard disk breaks down, al your data will be safe on the other hard disk (a mirror). The chances of both disks to break down at the same time are extremely little.
Note: if there is already some informaton on your hard disk, you can create a mirror for such disk.
The only disadvantage of a RAID 1 is that you have to buy two hard disks but they will work as one: that is, if you install two hard disks 500 GB each into your system unit, you will have 500 GB of space to keep your files instead of 1 TB.
If one of the two disks breaks down, you just replace it with another one, adding it as a mirror for the other (surviving) hard disk containing data, that’s all.
| Feature | RAID 0 | RAID 1 |
|---|---|---|
| Data Distribution | Striping – data is split and written across multiple disks | Mirroring – data is duplicated on two or more disks |
| Number of Drives | Requires at least 2 disks | Requires at least 2 disks |
| Performance | Higher read/write speeds due to data striping | Read performance is improved, but write speed is slower due to mirroring |
| Storage Efficiency | 100% of disk capacity is usable | 50% of disk capacity is usable (due to mirroring) |
| Fault Tolerance | No redundancy – data is lost if a single disk fails | High redundancy – data is preserved if one disk fails, as it’s mirrored on another disk |
| Use Case | Ideal for performance and speed, where data loss is not a major concern (e.g., gaming, video editing) | Ideal for critical data where redundancy and data protection are important (e.g., servers, backups) |
| Cost | Cheaper, as only two disks are needed and 100% capacity is usable | More expensive, as capacity is halved due to mirroring (needs more disks for the same usable space) |
Creating a Program RAID 1 Array From Two Empty Hard Disks With Windows 10 Tools

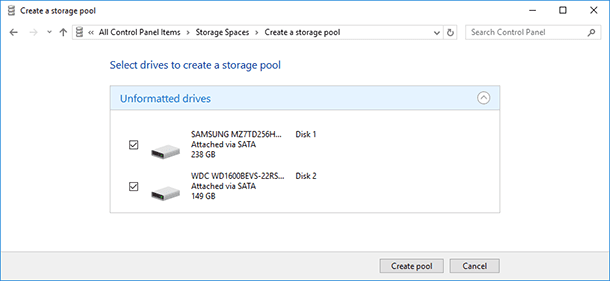
Software RAID in Windows 10, Storage Spaces and Data Recovery from RAID drives 💻⚕️🤔
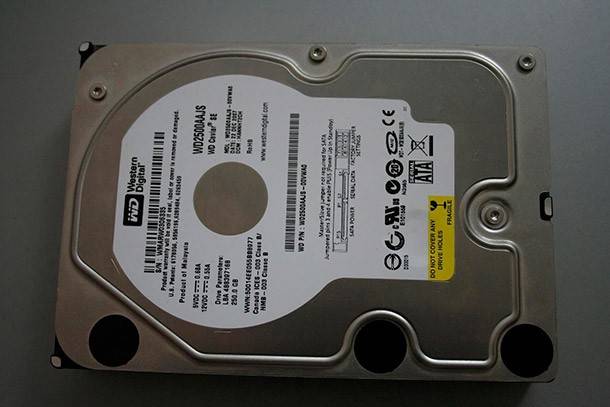
Firt of all, install two empty hard disks into the system unit. For example, let us take two hard disks 250 GB each.
Then, go to Disk Management:
Disk 0 – a solid-state drive (SSD) with the operating system Windows 10 installed in partition (C:).
Disk 1 and Disk 2 – hard disks 250 GB each that we will use to create a RAID 1 array.
Right-click on any hard disk and select «New Mirrored Volume»
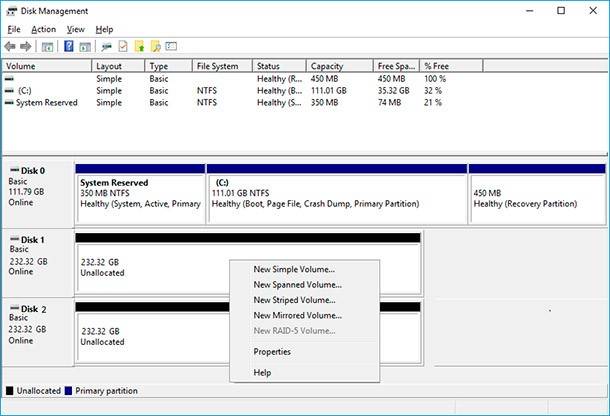
As a result, the wizard opens where you should click Next. Add the disk to work as a mirror for the disk you have selected previuosly. We have selected Disk 1 to be the first mirrored volume, so in the left part we should select Disk 2, click on Add and then click Next again.
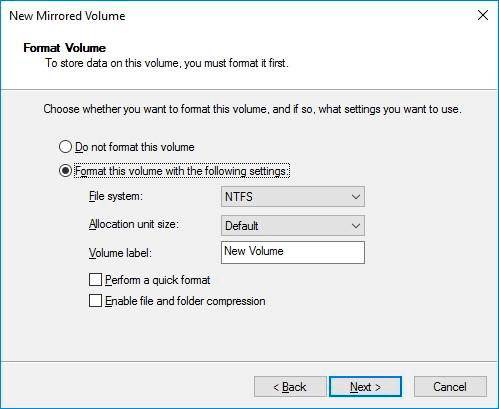
In the next window, select the letter for the program RAID 1 array. Check the box Perform a quick format and click next.
Ready.
In Disk Management, mirrored volumes are shown in red and have one disk letter, in our case, it is (D:). Copy some files to any of teh two disks, and they will appear in the other disk immediately.
In This PC window, the program RAID 1 array will be shown as one disk.
If one of the hard disks breaks down, in Disk Management the RAID array will be marked with an error “Failed redundancy” but the data in the other hard disk will be completely safe.
How to Create a RAID 1 Array If There Is Already Some Data on One of The Hard Disks
In the previous section of this article, we have created a RAID 1 array from two empty hard disks. But what can be done if one hard disk is already full of files and we need a mirror for it?
As we have already said, the principle behind RAID arrays is duplicating data or in simple words, there will be two hard disks in your computer to store data; they will copy each other completely. So if you wrote a file to the first hard disk, it will also be copied to the second hard disk. It is made to secure your data, and if one hard disk fails, all your files will be safe and sound on the other hard disk! The only disadvantage of a RAID 1 array is that these two hard disks will work as one; for example, installing two hard disks 1TB each into your system unit, the operating system will see them as one hard disk of 1 TB.
Now, let us imagine a situation, when your computer has two hard disks installed: a solid-state drive with Windows 10 and an ordinary 250 GB hard disk with most important files which you just cannot afford to lose. Then, we should create a simplest RAID 1 array of two hard disks – that is, buy another 250 GB hard disk and install it into the system unit.
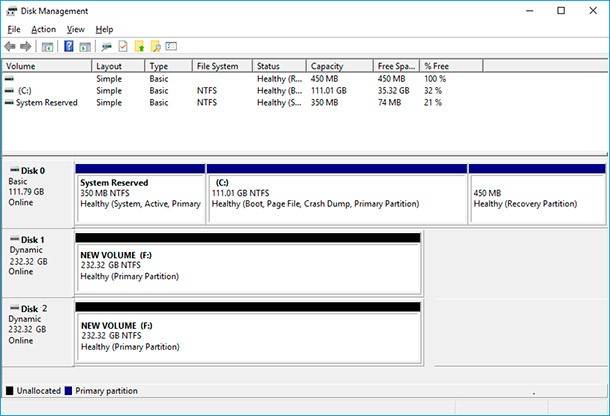
After that, turn on the computer; as soon as the operating system has booted. Go to Disk Management and find three hard disks there:
Disk 0 – a solid state drive (SSD), partition (C:) with Windows 10.
Disk 1 – an ordinary HDD (New volume (D:) of 250 GB containing your files, and we will create a mirror for it.
Disk 2 – an empty HDD of 250 GB which will become a mirror for Disk 1.
The size of the disks should not necessarily be the same; the point is that the mirror should not be less than the disk for which it is created.
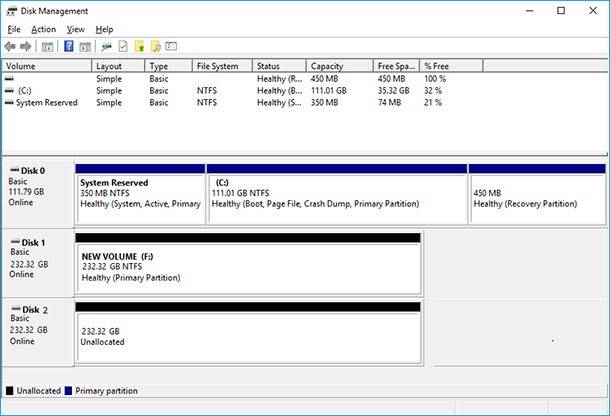
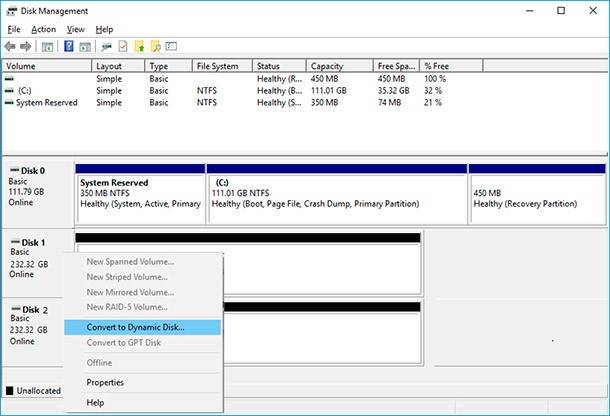
Right-click on Disk 1 and select Convert to Dynamic Disk.
Disk 1 (New Volume (D:) has been converted to Dynamic Disk; nothing has happened to our files and they are available.
Right-click on New Volume (D:) and select Add Mirror.
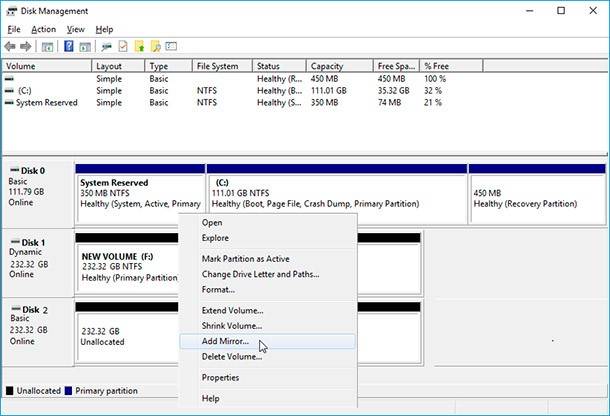
Left-click on Disk 2 and click on Add Mirror Volume.
The process of synchronizing contents of the hard disks begins, and all information from New Volume (D:) is copied to the mirror. Disk Management reports that syncronization is complete, the disks are all right and you can continue with your work.

In This PC window, the RAID 1 array is now shown as one disk.


Creating a RAID 1 array involves the following steps:
A RAID 0 array is a type of RAID (Redundant Array of Independent Disks) configuration that combines multiple disks into one larger, faster disk. It is also known as striping. The steps involved in creating a RAID 0 array are as follows: