Fix Hard Disk with CHKDSK in Windows 10: Step-by-Step Guide
Encountering issues with your hard disk in Windows 10? Don’t worry – CHKDSK is here to help! In this article, we’ll provide you with an essential guide to fixing your hard disk with the help of CHKDSK (Check Disk) in Windows 10. From running CHKDSK scans to repairing disk errors, we’ll walk you through the process step by step. Whether you’re experiencing disk corruption or file system errors, CHKDSK can help diagnose and fix issues with your hard disk. Watch now and learn how to keep your disk healthy and functioning smoothly!
- Step 1. Launch the Command prompt as Administrator
- Step 2. Type the command chkdsk
- Step 3. Configure chkdsk to restore the hard disk
- Step 4. Run chkdsk
- Conclusion
- Questions and answers
- Comments
Step 1. Launch the Command prompt as Administrator
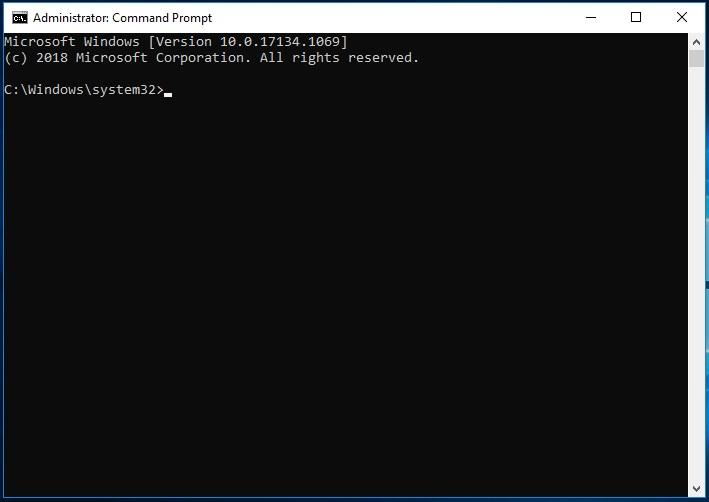
Even in Windows 10, the command CHKDSK is run with the Command Prompt, but to enjoy all of its functionality, you should start it with administrator rights. To open the Command Prompt as Administrator, press the key shortcut Windows + X and select the corresponding menu item. Also, you can access it by right-clicking on the Start button.

The User Account Control window will open, asking for permission to start the Command Prompt as Administrator. Click Yes and the Command Prompt window will open. You can make sure you have administrator rights by looking at the name of this window: it should say Administrator: Command Prompt.
Step 2. Type the command chkdsk
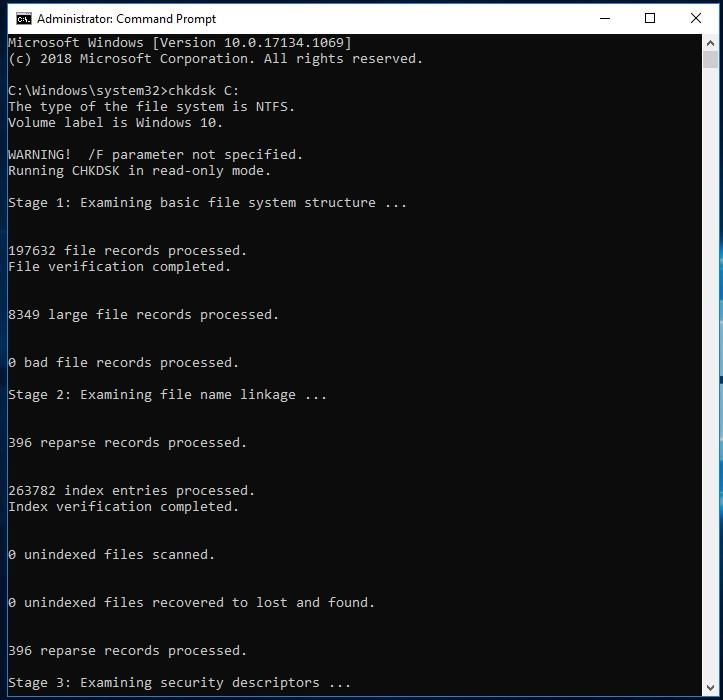
In the Command Prompt, type chkdsk, and follow it with the letter of the disk you need to check or fix. In our case, this is internal disk С.
Step 3. Configure chkdsk to restore the hard disk
If you start CHKDSK in Windows 10 with default options, it will only display the disk status and won’t fix any errors in this partition. To have the command fix the disk errors, there are some things to configure. After the disk letter, type the following flags, and remember to put a space after each of them: /f /r /x:
/f /r /x
- The flag /f tells CHKDSK to fix all errors it can find;
- The flag /r instructs it to find bad sectors and restore any data that could be read;
- The flag /x stops the disk before any operations are performed.
For more advanced tasks, there are other flags as well:
| Flag | Description |
|---|---|
| volume: | Specifies the drive letter or volume name |
| /v | Displays the name of each file in each directory when checking the disk |
| /i | Performs a less intensive check of index entries (only used for NTFS volumes) |
| /c | Skips checking loops in the folder structure (only used for NTFS volumes) |
| /b | Reevaluates damaged clusters on a volume (only used for NTFS volumes) |
| /scan | Performs an online volume scan (only used for NTFS volumes) |
| /spotfix | Performs a quick corruption repair on the volume on the next reboot (only used for NTFS volumes) |
| /l(:size) | Changes the NTFS log size. If no size is specified, the current size is displayed |
| /perf | Uses more system resources to complete the scan as quickly as possible. This may affect the performance of other processes running on the computer (only used for NTFS volumes) |
| /forceofflinefix | Forces offline repair on next reboot, even if errors were found during an online scan (only used for NTFS volumes) |
| /sdcleanup | Clears invalid mount point data (only used for NTFS volumes) |
| /offlinescanandfix | Runs an offline scan and repair on the volume |
| /freeorphanedchains | Frees any lost cluster chains instead of rebuilding them (only used for FAT/FAT32 volumes) |
| /markclean | Marks the volume as blank (only used for FAT/FAT32 volumes) |
| /? | Displays help on the command line |
Summing up, the command that you should type in the Command Prompt should look like this:
chkdsk [Drive:] [parameters]
In our case, this is how it looks:
chkdsk C: /f /r /x
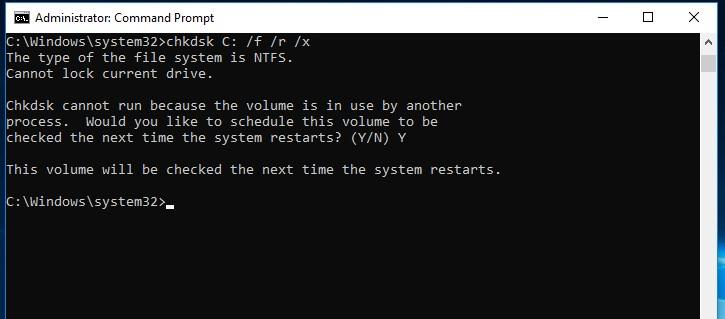
Bear in mind that CHKDSK must have an opportunity to lock the disk, that is, you shouldn’t use CHKDSK to check the system boot while such disk is in use. If the disk you are working on is an external one, or it is not the boot disk, CHKDSK will start as soon as you run the command. If this disk is the one that the operating system boots from, Windows will ask you if the command should run before the computer is booted next time. Select Y (Yes) and restart the computer, so that the command will run before the operating system boots and thus it will get full access to the disk.
Step 4. Run chkdsk
Running the CHKDSK command may take some time, especially if you are dealing with a large disk. When the process is finally over, you will see the summary. It will inform you on the full disk capacity, distribution of bytes and (what is most important) on all the errors that were found and fixed.
CHKDSK works with all versions of Windows, including the latest ones. As to older operating systems, you can still open the Command Prompt from the Start menu by selecting Run and typing cmd. After the Command Prompt opens, right-click on it and select Run as Administrator to gain access to all rights.

How to Check Your Hard Disk for Errors and Fix Them in Windows 10 🔎🛠️🗄️
Conclusion
Now that we have explored how to run CHKDSK in older versions of Windows, many of those following this guide could see that their hard disks lost some of their capacity after running the command. It means that the disk has some errors, because one of the functions in CHKDSK is detecting and blocking bad sectors on a hard disk.
If such disk contains only a few of them, this fact doesn’t affect your user experience at all. But if the disk encounters failures, there could be huge numbers of such sectors. When CHKDSK blocks them, it takes away a considerable amount of disk space.
Be prepared to see such results - and they suggest that all data theoretically stored in such sectors will be lost, even if the operating system doesn’t know about it. CHKDSK will try to restore data from such bad sectors while working with the flag /r, but some information is bound to remain damaged and unavailable for recovery. If it happens, CHKDSK is not to blame - it just displayed the current state of your disk.

⚕️ Tools to Check Hard Disk and Repair Bad Sectors in 2021 ✔️💻


