How to Recover Data From Linux KVM Virtual Machines After Error Or Removal
Read this article to find out how to recover KVM virtual machine data in Linux, and what to do when your virtual machine encounters a failure, or when it refuses to boot. How to recover a KVM virtual machine and recover its operability.
- Files of Linux KVM virtual machine
- The virtual machine is damaged or can’t boot: how to recover its data
- How to recover a deleted KVM virtual machine
- How to mount a freshly recovered Linux KVM virtual machine
- Conclusions
- Questions and answers
- Comments
In modern IT infrastructure, virtualization plays a key role as it allows using server resources efficiently, scaling services, and ensuring required flexibility in management of various environments. One of the most widespread virtualization solutions in Linux is KVM (Kernel-based Virtual Machine) — a powerful hypervisor that integrates into the Linux kernel and is used alongside with other tools such as QEMU and libvirt.
However, just like with any other IT systems, hardware failures, user errors, emergency shutdowns or virtual machine removal may result in loss of important data. In such situations, there is a need for quick and effective data recovery from disk images, configurations, or virtual machine backups.
In this article, we’ll cover:
- what file types KVM uses;
- where they are stored;
- what to do in case of an error or when your VM gets accidentally deleted;
- and what tools can help you recover deleted data.

How to recover data from Linux KVM virtual machines. How to install KVM and configure a VM
Files of Linux KVM virtual machine
Files of a Linux KVM virtual machine are stored in a certain structure and have various formats depending on the type of information they contain.
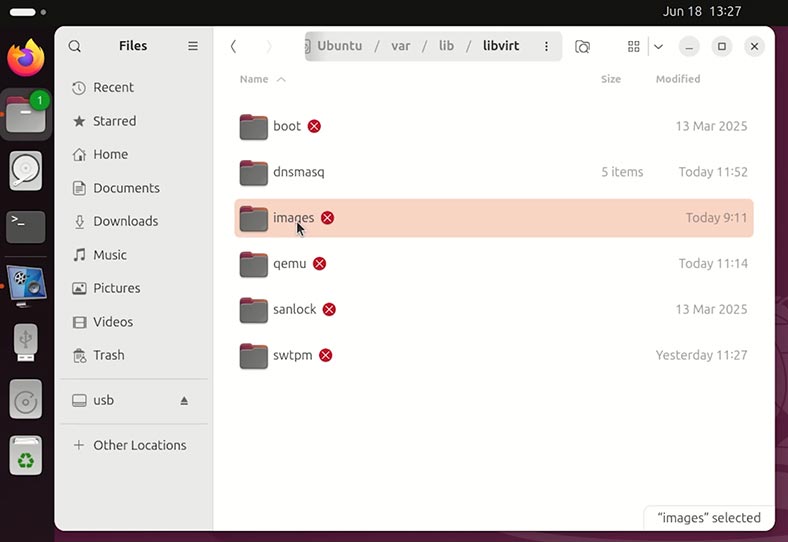
Here is the typical location of KVM hypervisor data files in Linux:
/var/lib/libvirt/images/

The typical file extensions for KVM disk images are .qcow2, .img and .iso. These are the files that contain user data.
Besides, the KVM hypervisor in Linux creates the following items:
-
Virtual machine configuration files:
/etc/libvirt/qemu/ -
Virtual machine working logs:
/var/log/libvirt/qemu/ -
Sockets, PID, runtime files:
/var/run/libvirt/ -
Libvirt network settings:
/etc/libvirt/qemu/networks/ -
Dumps or templates of virtual machine settings:
/home/user/VMs/or
/opt/vm/
| No. | File type | File extension | Default location | Purpose |
|---|---|---|---|---|
| 1 | Virtual disk images | .qcow2, .img, .iso | /var/lib/libvirt/images/ | Virtual hard disks and ISO images for OS installation |
| 2 | Configuration files for virtual machines | .xml | /etc/libvirt/qemu/ | Hardware configuration of a virtual machine |
| 3 | Virtual machine logs | .log | /var/log/libvirt/qemu/ | Startup and workflow logs of virtual machines |
| 4 | Temporary (system) files | (sockets, PID files) | /var/run/libvirt/ | System files used by libvirt for administration |
| 5 | Virtual network configuration | .xml | /etc/libvirt/qemu/networks/ | Virtual network configuration (NAT, bridge, etc) |
| 6 | Additional or user images | .qcow2, .img, .iso |
/home/user/VMs/ /opt/vm/ |
Non-typical or user-defined paths to save files |
The virtual machine is damaged or can’t boot: how to recover its data
What shall we do if a KVM virtual machine gets damaged, can’t boot, or displays various errors? That is, when you have no access to the data inside such virtual machine, and its files can’t be read or copied elsewhere.
To access the data of such virtual machine, let’s use a data recovery tool – Hetman Partition Recovery. It’s got two indisputable advantages over other software products of this type:
- The first advantage - it can mount disks created by most virtual machines.
- The second advantage - it works on all versions of Linux.
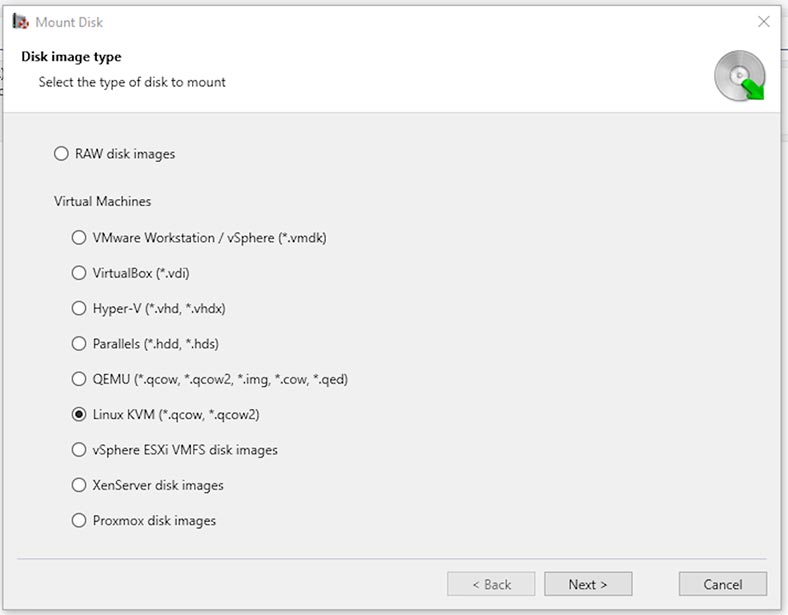
So now,
-
we have a Linux KVM virtual machine, which can’t boot, for some reason. It contains the files that we need to access.
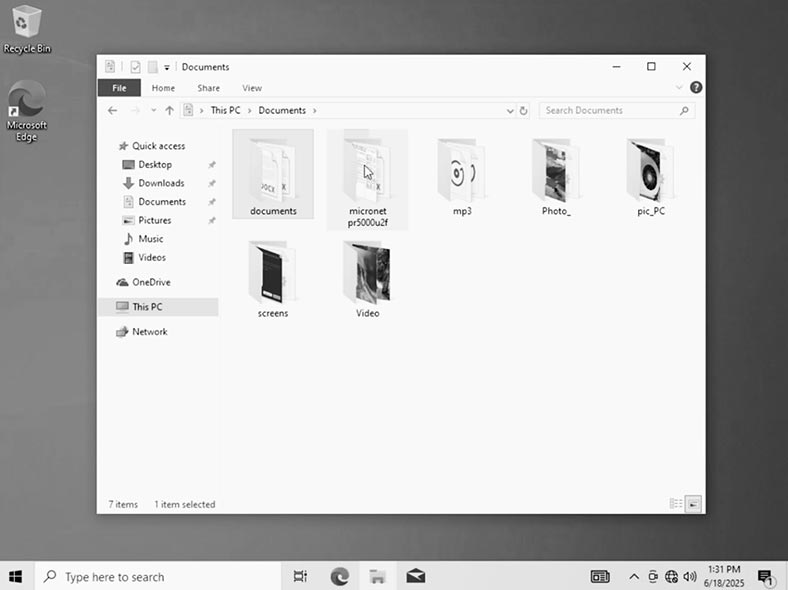
-
To access the files of such virtual machine, let’s run Hetman Partition Recovery.
-
The app identifies the disks connected to this computer. To access the virtual machine, let’s mount its hard disk in the recovery app. To do it, click Mount Disk.
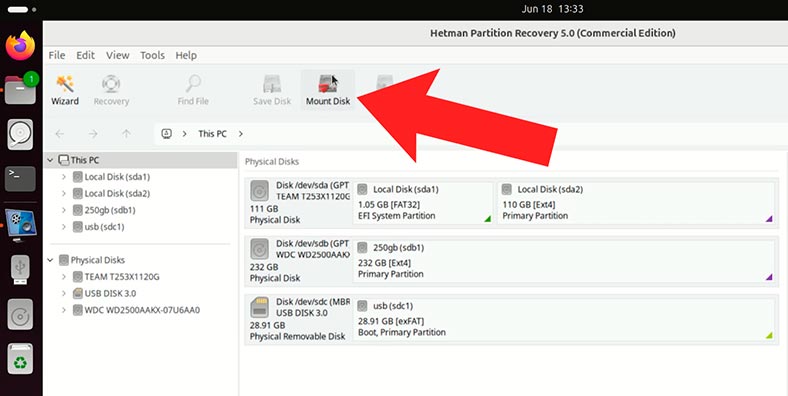
-
And select Linux KVM. If you have a virtual machine of different type, select it from the list.
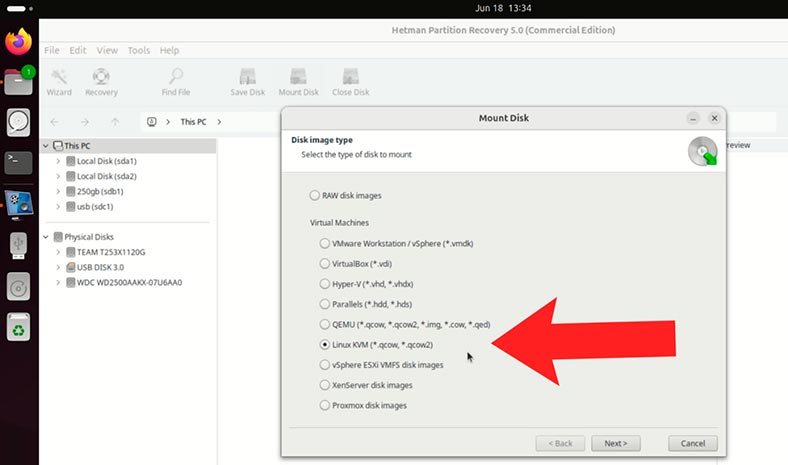
-
In the app window, choose the folder containing the virtual machine and click Open.

-
Hetman Partition Recovery identifies automatically the disk of the selected virtual machine. Click Next.
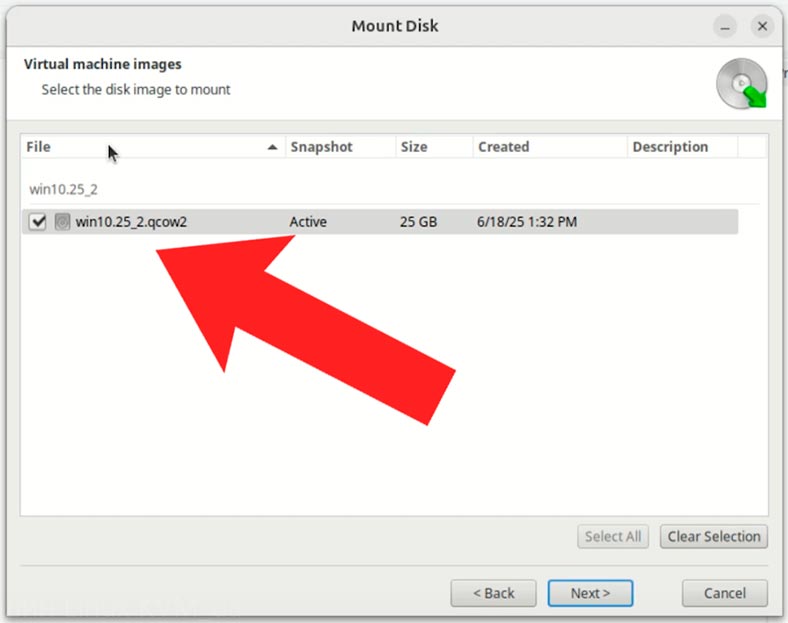
-
After that, the Linux KVM hard disk will appear among other disks as a mounted disk.
-
To access its data, right-click on it and select Open.
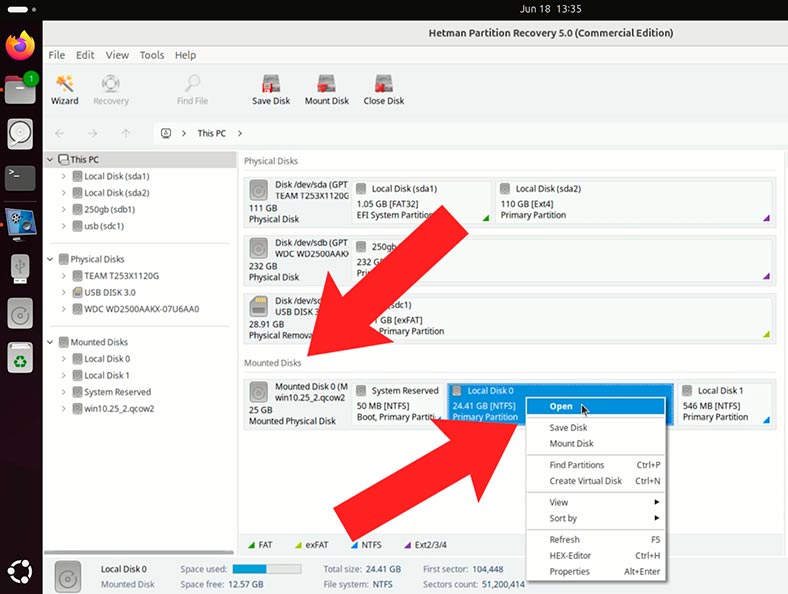
-
For starters, a Fast scan will be enough.
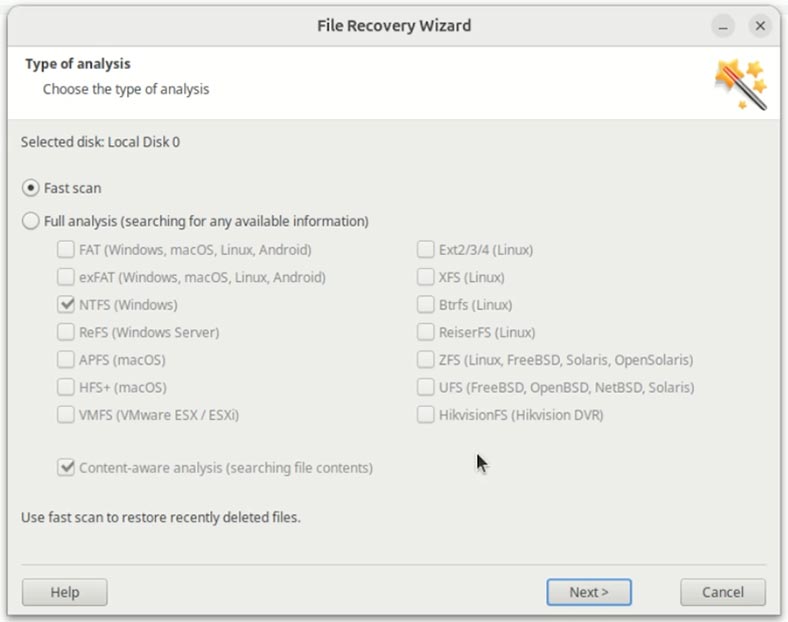
-
Here is the data stored in our virtual machine. Navigate to the required folder and save the required folder. As you can see, their contents can be seen in the preview window.
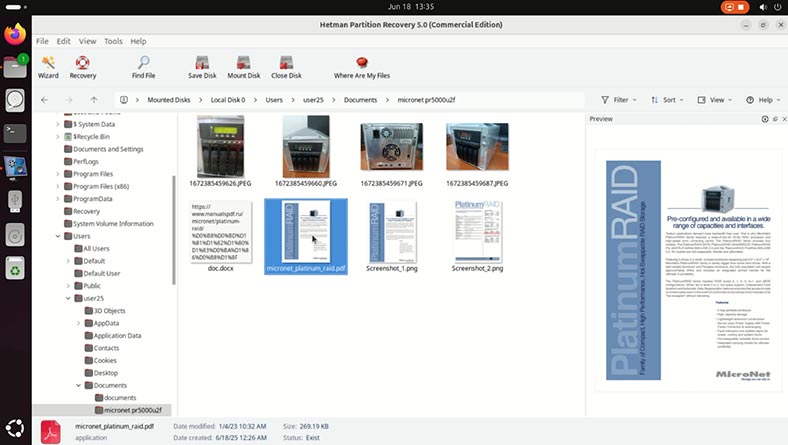
Warning! The recovery app can identify even the files which were removed from the virtual machine while it was still working properly. Such files will be marked with a red cross.
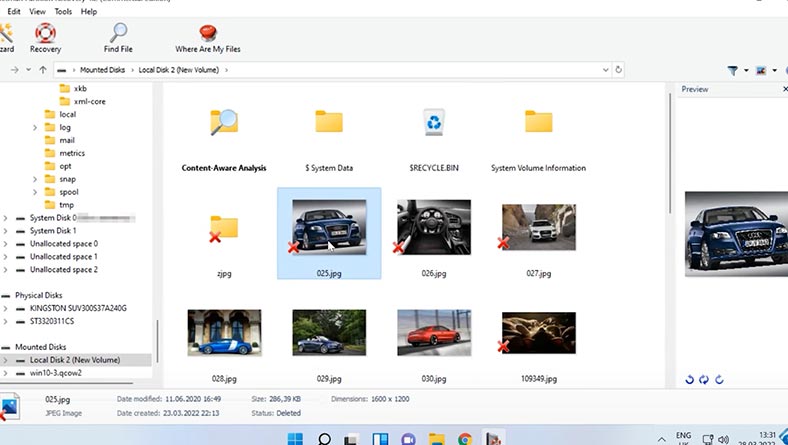
-
To have a file or folder recovered, select them and hit the Recovery button, then choose the directory where to save the recovered data.
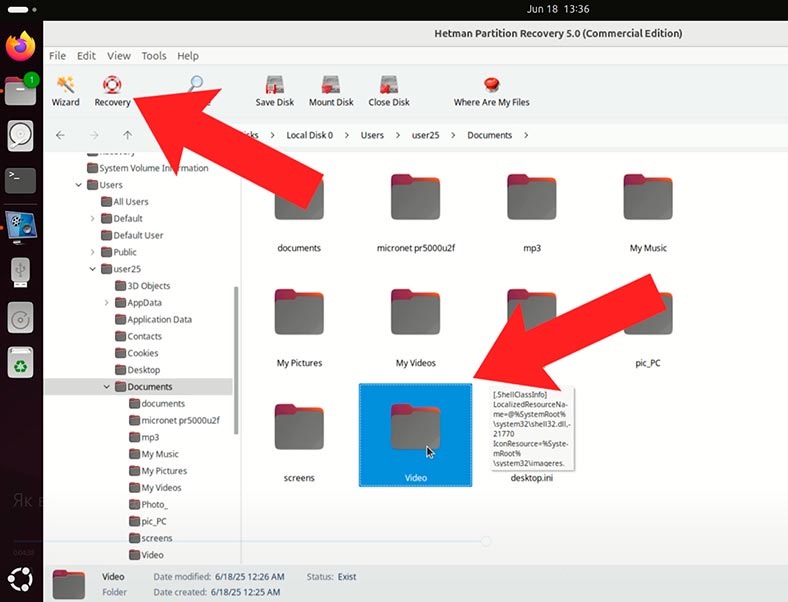
-
The files are recovered.
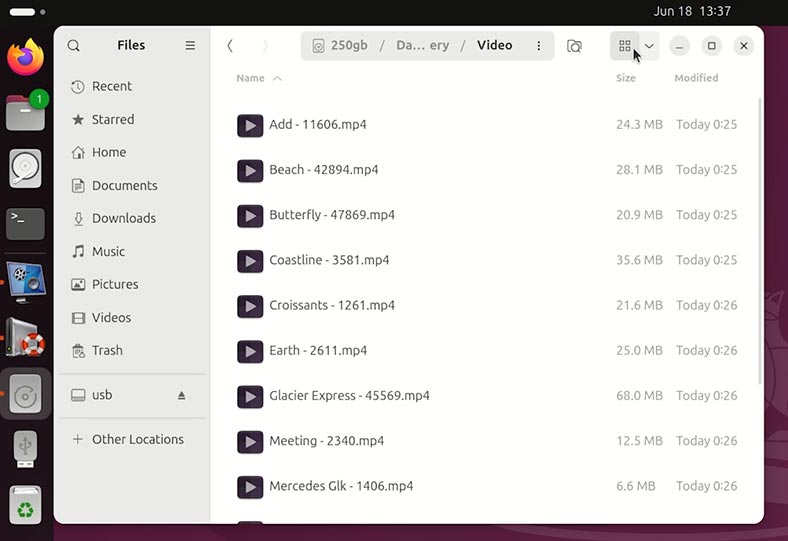
How to recover a deleted KVM virtual machine
What shall we do if a Linux KVM virtual machine is deleted? Can it be recovered?
Suppose we have a disk containing a virtual machine. It works properly, and it contains some data. Imagine you have deleted it accidentally.
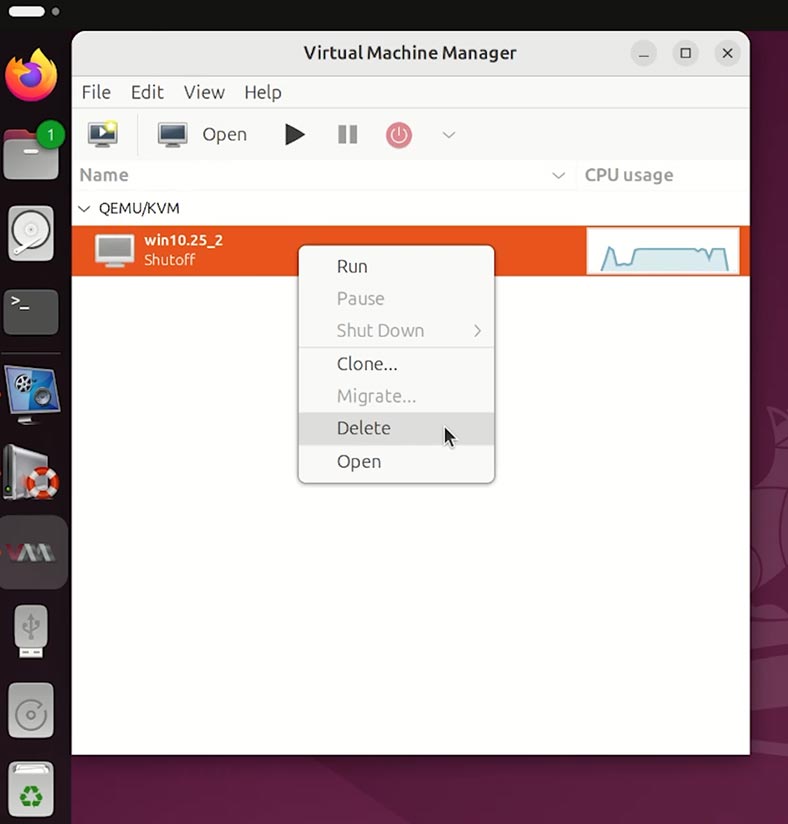
By the way, a virtual machine can be deleted both from its interface and from the file manager of your operating system.
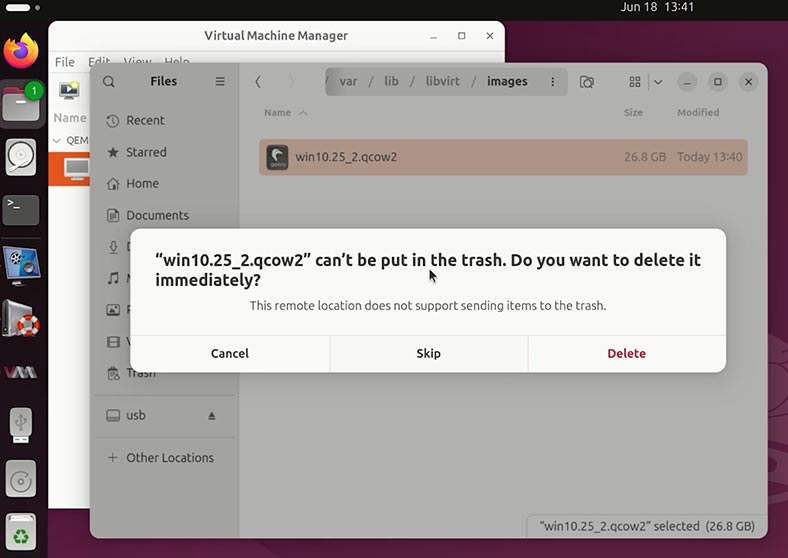
To recover it:
-
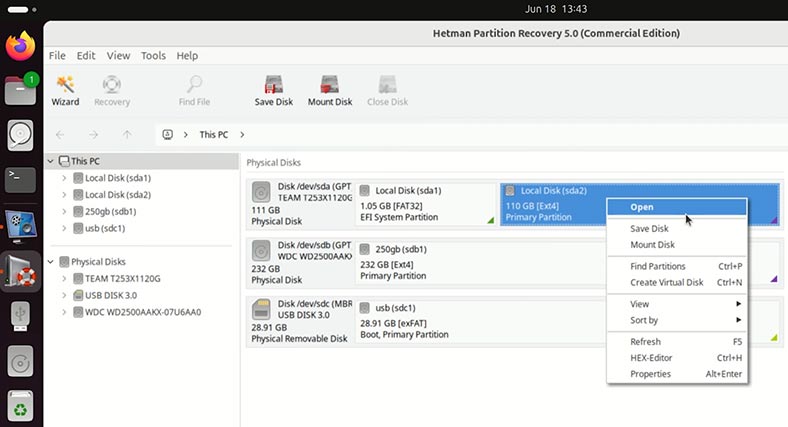
Run Hetman Partition Recovery. The app identifies the disks connected to this computer.
-
Our virtual machine was stored on disk sdа2. Let’s scan it. Right-click on it and select Open.
-
For starters, a Fast scan will be enough.
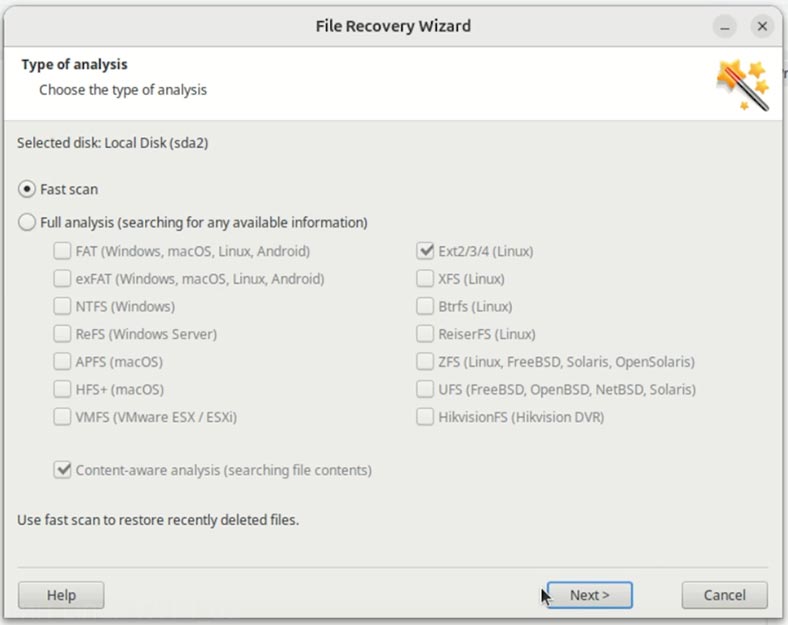
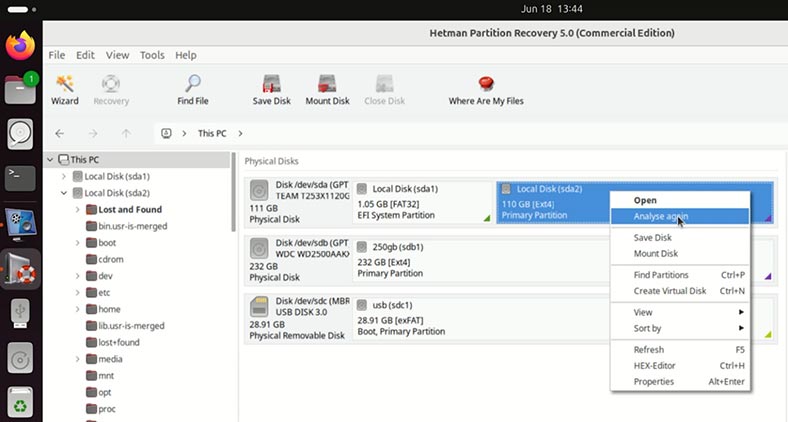
Warning! Depending on why the virtual machine was deleted and other factors, the recovery app may not find it after a Fast scan. If this is your case, right-click on the disk where the virtual machine was stored, and choose Analyze again. Select Full analysis and specify the file system of your disk.
-
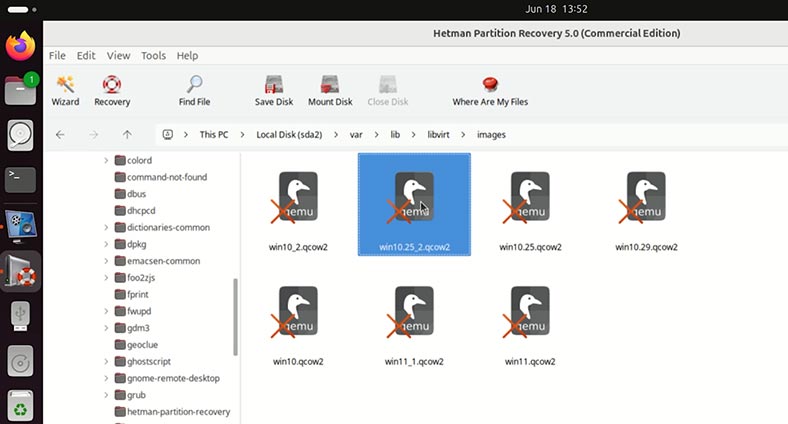
Here is the data on the scanned disk. The virtual machine we are looking for was stored in this folder. Open the folder and you can see the virtual machine disk. This is the file we need to recover.
-
To recover it, select the disk of the lost virtual machine, and hit the Recovery button.
-
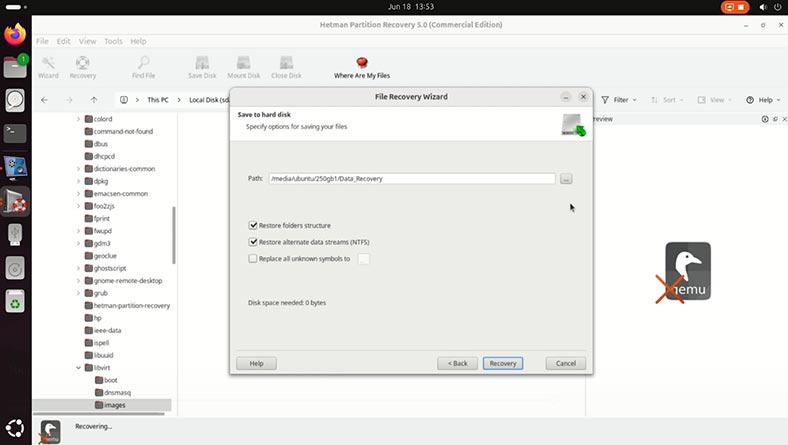
Choose the folder where to save the recovered data.
-
The selected virtual machine is recovered.

How to mount a freshly recovered Linux KVM virtual machine
As you can see, the disk of the required virtual machine is recovered. For convenience, let’s move it to the KVM virtual machine folder (/var/lib/libvirt/images/).
To run a freshly recovered virtual machine:
-
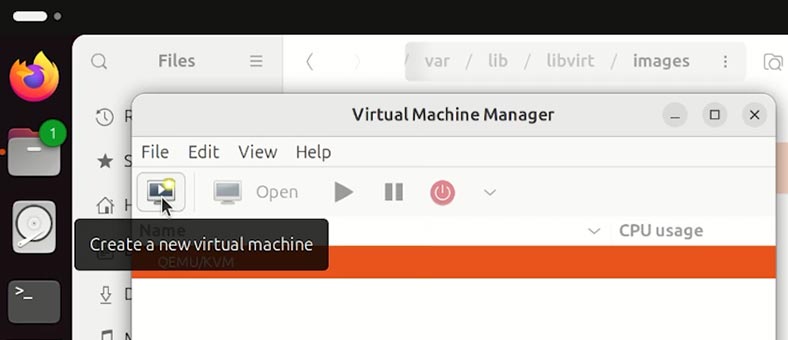
Open Linux KVM and select – New Virtual Machine.
-
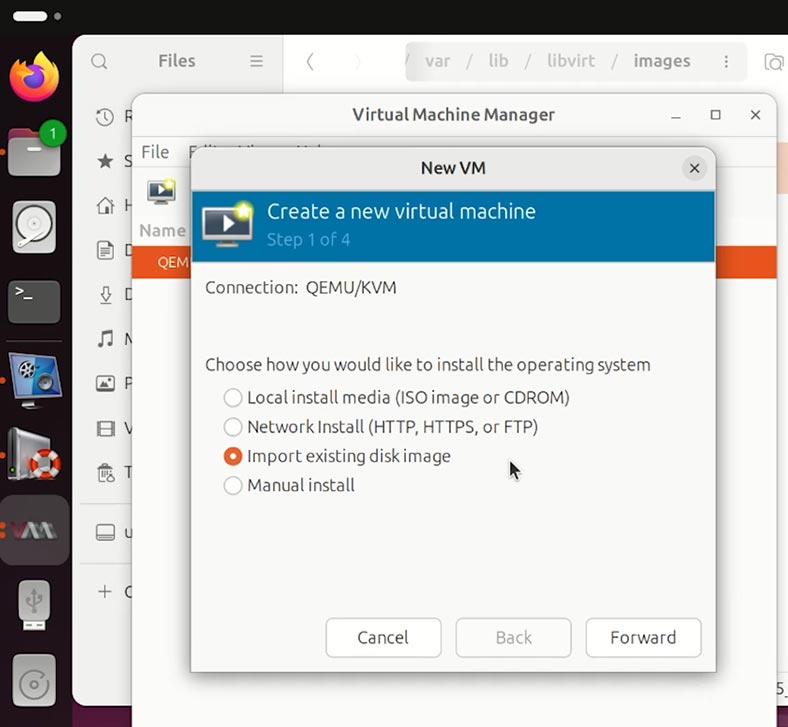
In the next window, choose Import existing disk image and give the path to the image.
.
-
Add the type of the operating system installed on such virtual machine.
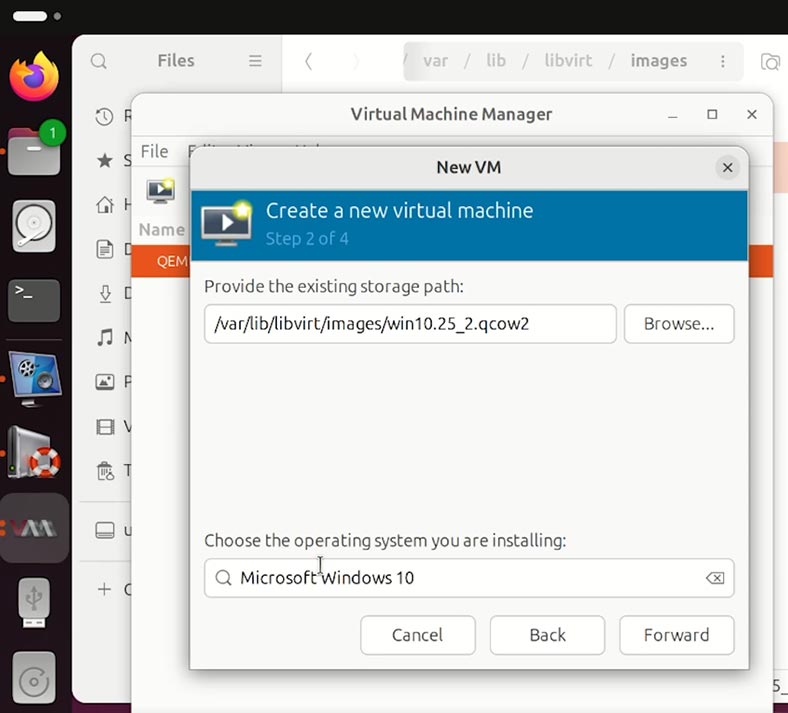
-
Select memory and CPU settings.
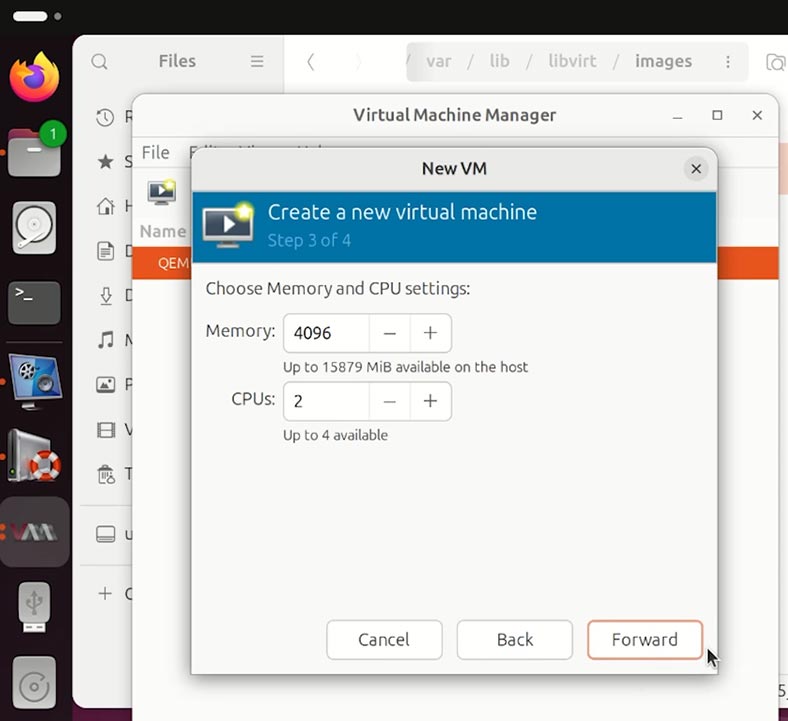
-
Give your virtual machine a name.
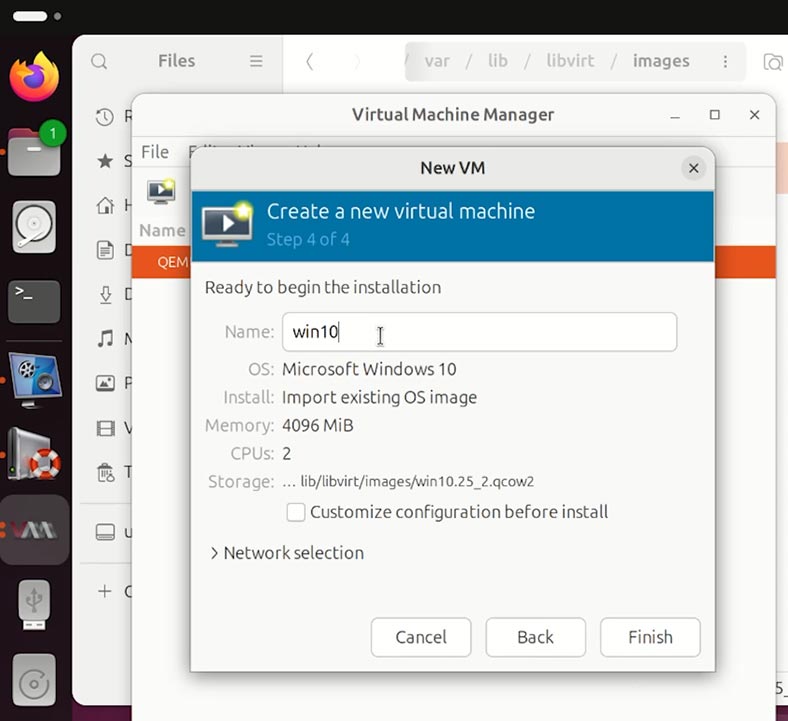
-
All right - now the virtual machine starts easily from the freshly recovered qcow2 disk.
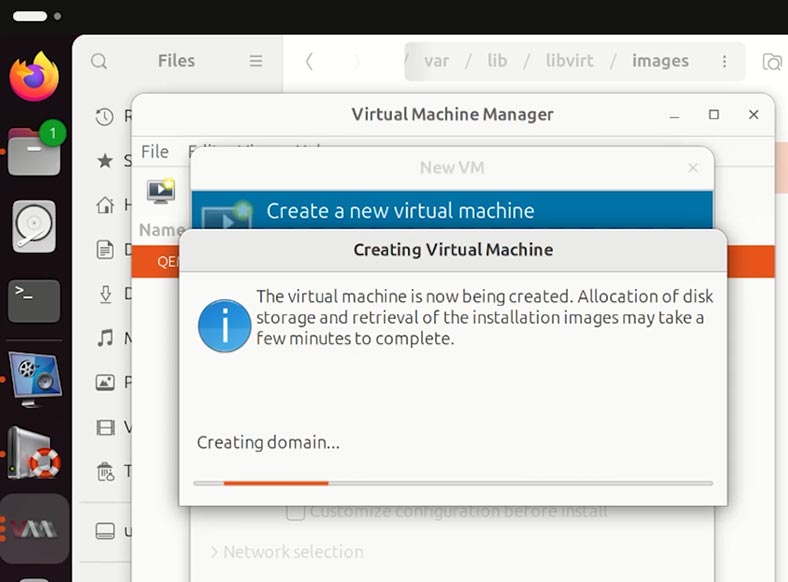
-
Let’s go to the folder where its files were stored. They are all here, and none is damaged.
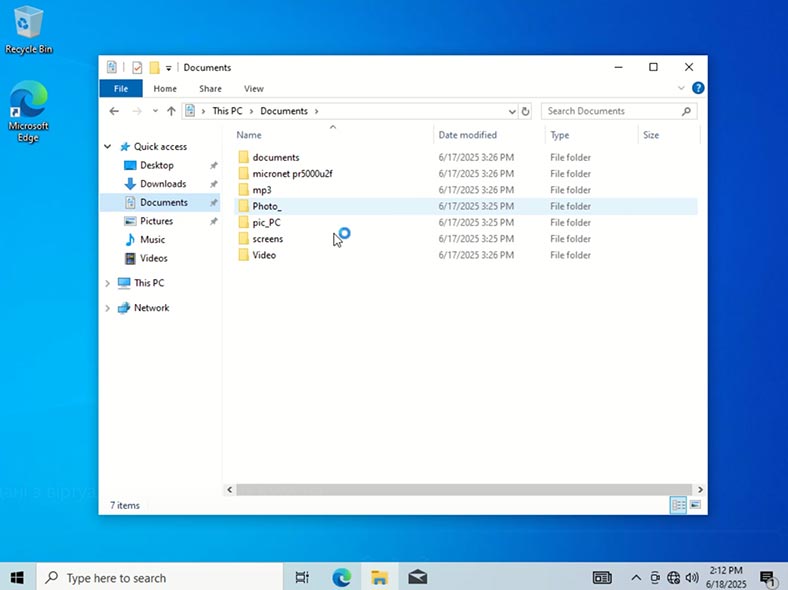
If a virtual machine refuses to boot from a freshly recovered disk, the disk might have been damaged. In this case, you can recover its data in the same way as we do it with a damaged virtual machine. That is, by importing the machine’s hard disk file into the data recovery tool - Hetman Partition Recovery.
Conclusions
As you have just seen, Hetman Partition Recovery is not only a data recovery app to restore deleted files in Linux, but also a powerful tool to work with virtual machines of all kinds.
Although KVM-based is a flexible and reliable solution for deployment of server-type and workstation-type environments in Linux, there is no system which is 100% secured against failures, power shutdowns, hardware failures or human errors. That is why timely and proper response to emergency situations is crucial for successful recovery of a virtual machine and its data.
Today, we have explored the following:
- main file types related to KVM and libvirt;
- where they are stored;
- methods to check disk image integrity;
- and the tools to help you recover lost or damaged files.
To avoid critical losses in the future, it’s important to:
- back up regularly the .qcow2 or .img image files and configuration files;
- monitor the storage status and stability of your host system;
- have a clear recovery plan for emergency situations and failures.
By following these recommendations, you’ll be able to reduce risks and ensure stable operation of your KVM-based virtual machines.


