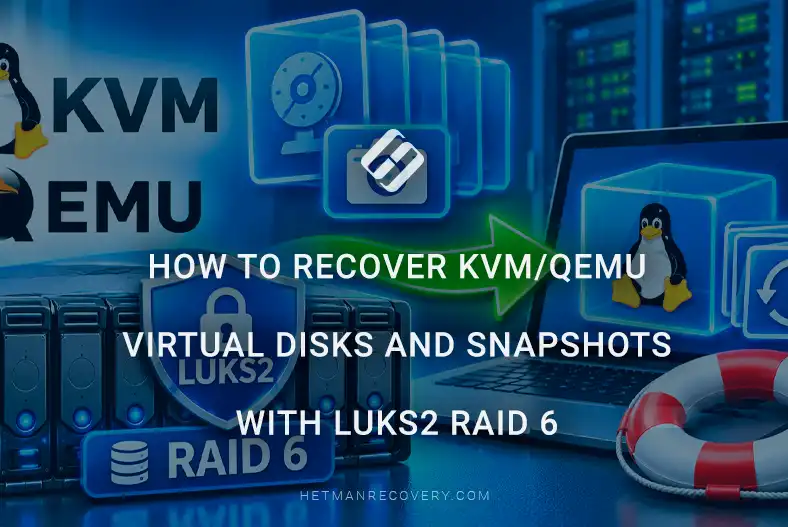
How to Recover KVM/QEMU Virtual Disks and Snapshots with LUKS2 RAID 6
-
Author:
Vladimir Artiukh

-
Editor:
Oleg Afonin



This article examines the recovery of KVM/QEMU virtual disks and snapshots from a storage system built on LUKS2 and RAID 6. The focus is on determining the correct recovery sequence, safely working with physical disk images, reconstructing the RAID array, unlocking the encrypted container, locating QCOW2/RAW images, analyzing the backing chain, and restoring access to virtual machine data without modifying the original media.
- STEP 1. Creating a KVM/QEMU virtual machine
- STEP 2. Creating a snapshot and deleting the LUKS2 partition
- STEP 3. Connecting the drives and starting recovery
- STEP 4. Automatic detection of MD RAID 6 and LUKS2 partitions
- STEP 5. Analyzing the LUKS2 partition and recovering virtual machine files
- STEP 6. Mounting virtual disks and snapshots
- STEP 7. Comparing disk states and recovering files from a snapshot
- STEP 8. Searching for data by virtual disk file systems
- Summary
- Frequently Asked Questions
- Comments
In modern server environments, KVM/QEMU-based virtualization is often used together with software RAID arrays and disk encryption. This architecture combines performance, fault tolerance, and data protection, but it also significantly complicates recovery when drives, RAID metadata, the LUKS2 container, the file system, or the virtual machine snapshot chain becomes damaged.
Particularly difficult are cases where KVM/QEMU virtual disks in QCOW2, RAW, or other compatible formats are stored inside an encrypted LUKS2 volume built on top of RAID 6. In such a configuration, access to the data depends on several levels at once: physical drives, the RAID array structure, the integrity of the LUKS2 metadata, the file system, and the internal structure of the virtual disks.
Additional complexity is introduced by QEMU/KVM snapshots. They can form a chain of dependent QCOW2 files, where each subsequent image contains only changed blocks and references the base disk or the previous snapshot. Loss of one element in such a chain, damage to the backing file, or an incorrect sequence determination can make it impossible to start the virtual machine even if most of the data is still physically present on the drives.

How to Recover a Deleted MySQL Database on Linux RAID 6 + LUKS2 (Ubuntu)
STEP 1. Creating a KVM/QEMU virtual machine
For testing, we installed Ubuntu Server 24.04 and used Cockpit to create a software Linux MD RAID 6 array from four drives.
Three partitions were created on the RAID array. Each was encrypted with LUKS2, and Ext4 file systems were created inside the encrypted containers. The third partition was used to store the virtual machine.

The server was running the KVM/QEMU hypervisor. Through Cockpit, we created a separate storage pool for the virtual machine on the third partition – raid6-vm-images. The virtual machine files were stored in the vm-images directory.
For the virtual machine, we created a QCOW2 system disk with a capacity of 32 gigabytes, as well as two additional disks: a QCOW2 disk of 2 gigabytes and an IMG disk of 1 gigabyte.


Windows 10 was installed on the system disk. The two additional disks were formatted inside Windows as NTFS and FAT32, respectively.

STEP 2. Creating a snapshot and deleting the LUKS2 partition
We copied an initial set of files to the system disk and the two additional disks, then created an external snapshot. After that, we added another folder with files and deleted some of them.

After the test changes were completed, the virtual machine was shut down. Next, the vm-images folder containing the base disk images, external snapshot files, and the memory state file was copied to the second LUKS2 partition of the RAID array.
To simulate data loss, we used Cockpit to delete this partition from the partition table. As a result, its area became unallocated. We did not format it or write new data to it in order to preserve the possibility of subsequent recovery.


STEP 3. Connecting the drives and starting recovery
After deleting the partition, we powered off the server and removed the RAID array drives. Only two of the four drives were connected to a computer running Windows 11 via a USB dock station.
If Windows prompts you to initialize or format the drives after connection, make sure to click Cancel. Do not write new data to them and do not run error checking or repair operations, as this may worsen the recovery result.
You can also work with the drives in other ways. For example, connect them remotely to the software via SSH or mount previously created images if you do not want to work directly with the original drives.

STEP 4. Automatic detection of MD RAID 6 and LUKS2 partitions
Immediately after launch, Hetman RAID Recovery read the service information from the two connected drives.

RAID 6 allows up to two drives to be missing. Since both available drives were healthy and the service information was intact, the program automatically reconstructed the MD RAID 6. The two missing drives were shown as Empty disk, and the array received the status Recoverable.

The properties show the Left Synchronous P+Q layout, a block size of 512 KB, as well as the disk positions, offsets, and sizes.
The program found three areas with LUKS2 encryption on the array. The first and third partitions remained in place, and the deleted second one is shown as unallocated space marked with LUKS.
STEP 5. Analyzing the LUKS2 partition and recovering virtual machine files
Double-click the unallocated area marked LUKS. The program will prompt you to enter a password or select a key file.

After unlocking, the Ext4 file system will become available. Next, select the analysis mode.
We recommend starting with Fast Scan. If the quick scan does not find the required data, run Full Analysis and specify the Ext2/3/4 file system.

In our case, Fast Scan was sufficient. The program restored the structure of the deleted partition and found the vm-images folder, which contained the system disk and additional virtual disks, as well as their snapshot files.

It is important to note that the virtual machine configuration is stored separately from its disks – usually in the /etc/libvirt/qemu directory. If the XML configuration file is lost, data from the virtual disks can still be recovered, but the machine configuration will have to be recreated in order to start the VM again.

Select the folder containing the virtual disks and snapshot files and click Recovery.

We recommend recovering the entire folder so that the base images and their related snapshots remain together.
Select a different physical drive for saving. Do not recover the files back to the original RAID array, as this may overwrite data that can still be recovered.
STEP 6. Mounting virtual disks and snapshots
If you need access to the data inside virtual disks or snapshots, as well as to locate and recover deleted files, you can do this directly in our program.
Click Mount Disk.

In the Disk Image Type window, under Virtual Machine Disk Images, select QEMU, since in our test the virtual machine and its disks were created based on KVM/QEMU. If the images were created in another virtualization environment, select the corresponding disk type from the list. Then click Next.

On the next step, specify not an individual image file, but the folder where we recovered all virtual machine files. It is important that the base disks and their related snapshots are stored together and keep their original names.

The program will analyze the folder contents, determine the relationships between files, and automatically group the base disks with the corresponding snapshots. If multiple snapshots were created for one disk, the program will arrange them in the correct order. The latest state of each chain will be marked as Active. Select the required disks and their states, then click Next.

After mounting, they will appear under Mounted Disks as separate drives. On the main screen, the Active label is no longer shown, so the base disk and its snapshots can be distinguished by the names of the corresponding files.

STEP 7. Comparing disk states and recovering files from a snapshot
To compare the base disk image and its snapshot, you need to analyze both mounted disks. Double-click each of them and first run Fast Scan.
If Fast Scan does not find the required data, perform Full Analysis. During full analysis, you must specify the file system used inside the virtual disk.
The base image preserves the previous file system state.

On the disk mounted from the snapshot, the later changes are visible: the added folder and the files deleted from it, which the program marks with an X.

Since these files were written after the previous disk state was created, they must be found and recovered from the mounted snapshot.
Review the found files in the preview window, which supports many common formats. You can view document contents, lists of files inside archives, images, videos, and other data here. The preview can be expanded to full screen, which is especially convenient for reviewing images and video recordings.
After confirming that the required files are selected, mark them and click Recovery. Save the recovered data to another physical drive.

STEP 8. Searching for data by virtual disk file systems
If the required virtual disk images were not found or could not be mounted, you can try to recover the data directly by the file systems used inside those disks.
To do this, select the unlocked RAID partition, launch the recovery wizard, and choose Full Analysis.

When configuring the analysis, instead of the Ext4 file system actually used on this partition to store virtual disk files, specify the file systems located directly inside the virtual disks themselves. In our case, these are FAT32 and NTFS, so we select FAT and NTFS for the search.

This method is most effective for virtual disks where the entire space was preallocated in advance. In this case, the virtual disk data is physically present inside the image file, and the program can find and analyze the file system stored in it even if the image file itself is damaged or lost.
For thin-provisioned virtual disks, this approach usually does not allow complete disk recovery. In such images, only the blocks to which data has already been written are physically stored, while unused space is not allocated in advance. Therefore, without the structure of the image itself, individual virtual disk blocks may be fragmented, and reconstructing the entire file system correctly is much more difficult.
After the analysis is complete, review the found partitions and files.

This method can help recover individual data or even a file system from a preallocated disk, but the image file itself and its relationships with snapshots are not recovered in this way.
Summary
As a result, Hetman RAID Recovery automatically assembled the Linux MD RAID 6 from two available drives, found the deleted LUKS2 partition, unlocked it, and restored the folder with the disk images and virtual machine snapshots.
After mounting, we were able to compare the disk state before and after snapshot creation, locate the required data, and recover files deleted later. It is important to keep all related images and snapshots together, not change their names, and recover data only to another physical drive.