RAID Data Recovery: Essential Guide for Areca ARC-1210 Controller Users
Struggling to recover data from your RAID system based on the Areca ARC-1210 Controller? Don’t worry, we’ve got you covered! Our comprehensive guide will walk you through expert strategies and techniques to successfully retrieve your valuable data. Say goodbye to data loss worries and reclaim your files with ease!
- How to create a RAID 5 array on Areca ARC-1210 controller
- How to create a RAID with the manufacturer’s utility
- Data recovery from Areca ARC-1210
- Conclusion
- Questions and answers
- Comments
Losing important data is something that you can never predict. Although RAID 5 is one of the most reliable solutions to store data among other disk array types, it can’t guarantee 100% protection against data loss. At any time, one or several disks may fail, and this is also true about the controller, or other hardware components. Other possible issues may include wrong configuration, accidental removal of hard disks or their formatting – but the result the same: important information can be lost for good.
| Reason | Description |
|---|---|
| Failure of two or more disks | RAID 5 can tolerate the failure of one disk, but the failure of two or more disks leads to complete data loss. |
| RAID controller errors | Failures in the RAID controller can damage metadata or the array configuration, resulting in information loss. |
| Incorrect array reconstruction | Errors during RAID recovery or reconstruction can lead to data loss. |
| Corrupted disk sectors | The presence of bad sectors on multiple disks can complicate data recovery. |
| Logical errors | File system issues, viruses, or incorrect settings can cause information loss. |
| Firmware update failures | Failed updates of disk or controller firmware can disrupt the array’s operation. |

How to Recover Data from a RAID 5 with a Non-Operable Controller Areca ARC 1210
How to create a RAID 5 array on Areca ARC-1210 controller
First of all, let’s explore the process of creating a RAID system, the important aspects to be considered when building it, and the settings which become crucial if you want to make data recovery possible. This RAID will consist of three hard disks combined into an array with the help of Areca ARC-1210 controller.
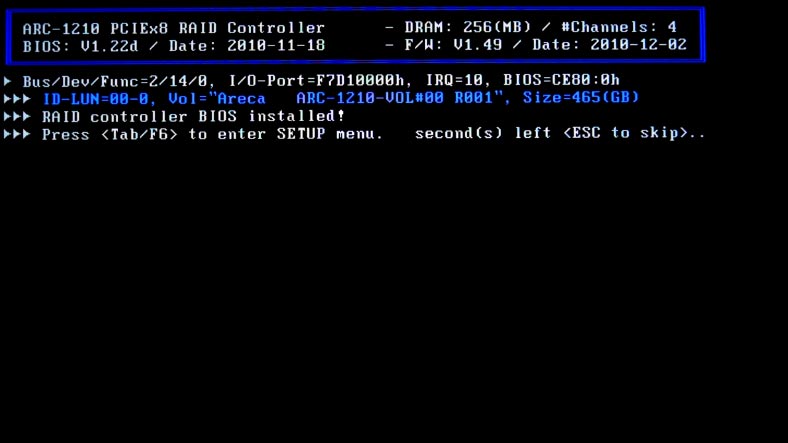
When starting the operating system with the installed RAID controller and the hard disks, this message will appear on the screen. It will remain there for about five seconds, which gives you enough time to start the Setup tool by pressing the Tab or F6 key. To skip setup, press ESC.
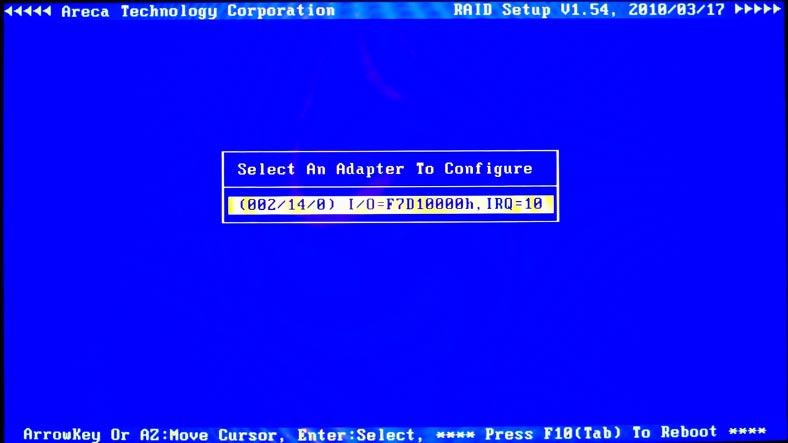
When you enter the Setup menu, you’ll see the BIOS window with the dialogue box which lists the controllers connected to the motherboard. Use the Arrow Up and Arrow Down keys to select the adapter which needs to be configured, and then press Enter to access the main setup menu.
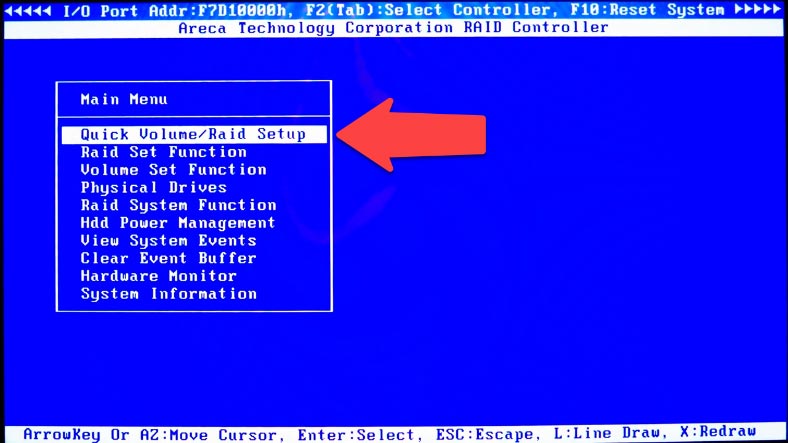
For quick configuration of your RAID system, select the first menu item – Quick Volume/RAID Setup – and press Enter.
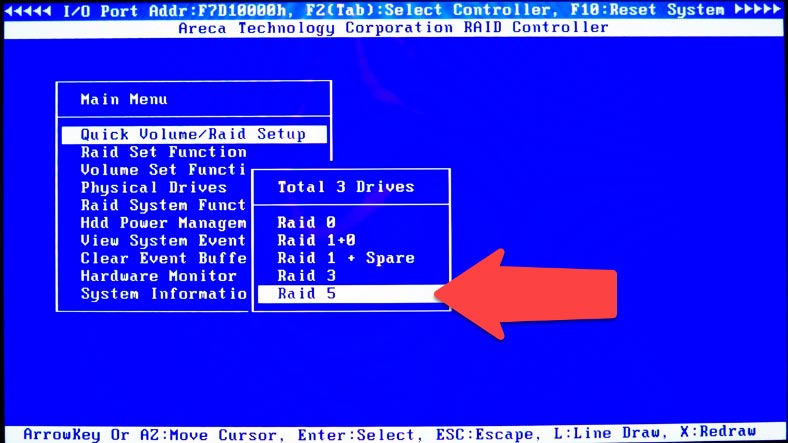
Select the RAID type from the list and press Enter to continue.
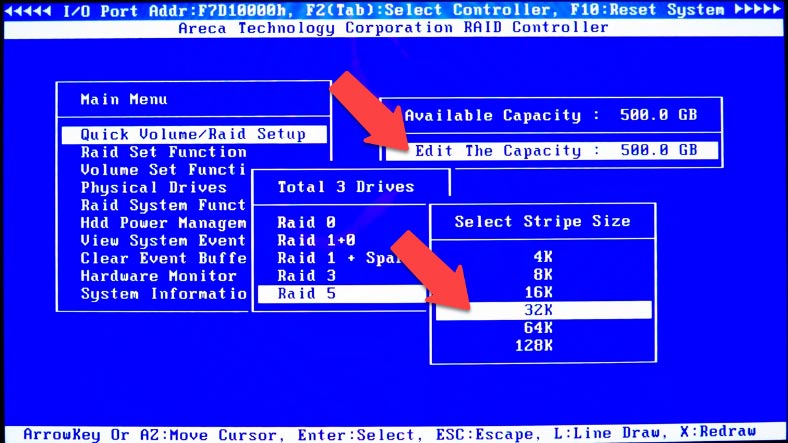
Set the volume capacity, stripe size, select “Create Volume” – “Yes” – and press Enter to confirm.
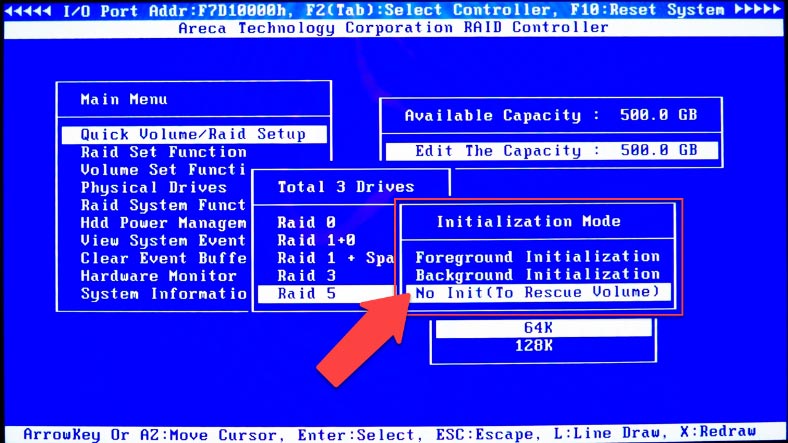
After that, choose initialization mode – Foreground Initialization/Background Initialization/No Initialization – and press Enter to confirm it.
Now the RAID system has been created. To exit and restart, press the Tab key several times.
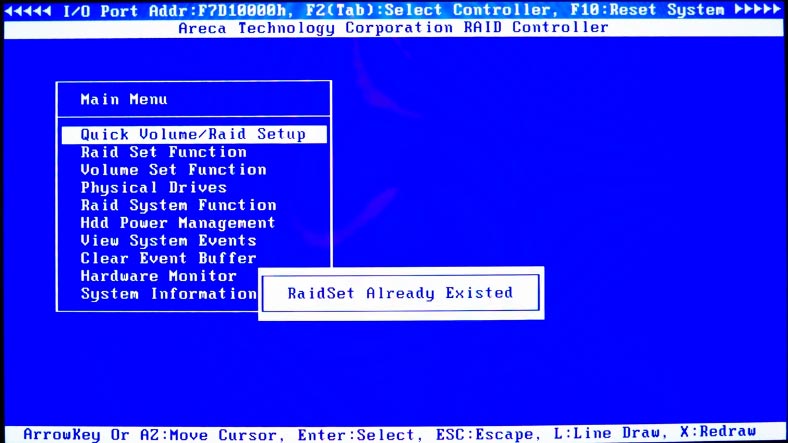
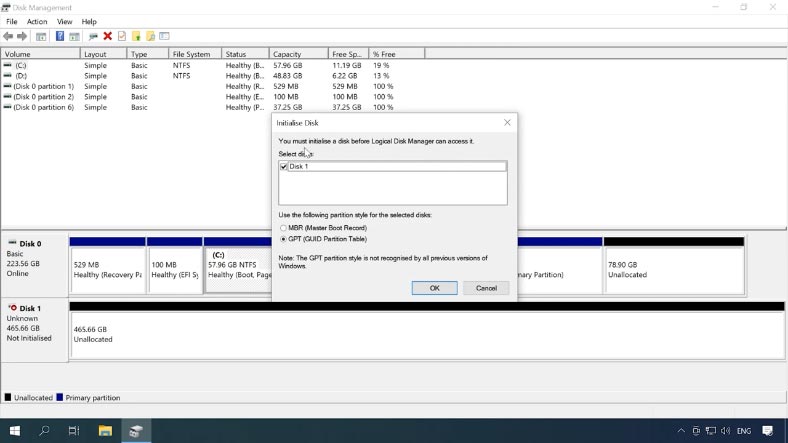
When the system starts booting again, skip the setup stage by pressing ESC and wait until the system boots. Open Disk Management and partition the new volume.
How to create a RAID with the manufacturer’s utility
The other way to create a RAID system is by using a web browser or the manufacturer’s utility ArcHTTP. The utility will help you identify the controller and its IP address. Launch it by double-clicking on its icon in the quick access menu or open it from the Start menu.
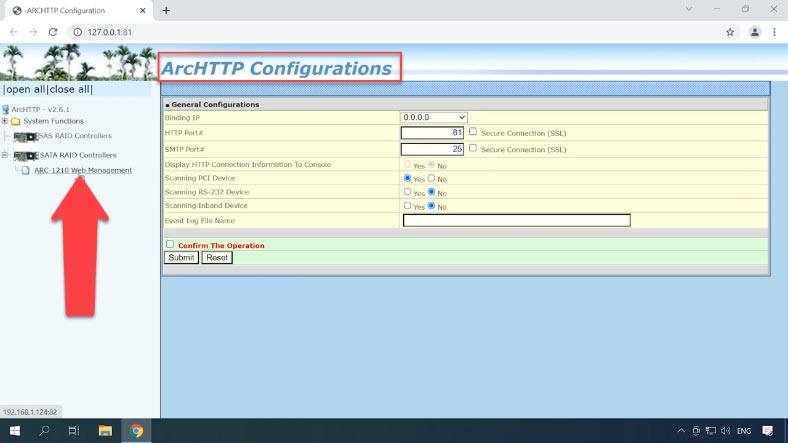
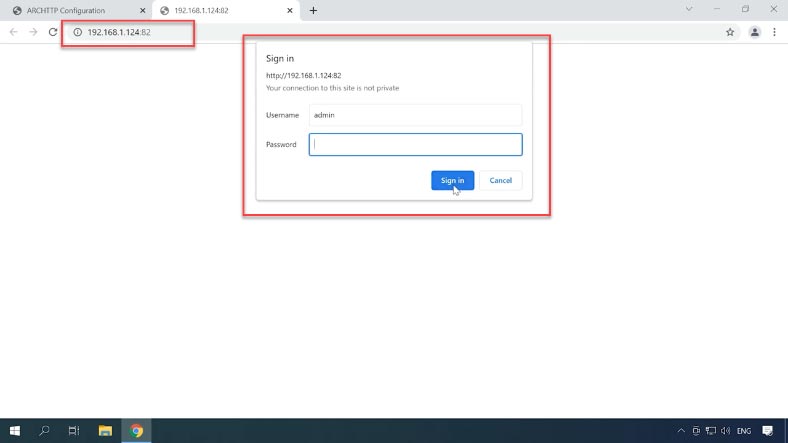
On the left side of the browser window, you will see the list of identified controllers. Select your device from the list and expand this tab. When you click on the model, a new browser tab opens, with the IP address of your storage device. If the controller cannot be identified, download drivers and install them manually.
To access the RAID controller management panel, enter username and password: by default, the username is “admin” and the password is 0000.
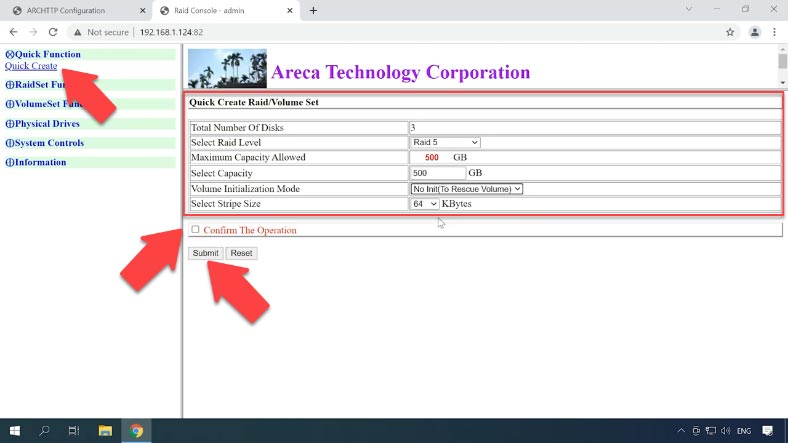
Open the tab Quick Function – Quick create. In the window that opens, look to the right to select RAID level, set the capacity, initialization mode, stripe size; then check this box and click “Submit”.
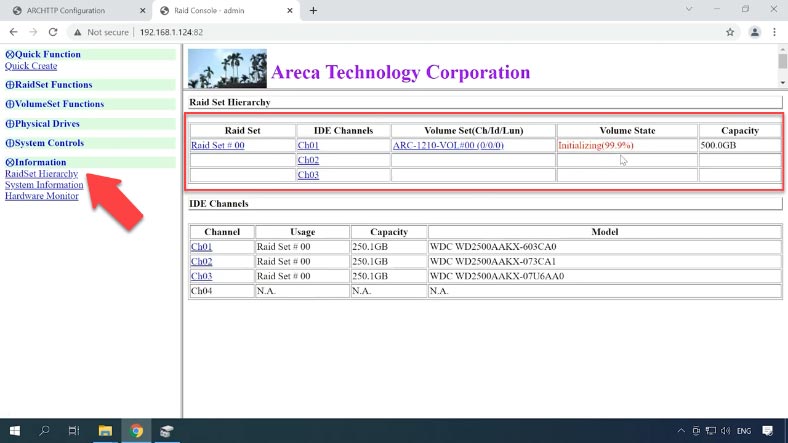
The volume is created; wait for the initialization process to finish, and then it will appear in the Disk Management menu. The last step is to partition it and write your data to the disk.
Open Disk Management – Initialize disk – OK – and partition it.
Data recovery from Areca ARC-1210
Method 1. How to recover data after accidental removal of the controller or a controller failure
When the controller fails, you won’t be able to access the data on the disks without replacing it. You can try reading the hard disks with the help of a Linux operating system, but if you aren’t an expert user, there’s always a risk of making things even worse and losing the data completely.
If your attempt at replacing the damaged controller wasn’t successful, then use a specialized RAID data recovery tool – Hetman RAID Recovery. This program supports most popular file systems and RAID types. It can read all the information about the controller used to create the disk array, and then it will rebuild the damaged RAID system.
Connect the disks directly to the motherboard of a Windows computer and launch the program.
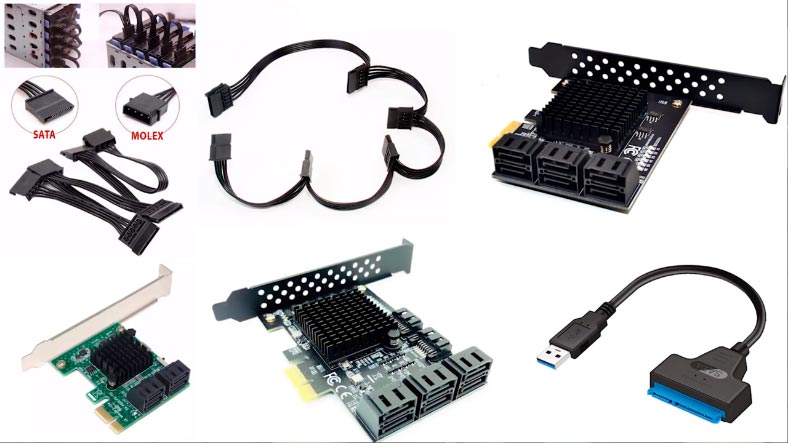
Before you start the recovery process, make sure you have a disk with the same or larger capacity than the amount of data you’re going to recover. While connecting the hard disks, you may discover that you don’t have enough SATA ports and power connectors. This problem can be fixed with a variety of expansion cards and power adapters.
The data recovery tool has easily rebuilt the damaged RAID system automatically, using the hard disks which are connected; you can check all the details below.
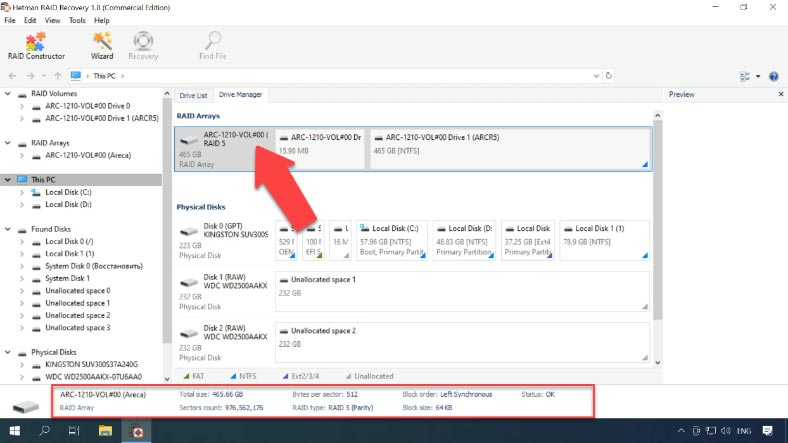
Right-click on the array and start “Fast scan” to search for files. After then, click “Finish” to display the search result.
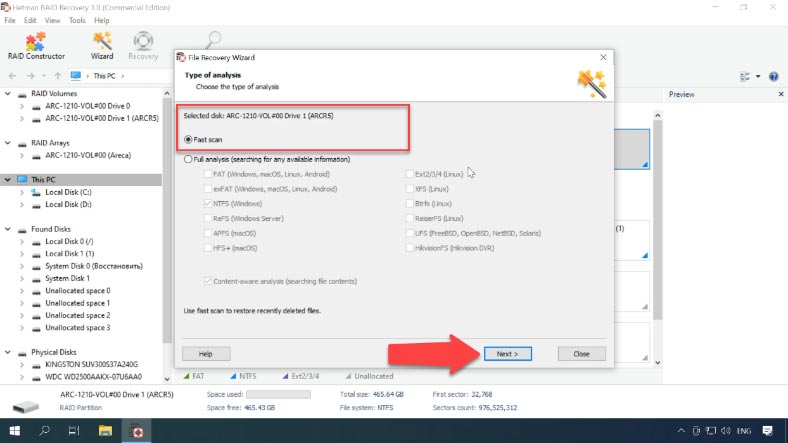
Find the folder where your files used to be stored; by clicking on a file, you can use the preview feature. Select all the elements you want to recover, click Recovery, select where you want to save them, and click Recovery again. When the entire process is over, you will find the recovered files in the folder you have chosen.
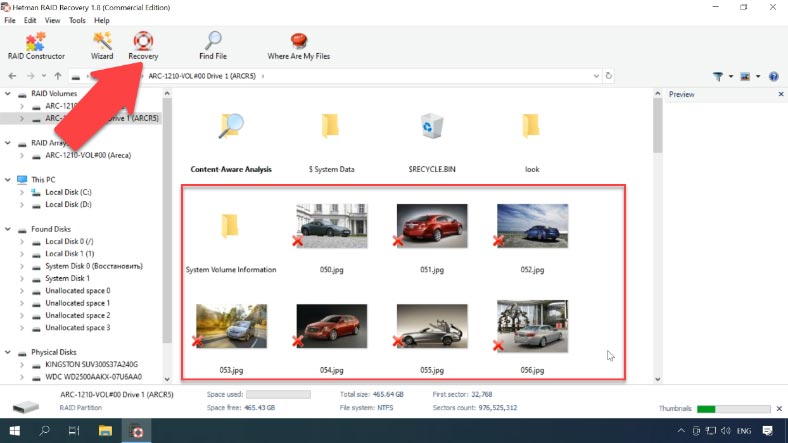
If the Fast Scan failed to find the deleted information, then go for Full analysis.
Method 2. How to find the offset when building the array manually in RAID Constructor.
Even if the program failed to recognize and rebuild your disk array automatically, you can still use the RAID Constructor. However, it requires you to know all the information about this specific disk array.
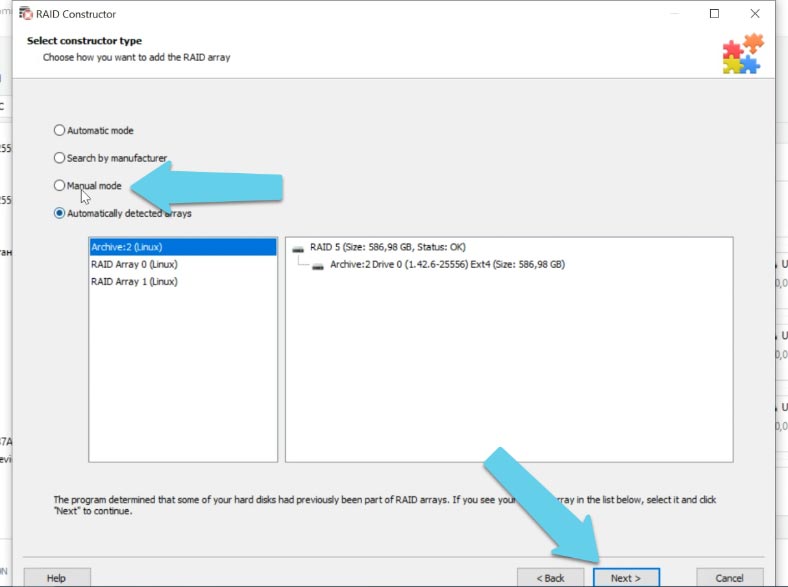
Select “Manual mode” and click “Next”, then select the RAID type, the block size and order, select the disks in the array and specify their order; use the plus button to add empty disks instead of any disks that are shown as missing.
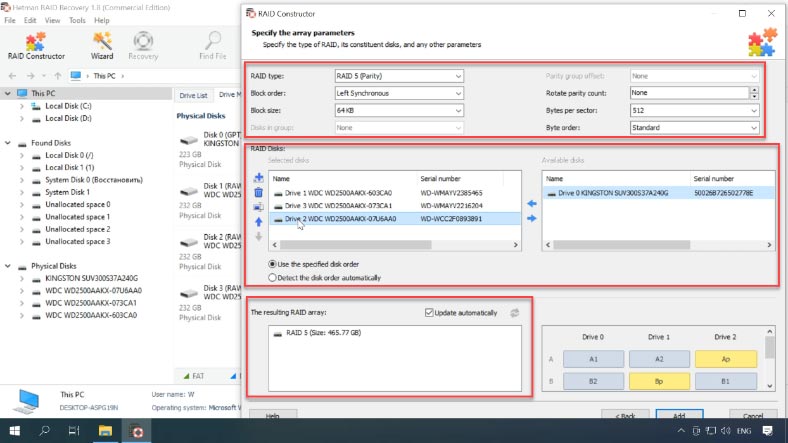
If you get the properties right, the RAID system will be displayed as having at least one partition: expand it and check if the folder you are looking for is there.
If the volume doesn’t appear but you know that the properties are correct, most likely you will have to find and enter the offset value which says where the beginning of the file system is located on the disks.
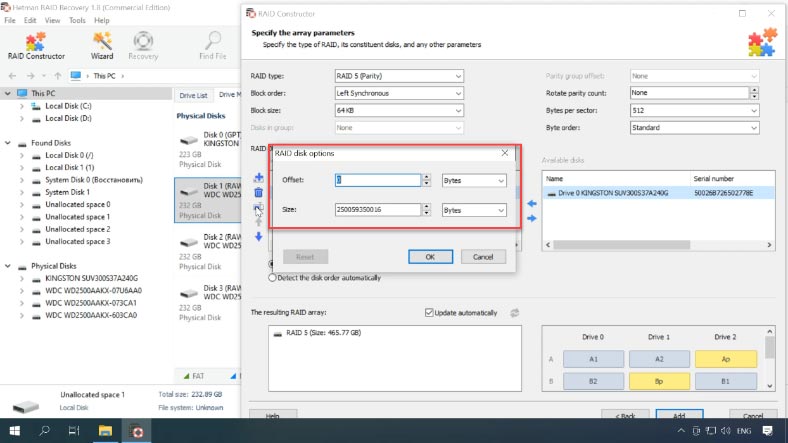
With this controller type, RAID arrays are built in such a way that the beginning of the file system does not coincide with the beginning of the disk.
As some information was erased, the program failed to identify the offset automatically. Use the HEX editor to find it. Start it by right-clicking on the disk and then selecting HEX editor from the menu, or by pressing the key shortcut Ctrl+H.
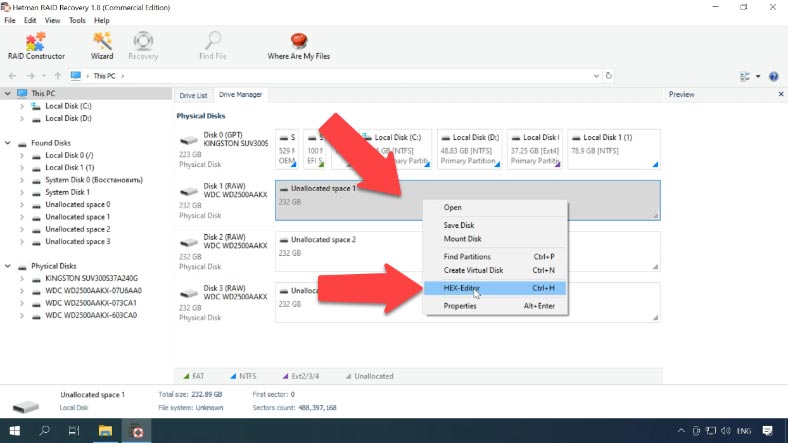
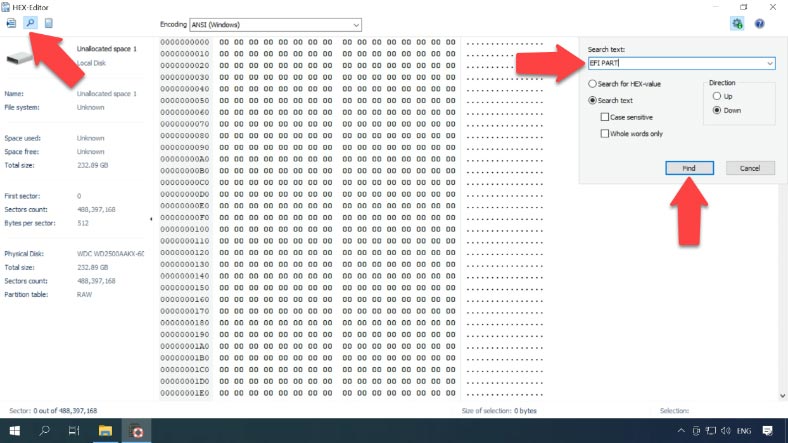
Click on the search icon here and type the following value into this field “EFI PART” and click “Find”.
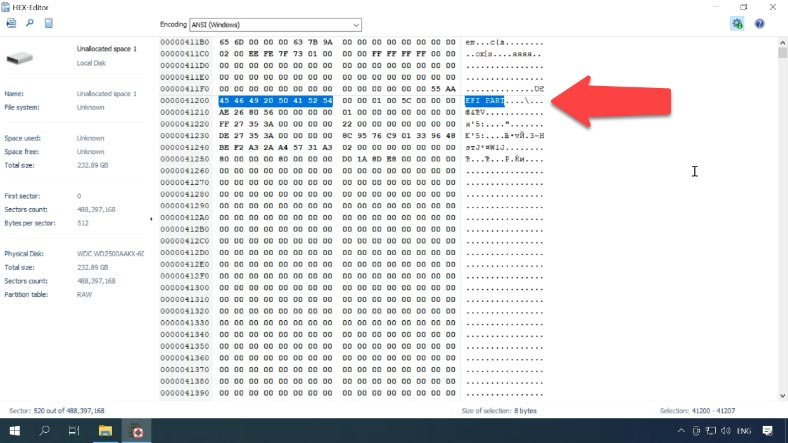
Use the identified value but with minus one sector (that is, if you find 521, you should use 520) because the beginning of the file system is located in the second sector from the beginning.
Enter this offset for each of the disks.
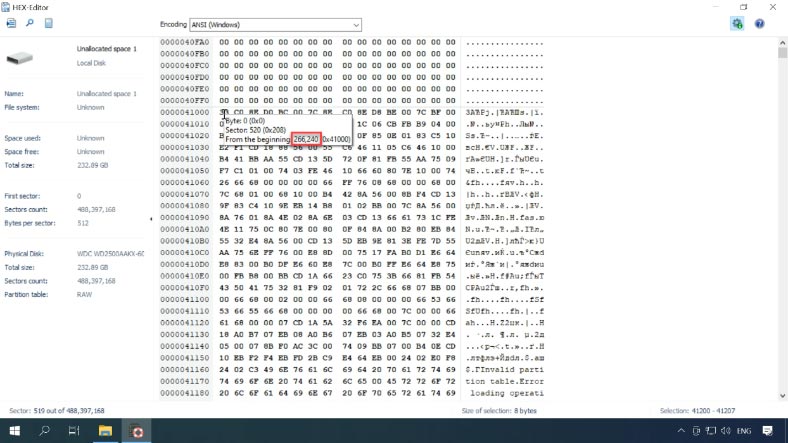
Double-click on a disk, and type the offset in this field. If the volume didn’t show up before, it should appear now that you have entered the offset value.
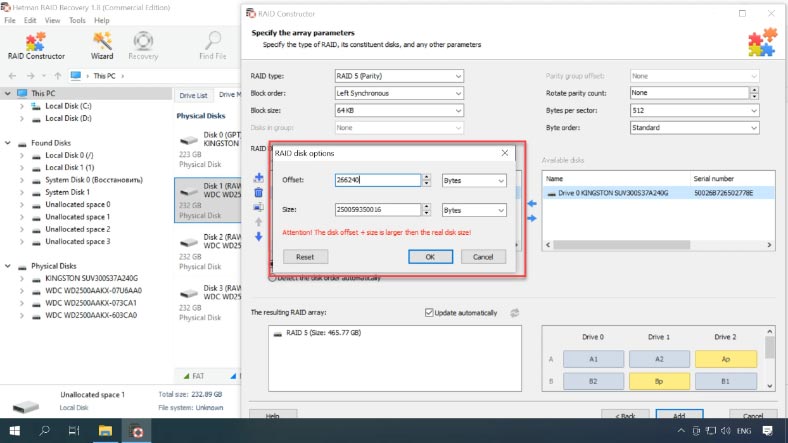
When all the properties are given, click “Add”. After that, the RAID system will appear in the Drive Manager. Now the final step is to scan it and recover your data.
Conclusion
Loss of data often occurs when hard disks are swapped over or placed into other storage systems in an attempt to rebuild the disk array. Be careful, pay attention to what you’re doing and don’t agree to initialize and format the disks when the other operating system suggests it. Formatting the boot disk or boot partition may damage or remove the striping which reduces your chances for data recovery and may cause a permanent data loss. Before taking any action, make sure you have backed up your disks.
Hetman RAID Recovery offers extra features to improve effectiveness of working with RAID disks that have hardware issues. It lets you create disk images and then analyze these images instead of the actual hard disks in order to reduce disk usage and prevent them from breaking down at the most inappropriate moment.
Always remember to back up important information regularly in order to prevent data loss.


