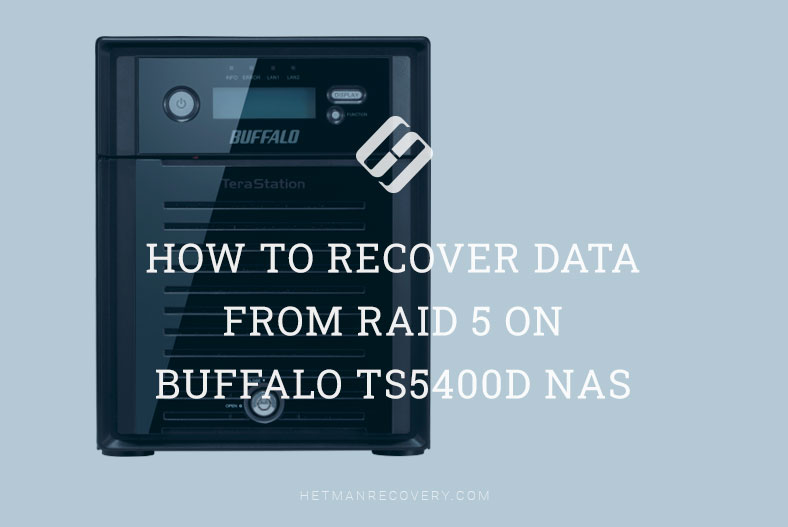
Rescuing Data From RAID 5 on Buffalo TS5400D NAS: Expert Solutions
Discover effective methods to recover data from RAID 5 on Buffalo TS5400D NAS in this comprehensive guide. Whether you’re encountering data loss due to RAID failure or seeking proactive measures, this tutorial provides expert insights and practical solutions. From diagnosing issues to implementing recovery strategies, we’ll equip you with the knowledge and tools necessary to retrieve your valuable data and mitigate downtime effectively.
- How to create a RAID on Buffalo TS5400D NAS
- How to recover data if the Recycle Bin feature is inactive or the NAS if out of order?
- Conclusion
- Questions and answers
- Comments
These days, many users and companies experience the need to store large amounts of data used in their everyday work. For this purpose, they use NAS systems allowing them to manage and store this data. Typically, network-attached storage systems make use of the RAID technology that enables them to organize data in a convenient way and improve the storage reliability. Such storage systems let them keep the data intact even if one or several hard disks fail – and this depends on the specific RAID level.
However, even with RAID technology applied, data can be lost due to unexpected system failures, NAS breakdown or user errors. Below, we will explore the steps required to recover information from a RAID 5 system built on a Buffalo TS5400D NAS.

How to Recover Data From RAID 5 on Buffalo TS5400D NAS
How to create a RAID on Buffalo TS5400D NAS
To get a general idea of how data is stored inside a RAID, let’s see how to create it on this specific network storage device. To access its administration panel, start NAS Navigator, find your device on the list and right-click on it, then choose Open Settings. Otherwise, open a web browser and enter the IP address of your storage device in the address bar.
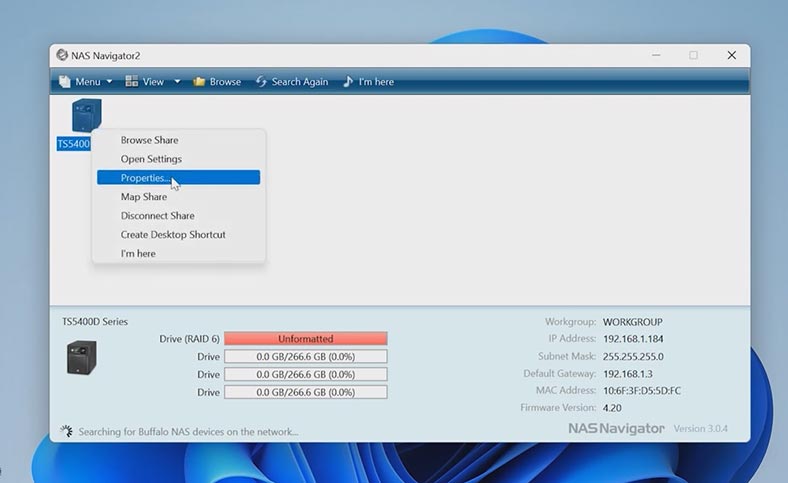
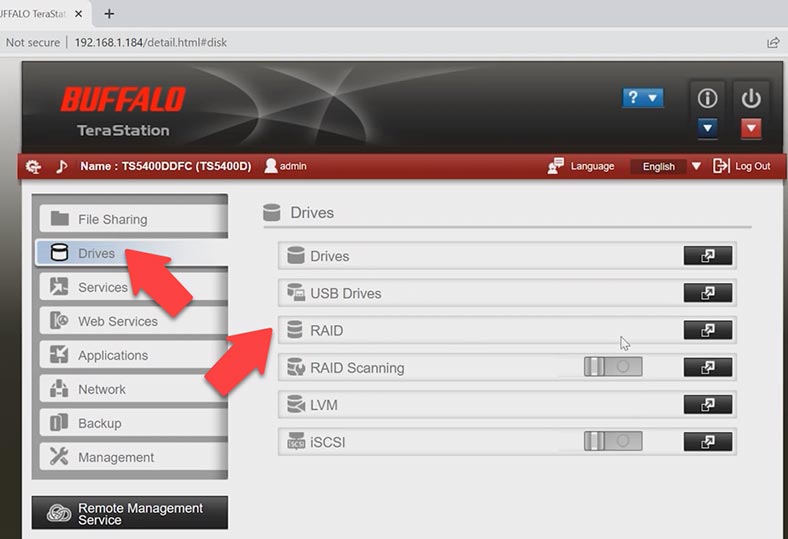
After that, go to Drives, then click on the RAID tab, and access the settings for Array1.
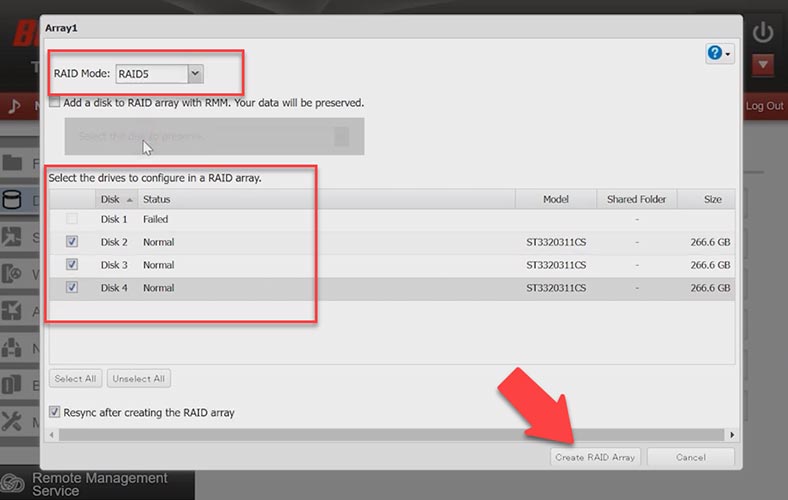
In the window that opens, select the disks for the future array, look up to choose the RAID level, and then click Create RAID Array.
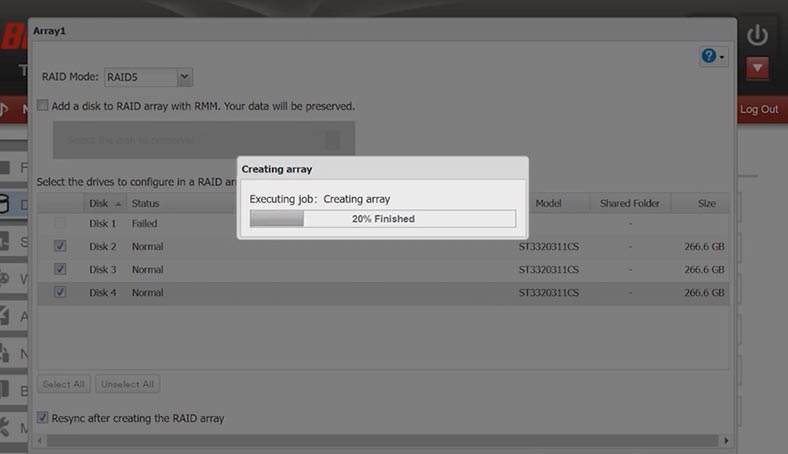
This will start the process of building the array, followed by disk resynching. It can be really long since everything depends on the size and read/write speed of the disks involved. Wait until the process is complete.
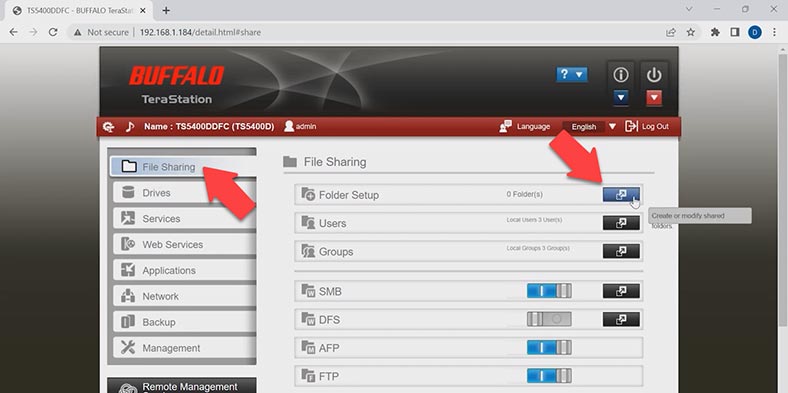
When the disks are combined into an array and resynced, you can create a shared folder and add some files there. To do that, access the File Sharing settings. To add a new directory, open Folder Setup and then click Create Folder.
In the shared folder settings window that opens, give its name and other attributes, check the boxes for required network protocols, and click OK. Now the shared folder will be available on the network, and you’ll be able to write data to the disks.
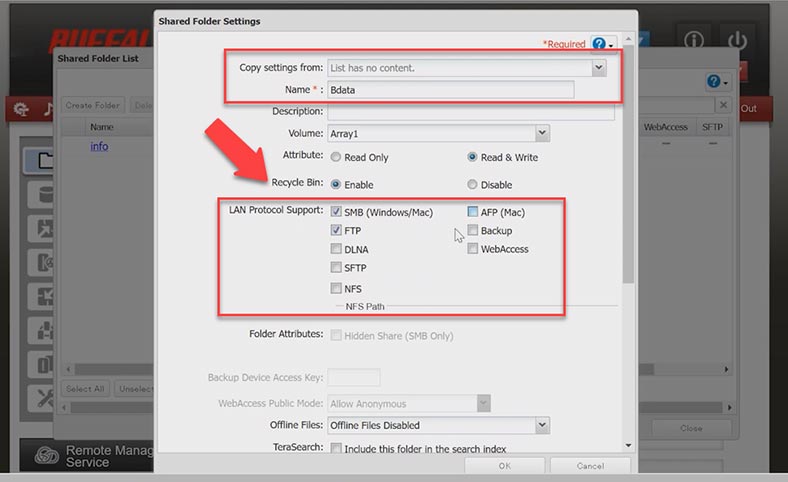
In the shared folder settings, there is an option called Recycle Bin which can help you restore any data you accidentally deleted from this NAS. All you have to do is to open the Recycle Bin folder and access the previously deleted files. If the files you are looking for are missing from the Bin or this feature is disabled, you can restore the files with a data recovery tool.
How to recover data if the Recycle Bin feature is inactive or the NAS if out of order?
If the network-attached storage doesn’t work, you lost access to the network drive, or the RAID is crashed, you need a specialized tool to retrieve the important file from your NAS.
| Number | Program Name | Advantages | Disadvantages |
|---|---|---|---|
| 1 | Hetman RAID Recovery |
– Recovery of RAID arrays of various configurations – Support for Buffalo NAS – Easy to use – High data recovery rate – Automatic RAID configuration detection |
– Trial version lacks minimum data saving capacity |
| 2 | R-Studio | – Support for many file systems – High recovery accuracy |
– Complex interface for beginners |
| 3 | DiskInternals RAID Recovery | – Specializes in RAID array recovery – Support for Buffalo NAS |
– Lacks support for some rare RAID configurations |
| 4 | UFS Explorer RAID Recovery | – Ability to recover from various storage systems – Support for virtual machines and RAID |
– High price for home users |
| 5 | EaseUS Data Recovery Wizard | – Easy to use – Supports various data carriers |
– Can be slow when scanning large data volumes |
Hetman RAID Recovery will rebuild the damaged RAID with the available hard disks, so that you’ll be able to get the lost data back. This program supports all popular RAID types and most file systems. You can use it to recover data from Buffalo NAS systems as well as from devices by other manufacturers including Synology, QNAP, and other popular storage system brands.
It can also help you rebuild a damaged RAID if the NAS or its controller is broken and do it even if one or several disks within the array are out of order. You’ll be able to restore critical information, which is still on the disks, and achieve it even without actually using the NAS.
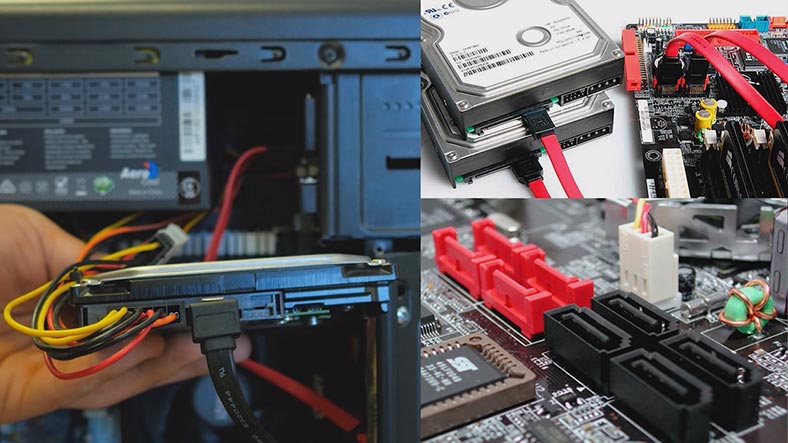
To start the recovery process, take the disks out of the storage device and connect them directly to the motherboard of a Windows computer.
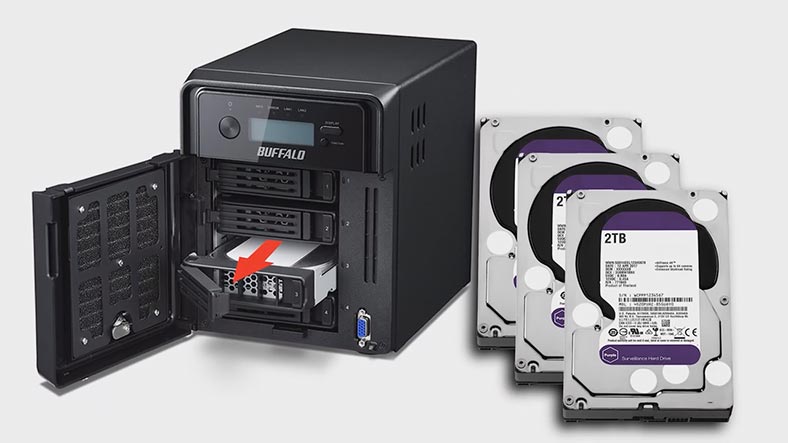
If your motherboard lacks SATA ports to connect all the disks, or you have a similar problem involving power connectors, you can solve the problem by using special expansion cards and adapters. When the disks are connected, run the data recovery tool.
It will automatically rebuild the damaged RAID system with the available disks, and display it in the program’s window. Below, you will see detailed information on the RAID which is just rebuilt.
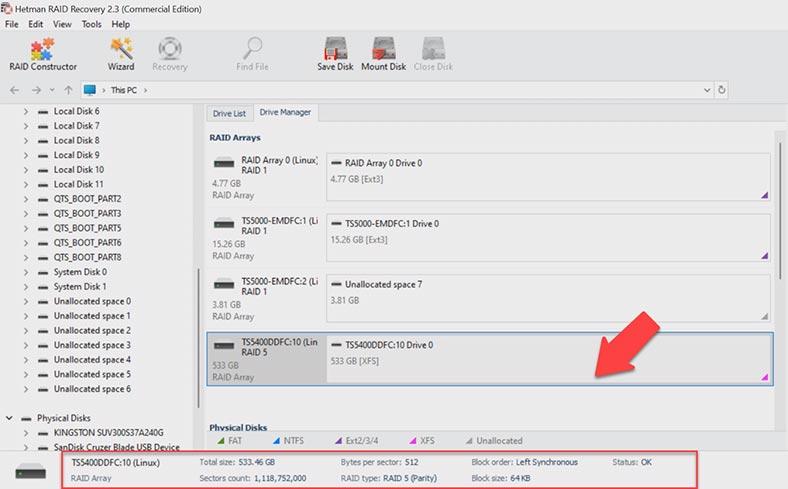
To start searching for files, run the disk scan. Right-click on the volume and select Open. Choose the search type, Fast scan or Full analysis.
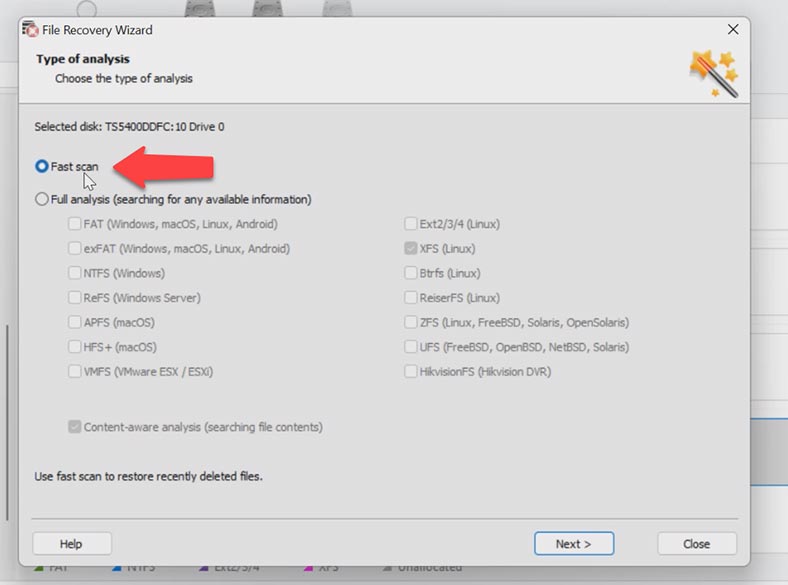
For starters, we recommend a Fast scan – the utility will promptly analyze the disks and display all the files it can find. This scan type will help you find the files in most cases. The program has easily found all the files still remaining on the disks within the array. It also displays the previously deleted files, which are marked with a red cross.
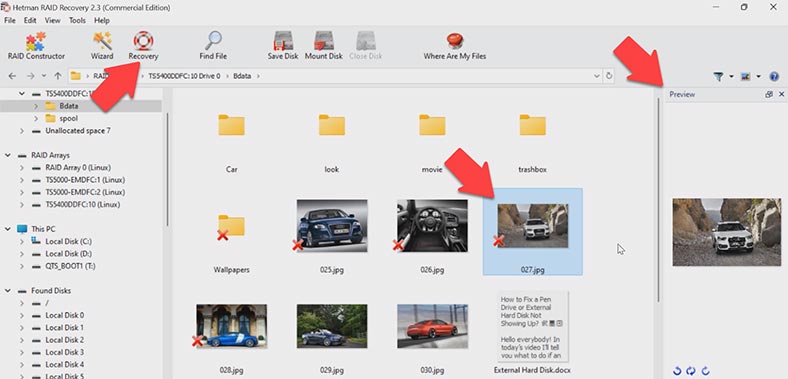
You can check the contents of all files in the preview window. Select all the items you want to recover and click the Recovery button. Choose the disk and folder where to save the data. When the recovery process is complete, you’ll see all the data in the specified directory.
If this scan type can’t find the required files, then go for Full analysis.
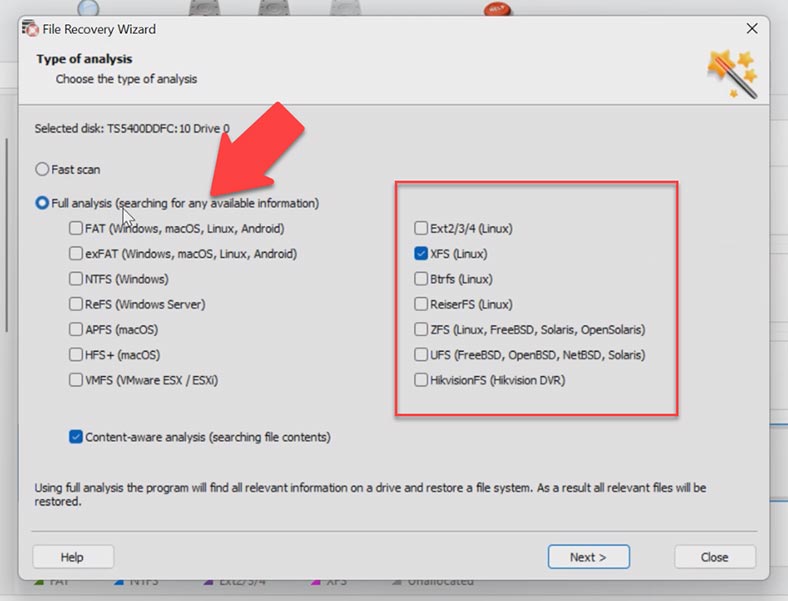
To do that, go back to the program’s main window, right-click on the disk and choose Analyze again – Full analysis – specify the file system for this disk and click Next. In the most complicated cases, we recommend searching for files by their contents, and you can do it by checking the box next to Content-Aware Analysis.
To quickly find a specific file, there is a search-by-name feature. Also, this utility lets you save a copy of the entire disk, and then work on it instead of addressing the actual disk all the time. Such feature allows you to protect the disk data from being overwritten, from an accidental disk failure, or from other mistakes that users could make.
Conclusion
Recovering data from RAID 5 on a Buffalo TS5400D NAS can be a challenging thing to do, but if you follow the instructions and choose the right data recovery tool, you’ll be able to get the lost files back. It should be noted that users should be very careful when recovering data from RAID and be sure not to take any steps that may result in overwriting or modifying the data stored on its disks. The best solution is to work with a copy of the disk array so that the original data cannot be lost in the process.
Generally speaking, a RAID data recovery utility is a must-have tool for any administrator who takes care of data integrity in their storage system. With such utilities, you’ll be able to restore access to the storage quickly and safely, and then recover the mission-critical data even if your NAS is out of order or its RAID array is damaged.


