Flashing a Wi-Fi Router: Tips and Tricks (TP-LINK TL-WR841N Walkthrough)
Looking to optimize your Wi-Fi network performance? Learn how to flash your Wi-Fi router with our comprehensive tutorial, focusing on the TP-LINK TL-WR841N model. Follow along step-by-step as we guide you through the flashing process, unlocking new capabilities and enhancing your connectivity. Don’t miss out on this essential guide to improving your network!
Every day, the Internet is becoming a more and more inseparable part of our lives, so having a high-quality and fast Internet connection often means a key to success. It is common knowledge that when connecting to the Internet you might face all kinds of issues that seem to disagree with the paramount goal of having a fast and reliable connection. One of such issues can be related to errors in the router firmware.
When faced with such problem, most users tend to contact a service center; however, you can just as well flash the router without leaving your place.
I will show you how it’s done with the example of a TP-Link router, but this guide will be fine with other models, regardless of the manufacturer’s name. The only thing that may really differ is the interface of the settings menu.
When you buy a router from a shop, don’t be too confident about its having the latest software onboard. You may not know when exactly it was produced and how much time it spent on the shelf. Routers supplied with older versions of their built-in software usually have security vulnerabilities.
- What is Router Firmware?
- Why Flash a Router?
- Where Can I Get a Suitable Version of its Firmware?
- Flashing the Router
- Restoring Router Settings
- Third-Party Router Firmware (DD-WRT)
- Recovering a Router After a Bad Flash (Tftpd)
- Questions and answers
- Comments

How to Flash a TP Link or D Link Router, Update Router Firmware
What is Router Firmware?
Firmware is a piece of microcode stored in the nonvolatile (permanent) memory of a computer, tablet PC, smartphone, GPS navigation system or any other digital device.
In other words, it is a kind of an operating system which is made up of a huge number of small applications. This microcode (firmware) is stored in the permanent memory of a device, and the process of its upgrading is known as reflashing.
Why Flash a Router?
You should flash a router only when it is really necessary:
- Yet it is recommended to upgrade the router firmware when you notice failures or freezes, when Wi-Fi turns on and off on its own, or when Internet connection gets lost all the time.
- Besides, it makes sense to upgrade the microcode if newer versions feature certain technical changes which you need for fine-tuning your router, or they introduce support for some new standards.
- If there is a new version of the firmware fixing an important security issue, for example, in the Wi-Fi protocol.
- Or if your router has its interface in the English or other language only, and you would like to change the interface language.
- You may also need new firmware to unlock your router or unlock it from a certain service provider.
- Often, people install alternative firmware which comes supplemented with new drivers and applications (IPTV, Voip, Proxy, torrent clients, webcams, modem support etc).
Yet as long as your router works without any serious issues and new firmware versions don’t contain any considerable changes, there is little sense in upgrading it.
By the way, if you notice that your router broadcasts a weak Wi-Fi signal, it doesn’t mean that it needs reflashing. The router may be positioned in the wrong way, or other factors may affect the level of signal.
Where Can I Get a Suitable Version of its Firmware?
First of all, it should be understood that possible mistakes when upgrading your device may deprive you of your warranty and make the device inoperable – without any hope to repair it.
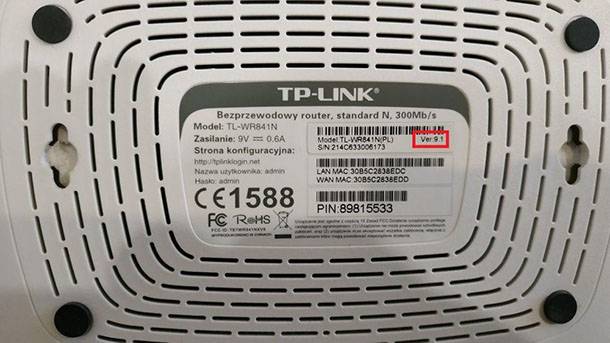
To begin with, you should know the device model and its hardware version. The easiest way to learn them is to have a look at the sticker on the bottom side of the device. You can see the model, address, hardware version and other information. For example, my router’s hardware version is 9.1.
When you know the model and hardware version, it’s time to look for compatible firmware. To do it, go to the official website of the router manufacturer. Look for a tab entitled Support and give the router model in the search field.
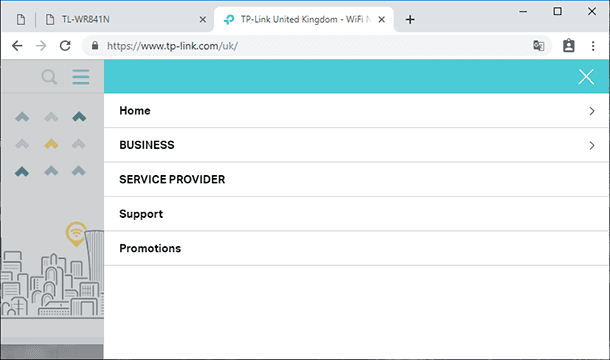
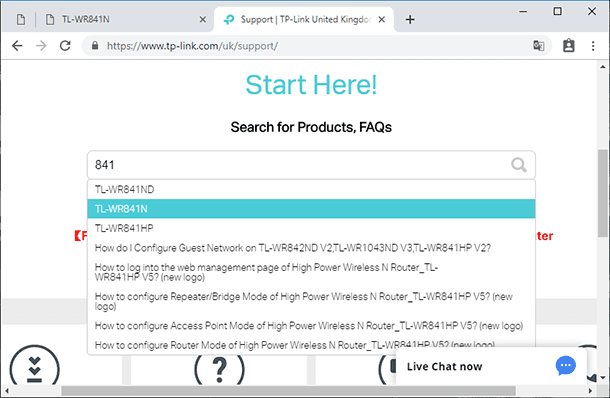
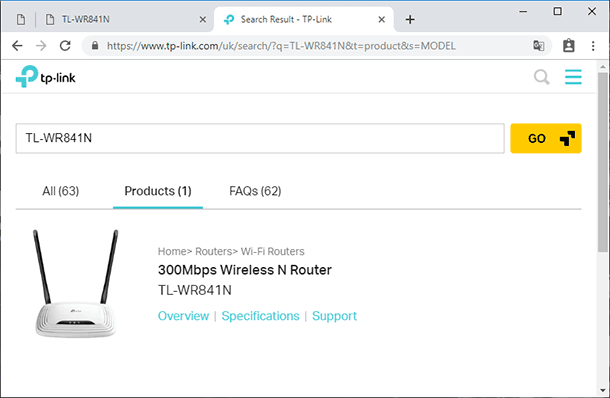
Then go to the tab Support, select the hardware version and then click on the tab Firmware below.
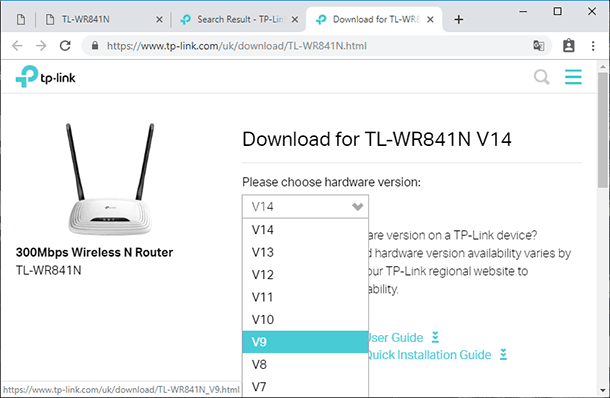
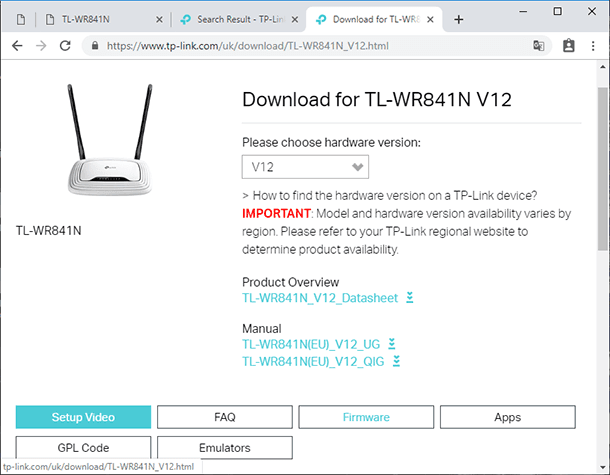
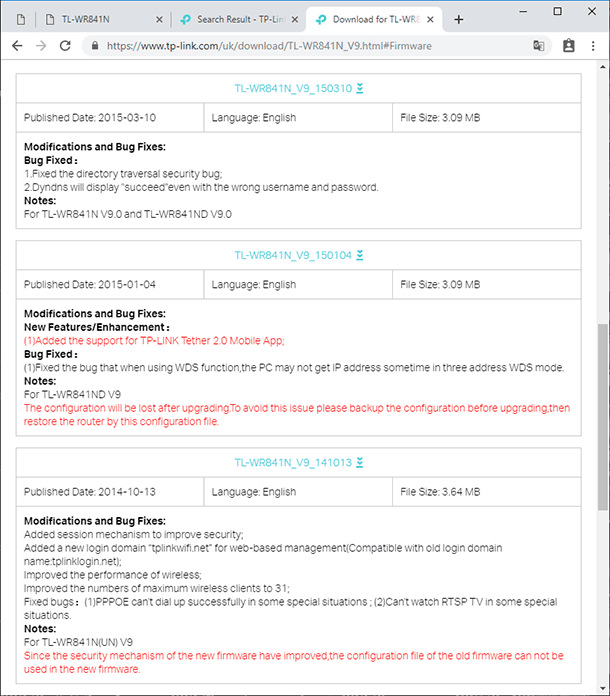
Look for the latest firmware version with the language you prefer and click Download (a link fashioned like an arrow pointing down, with the router name). After that, unpack the file to any convenient directory. That’s all – the only thing left to do is to install it onto the router.
Flashing the Router
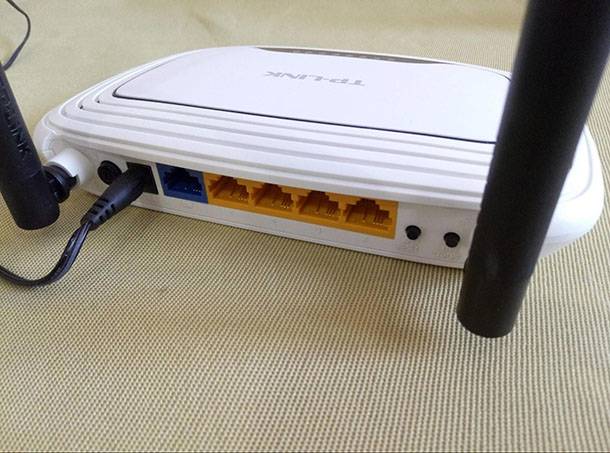
Before you start flashing the router, disconnect it from the provider and the network so that there is no interference. It means you should unplug any wires it had in the WAN/Internet and LAN/Ethernet ports.
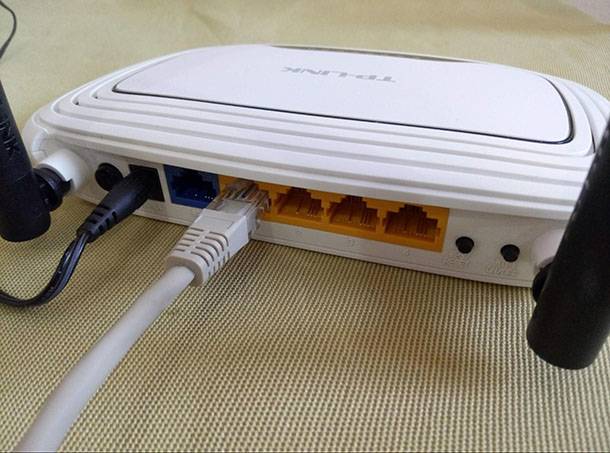
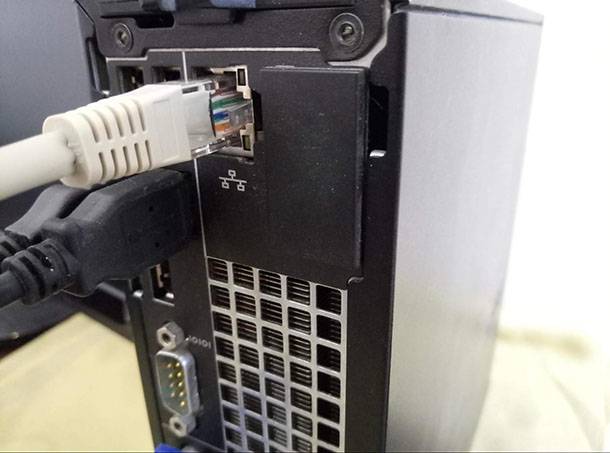
Then connect the router to the computer with a network cable which usually comes supplied with the device. It is not recommended to flash a router by Wi-Fi. The network cable should be plugged into the LAN/Ethernet port of the router.
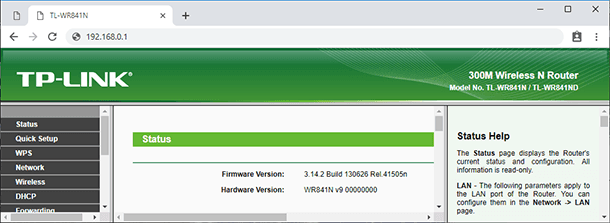
Now you should enter the web interface of the device. To do it, use your computer to open any browser and type in the router’s IP address which you’ve just found on the sticker. As a rule, it is 192.168.1.1 or 192.168.0.1, But it can also be something like tplinkwifi.net or tplinklogin.net.
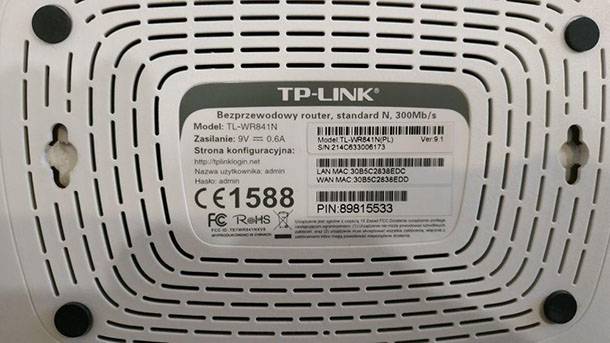
In the window that opens enter the login and the password to access the settings: by default, these are admin and admin, and you can see it on the same sticker.
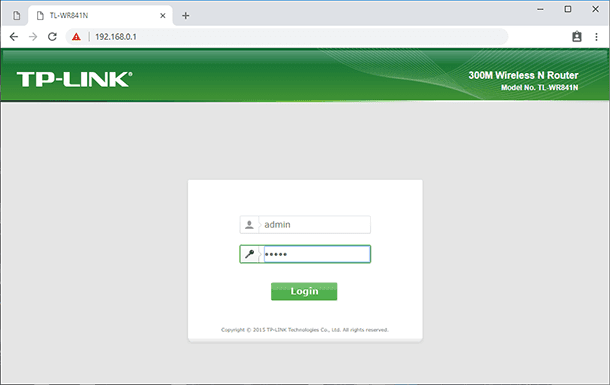
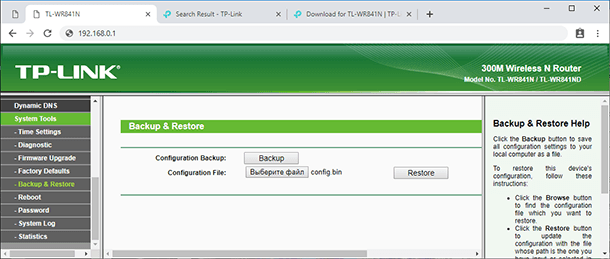
After you opened the router settings, it’s time to create a restore point. Go to the tab System Tools and look for Backup & Restore.
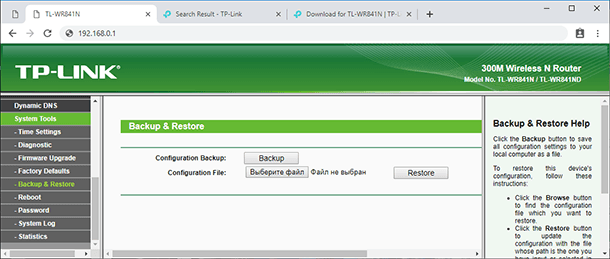
Click on the Backup button and specify the path where you want to save the file containing the settings.
Important advice! No matter what you are trying to do with the router software, it is recommended to create a restore point for settings. It should be done to have a chance of recovering the current settings in case anything goes wrong. This simple precaution can save not only your time and mental health, but also your money which you would have to spend on paying the ISP engineers for bringing your router back to life.
Finally, the flashing process itself. Go to the tab System Tools and look for Firmware Upgrade. Click on it to select the firmware file you have downloaded, then click Upgrade. You will have to wait until the process is over.
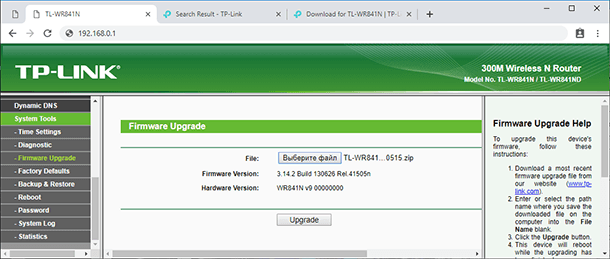
Here is one more important thing. While the router is being flashed, you shouldn’t do anything with it. If you do, it can trigger a failure when the old firmware is removed, and the new version is not installed yet. If it happens, there are very little chances to recover the device at home.
When the flashing operation is complete, the router will reboot and waiting for setup operations – but now with new firmware.
Restoring Router Settings
When the router has been upgraded successfully, you can restore the settings it had before. And this is when the file you have created before the flashing operation comes in handy.
Go to the tab System Tools / Backup & Restore. Click on Choose File. Give the path to the previously created file and click Restore.
That’s all, the flashing procedure is over, and you can see that it’s quite simple and quick. However, it requires all your attention, because a single step taken wrong can break down the device.
If flashing was performed properly, the device should work quickly and reliably without any failures and providing the quality of signal as guaranteed by the manufacturer.
Third-Party Router Firmware (DD-WRT)
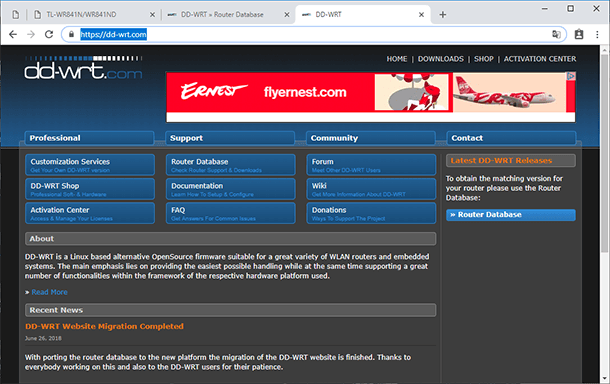
You can also install third-party firmware for your router. For example, DD-WRT.
| Firmware | Description | Advantages | Disadvantages | Supported TP-Link Router Models |
|---|---|---|---|---|
| OpenWRT | One of the most popular and powerful open-source firmwares. Supports a wide range of settings and features. | – Supports a wide range of devices – Advanced settings – Large community |
– Complex setup for beginners – Not always stable on older devices |
TL-WR841N, TL-WR1043N, Archer C7, and others |
| DD-WRT | A firmware with rich features for home and professional users. Suitable for most routers. | – Good performance – Many functions and settings – User-friendly interface |
– Limited support for newer TP-Link models – Fewer advanced settings for expert users |
TL-WR841N, Archer C7, TL-WR1043ND, and others |
| Tomato | An easy-to-use firmware focused on speed and simplicity. Best suited for home users. | – Simple and intuitive interface – Fast setup and connection |
– Fewer features compared to OpenWRT and DD-WRT – Fewer supported models |
TL-WR841N, TL-WR1043ND, Archer C7, and other models |
| LEDE | A fork of OpenWRT with improved stability and performance. It has merged back into OpenWRT. | – Very stable operation – Good performance on low-end devices |
– Fewer documentation and community support than OpenWRT – Does not support all TP-Link models |
Archer C7, TL-WR1043ND, and others |
| AdvancedTomato | A modification of Tomato with an improved user interface, suitable for both beginners and advanced users. | – Simple and attractive interface – Supports all basic features |
– Fewer customization options compared to OpenWRT and DD-WRT | Archer C7, TL-WR841N, and others |
DD-WRT – is a free alternative firmware for wireless routers. It includes special functions which are not available in original firmware versions.
These include Kai network, daemon-based services, IPv6, Wireless Distribution System, RADIUS, supercharge options and hardware modification support for SD cards.
The official website of our router manufacturer says that official firmware can be replaced with third-party stuff, for example, with DD-WRT. However, the company will not undertake to provide service or technical support for a device with third-party software and cannot guarantee its reliability. The damage done to the device as a result of using third-party applications will cancel the warranty.

Why Would You Need Third-Party Router Firmware?
If you feel you can’t get enough from the functions offered by the standard web interface of your router, you can install third-party software. Yet if you don’t know why this kind of firmware is necessary, it is a clear sign you don’t actually need it.
DD-WRT firmware is a Linux-based operating system. Even with default settings, it has a very wide functionality that cannot be compared to the factory-supplied firmware. It features such components as an FTP server, Samba, WOL and many other things. With a web interface you can access detailed statistics and see the traffic load for the local network, wireless network, and the primary Internet connection. You can also monitor the load on the router’s processor and memory.
If you configure the router for installation of additional packages, you can turn your router into a home media server. Connect a hard disk with a torrent client installed on it, HTTP-based IPTV broadcasts that you can watch by Wi-Fi. If you have a television supporting DLNA standard, you can connect it to the router and watch IPTV, as well as watch films from the hard disk.
How to Install Third-Party Router Firmware?
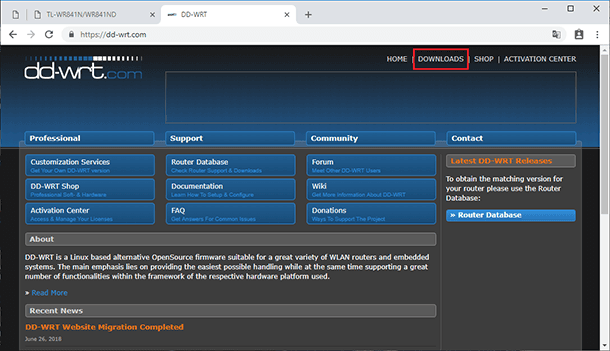
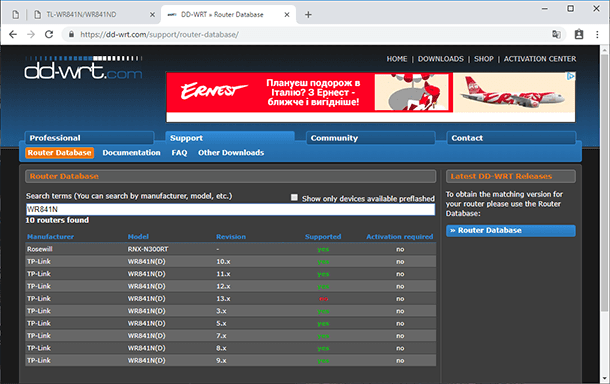
Flashing third-party firmware follows the same steps as in the case with the standard software for your router. Start with downloading the firmware. To do it, visit the official website dd-wrt.com/ and click on Downloads.
Type your router model in the search field and download the firmware that corresponds to the hardware version of your device.
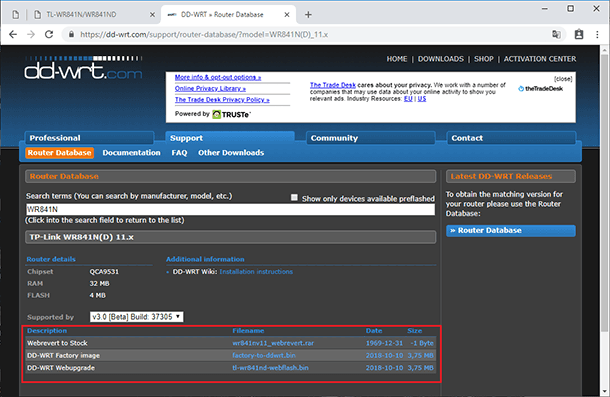
You will see three files. The first and the last file are what you need to flash your router. The second file will be required to roll the router back to the standard firmware.
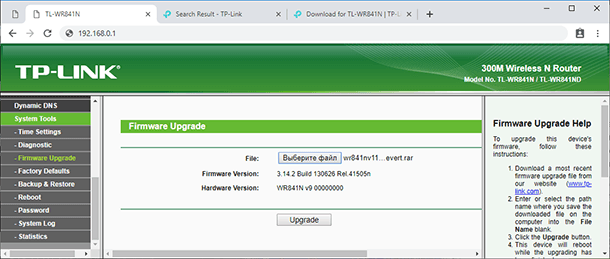
After the download is over, open a browser, enter the web interface of the router, go to the tab System Tools / Firmware Upgrade. Select the first downloaded file and click Upgrade. Wait for the process to finish, and enter the web interface again.
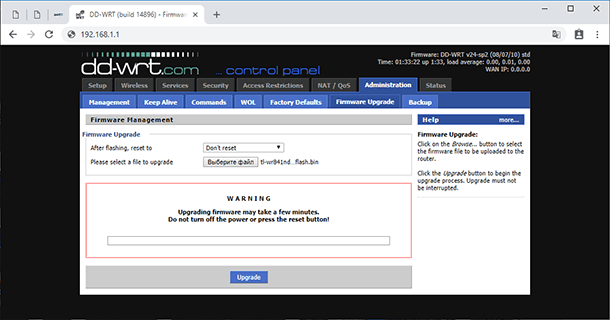
The address required to access the router may change to 192.168.1.1. Enter the login and the password: admin and admin. Then switch to the tab Administration / Firmware Upgrade. Again, click Choose File and specify the path to the second file. Wait until the flashing process is complete. The job is done; the third-party firmware is now installed.
This kind of software can even boost Wi-Fi signal to the maximal level that your router can support.
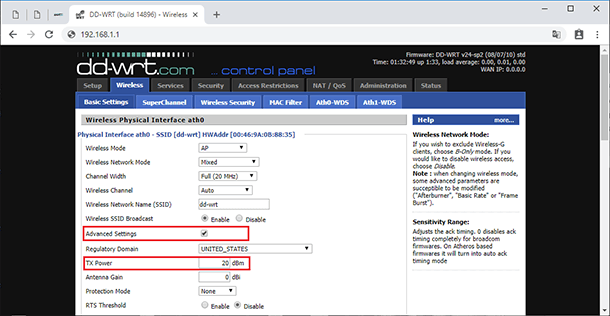
If you want to do it, go to the tab Wireless and check the box Advanced Settings. In the line TX Power, you can see the output rating of 20dbn. For the standard firmware, this value is maximal, but with the new software you can set it even higher. This way, you can improve Wi-Fi signal for some routers.
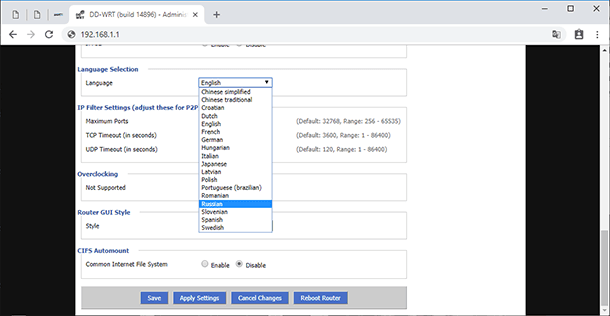
To change the interface language, just go to the tab Administration / Management. Scroll down and chose the necessary option in the Language line. By contrast with the standard firmware, you don’t have to look for software with particular language options.
Recovering a Router After a Bad Flash (Tftpd)
When we say a bad flash we mean the situation when the router firmware has been lost after a flashing attempt, and the router is bricked. That is, the firmware is corrupt or not available at all. What should you do if things go wrong?
The easiest way is to reset the device to factory settings by pressing and holding the corresponding button on the router. However, it will not help you in most cases if you tried to install incompatible software.
If this is the case, you will have to use an alternative method. It doesn’t work for every model, and success is not guaranteed, so use on your own responsibility. Anyway, there is no other way to recover your router if it was bricked after a flashing attempt.
To use this particular method, you will need the factory-supplied firmware (with your hardware version and localization) and an application called Tftpd. This software is free, and here is the download link: tftpd32.jounin.net/.
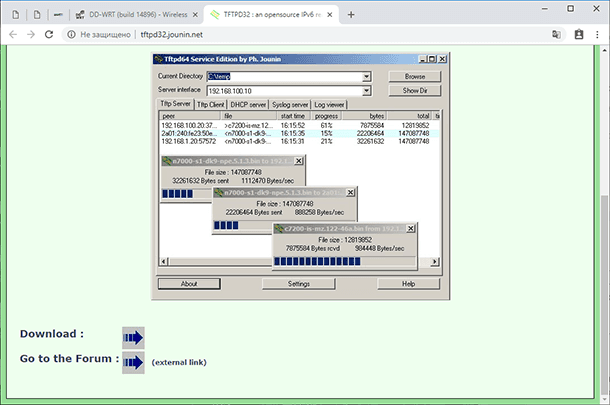
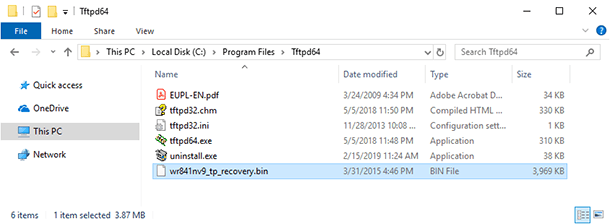
Unpack the archive and rename the file, at first specifying the hardware version and model of your device.
For example: wr841nv9_tp_recovery.bin
Where,
- wr840n – router model;
- v9 – router hardware version.
It is also important to specify the hardware version.

When you do it, place the renamed file into the folder containing the Tftpd application.
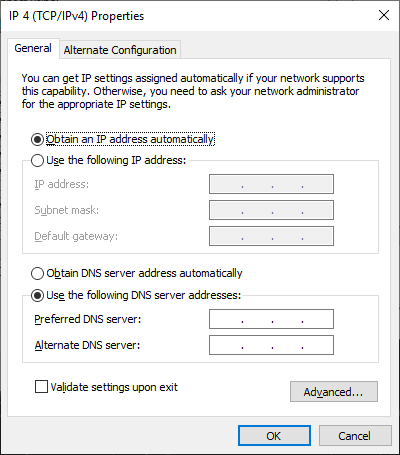
After all these steps, you should change only one router value – refresh its IP address. For a Windows 10 computer, open Settings / Network & Internet / Change adapter options. Double-click on your network and choose Properties for IP4 by double-clicking on it.

Type in the following IP address: 192.168.1.66, for some models it should be 192.168.0.66 (and if neither works, then try using 192.168.0.86).
Specify the subnet mask: 255.255.255.0 and return to working with the Tftpd application and the firmware file.
Make sure that the router is connected to a computer or laptop with an Ethernet cable within a local network.
Run the Tftpd application with administrator rights. In the window that opens, you will see a field entitled Server Interface where you should select the IP you have given in the network settings before.
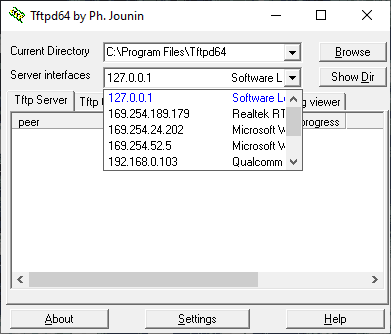
When select it, click on the button Show Dir. There must be the renamed firmware file that you have placed into the same folder with the Tftpd application.
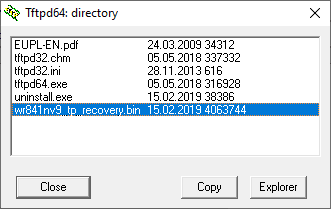
If you do everything right, it is time to power up your router, then press and hold the button WPS/Reset.

At this stage, the upgrading process is displayed on the screen. If it isn’t happening, turn off the router, hold the WPS/Reset button and turn the router on again.
You are almost done – just wait until the upgrade process is complete and the router reboots automatically. When the process is over, you should be able to access the device settings again.
If everything worked fine, don’t forget to open the local network settings and change the option Use the following IP address back to Obtain an IP address automatically.
That is all for now. I hope you will find this article useful. You are welcome to leave comments and ask questions.


