Disk Defragmentation: Optimizing Your Drive in Windows 10
Struggling with Slow Performance? Is your Windows 10 PC running slower than usual? It might be time for disk defragmentation! In this essential tutorial, we’ll cover everything you need to know about disk defragmentation in Windows 10. From understanding what disk fragmentation is to learning how to optimize your drive for better performance, we’ll walk you through the process step-by-step. Whether you’re a novice or an experienced user, these easy-to-follow instructions will help you optimize your drive and improve your PC’s performance.
- What is Defragmentation?
- How to perform disk defragmentation in Windows 10?
- Questions and answers
- Comments
What is Defragmentation?
Defragmentation is a process of updating and optimizing the logical structure of a disk partition performed to ensure that files are stored in an uninterrupted sequence of clusters. That is, if the computer works with the hard disk for a long time, large files will be stored in different areas of the hard disk which, in its turn, slows down the process of reading and writing files.
With the help of defragmentation, you can move all parts of these files to adjoining sectors of the hard disk, that is, speed up your PC and improve its performance. You can perform hard disk defragmentation without using any third-party software, and all you need is already inside your operating system.

How to Defragment Your PC's Hard Drive on Windows 10 🛠️🗄️⏲️
How to perform disk defragmentation in Windows 10?
In Windows 10, there are several ways you can defragment a disk using only integrated tools.
Method 1. Control Panel
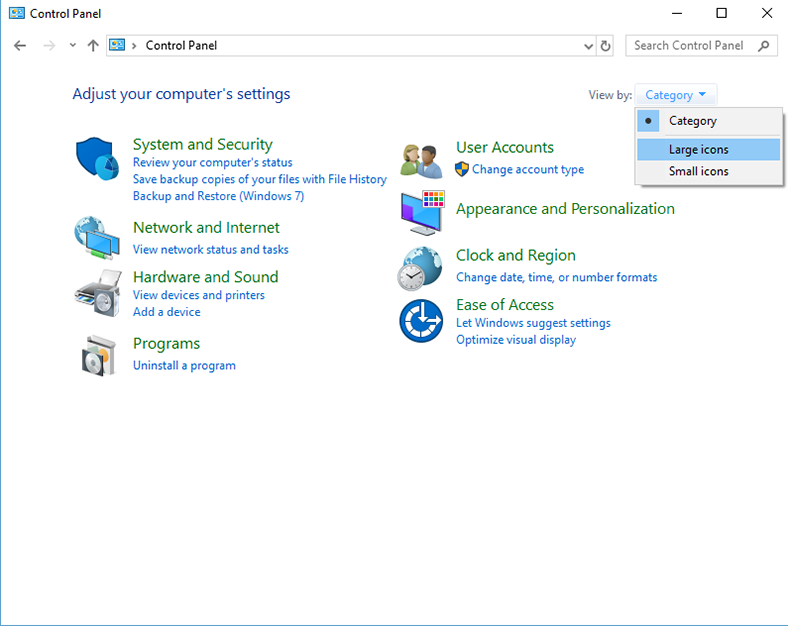
Open Control Panel.

Select the view option Large Icons, then look for Administrative Tools.
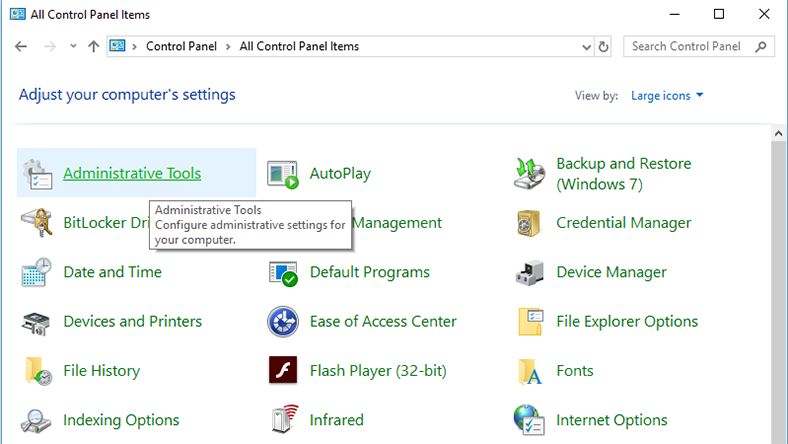
Find the menu Defragment and Optimize Drives.
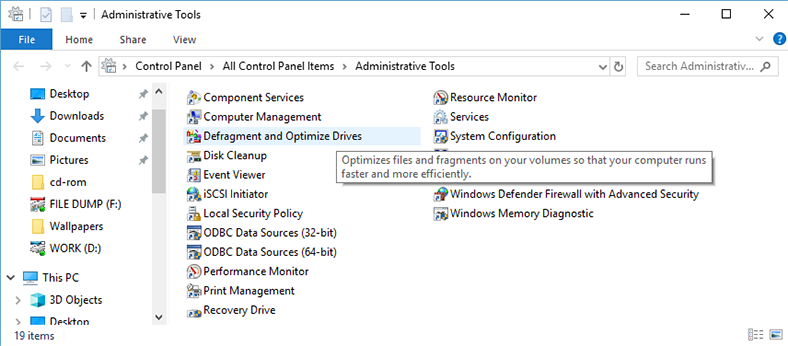
By default, scheduled optimization (that is, defragmentation) is enabled in Windows 10.
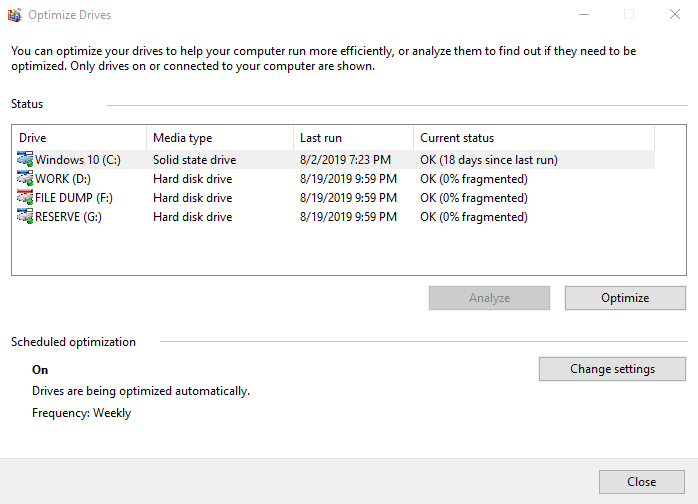
Click on Change settings to view details and modify them if necessary. You can enable or disable scheduled optimization every day, every week and every month, decide if you need notifications when three consecutive scheduled runs were missed, and choose the disks which you would like to optimize on schedule, and even enable or disable automatic optimization for new disks.
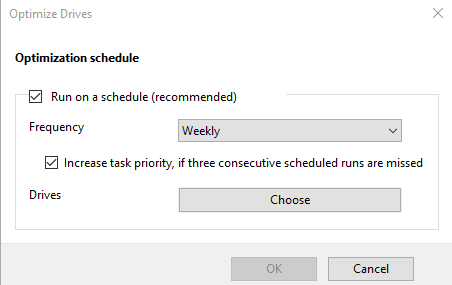
However, any disk can be optimized manually, at any time you think fit. First of all, you can analyze the disk to see if it needs optimization. For example, select disk D and click Analyze.
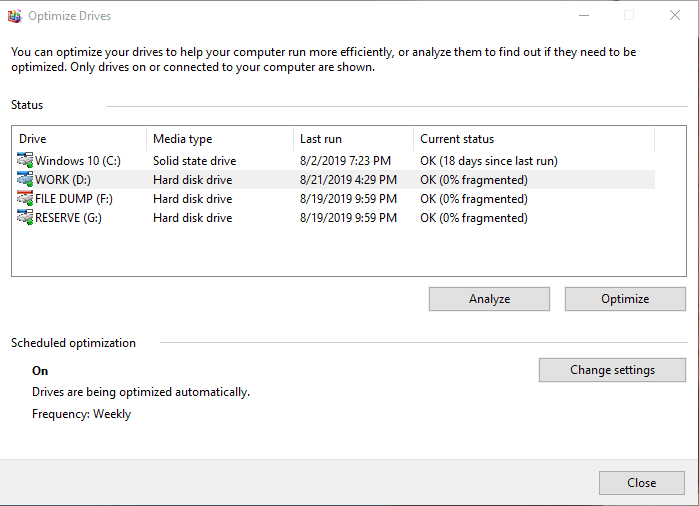
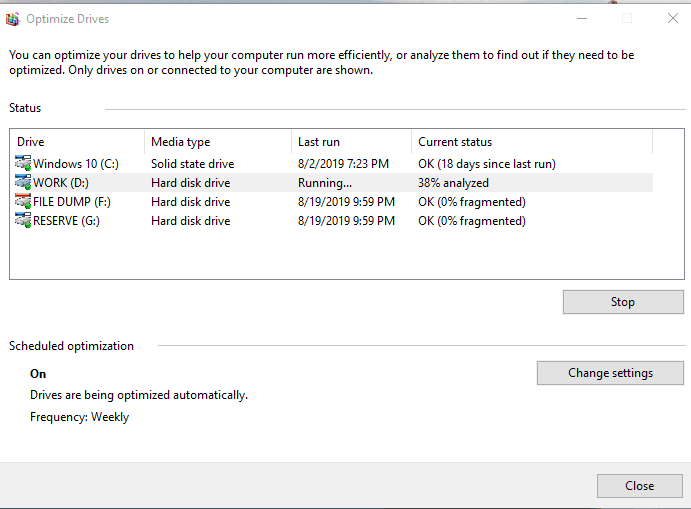
After the analysis you will see the fragmentation percentage of the disk (in my case, fragmentation is 0%). After that, click Optimize and wait until the process is over. I’d like to note that disk defragmentation can take up quite a long time, depending on the disk size and frag percentage.
Method 2. Command Prompt
The second method is defragmenting the hard disk with the Command Prompt.
Launch the Command Prompt as Administrator.

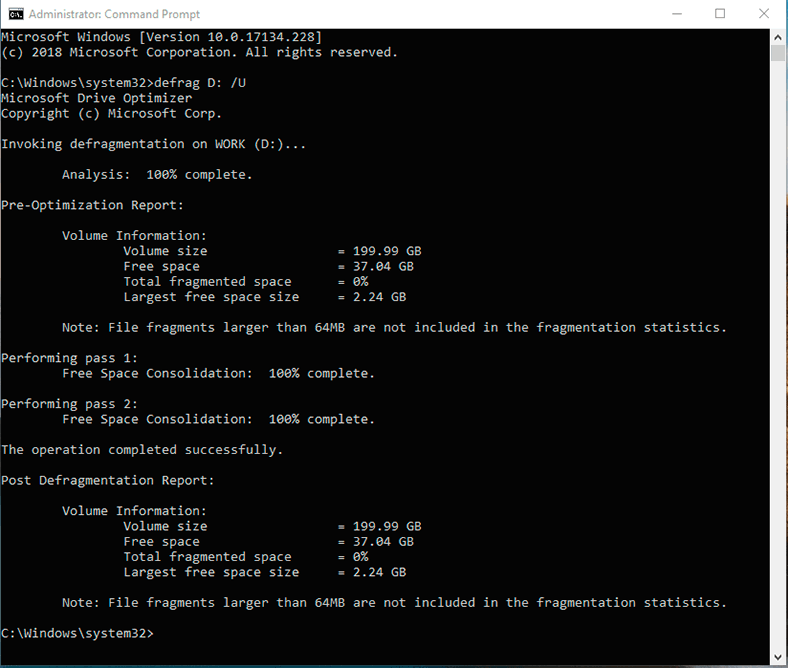
Then, type in the command defrag and specify the letter of the drive to be optimized (for example, D).
defrag D: /U
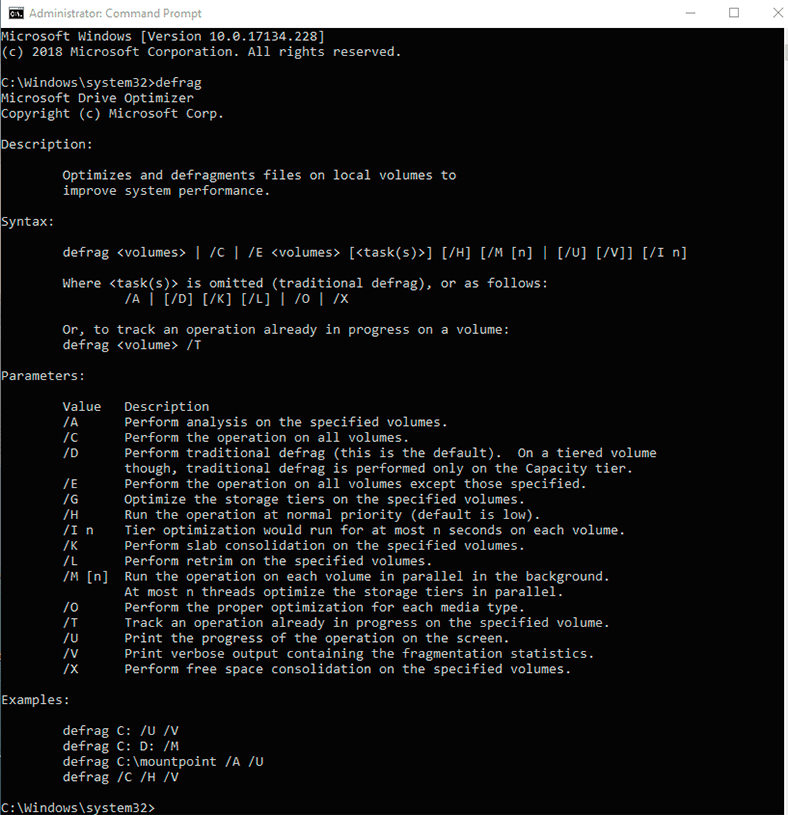
Type proper settings for optimization (defragmentation) and press Enter. After that, the defrag process will start. You can learn more about the settings for the defrag command at the end of this article.
After the defragmentation is over, you will see a report saying that the operation has been successful and giving us general data on the volume you have optimized: the volume size, free space left, total amount of fragmented space and the maximal amount of free space available. The fragmentation statistics does not include file fragments larger than 64 Mb.
Settings for the Defrag Command
- /A - Analyzing specified volumes.
- /C - Performing an operation for all volumes.
- /D - Standard defragmentation (by default).
- /E - Performing an operation for all volumes, except for the specified ones.
- /H - Running the operation at standard priority (by default, it is low-priority).
- /K - Optimizing memory in selected volumes.
- /L - Repeating optimization for selected volumes.
- /M - Running the operation simultaneously on every volume in background mode.
- /O - Optimization using a suitable method for every media type.
- /T - Monitoring the operation which is already being performed on the specified volume.
- /U - Displaying the operation progress on the screen.
- /V - Displaying detailed fragmentation statistics.
- /X - Uniting free space in the specified volumes.
If you have any questions about disk defragmenting in Windows 10, post a comment, and we will certainly give you the information you are interested in.


