VMware Fusion Doesn’t Work — How to Recover Virtual Machine Data In macOS
Read this article to find out how to recover data from a non-operational or damaged VMware Fusion virtual machine on MacOS. You’ll learn what to do if your virtual machine won’t run, and there are some important files inside it. We’ll explore in detail how to fix this issue, and how to retrieve information from the virtual disk file of the non-operational virtual machine.
- Why access to VMWare Fusion data can be lost
- VMWare Fusion virtual machine files
- How to recover data from a non-operational or damaged VMware Fusion virtual machine on macOS
- How to avoid loss of data and prevent VMware Fusion virtual machine failure/breakdown
- Conclusion
- Questions and answers
- Comments
Losing access to a Mac-based virtual machine may become a stressful experience, especially if there were some important documents, projects or personal files inside it. One of the most commonplace virtualization tools for macOS — VMWare Fusion — often generates problems: startup errors, damaged .vmdk disks, freezing while booting, or even complete disappearance of the virtual machine after a system update.
If your virtual machine suddenly stopped booting or you deleted it accidentally, don’t give way to panic — your data can still be recovered. Even without a backup file, there are a few reliable ways to retrieve information from VMWare disks. In this article, we’ll explore data recovery methods involving integrated macOS tools and third-party utilities that will work both for newbies and power users.

How to Speed Up VMWare, Oracle VirtualBox and Microsoft Hyper-V Virtual Machines
Why access to VMWare Fusion data can be lost
For starters, let’s explore why access to virtual machine data can be lost and what causes this problem:
- VMware Fusion or macOS update errors.
- Damage to .vmwarevm file or .vmdk file (the latter is the virtual disk file).
- Unexpected or quick system shutdown can also make you virtual machine non-operational.
- Another cause is the lack of hard disk space.
- Also, it happens because of various file system errors affecting the system drive of your Mac.
No matter why you need to recover the data, the primary goal should be to locate the .vmdk virtual disk file and retrieve its data with the help of third-party software products.
VMWare Fusion virtual machine files
| File extension | File name | Purpose |
|---|---|---|
| .vmx | VM configuration file | It contains virtual machine settings: RAM amount, CPU, disks etc. |
| .vmdk | Virtual hard disk | The main file storing all data and guest OS file system |
| .nvram | BIOS/UEFI memory file | It stores the setting of the virtual machine BIOS/EFI |
| .vmem | Memory pagefile | It is used to save the state of RAM |
| .vmsd | Snapshot metadata | Data about existing virtual machine snapshots |
| .vmsn | VM state snapshot | It stores the state of VM while creating a snapshot |
| .lck | Lock file | It is used to protect files from simultaneous access |
| .log | Virtual machine logs | Log files containing information about VM activity and errors |
| .vmxf | Additional configuration file | It is used for working with other VMware products |
| .plist | macOS Launch Services file | It contains metadata created by macOS at VM startup |
Where are VMWare Fusion virtual machine files stored? If you didn’t change the virtual machine save paths during the initial configuration process, the files should be found in the user’s folder:
/Users/user_name/Virtual Machines/
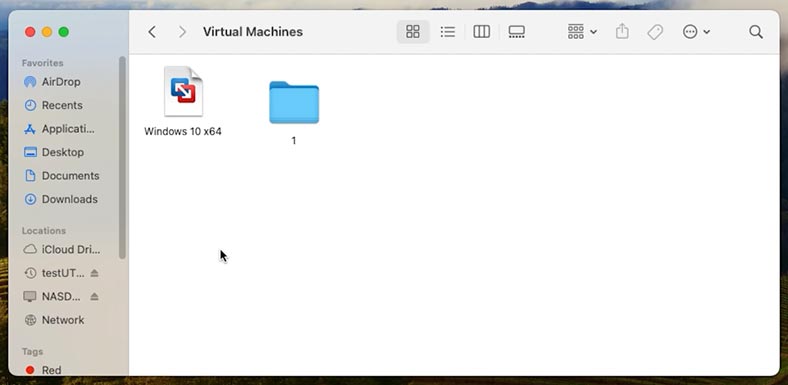
In any case, to recover data of a VMWare Fusion virtual machine, you need to find a container with the extension .vmwarevm.
For quick search, you can use Spotlight. Press the key shortcut Command+Space and type the name in this line.
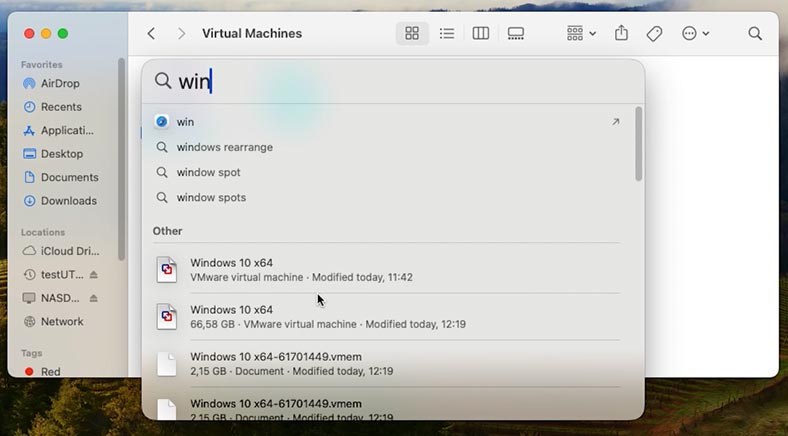
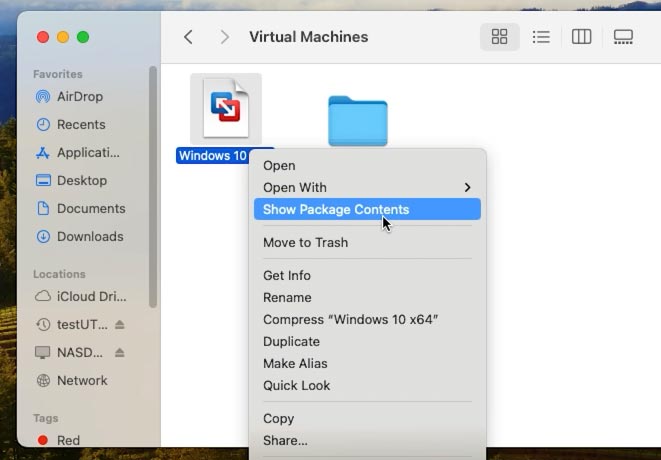
The file with the extension .vmwarevm is a special package - a folder which macOS displays as one object for our convenience.
To open it, right-click on the file and choose Show Package Contents.
As you can see, there are many different files inside. You should find the largest file by size, with the extension .vmdk. This is the virtual hard disk file we are looking for. All documents, apps and photos are stored inside it.
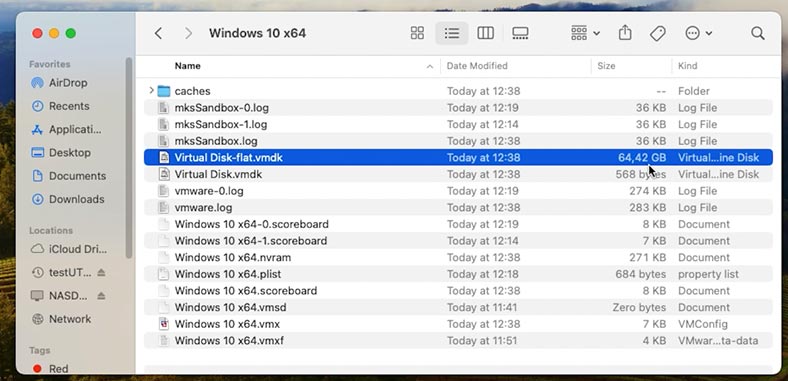
If there are several files of this type but with numbers in their names, it means the virtual hard disk was divided into several parts.
How to recover data from a non-operational or damaged VMware Fusion virtual machine on macOS
Method 1. How to retrieve data from a .vmdk file in VMWare Fusion
Now that we have found the .vmdk file, we can try and extract the necessary information from there.
For this purpose, use the data recovery tool - Hetman Partition Recovery.
This is a versatile tool for solving data loss issues. It supports both properly working disks and inaccessible and damaged logical volumes, as well as virtual disk files. This app supports most popular file systems used in Windows, MacOS, Linux and Unix.
Go to its website hetmanrecovery.com and download the tool. Choose the version for macOS.
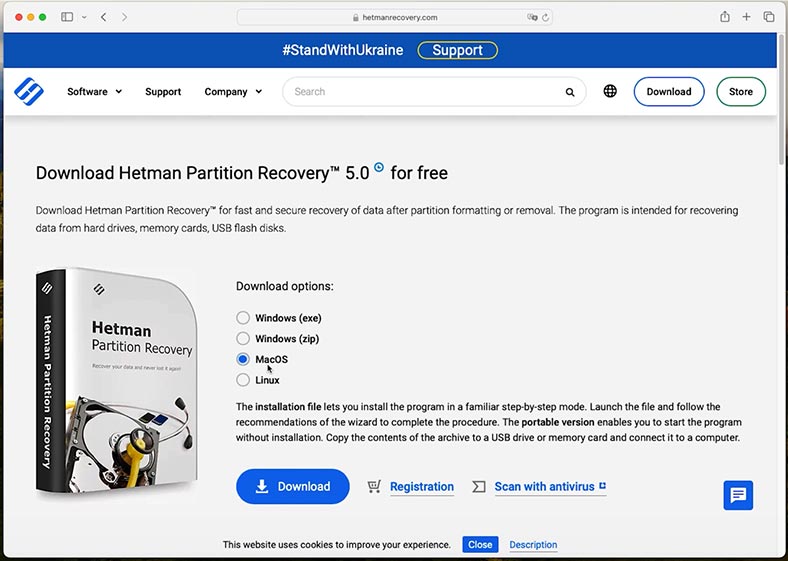
Now install it just like any other app, and drag the shortcut to the folder containing your programs.
The utility needs full access to hard disks to work properly. Do it by opening the settings and granting the utility with full access to disk.
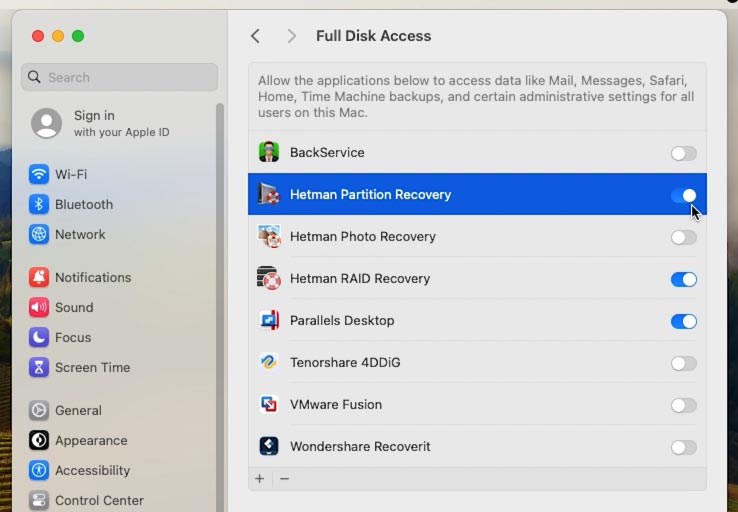
Start the utility - remember to type the administrator password.
As a result, you’ll see a list of all connected drives, but there is no virtual machine disk. We need to mount it in the recovery tool.
If the .vmdk file is not damaged, it can be mounted and its contents can be viewed.
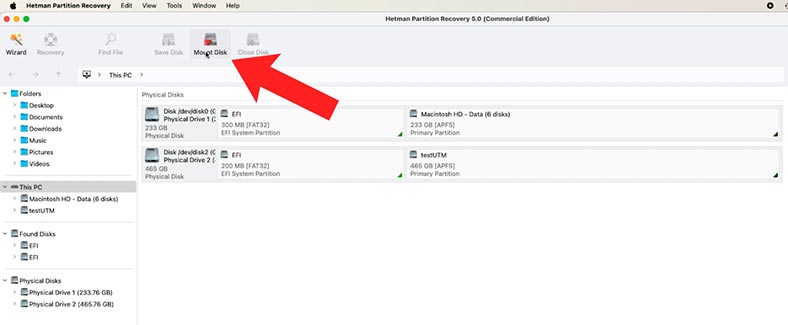
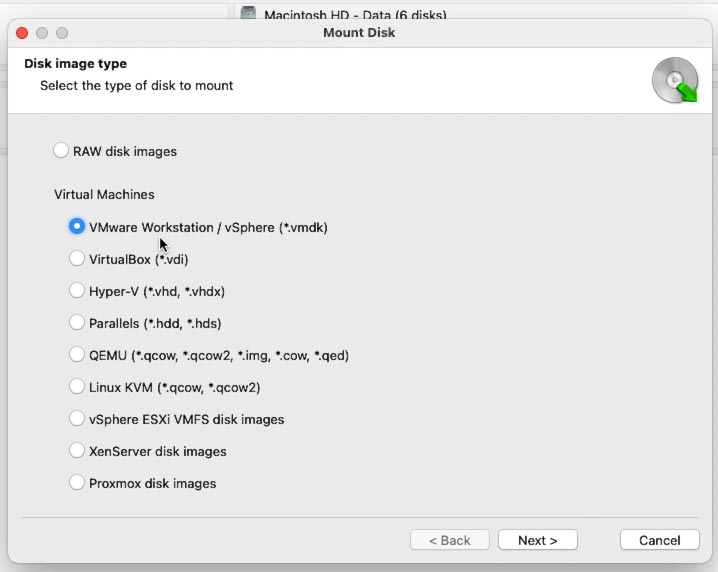
To do it, click on Mount Disk. From the list, choose VMWare virtual machine files with the extension .vmdk.
After that, give the path to the virtual disk file. When the full path to such container is ready, click Open.
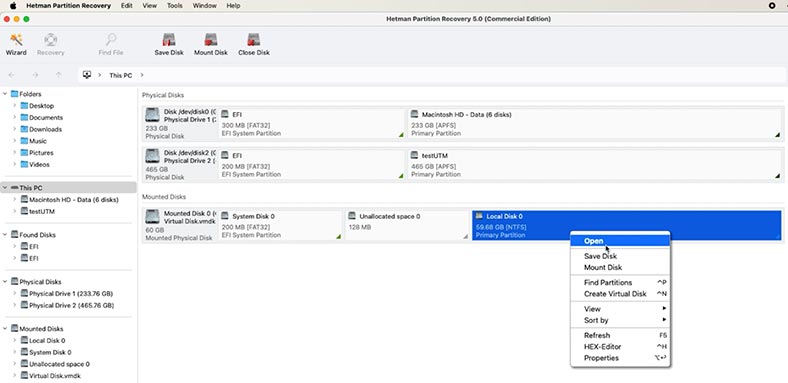
Now the mounted disk will appear in the recovery tool’s main window. To have it scanned, right-click on the disk and choose Open.
Then choose the scan type - Fast scan or Full analysis.
To begin with, we recommend running a Fast Scan first - it will take less time and help you find the files in most scenarios involving data loss.
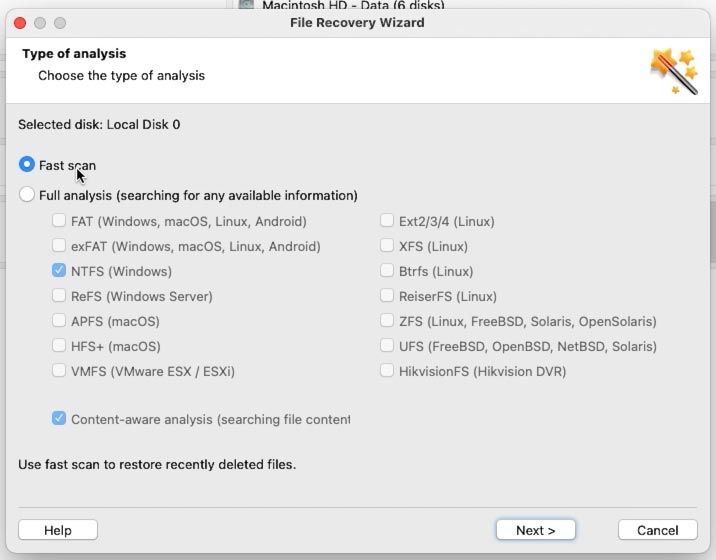
If the Fast scan can’t find the required files, then go for Full analysis.
A full analysis will take longer since it makes use of a more complicated search algorithm.
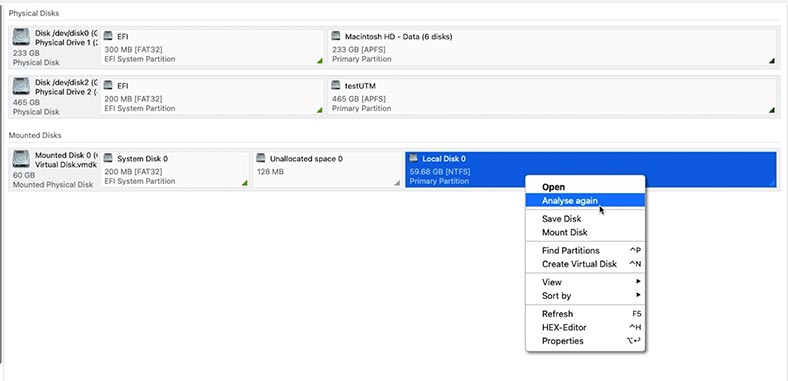
To run it, go back to the main menu, right-click on the disk - Analyze again - Full analysis, select the file system - Next.
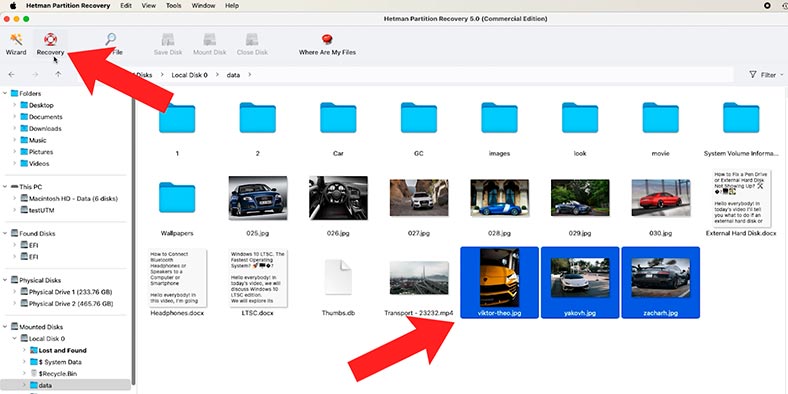
When the scan is over, open the folder where you stored the files that need to be recovered. For your convenience, there is a preview feature to see the file contents.
Select all files and folders you want to restore, and click the Recovery button.
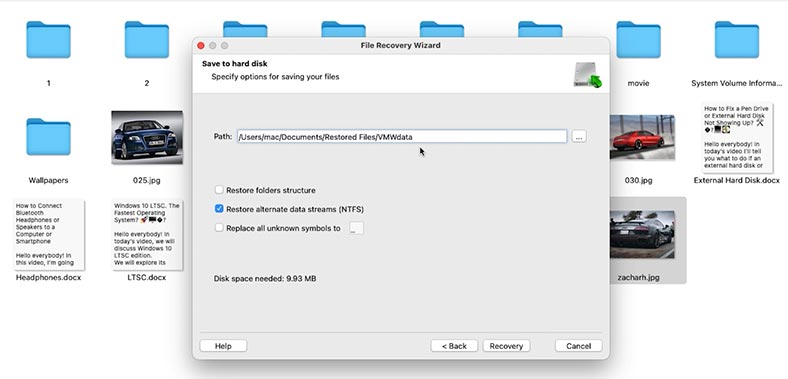
Then choose where to save the items and hit Recovery again. As a result, you will find the recovered files in the folder you have chosen.
This way, even if the virtual machine is damaged and it won’t boot, you’ll be able to retrieve its data directly.
The recovery tool displays both main volumes and previously deleted or damaged partitions.
Method 2. Recovering VMWare Fusion data with Time Machine
If you have configured backup options previously, there is always a chance to recover data without using third-party tools. For starters, you can try and recover the virtual disk file with the help of Time Machine. It will help you restore the operability of your virtual machine if some of the files were damaged or even deleted.
To do it, open the folder where the virtual machine files were stored:
~/Documents/Virtual Machines.localized/
Now open Time Machine. After that, choose the date when this virtual machine worked properly, and recover the necessary version of the .vmwarevm package.
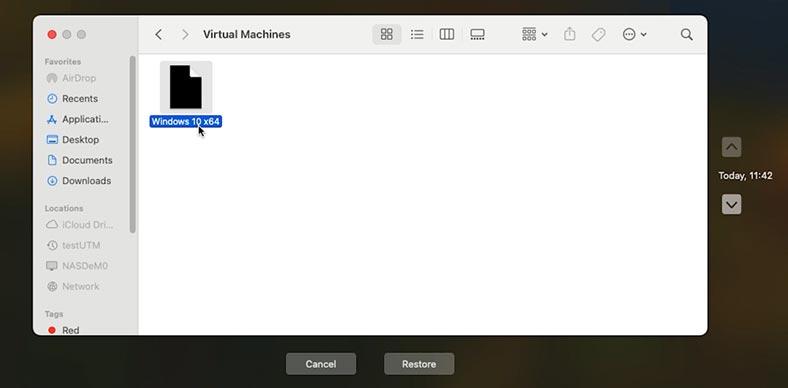
As a result, the virtual machine should start working as it did before. The only drawback is that it will NOT have the files you added after the date of the backup file you have used for recovery.
Method 3. Data recovery with snapshots in VMWare Fusion
One more method to restore operability of a virtual machine without resorting to third-party software is by using snapshots.
To do it, open VMWare Fusion, select the virtual machine which won’t run, and go to the Snapshots tab.
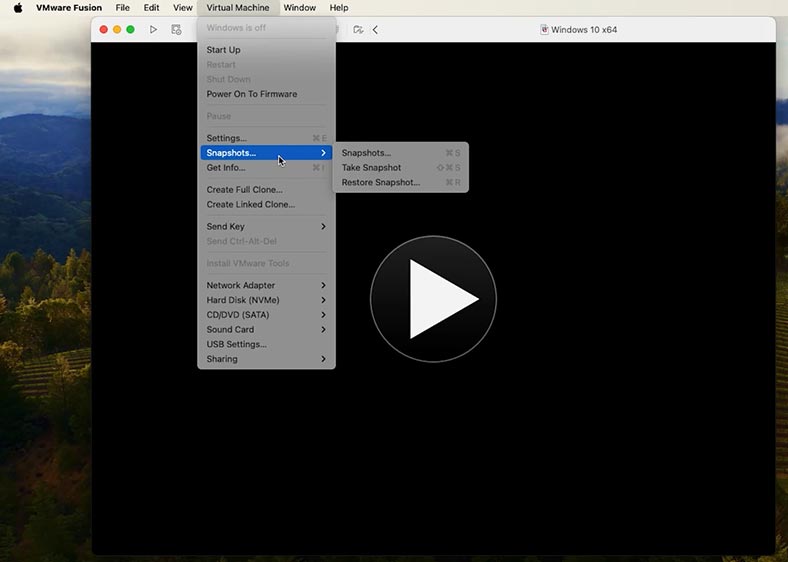
Now select the latest snapshot of a properly working machine and click Restore Snapshot.
However, you should keep in mind that the snapshot solution only works if you have enabled this feature in advance.
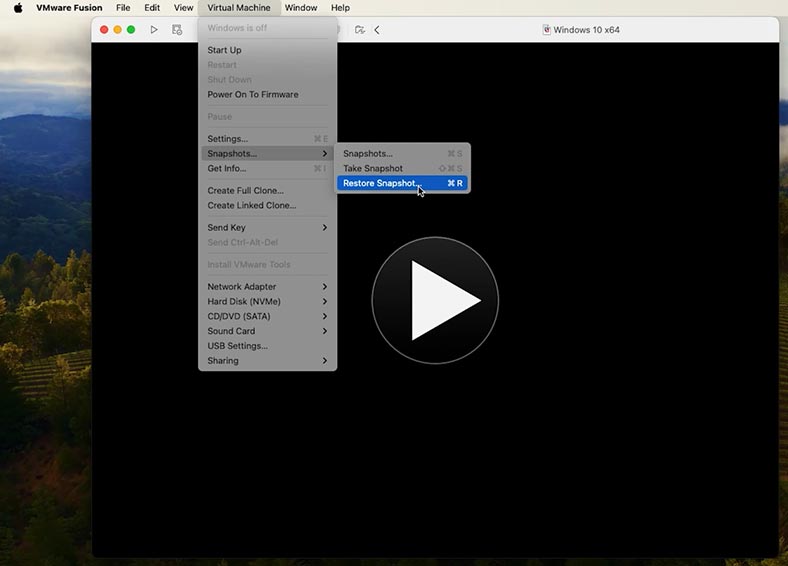
With snapshots, you can get your system back to the condition when no data was lost yet. Still, any information written to your disk after the latest snapshot was created will be lost - just like in the previous case with using Time Machine.
Method 4. How to recover a deleted VMware Fusion virtual disk file
If the virtual disk file was deleted and you can’t see it in the Trash, then Hetman Partition Recovery will help you restore it.
If the files weren’t stored on the system drive, you can try to recover accidentally deleted files of your virtual machine with the help of this recovery app.
To do it, scan the disk - just like you did it to the virtual disk. You don’t have to mount anything - the disk will be displayed in the main window immediately after the recovery app starts.
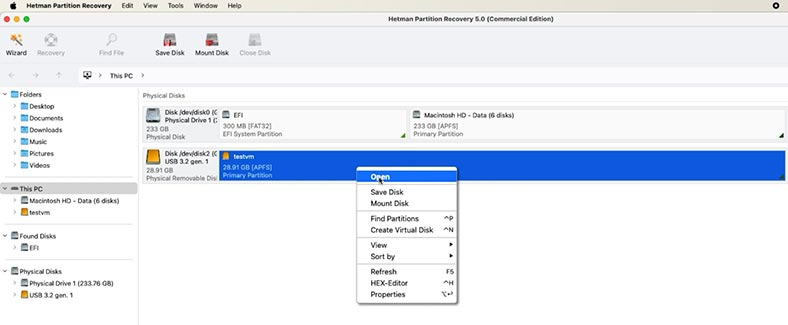
Right-click on it and choose Open, then select the scan type.
If one scan type failed to bring you any results, use the other option. After that, just select the virtual disk file and hit Recovery.
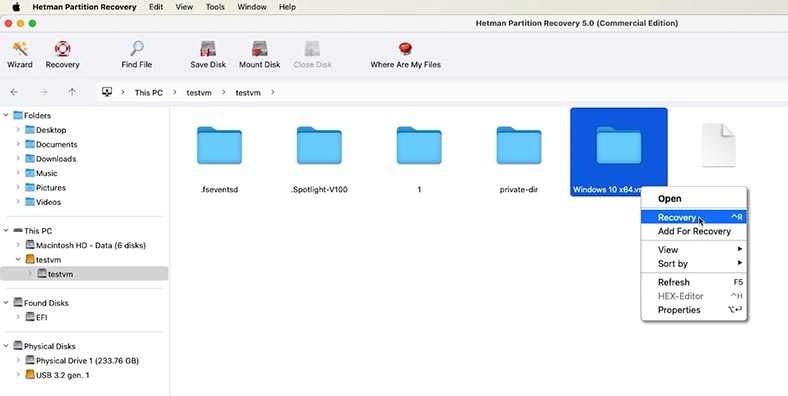
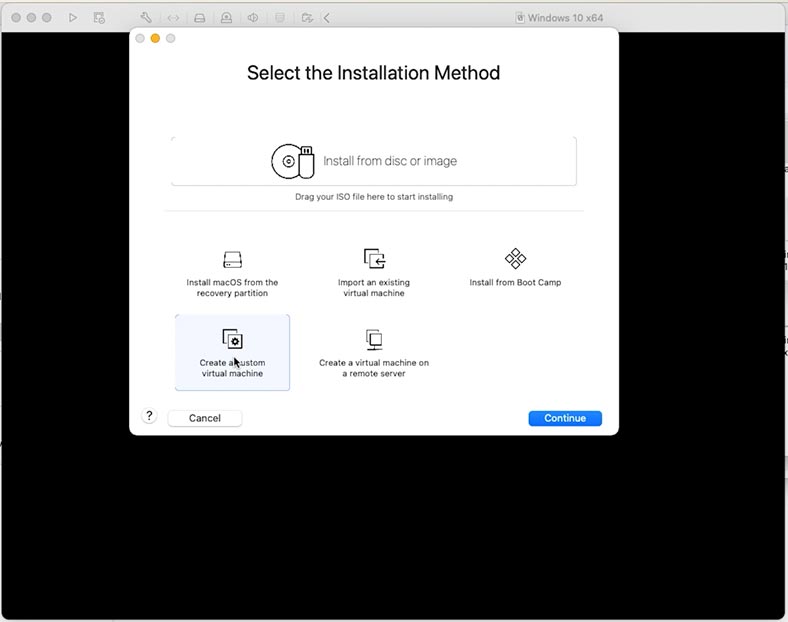
Later, you’ll be able to place it to its previous location and run the virtual machine, or upload the file into a new virtual machine. To do it:
-
Click File - New - Create custom virtual machine.
-
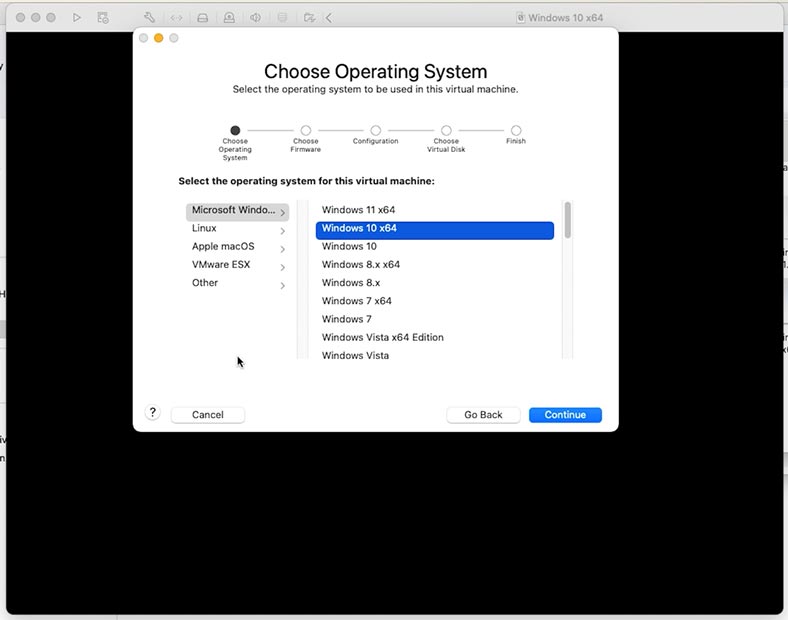
Select the operating system.
-
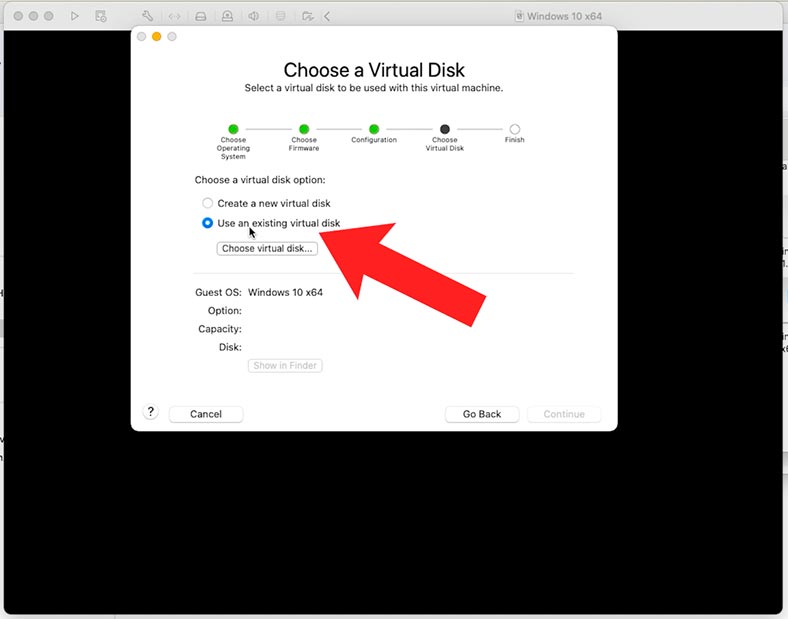
In the Hard Disk tab, click Add existing disk, and specify the path to the .vmdk file.
-
When you’re done, run the virtual machine and check if the files you are looking for are there.
Method 5. Mounting a VMDK disk directly in macOS
Also, there are a few more advanced methods to recover files from a virtual machine, but they require you to use the command prompt and additional software tools.
For example, you can convert a .vmdk virtual disk into a format supported by macOS out of the box. It could be a raw disk image disk image.
For this purpose, you will need a special utility like qemu-img. You can install it via Homebrew.
Homebrew is a package manager for macOS.
To install it, open the Terminal and type the following command:
brew.sh
/bin/bash -c "$(curl -fsSL https://raw.githubusercontent.com/Homebrew/install/HEAD/install.sh)"

To install QEMU, run the following command in the Terminal:
brew install qemu

Use another command to convert the .vmdk file into the .img format:
qemu-img convert -O raw "Virtual Disk.vmdk" "Virtual Disk.img"

The .img file you have received should be mounted with the help of this command:
hdiutil attach "Virtual Disk.img"

However, since the file system inside it is NTFS, you’ll need a special driver for writing operations. But for simply copying the files, even the default macOS features will do!
This method creates one more copy of your data, but then such image can be opened easily even without using VMWare.
How to avoid loss of data and prevent VMware Fusion virtual machine failure/breakdown
To avoid similar issues in the future, remember to back up important data. Back up your virtual machines with the help of Time Machine or snapshots. Also, make sure that you never shut down your Mac while the virtual machine is running. Another important aspect is having sufficient disk space - check your hard disk regularly so it doesn’t get severely full.
Conclusion
If your virtual machine in VMWare Fusion refuses to run, it’s not the end of the world yet. Even in case of a complete failure, damage to the .vmdk disk, or removal of files, you can still recover important data. The key to successful recovery is to stop writing new data to the disk, and scan the disk as soon as possible.
In this article, we have reviewed main file types that comprise virtual machines, as well as practical methods to retrieve information with the help of third-party and integrated tools. These solutions allow you to mount virtual disks, scan their contents, and recover files without even having to start the actual virtual machine.
If you work regularly with virtual machines, we strongly recommend backing up .vmdk and .vmx files, as well as take snapshots before important updates or system upgrades.
Remember: the sooner you start data recovery procedures, the higher are your chances to rescue valuable data.


