Fix RAID 5 Failure Easily – How to Recover Data From a Buffalo NAS hd-H1.0TGLR5
This article examines the causes that can lead to damage to the RAID 5 array Buffalo HD-H1.0TGLR5, and describes methods of data recovery using specialized tools.
- How to create RAID 5 on Buffalo hd-H1.0TGLR5
- How to create a shared folder on Buffalo hd-H1.0TGLR5
- How to recover data from RAID on Buffalo hd-H1.0TGLR5
- Conclusion
- Questions and answers
- Comments
RAID storage based on Buffalo network-attached storage (NAS) devices is widely used in small businesses and home environments for reliable storage of large volumes of data.
The model Buffalo TeraStation HD-H1.0TGL/R5 includes support for RAID 5, which allows multiple drives to be combined into an array with data and parity distribution. This configuration provides a balance between performance, fault tolerance and efficient utilization of disk space.
However, even RAID 5 does not guarantee absolute protection against data loss. Failure of one or more hard drives, controller hardware faults, software errors or incorrect user actions can lead to array corruption and loss of access to files. For NAS owners such situations are critical, since important work documents, archives or multimedia content are often stored on these devices.
The following demonstrates how to recover data from a RAID 5 array (consisting of four drives) using the example of the NAS Buffalo hd-H1.0TGLR5 device.
How to create RAID 5 on Buffalo hd-H1.0TGLR5
The following explains how to create a RAID 5 on this network storage.
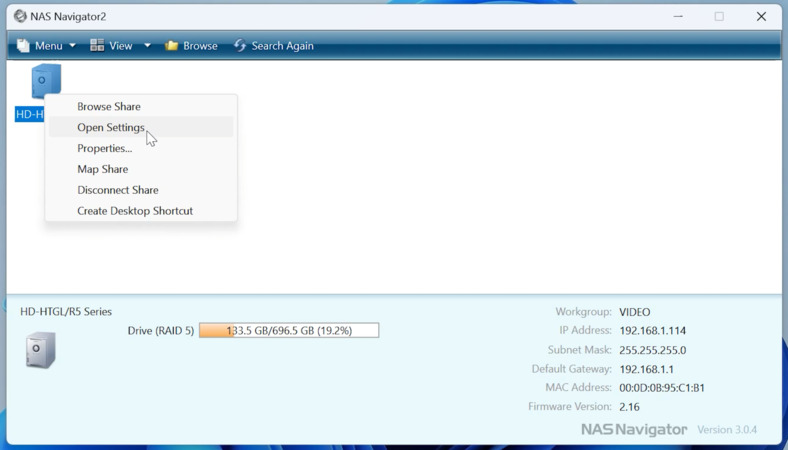
To access the storage management panel, launch NAS Navigator, locate the device in the list and open its settings (right-click – Open settings).
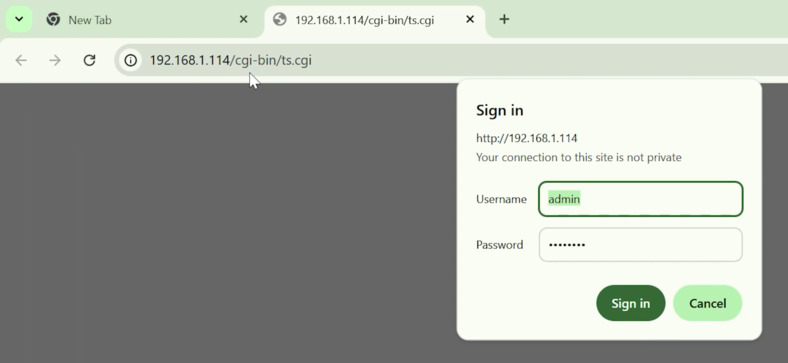
Alternatively, open a browser and enter the IP address of your storage in the address bar. To access the NAS administration panel you must enter the administrator login and password. By default these are admin and password, respectively.
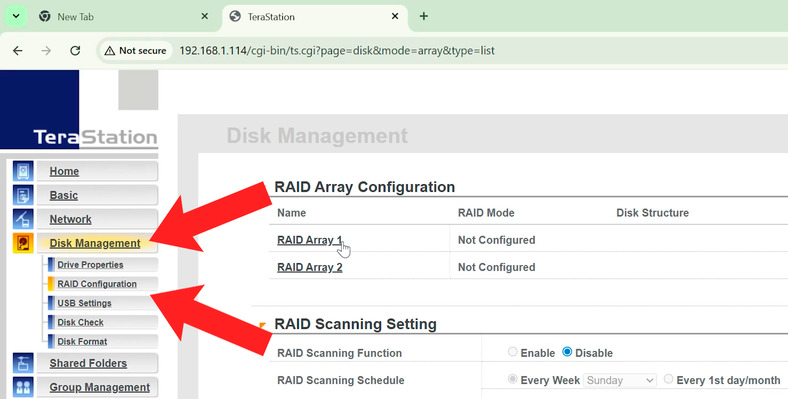
Next, go to Disk management – Raid configuration. Open one of the configurations, for example: RAID array 1.
At the next step select the RAID type (in this example — RAID5) and mark the drives that will comprise the array.
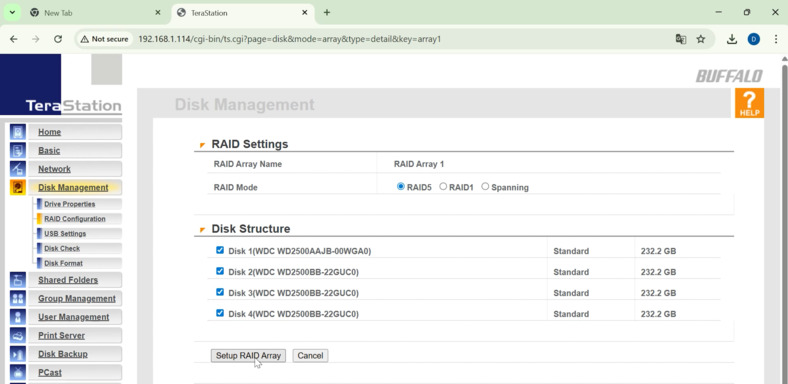
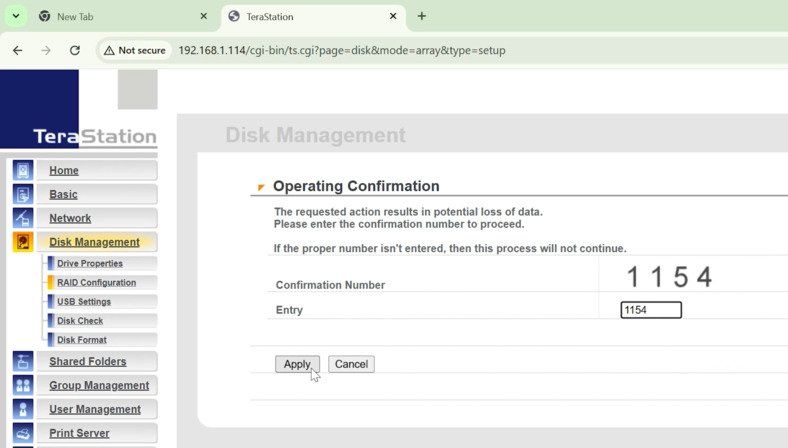
After that, click the Setup RAID Array – Ok button, and enter the confirmation code displayed on the screen.
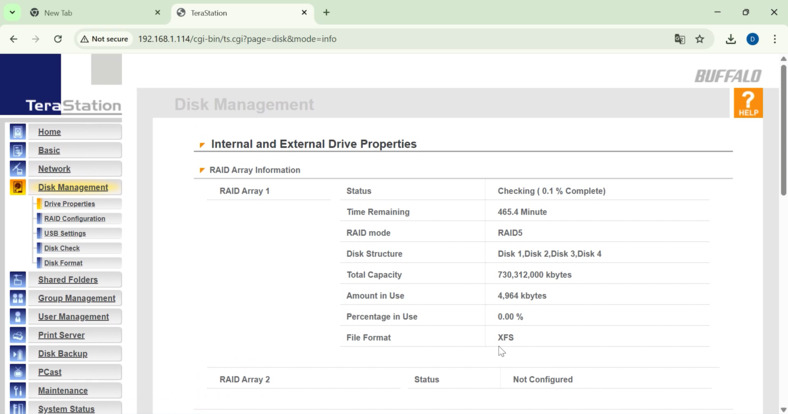
After this the array build and verification will start. As shown, the XFS file system will be used. Other RAID parameters can also be reviewed here.
How to create a shared folder on Buffalo hd-H1.0TGLR5
While verification is running we can continue configuration. Let us add a shared folder and configure access parameters.
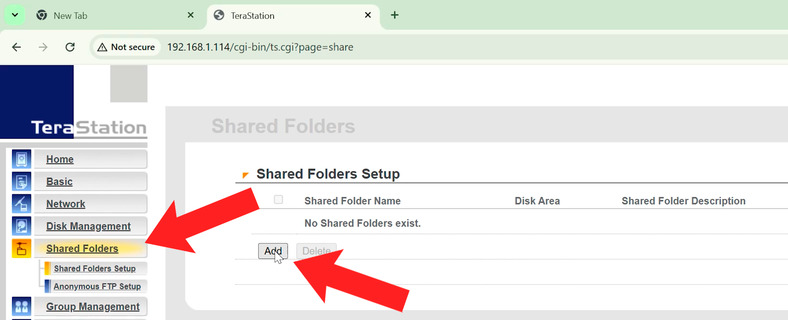
To create a shared folder go to the settings – Shared folders. In the opened settings window click – Add.
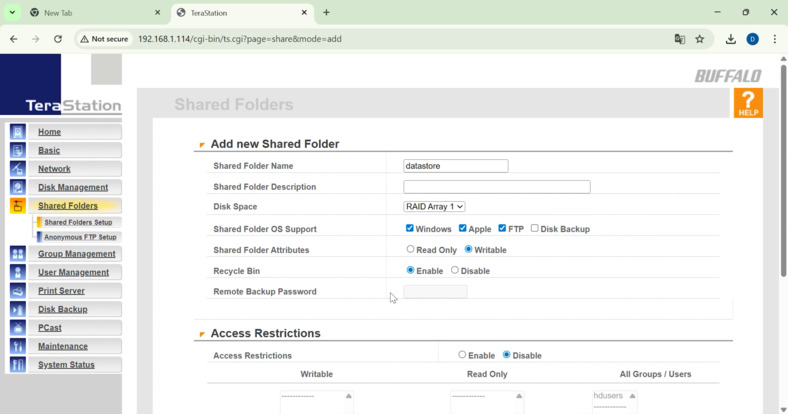
Next, specify the network resource name and select the array where the folder will be stored. Also select the operating system types for which it will be available over the network, enable the Recycle Bin, etc. Below you will see Access settings.
How to recover data from RAID on Buffalo hd-H1.0TGLR5
To successfully recover data, it is necessary to understand the situation we are dealing with.
| Parameter | Description |
|---|---|
| NAS model | Buffalo HD-H1.0TGL/R5. The R5 designation almost always indicates operation in RAID 5 mode. Data and checksums are distributed across all four drives, allowing the array to survive failure of one disk. In our case the failure is most likely related to power or the system board; the drives themselves remain functional. |
| File system | NAS devices operate on Linux. Buffalo devices of this series typically use the XFS file system. It is fast and reliable, but Windows and macOS do not recognize it natively. Therefore, when drives are connected directly to a PC, the data will not be displayed. |
| Our objective | Remove the drives, connect them to a Windows computer, and use Hetman RAID Recovery to virtually assemble the RAID 5 array. This will allow the software to read the XFS file system and provide access to the stored files. |
Before starting data recovery you must be fully aware of your actions. Any mistake when working with drives from a RAID array can lead to irreversible data loss. If the information on the drives is critically important and you are not confident in your actions, consider contacting professional data recovery services.
STEP 1. Tools required during the data recovery process
What is required to recover data from a RAID on Buffalo hd-H1.0TGLR5:
First, a computer running Windows. A desktop PC with free ports and power connectors is suitable for this task.
This NAS model uses IDE drives. If your motherboard does not have the corresponding ports, you will need an IDE-to-SATA adapter. You should connect all drives simultaneously or create images of each drive.
- Direct connection to the motherboard SATA ports is the preferred option. An external docking station is also acceptable for this purpose.
- Specialized software designed for data recovery from damaged RAID arrays. For this guide we will use the program Hetman RAID Recovery.
- A separate hard drive (external or internal) to which recovered data or images will be saved. Its capacity must be sufficient for all recovered files and images.
- A marker to label the drives.
- A screwdriver to remove the drives from the enclosure.
STEP 2. Beginning the recovery process
To begin the recovery process, remove the drives from the device and connect them to the motherboard of a Windows computer.
Be sure to label the drives! Use a marker and number each drive according to its position in the NAS: “1”, “2”, “3”, “4”. Drive order is a critically important parameter for assembling a RAID 5. Do not mix them up!
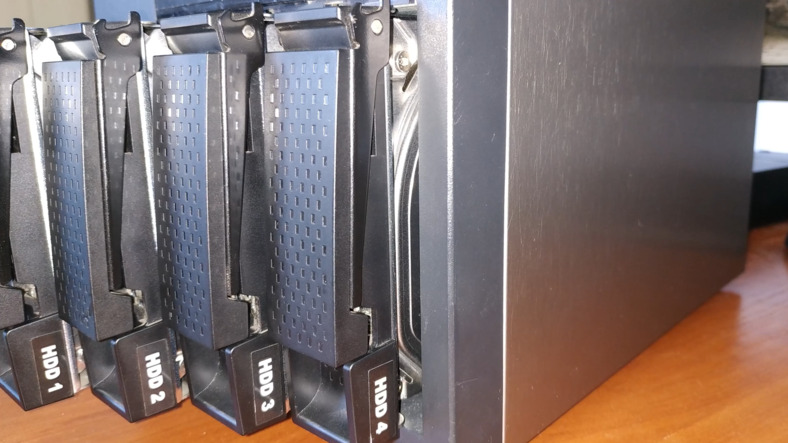
Also, when connecting the drives, Windows may prompt to “initialize” or “format” the disks because it does not recognize the XFS file system. DO NOT accept these prompts. Click “Cancel” on any such messages.
After connecting the drives, start the application.
Hetman RAID Recovery will reconstruct the broken RAID from the drives and allow you to retrieve lost data. The program supports all common RAID types and most file systems. Using it you can recover data not only from Buffalo NAS devices but also from other manufacturers including Synology, QNAP and other popular storage devices.
It helps to reconstruct a damaged RAID from drives in cases of NAS device failure, controller failure, or the failure of one or more array disks. Using this tool you can recover critical information that remains on the drives without using the original NAS enclosure.
STEP 3. How to create a disk image
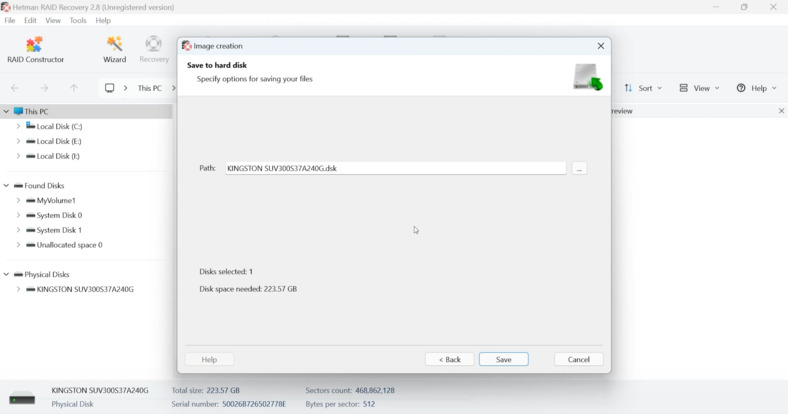
Since I will recover data from disk images, I will show how to create an image of the required drive.
To do this, select the required drive and at the top click – Save disk.
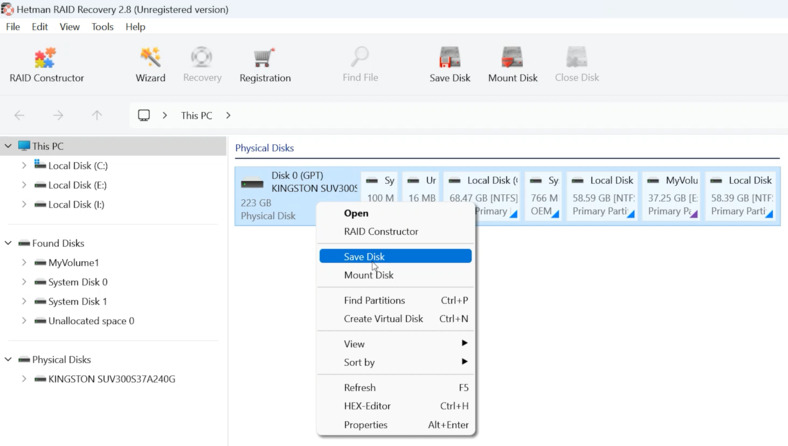
Next, specify the path where to save it. In our case this is a pre-prepared storage drive.
To load the image into the program, click Mount disk and specify the path to the image.
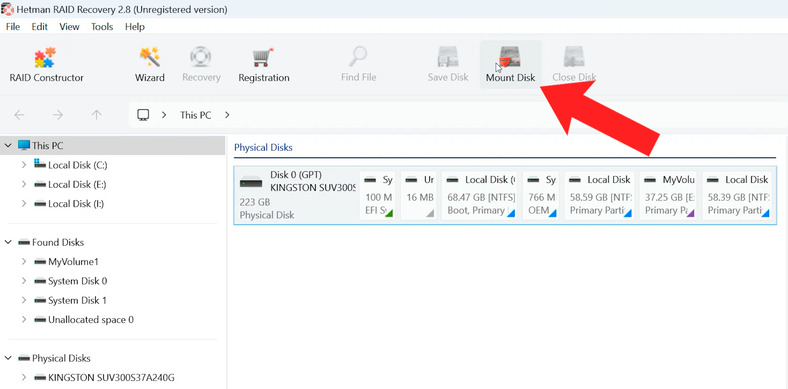
Thus I created images of the storage drives and mounted them in the program.
Whether the input is a mounted image or a physical disk, the utility will automatically reconstruct the broken RAID from the drives and display it in the main window of the program. At the bottom you can view the parameters of the assembled array.
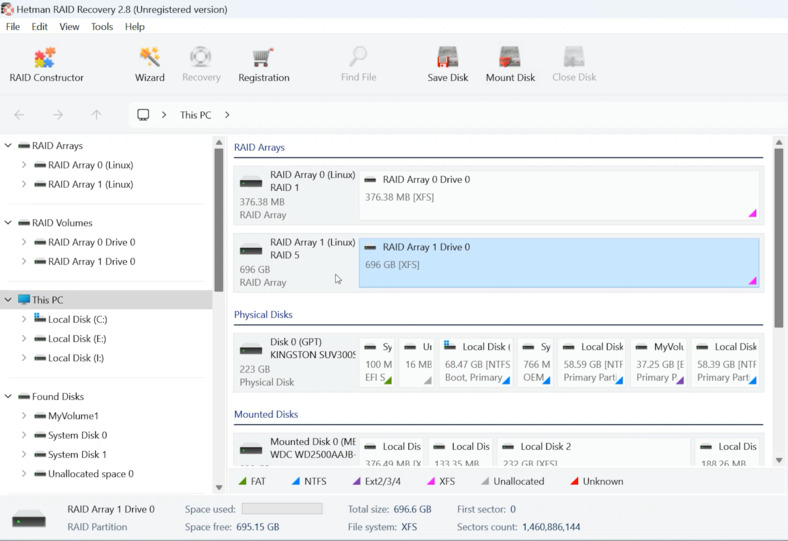
STEP 4. Data recovery process
To search for files, start a disk analysis. Double-click the desired partition and select the search type: Fast scan or Full analysis.
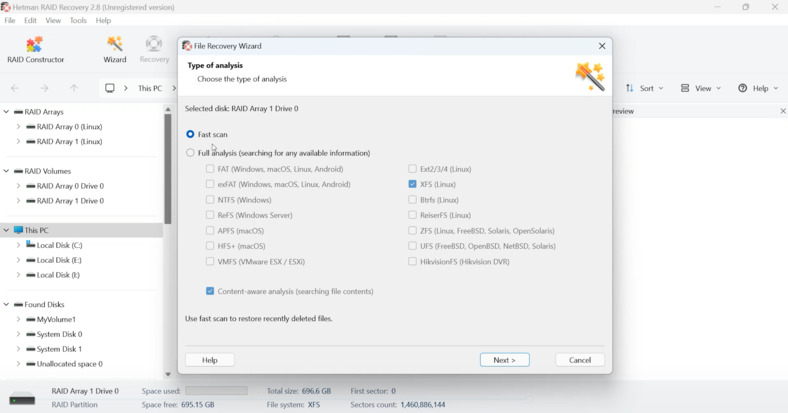
It is recommended to start with a Fast scan. In this mode the program will quickly scan the drives and display all found files. This scan type will locate files in most data loss scenarios.
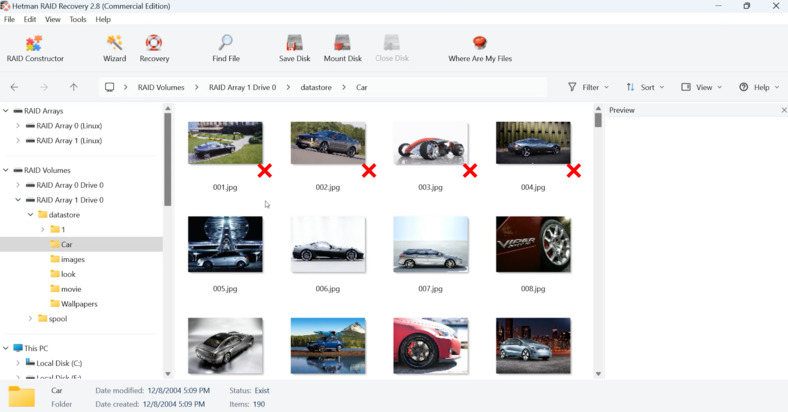
As shown, the program easily found all files remaining on the array drives. It also located deleted data, which is marked with a red cross.
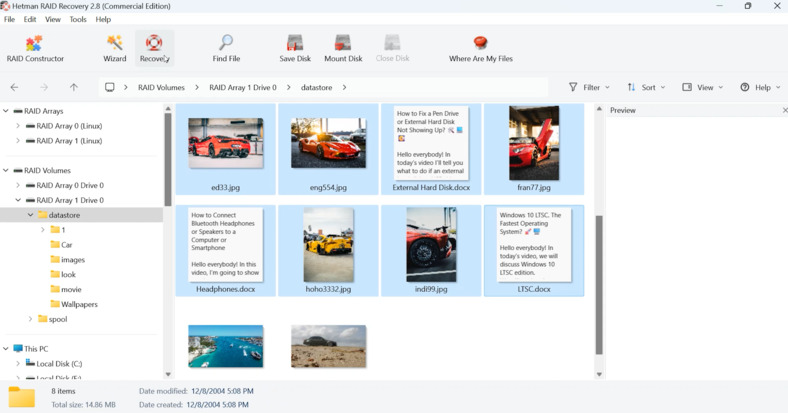
After identifying the required files, select everything you need to restore and click the Recover button.
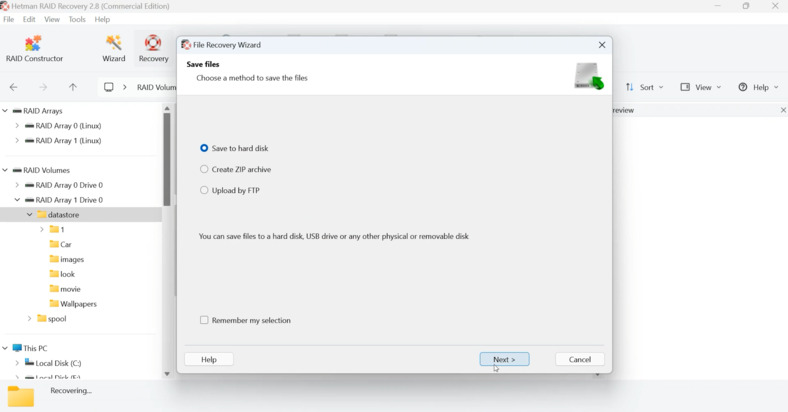
Select the drive and folder where to save the recovered data.
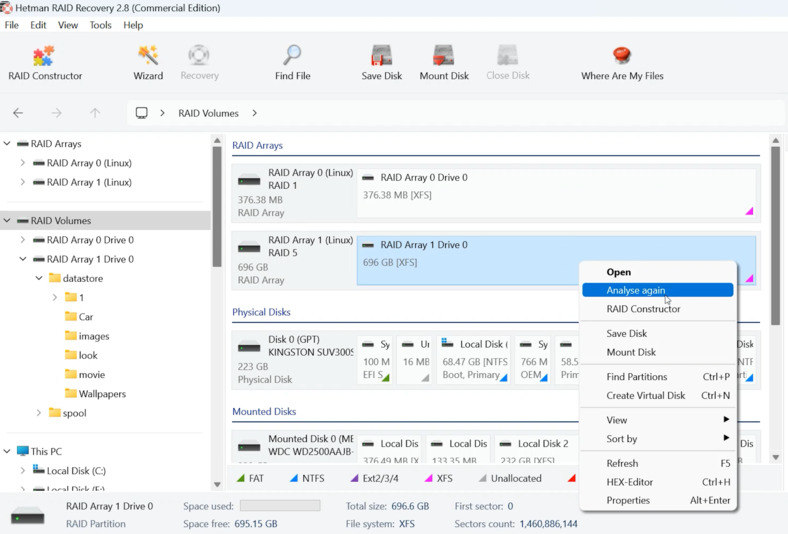
If the program did not find the required file, perform a Full analysis.
To do this, return to the program’s main menu, right-click the disk, and select Reanalyze – Full analysis.
Specify the file system and click Next.
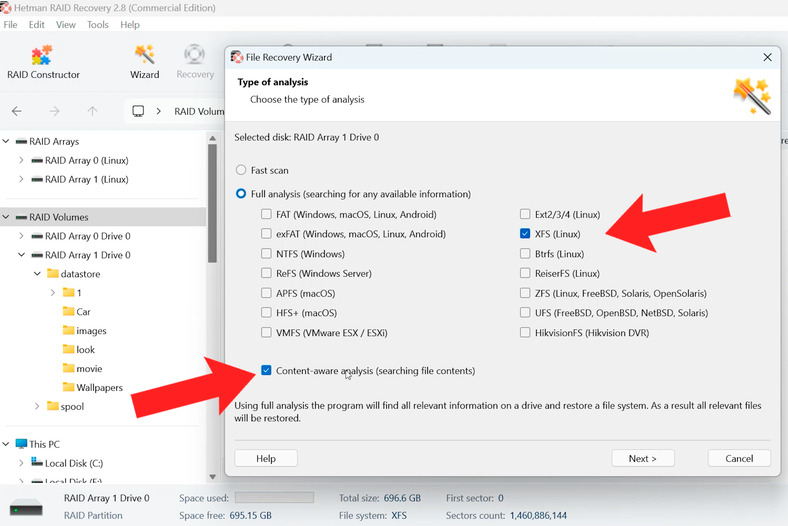
In particularly complex cases it is recommended to perform a content-based search by enabling Deep analysis.
Then simply select and recover the required files.
The program also implements a RAID constructor that allows you to assemble your RAID manually. For this method you must know RAID parameters: RAID type, block order, block size, etc.
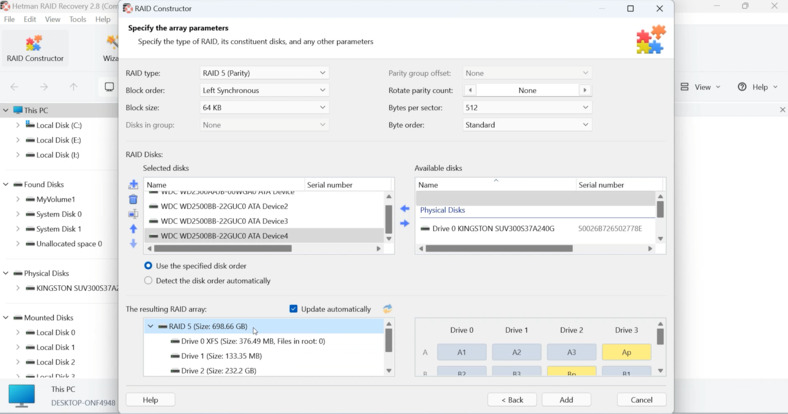
One advantage of Hetman RAID Recovery is that the program attempts to analyze the specified parameters in real time. If entered correctly, information about your array and its file system (XFS) may appear below in the constructor window. If you can see the disk structure, you are on the right track!
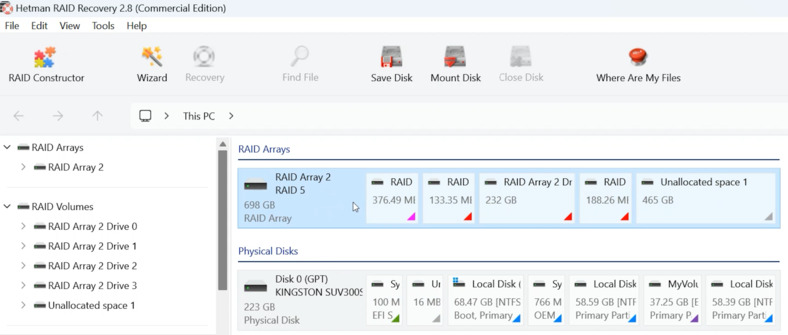
Confirm creation. Click “Add”. After that a new virtual partition “RAID 5” will appear in the program’s disk list. This is the assembled array. You only need to scan it and recover the information.
Conclusion
Data recovery from a RAID 5 array on a NAS Buffalo HD-H1.0TGL/R5 is a task that requires attention to detail and the correct approach. Although such systems are designed for high reliability, power failures, system board failures or incorrect user actions can result in complete loss of access to information.
The main rule in such situations is not to “experiment” with the drives and not to initiate array re-creation on the NAS itself, as this may permanently damage the data. The optimal approach is to remove the hard drives, connect them to a computer and use specialized solutions such as Hetman RAID Recovery. This software allows you to virtually recreate the RAID 5 structure, read the XFS file system and restore access to files.
Thus, even if the Buffalo device itself fails, the data on the drives remains intact and can be recovered. Properly chosen software and correct user actions help minimize losses and restore important documents, archives and multimedia.
Remember: the sooner you start the recovery process and the more carefully you handle the media, the higher the probability of a successful result.


