Top 10 Linux Data Recovery Tools 2025
In this article, we’ll explore data recovery tools designed to handle Linux operating systems. We will test the most popular apps and try to assess them objectively, from the viewpoint of user convenience and quality of data recovery.
- Tools using the Terminal
- TOP 3: data recovery tools for Linux with a graphical interface
- Pros and cons of data recovery tools for Linux
- Conclusions
- Questions and answers
- Comments
This material is planned as a sort of an overall review, since there are plenty of tools to recover data from Linux, and we’d like to have a quick look at each of them.
Later on, we can run a more detailed test to compare how certain tools perform in typical scenarios. Leave your comments to let us know which tools you are most interested in.
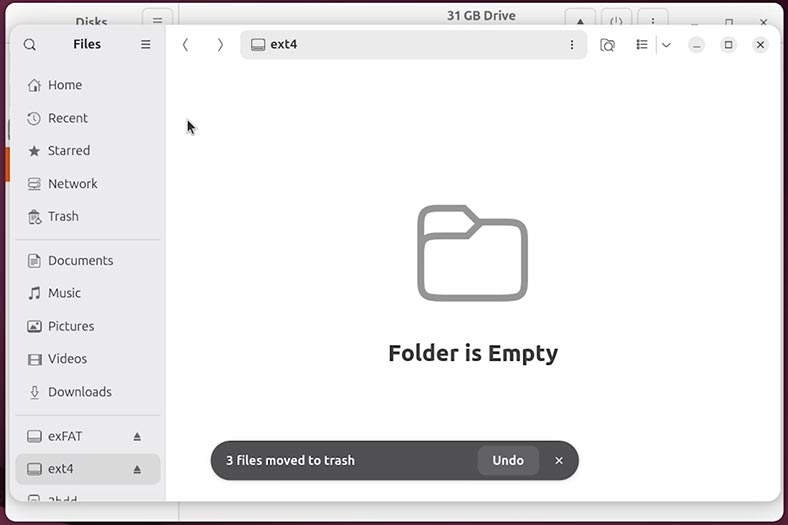
For our testing, we are going to remove files from a disk, and then review our top 10 list of apps based on how they manage to recover those files. You will find the top 3 tools in the final part of the article – so feel free to follow the link in the contents section if you only want to know about the best apps ever.

TOP 10 Data Recovery Tools in Linux
Tools using the Terminal
Let’s start with apps which are not actually classified as full-fledged data recovery tools. All of them lack a graphical interface, and some of them are very highly specialized.
10th position. SafeCopy
The tenth place goes to SafeCopy.
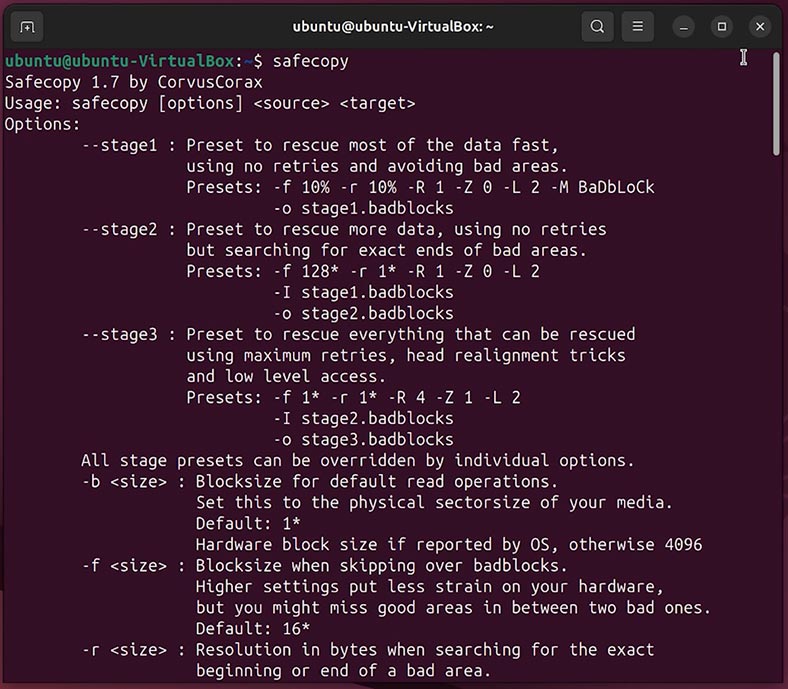
It’s not a classic tool to recover deleted files like PhotoRec or TestDisk, but only a means to copy safely all contents from a damaged device. It doesn’t recover specific files directly, but creates a perfectly complete image, which is then handled with other tools, such as Hetman Partition Recovery.
A good example of a basic scenario is copying contents of a disk into an image. You can do it with the following command:
sudo safecopy /dev/sdс1 /home/user/disk.img

where,
- /dev/sdс1 — the source device (a hard disk or USB stick).
- /home/user/disk.img — the directory where the image (resulting from the copy operation) will be saved.
SafeCopy will come in handy in situations when:
- a disk contains bad sectors;
- files are read with errors;
- your device freezes during copying operations;
9th place. DDrescue
In the next place, we find DDrescue.
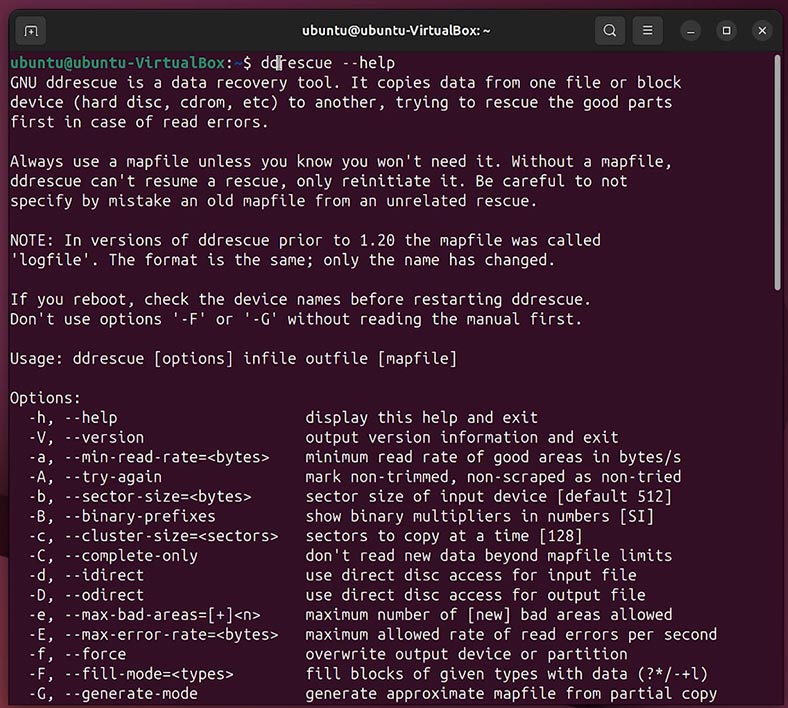
It’s a console utility designed to recover data from damaged disks or sectors, which runs read operations repeatedly on the lost areas, saves the process map and allows you to continue copying from the same place where it started.
Here’s an example of a basic command:
sudo ddrescue /dev/sdс1 disk.img rescue.log

where,
- /dev/sdс1 — source device.
- disk.img — the directory where the disk image will be saved.
- rescue.log — the log file where the process map is saved (and this element is compulsory!).
After an .img file is created, you can use other utilities to recover specific files. For example, Hetman Partition Recovery.
8th position. Extundelete
The 8th place goes to Extundelete.
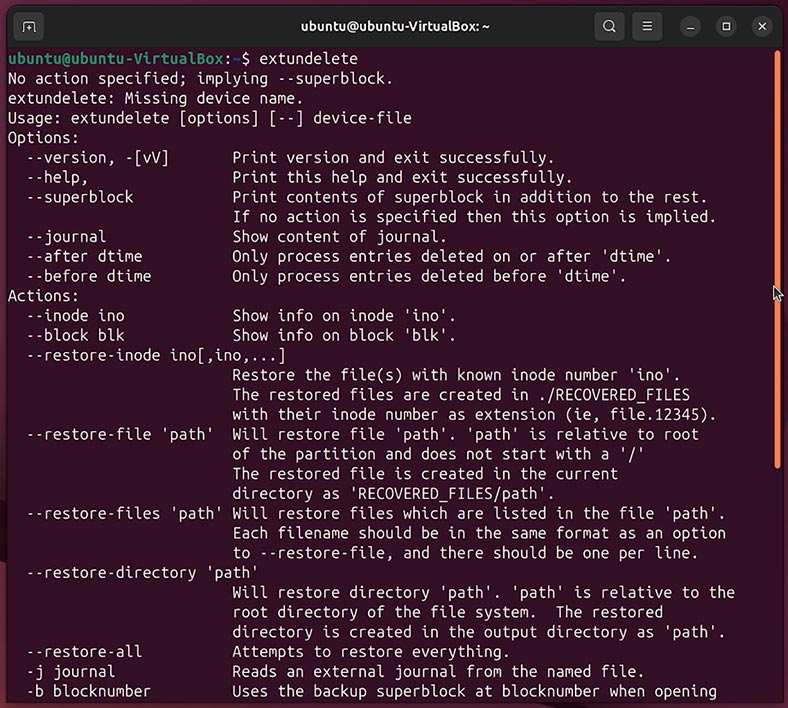
It’s a specialized utility meant to recover deleted files from volumes formatted in ext3 or ext4 file systems. It only works with unmounted volumes and lets you recover files which have not been overwritten yet.
To recover all deleted files from a certain disk, type this command:
sudo extundelete /dev/sdс1 --restore-all

If you want to recover a folder, type --restore-directory and add the path to such folder. If you need to recover a specific file, type --restore-file and the path to such file.
All recovered files are saved to the folder named RECOVERED_FILES/ in your current directory.
7th position. Foremost
The 7th place in our rating belongs to Foremost.
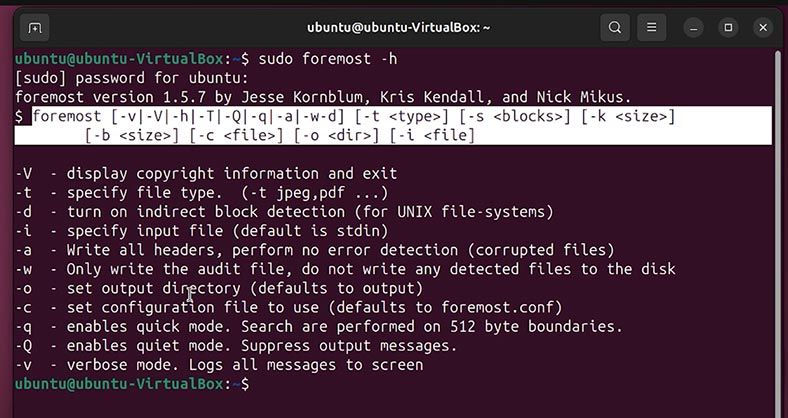
It’s a free utility for recovering deleted files that uses disk contents analysis for its operations (file carving). It doesn’t require any file system to be present, and it can even handle damaged partitions.
The main command for this tool looks like this:
sudo foremost -i /dev/sdс1 -o /home/user/recovery

where,
- -i /dev/sdс1 — indicates a disk or image
- -o /path_to_folder/ — where to save the recovered files
By default, Foremost can recover files in such formats as: jpg, gif, png, bmp, avi, exe, mpg, wav, riff, dll, zip, rar, pdf, doc, ole, ppt, xls, html, cpp, java, txt.
This is how results of recovery operations look like.
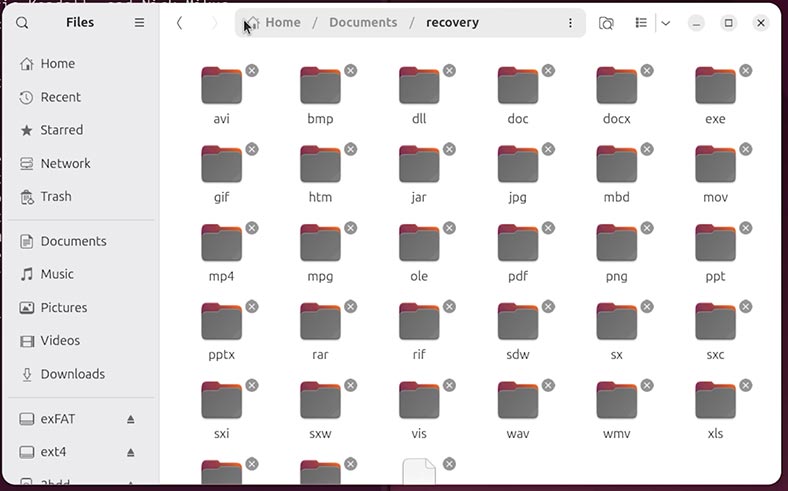
It’s a simple tool but the data recovery results are quite POOR.
6th position. Scalpel
The sixth position goes to Scalpel.
It’s a free and quick utility which recovers deleted files by analyzing raw bit data located on a device or in an image file. It is based on the same principles as Foremost.
Before you run the utility, specify the types of files to recover. To do it, open the configuration file which can be found here:
/etc/scalpel/scalpel.conf

Find the lines containing the required file types (they are commented with the # symbol) and uncomment them. After that, save the configuration file.
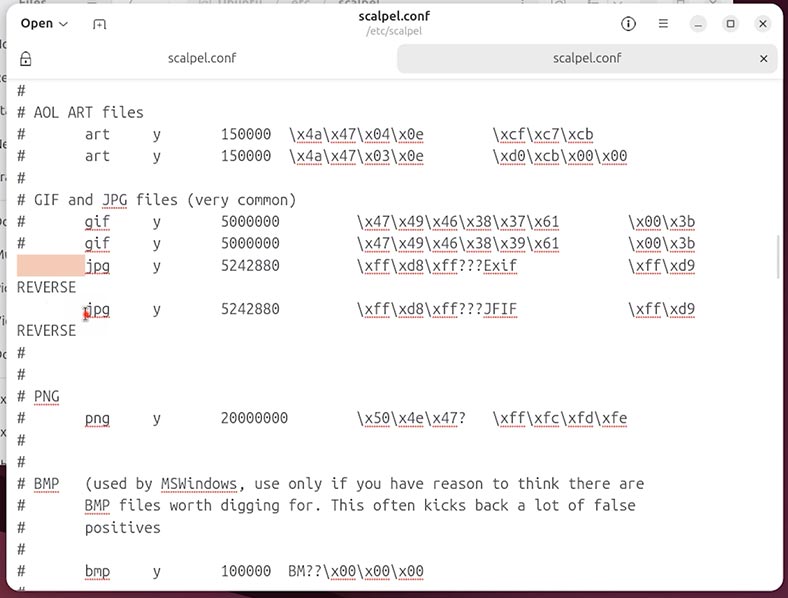
To start the recovery process, type the following command:
sudo scalpel -c /etc/scalpel/scalpel.conf -o /path/to/results /dev/sdb

where,
- -c — the path to a configuration file
- -o — where to save the found files
- /dev/sdb — the device, image or file
When Scalpel finishes its work, it will create the structure of the said directory with subdirectories by file type (for example, jpg/, pdf/, doc/) where all found data will be saved.
5th position. PhotoRec
The fifth and the fourth places have been assigned to classic data recovery tools for Linux - PhotoRec and TestDisk.

PhotoRec is a free open-source utility designed to recover deleted files from hard disks, USB drives, memory cards, and disk images. Although it is still a Terminal-based app, it’s got a sort of a menu for users to navigate.
PhotoRec is provided and installed within the same package with TestDisk.
The interface is text-based but convenient.
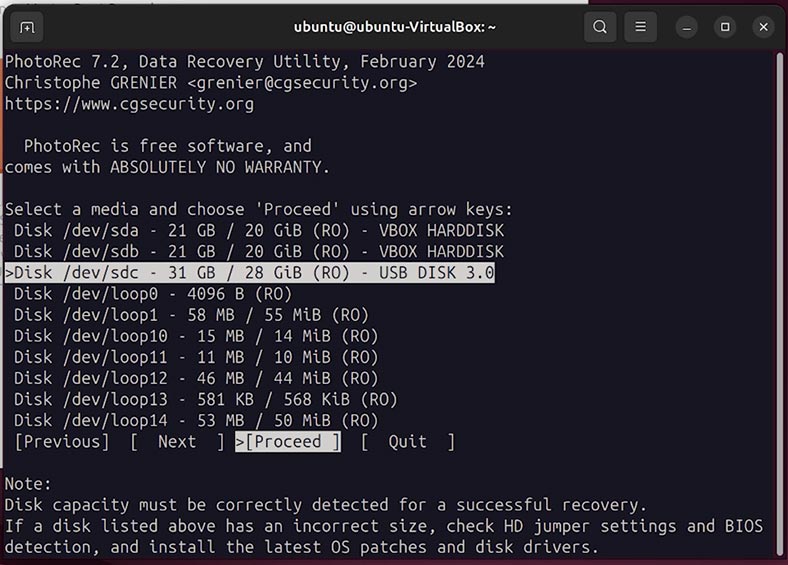
-
Select the device to recover data from.
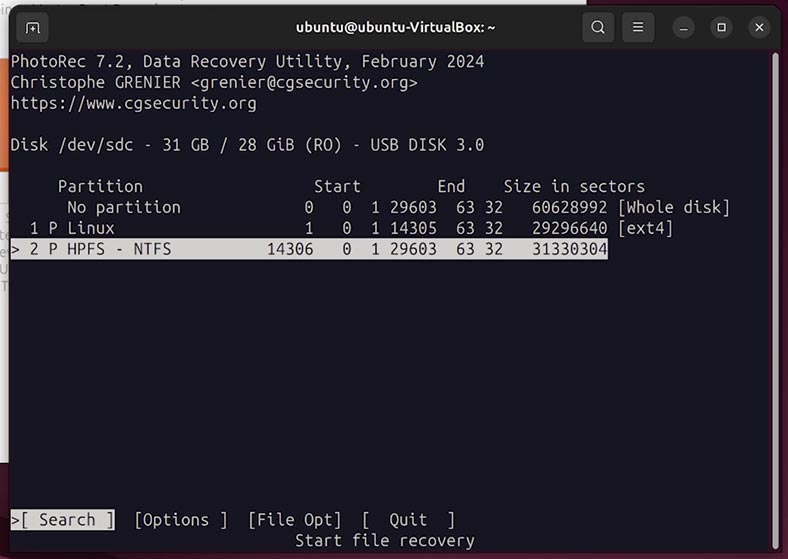
-
Select a partition or the entire disk
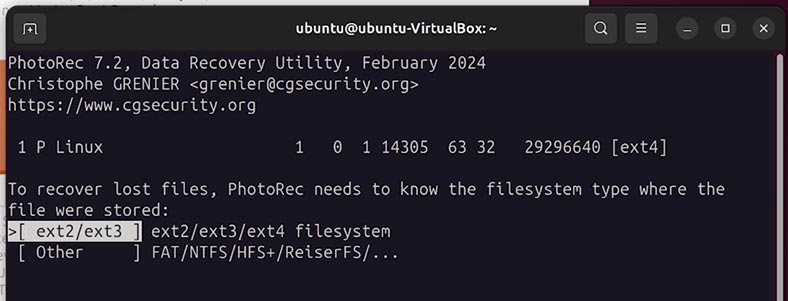
-
Choose the file system.
-
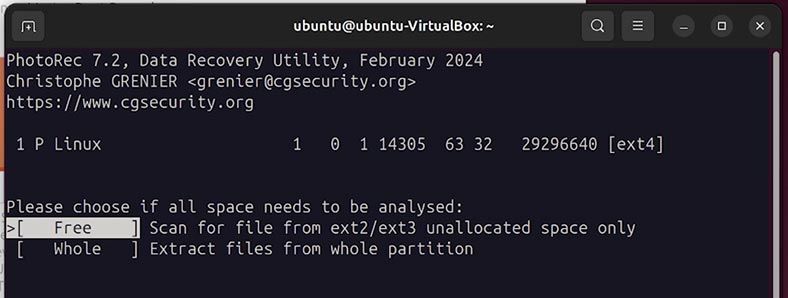
Now select [Free] — if you want to scan the unallocated disk space only, or [Whole] — if you want to scan the entire partition.
-
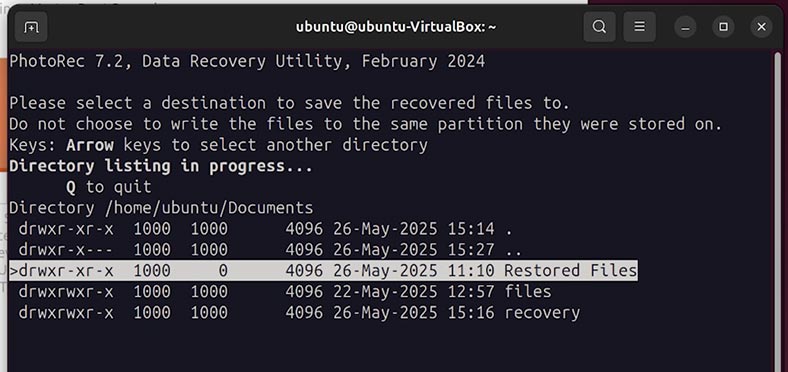
Select the directory where to save the recovered files.
-
Press С to start the process scanning the disk and recovering the data.
PhotoRec will create folders with the names recup_dir.1, recup_dir.2 where recovered files will be saved. File names will look like f12345678.jpg, f98765432.pdf - that is, their original names will not be restored.

The folder structure and file names will not be preserved, either. However, the recovery results are much better than all other tools we have mentioned before.
4th position. TestDisk
TestDisk is a free open-source utility designed to do any of the following: recovering deleted partitions, recovering deleted files, repairing partition tables, and restoring the boot sector.
Its interface and functionality are similar to those of PhotoRec, with certain exceptions.

To recover data:
-
Select a disk from the list and click Proceed.
-
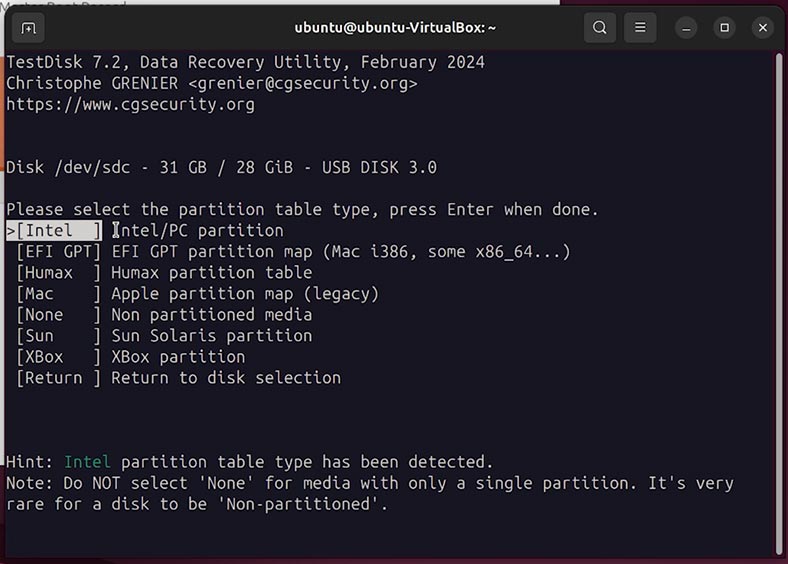
TestDisk usually identifies the disk type automatically. In my case, it’s an Intel (MBR).
-
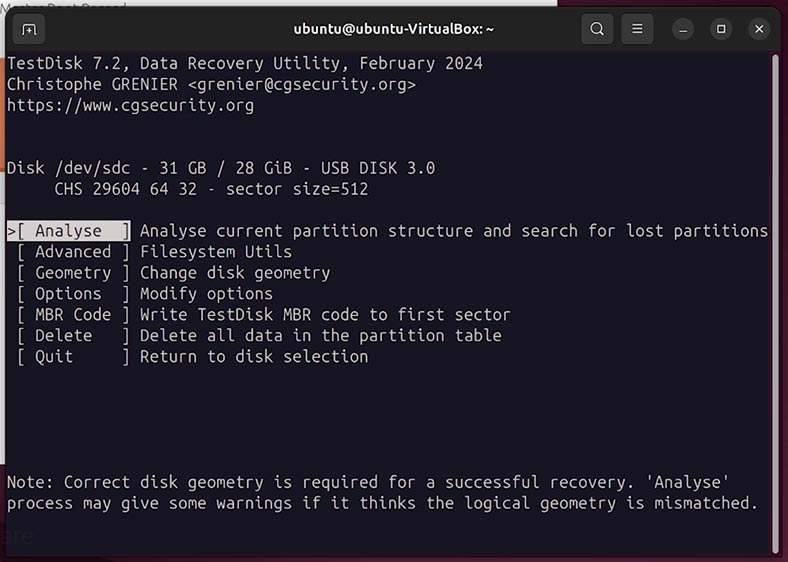
Select what you want to do.
-
Choose the partition from which some files were deleted and scan it.
-
After copying, the files will be saved to the selected directory.
TOP 3: data recovery tools for Linux with a graphical interface
For our top 3 list, we’ve chosen the apps which we believe are full-fledged data recovery utilities for Linux. All of them have a graphical interface, while the list of available functions and the quality of data recovery are as good as they could be.
3rd position. R-Linux
We give the third position to R-Linux.
R-Linux is a graphical app by R-Tools Technology which allows users to recover deleted files, recover data from damaged or formatted partitions, work with ext2/ext3/ext4., UFS, XFS, NTFS, FAT.
Please take note: R-Linux DOES NOT support such file systems as Btrfs and ZFS.
It’s got a simple graphical interface and can work with physical disks, partitions, and images.
To recover deleted files, run the app and follow these steps:
In the main window, select the disk or partition that you need to recover data from.
-
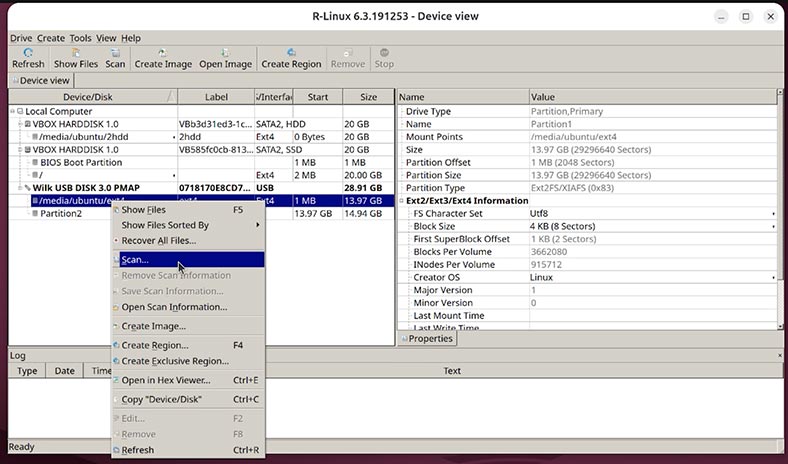
Hit Scan to have the app analyze the disk structure.
-
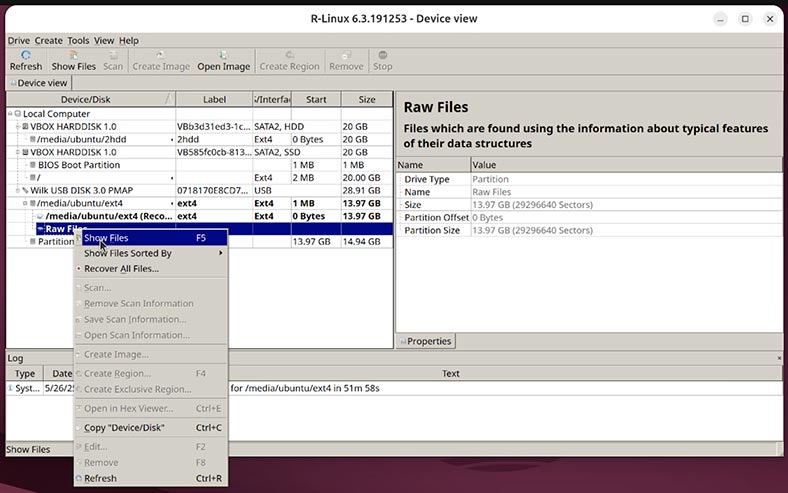
When the scan is over, click Show Files.
-
Find the required files or folders.
-
Select them and click Recover.
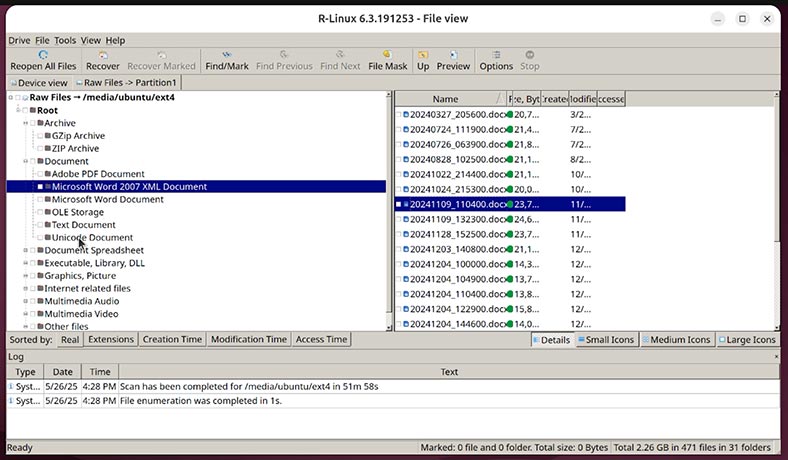
This app is good at recovering deleted data, but it has certain file system limitations, and its interface is quite cluttered and not too user-friendly. However, it is still more convenient than typing command in the Terminal.
2nd position. UFS Explorer
For the second best tool, our choice is UFS Explorer.
UFS Explorer is a more professional tool for recovering removed files and partitions, damaged file systems, RAID arrays, virtual disks and disk images.
It works with many file systems: ext2/3/4, XFS, ReiserFS, Btrfs, ZFS, NTFS, FAT, exFAT, HFS+. The tool also supports Linux, Windows, and macOS.
To recover deleted data:
-
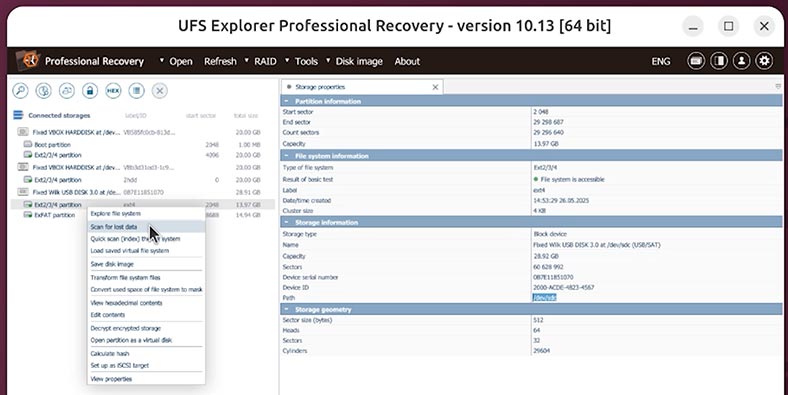
In the main window, select the disk, partition or image that you need to recover data from.
-
The app will scan the file system structure.
Typically, a disk scan takes quite a long time to complete, since there is no option to run a fast scan instead.
-
In the file system browser window, find the files and folders that have been deleted.
-
Deleted files are often marked with a red cross or placed into the category entitled Deleted files.
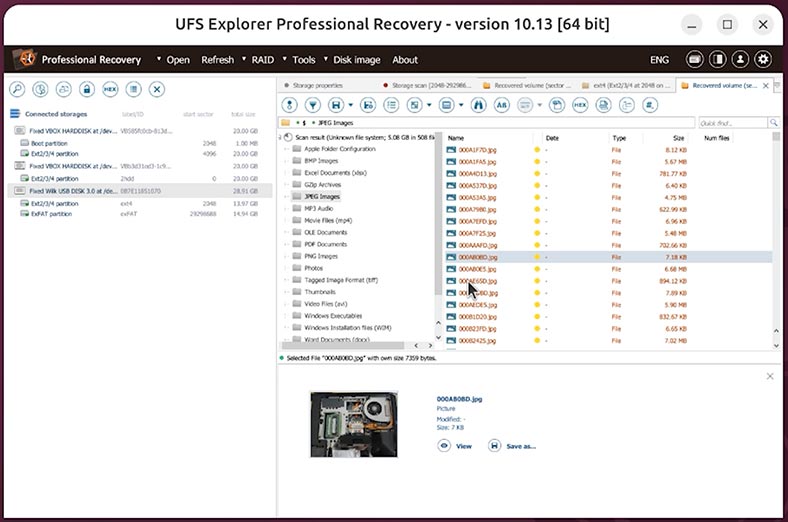
-
Select the required items and click Save (Recover).
-
Choose the directory where to save the recovered data.
The app interface is quite convenient, but it can be difficult for novice users to navigate. The range of functions it offers is pretty wide.
1st position. Hetman Partition Recovery
And finally, the first place we give to Hetman Partition Recovery.
This is a powerful data recovery tool for Linux, Windows, and MacOS. Hetman Partition Recovery can restore deleted files and folders, as well as lost, damaged or formatted partitions.
This professional tool is able to scan hard disks, USB drives, memory cards, disk images and virtual machine disks.
To recover deleted data:
-
Install and run Hetman Partition Recovery. You can find the corresponding link in the description below.
The tool recovers data from any devices, regardless of the cause of data loss. -
In the left-side window the program will display all existing local disks as well as physical disks connected to this computer.
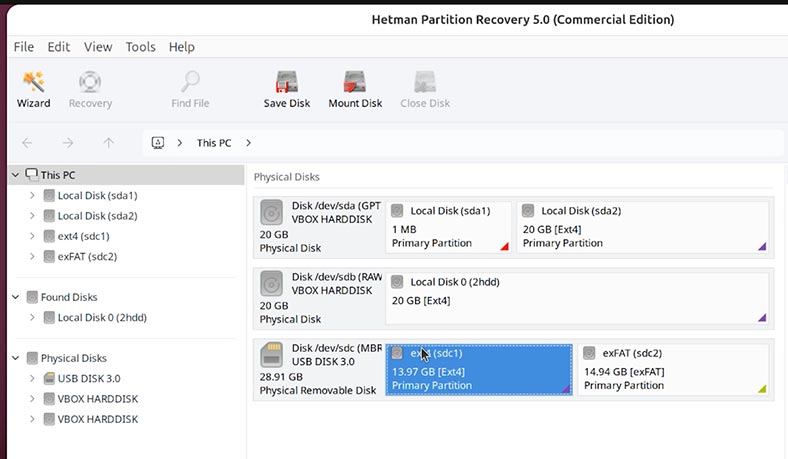
-
In the Disks tool, I can see that the required disk has the name sdс1. And it has this size.
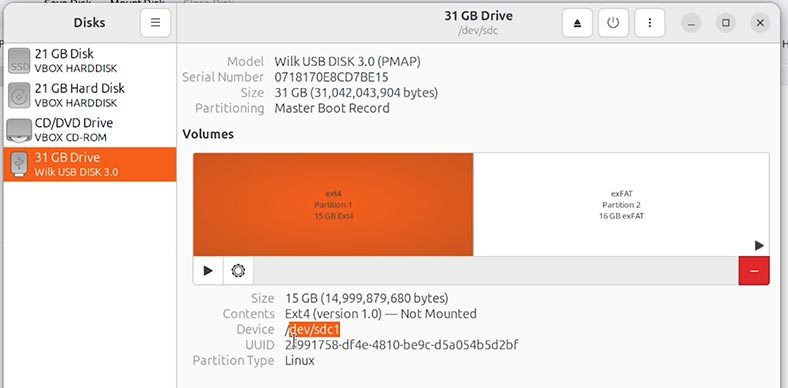
-
I can also see this disk in the app window. It means I will be recovering lost files from this particular disk.
-
To do it, let’s right-click on it, and choose Open.
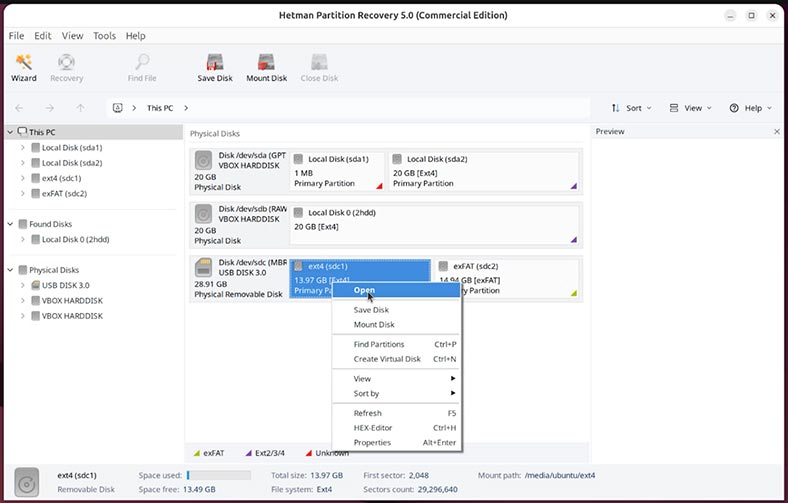
-
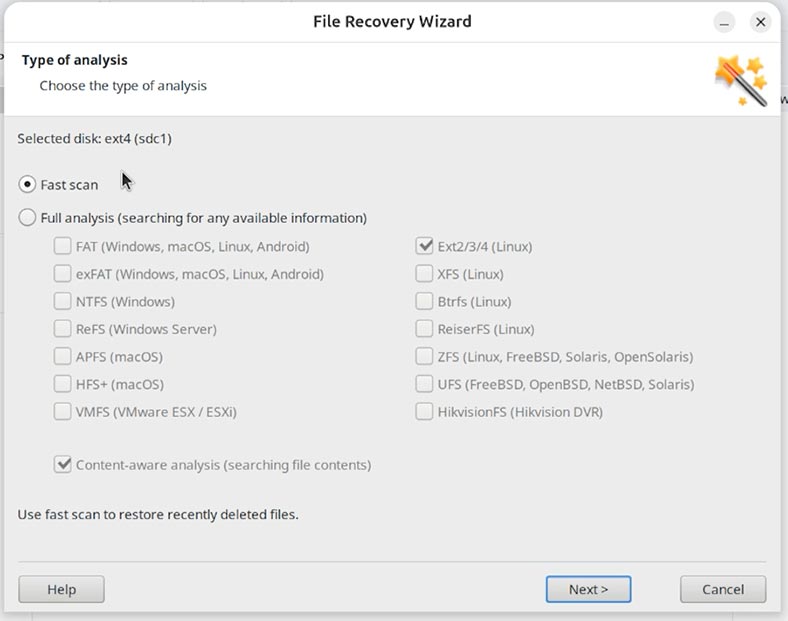
For starters, let’s try Fast scan.
-
As you can see, the app handled this task very quickly, identified the file system automatically, scanned the disk and found the deleted data.
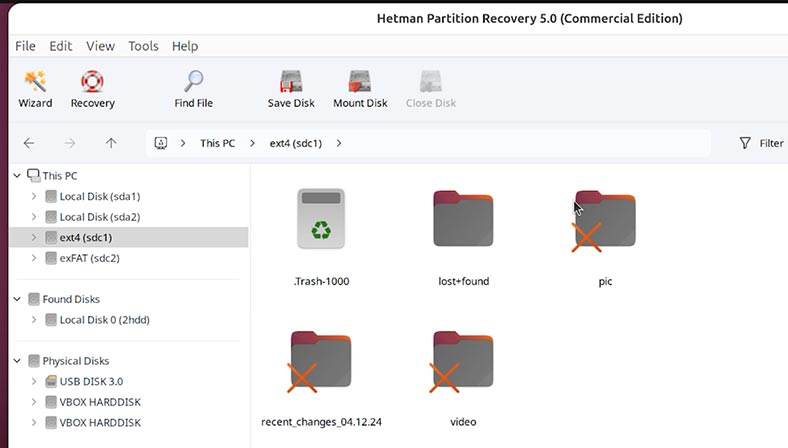
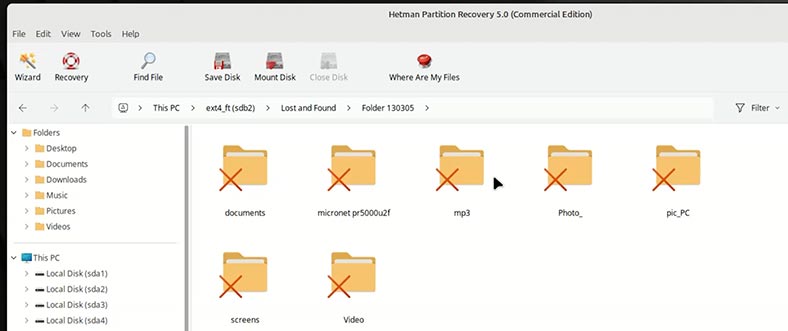
Take note, that even the file and folder structure has been preserved.
-
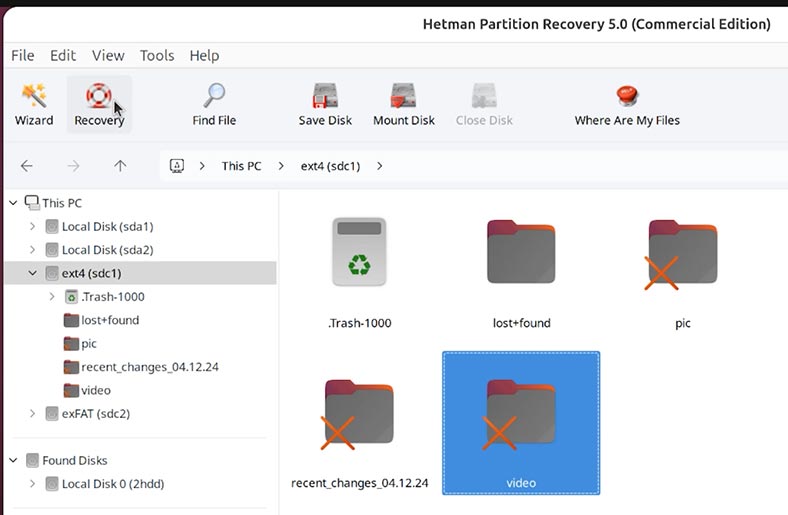
As you can see, all lost files and folders are here. Their contents can be seen in the preview window. To do it, just click on a file.
-
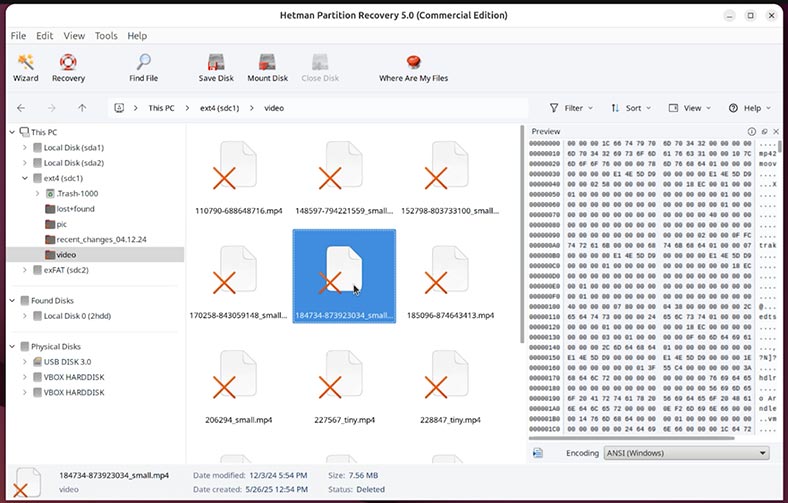
For some reason, the contents of video files are not displayed in the preview window. Let’s try to restore them to make sure that this recovery tool can handle them properly.
-
To have the files back, select them and hit the Recovery button.
-
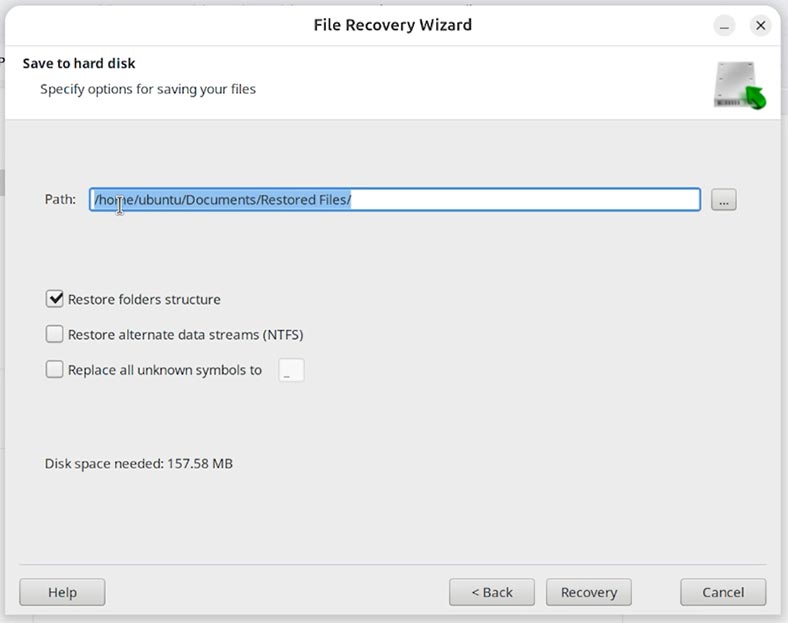
Choose the drive and folder for recovery.
-
Finish. The files are recovered.
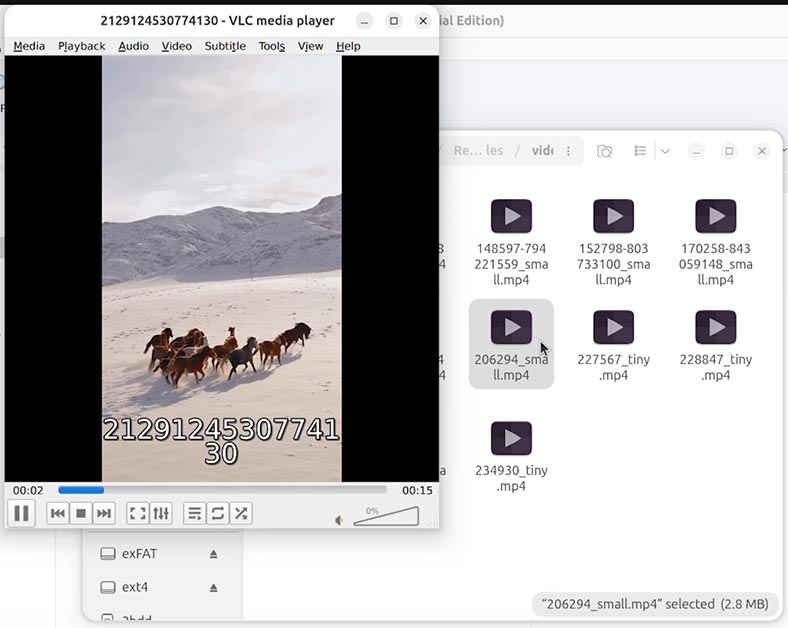
As you can see, the video files are recovered now. They can be played, and there is no damage.
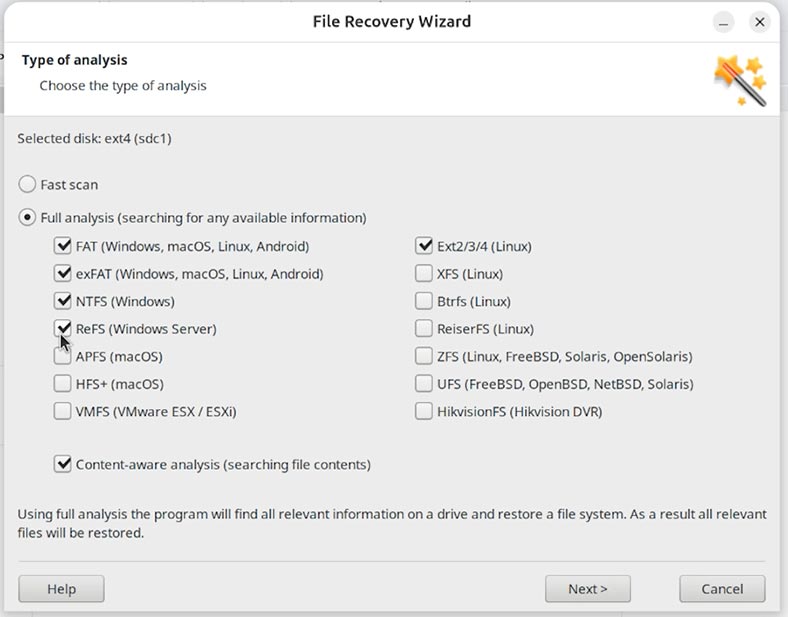
If your files can’t be recovered after a Fast scan, you can always bring them back with Full analysis.
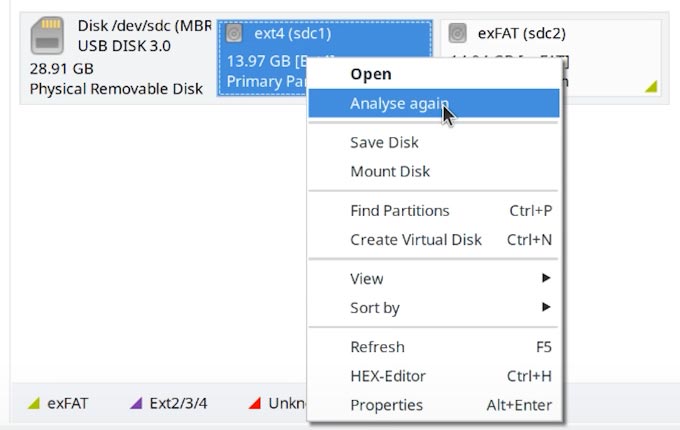
To do it:
-
Select Full analysis and specify file systems for the partitions you’d like to recover your data from. As you can see, the app supports quite a wide range of file systems.
Pros and cons of data recovery tools for Linux
| Position | Tool | Pros | Cons |
|---|---|---|---|
| 10 | SafeCopy | Easy to use, recovery from damaged sectors | Limited functionality, no GUI |
| 9 | DDrescue | Highly effective in copying from damaged storage devices | Requires Terminal knowledge, no visual interface |
| 8 | Extundelete | Designed for ext3/ext4, easy to run | Works only with ext-family file systems |
| 7 | Foremost | Good at recovering photos, videos, documents by signature | No GUI, sometimes fails to preserve file names |
| 6 | Scalpel | Flexible format settings to search for files | Relatively old, updates are rare |
| 5 | PhotoRec | Powerful data recovery potential, even from damaged devices | No graphical interface, difficult to navigate |
| 4 | TestDisk | Recovers partitions, MBR, multi-OS support | The interface is too complicated for novice users |
| 3 | R-Linux | User-friendly interface, support for ext2/ext3/ext4 | May have difficulty identifying some new file systems |
| 2 | UFS Explorer | A powerful professional solution with RAID and LVM support | Paid license, complicated settings |
| 1 | Hetman Partition Recovery | Fast scan, convenient interface, support for multiple file formats and file systems, data recovery for virtual machines. Versions available for Linux, Windows, MacOS. | No preview option for video files. |
Conclusions
As we have demonstrated, Hetman Partition Recovery turns out to be the most user-friendly tool while offering the widest range of features and the highest quality of data recovery.
However - and I’d like to emphasize it one more time - this article is meant to be a sort of review to introduce you to the available tools you can choose from when you need to recover data from Linux. The choice is always yours - so feel free to go for the tool or app that seems the best for your case.


