How to Delete Facebook Account Without Losing Photos & Contacts
Safely Remove Your Facebook Account: Keep Your Photos and Contacts Intact with This Step-by-Step Guide! Ready to say goodbye to Facebook but worried about losing your precious photos and contacts? In this comprehensive tutorial, we’ll walk you through the process of removing your Facebook account while ensuring that your photos and contacts remain safe and sound. From backing up your data to navigating the account removal process, we’ve got you covered every step of the way. Whether you’re switching to a new platform or taking a break from social media, you can trust us to help you preserve your digital memories.
- The difference between deactivating and deleting a Facebook account
- Deactivating a Facebook account
- How to remove a Facebook account entirely but still keep your data?
- How to remove a connected company page on Facebook without losing data?
- Conclusion
- Questions and answers
- Comments
The difference between deactivating and deleting a Facebook account
In Facebook, you can choose to either deactivate an account temporarily or delete it entirely. Here’s the main difference. When deactivated, the account doesn’t work anymore and other users can’t see your Facebook account. However, deactivation doesn’t remove any data or published posts, and lets you use Facebook Messenger to chat with your friends. Later, you can activate your account at any time, if necessary.
On the contrary, you can activate an account again once it has been deleted. All of its contents will be removed without any chances for recovery, and you won’t be able to sign in to other web resources that use the Log in with Facebook option (such as Spotify and Pinterest). Also, removing a Facebook account will make you lose access to Facebook Messenger and all your chats there.
So if all you need is to stop using Facebook for some time but retain the functionality of Facebook Messenger, you should go for deactivation. After all, if you don’t feel like using this social network any longer, the Facebook can be deleted forever.
| Criteria | Deactivating Account | Deleting Account |
|---|---|---|
| Profile Access | Temporary, profile is hidden but can be restored | Permanent deletion, no recovery possible |
| Messages and Data | Messages remain available to friends | All data, including messages, is deleted |
| Messenger | Messenger continues to work | Messenger is deleted |
| Activity | Some data (e.g., comments) remains visible | All user data is removed from the platform |
| Deletion Time | Instant | Deletion takes up to 30 days |
| Recovery | You can log in and reactivate the account | Recovery is impossible after deletion is completed |

🚫 How to Delete or Deactivate a Facebook Account Temporarily from Phone 📱 or PC 💻
Deactivating a Facebook account
The procedure for deactivation of an account in Facebook is easy and only takes a few simple steps.
Step 1. Use a browser to go to Facebook website and log in to your account using the registration data you specified when this account was created.

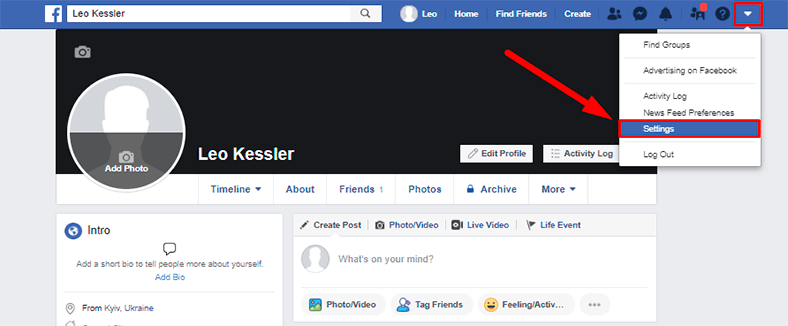
Step 2. In the upper right corner of the page, click the triangular button to open the nested menu, and select the line Settings.
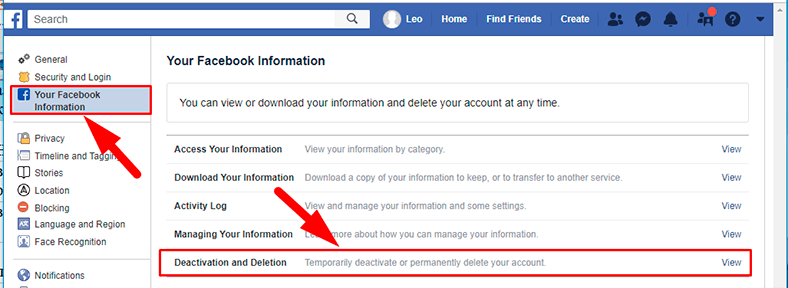
Step 3. In the settings page, look at the left side panel and switch to the tab Your Facebook Information. In the central panel, select from the available variants the line Deactivation and Deletion by clicking on the line or on the text link View.
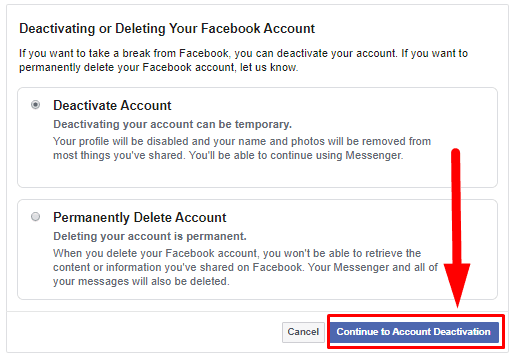
Step 4. In the new page, find the option Deactivate account. Deactivating your account can be temporary, and click Continue to Account Deactivation.
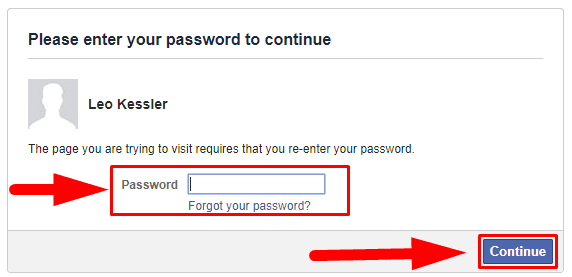
Step 5. To make sure the account can’t be deactivated by accident or deliberately by third parties, Facebook will ask you to enter the current password to your account again, and click Continue to confirm your choice.
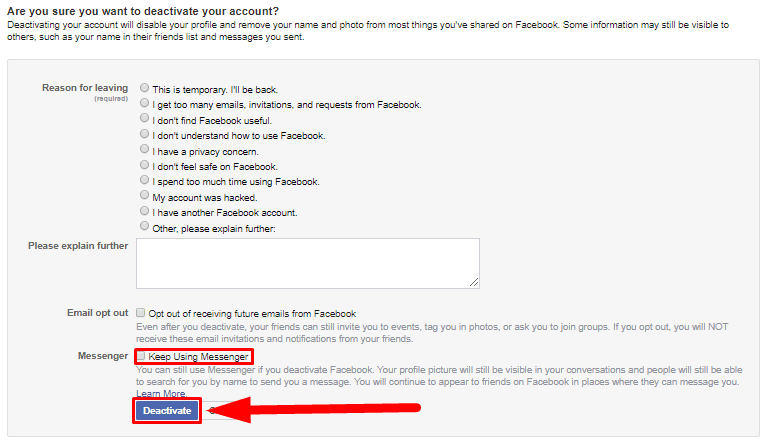
Step 6. At this stage of deactivation, check the boxes for required settings (for example, next to Keep Using Messenger, if you want to chat with friends in this app), and then click Deactivate to accomplish the process of blocking your account and removing your name and photo from most materials you shared on Facebook.
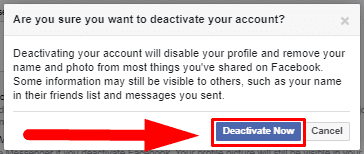
One again, you will be asked if your decision is final.
When you need to activate your account again, just repeat this procedure step by step and make your account active again, with full access to all data and functions.
How to remove a Facebook account entirely but still keep your data?
Before you actually start removing a Facebook account, you need to follow the procedure that allows you to keep the data that might be important to you, at your choice. This is how it looks like.
Step 1. Use any browser to go to Facebook and log in to your account using the corresponding button.

Step 2. Repeat the necessary steps to access the account settings page by clicking on the triangular button in the upper right corner of the Facebook page and choosing a corresponding line.

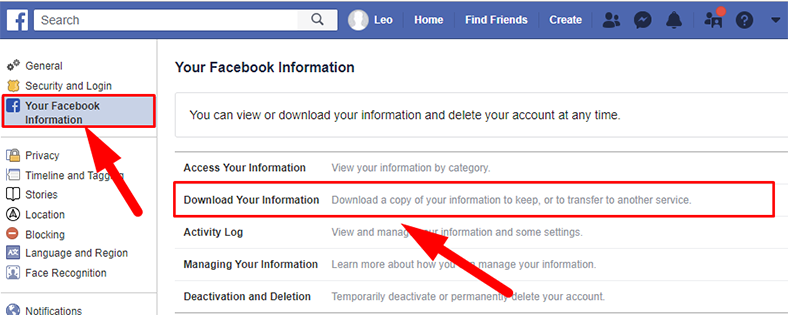
Step 3. In the left side panel switch to the tab Your Facebook Information to access the available options to work with data. In the central panel, choose Download Your Information by clicking on the text link View or just clicking on the corresponding line.
Step 4. In the download page, you will see quite a long list of all categories where you might have done certain actions in Facebook and where there is some data available for saving. This list includes all data uploaded to Facebook servers, such messaging in Facebook Messenger, added photos and videos, all posts and comments, contacts, friends and followers, payment history and other information related directly to this account, including complete account information. In this page, select the stuff you need to save – for example, if you are only interested in Photos and Videos, uncheck the boxes for other categories. Otherwise, use the link Select all if you need to save all data of this account.
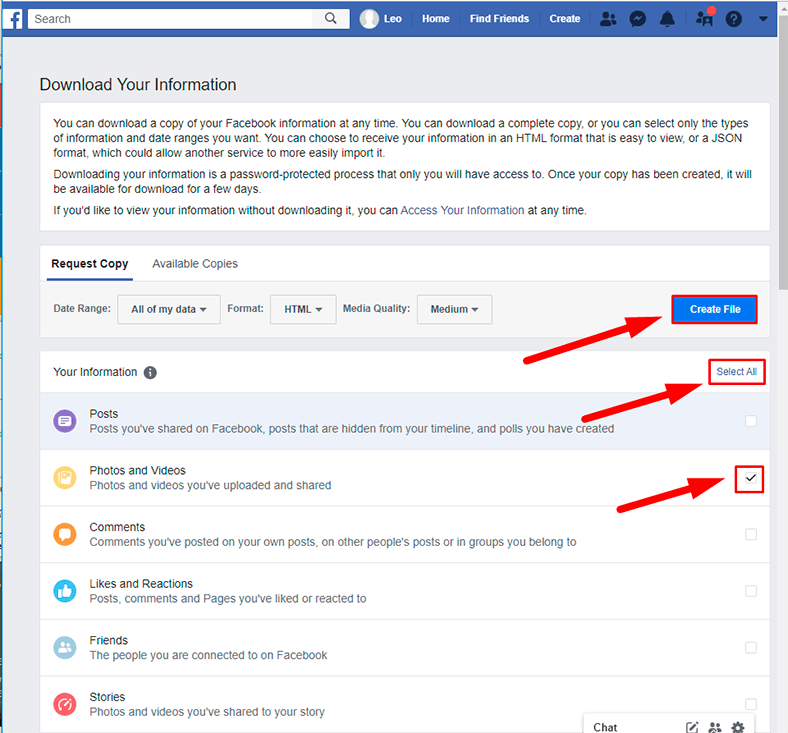
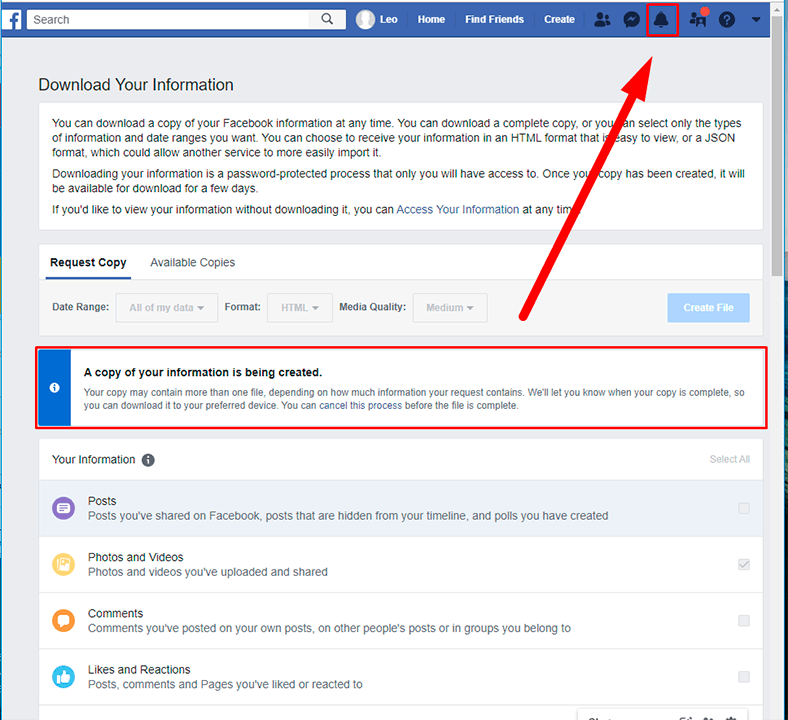
Now click on the Create file button located over the list of data. Facebook will initiate collection of data and prepare it for download as a archive file. Depending on the amount of your data, it may take from a few minutes to several hours. You can even close Facebook while user data is being prepared. As soon as it’s ready for download, Facebook will send you a notification that will show up in the corresponding panel.
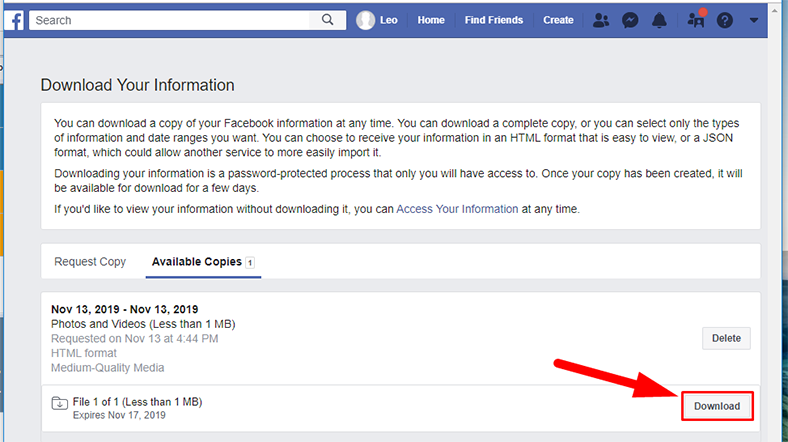
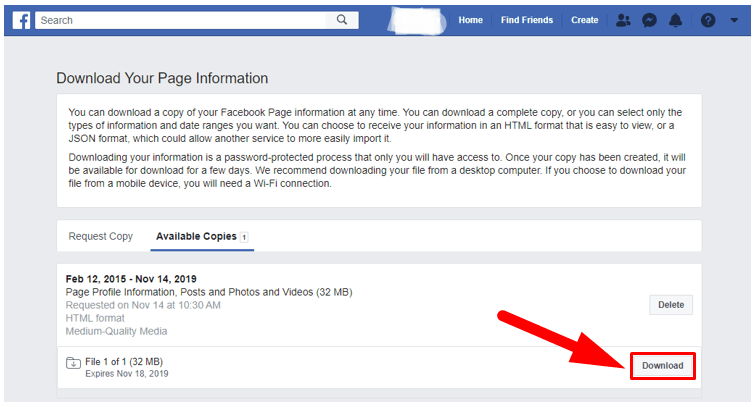
Step 5. In the page Download Your Information find the tab Available copies containing the file prepared by Facebook and save it by clicking on the Download button.
For security purposes, Facebook will ask you to enter the password again to confirm that this account is yours.
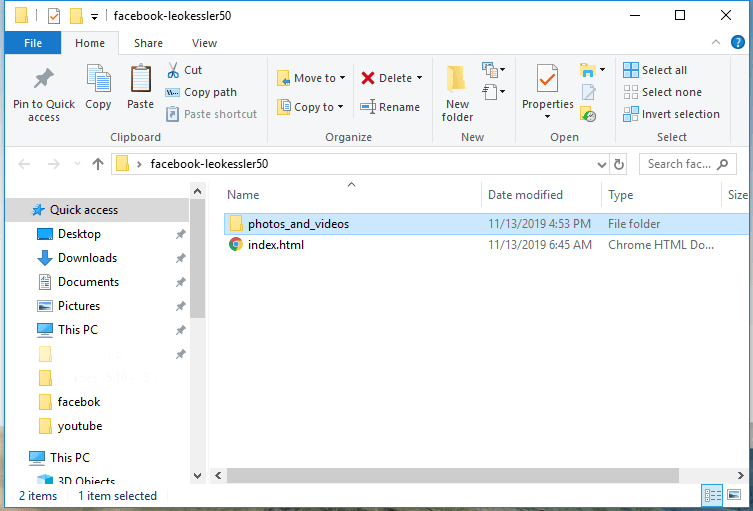
Now unzip the archive, and open it to make sure that it contains the data you requested. For example, the file format for download was selected as HTML. As long as the chosen category is Photo and video, the archive contains only one generalizing HTML file and a folder with the downloaded photos and videos.
Now that all data important to the user has been saved you can proceed with removing the Facebook account. This is how you do it.
Step 1. Go back to Settings and in the section Your Facebook Information, find the line Deactivation and Deletion in the central panel. Click on it or on the text link View.

Step 2. As user data has been saved, you shouldn’t worry about losing it, and now you can remove the account. Choose Permanently delete account and click on Continue to Account Deletion.
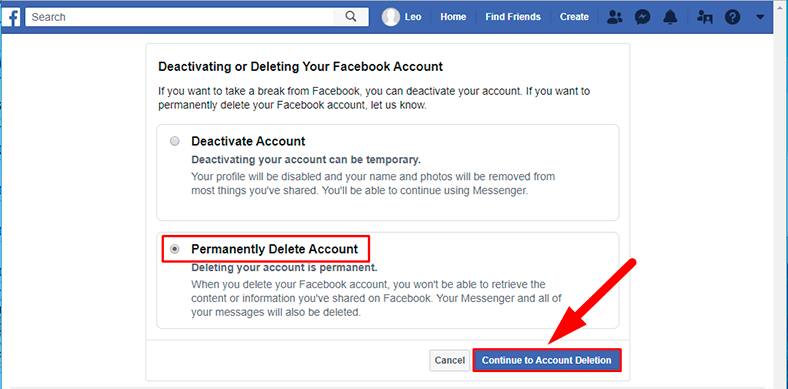
Step 3. Facebook suggests you to choose between deleting an account entirely or only deactivating it and keeping Messenger enabled, and offers to download your information which will be lost if you proceed with deletion. If you do want to remove your account instead of deactivating it, click Delete Account.
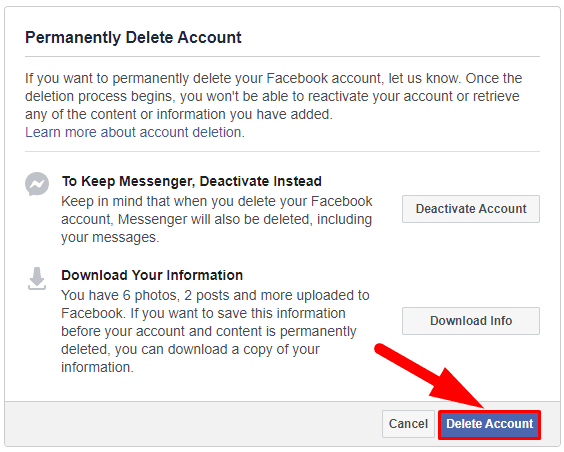
Now you have to confirm it is your account by entering your password. Do it and click Continue.
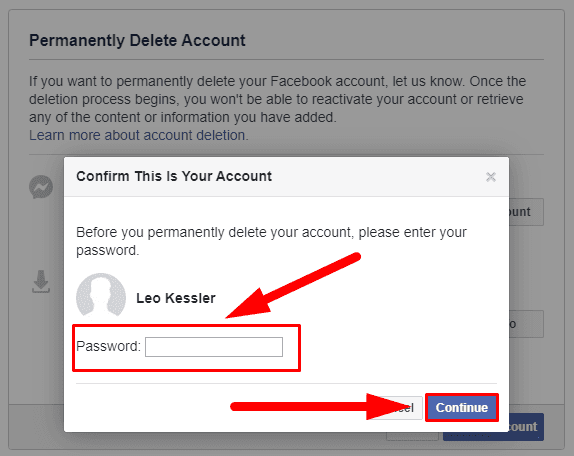
Finally, click Delete Account to start the process. The website warns you that you still have 30 days before irreversible changes begin to take place and the account will be removed entirely.
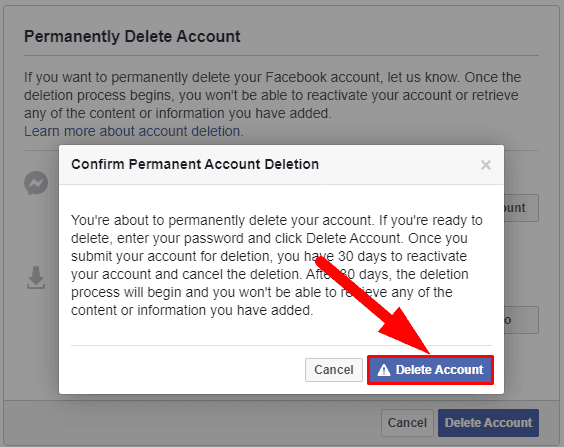
Note. Facebook will not delete anything from your account for 30 days so you can go back to this account at any time and cancel deletion – if you still need to use it.
How to remove a connected company page on Facebook without losing data?
To delete a connected company page on Facebook you need to perform a sequence of actions which we will describe below.
Step 1. Log in to your Facebook account in any browser by filling in the corresponding fields and clicking the corresponding button.

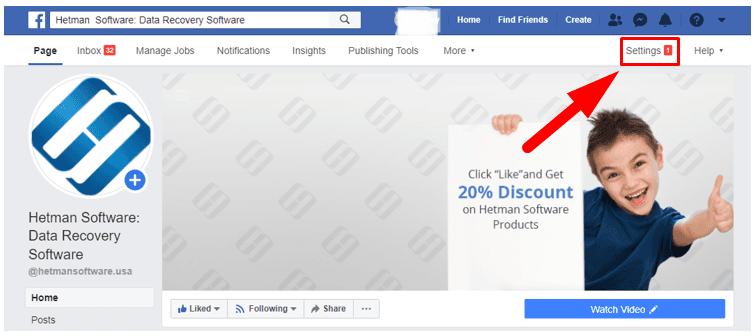
Step 2. Now go to the company page which you need to remove. In the main control panel, choose Settings.
Step 3. You will see all available page settings arranged by category. Scroll down and select Download Page by clicking on it or using the text link Edit.
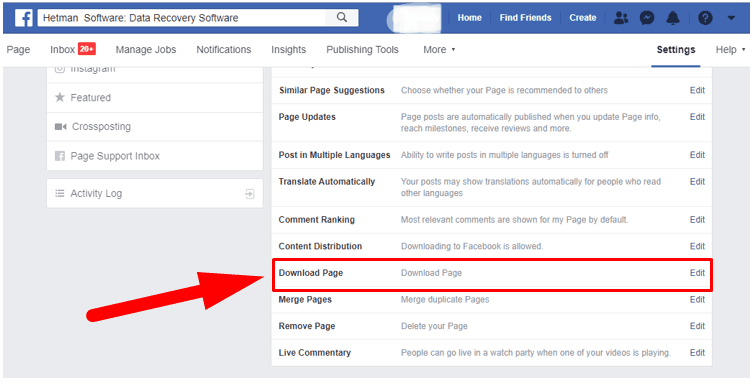
Step 4. It will open the section Download Page, where you can get access to copies of posts, photos, videos and all other information in such page.

Step 5. As you click on the link, the page for downloading user data will open, will all information divided into categories. Choose all the necessary data by checking the boxes next to the corresponding categories or click Select all if all data has to be saved. The company page information has less categories than you would see in user account information. The options available only include Posts, Photos and Videos, Events, Page Profile Information, Other Page Activity and Page Settings.
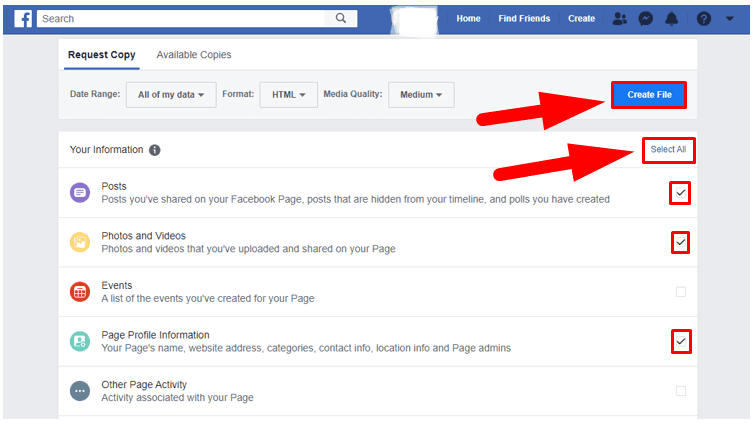
Now click Create File button over the information table and wait for a Facebook notification that the archived file is ready for download.
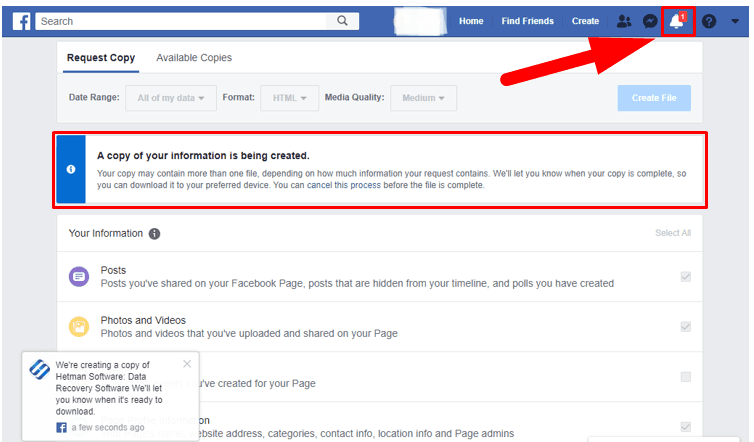

Step 6. Download the archive to your device by clicking Download. Now open the archive and make sure it’s got all the data you need.
Step 7. Now that the data is all right, open the settings page again and select Remove Page, by clicking on it or on the text link Edit.
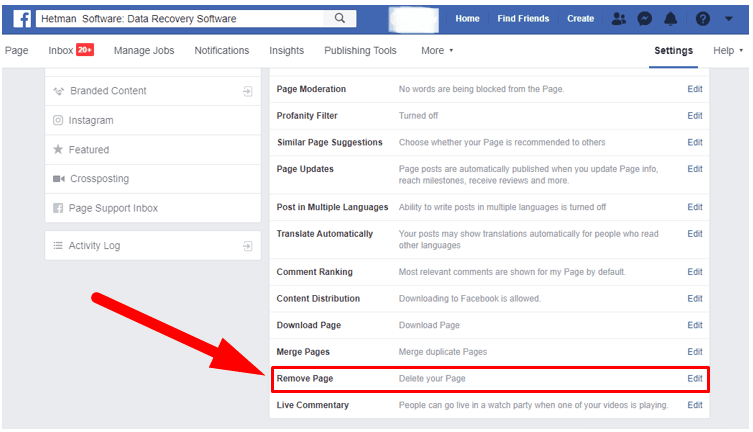
Step 8. The Remove Page section will contain a text link Delete Company Name, clicking on which starts the deletion process.

Note. You will have a 14-days’ time period when you can go back and cancel page deletion if you need.
Conclusion
Facebook unites its users into groups by interests so that they find new people to communicate with as well as exchange all kinds of information and keep in touch no matter where they are. However, scandals related to Facebook leaking personal user data to third-party companies and interested parties, and other instances of massive disclosure of personal data of its registered users have seriously undermined people’s trust to this social network, and many of us may start thinking of removing their accounts to secure themselves from this threat in the future.
Using the advice given in this article, you can now easily deactivate your account but retain the opportunity to use the Facebook Messenger app and continue exchanging messages and videos, or remove a company page or your personal account entirely, but with downloading all the information you created or received while you were a registered Facebook user.

🔓 How to Restore Access to Facebook Messenger, 🕵️Learn the Login and Password, and Read Chat History


