RAID 5 Data Recovery: What You Need to Know for NAS QNAP TS-412
Unlock the mysteries of RAID 5 data recovery on the NAS QNAP TS-412 with this comprehensive guide. Whether you’re facing data loss or seeking preventive measures, our expert tips and strategies will help you navigate the recovery process effectively. From understanding RAID configurations to implementing recovery techniques, this article covers it all. Don’t let data loss hold you back; join us as we demystify RAID 5 data recovery on NAS QNAP TS-412 and empower you to regain control of your data.
- Method 1. Recovering Deleted Files From The Network Recycle Bin
- Method 2. Replacing a QNAP Device
- Method 3. How To Use Hetman RAID Recovery
- Conclusion
- Questions and answers
- Comments
A QNAP NAS storage system consists of several hard disks. To improve resilience and data safety, such devices enable you to create RAID systems of various types. However, even the most reliable storage systems may encounter emergencies like accidental deletion of files, formatting or damaging the hard disk, system errors, controller failures and other hardware issues, which may result in loss of important data.
| Reason | Description |
|---|---|
| Hardware failure | Physical damage to hard drives, controller failures, or other NAS device components. |
| RAID configuration errors | Incorrect RAID array configuration or improper recovery after failures. |
| Virus or malware attacks | Malicious software can delete or encrypt data, making it inaccessible. |
| File system corruption | Data structure corruption on hard drives due to power outages or writing errors. |
| Firmware update failure | Failures during NAS firmware updates can lead to data loss or access disruption. |
| Human error | Unintentional file deletion, disk formatting, or incorrect system configuration. |
| Power outages | Sudden power cuts can cause data corruption or information loss. |
| Disk overload | If disks are completely full, the system may not correctly save new data, leading to data loss. |
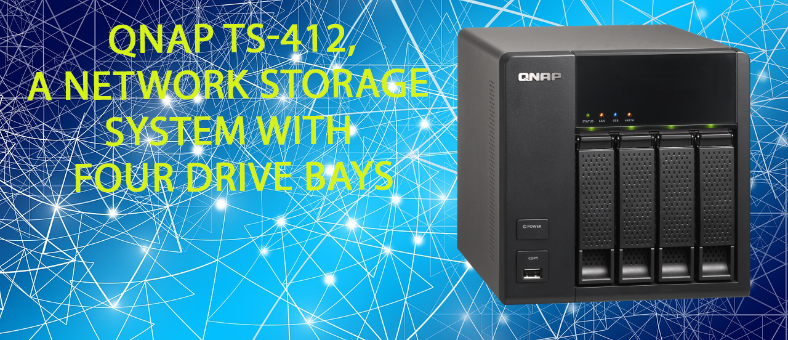

☁️ How to Recover Data from a RAID 5 Storage System Based on QNAP TS-412 ☁️
Method 1. Recovering Deleted Files From The Network Recycle Bin
If NAS works properly and you just removed some important files by accident, you can try restoring them from the Network Recycle Bin.
You can configure the Network Recycle Bin or check its settings by accessing Control Panel – Network & File Services – Network Recycle Bin.
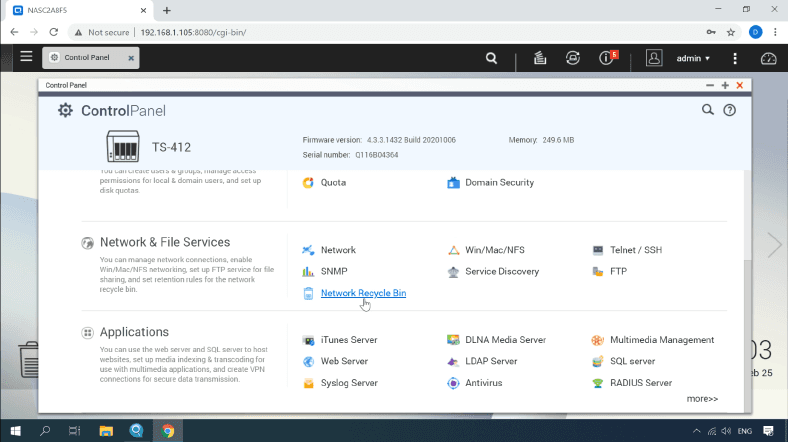
Check if this option is enabled.
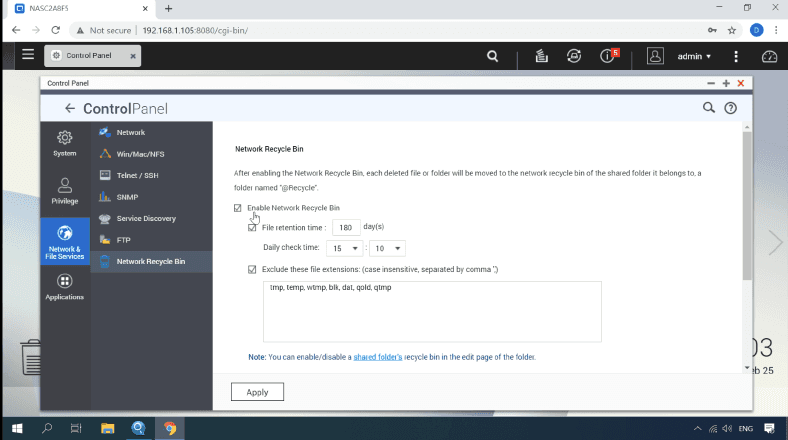
Then make sure it is enabled for the specific folder from where the data was deleted. Click on this Shared folder link, find the required directory in the list and click on the Folder Property button to modify its settings. The option to Enable Network Recycle Bin must be checked.
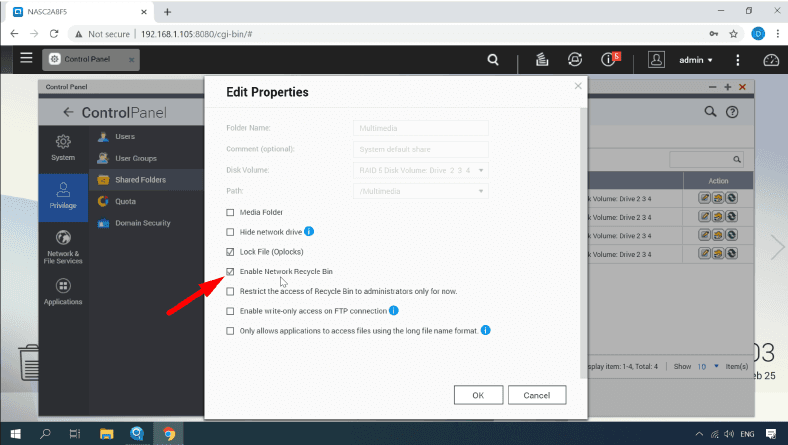
Now that the shared folder option is enabled, the deleted files must be in that folder, and they can be recovered.
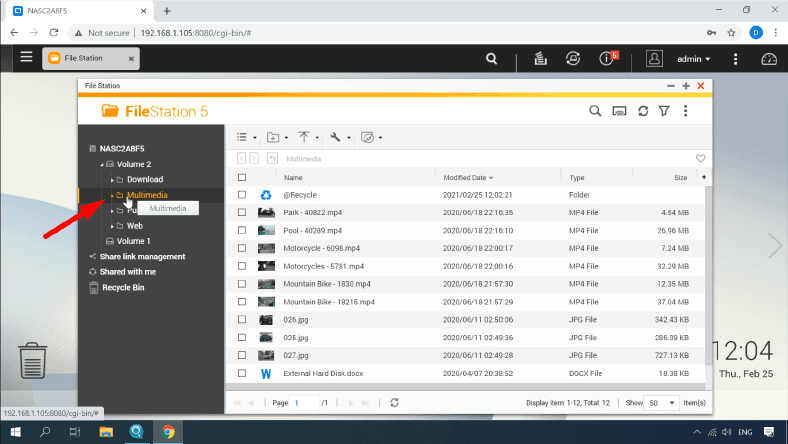
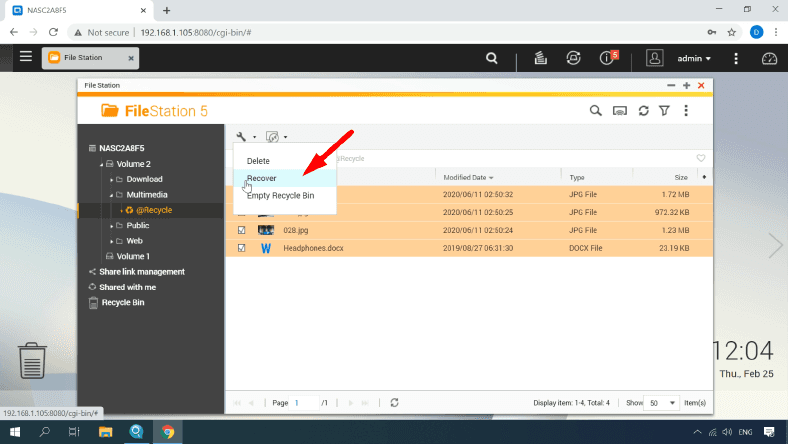
Open File Station and go to the directory where the removed files used to be stored; you will see a folder with the name @Recycle which contains all files deleted from this directory.
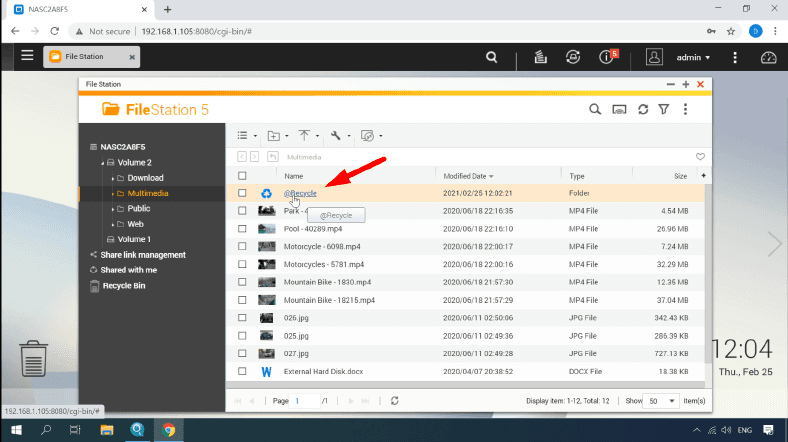
Select them and click Recover to have them reappear in their original location.
Method 2. Replacing a QNAP Device
If your QNAP system won’t turn on, it may be out of order. But what can you do with all the data that’s still on the disks? There is no way to access the files by just connecting the disks to the computer. You can try replacing the device itself, but there’s no guarantee that the information will still be intact after you configure the new server.
Take the disks out of the QNAP device, and remember the order in which they were arranged: this is something you’ll need for the recovery process.
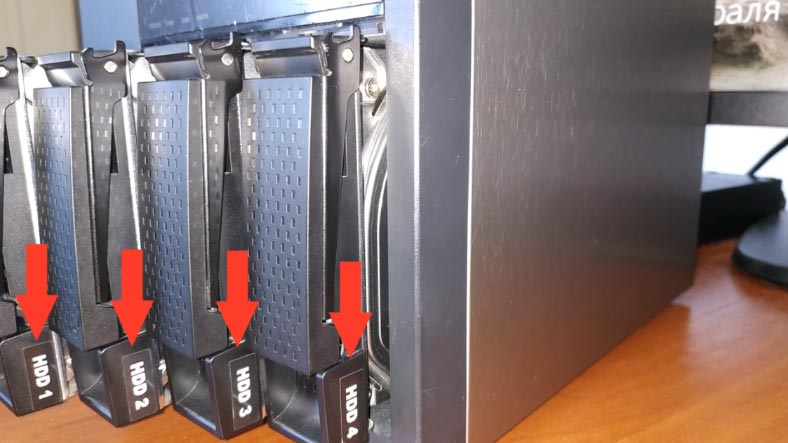
Usually disk bays have corresponding factory markings.
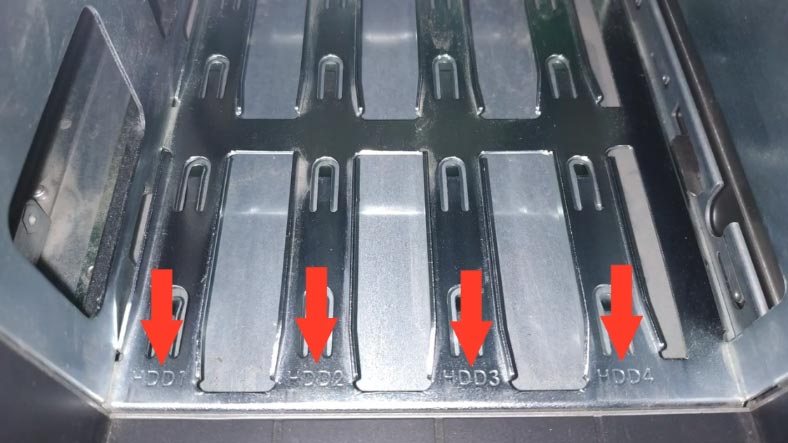
After that, put the drives into the new QNAP, observing the correct order. If the damage has not affected the storage devices and their contents, your new system is likely to work as if nothing happened.
However, you should take into account the chances of the new device overwriting the data still remaining on the disks.
That is why it is better to use specialized data recovery tools and avoid taking unnecessary risks. There’s Hetman RAID Recovery to give you a helping hand, so you can restore files both from healthy RAID systems, and from separate disks within such arrays. Even if several disks are damaged and the remaining data cannot be identified, the utility will read the data from other disks which are still healthy.
Method 3. How To Use Hetman RAID Recovery
For illustration purposes, we’ve got a NAS device with four disks, three of them combined into a RAID 5 system.
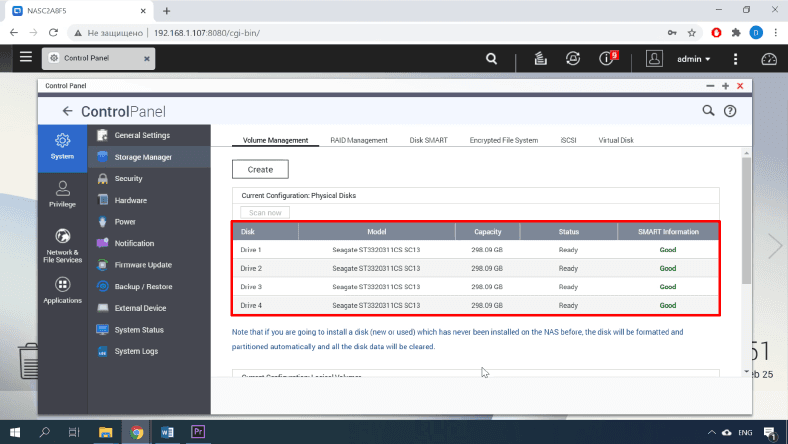
As to the file system, for many years all disks in QNAP devices tend to be formatted into EXT FS. Let’s simulate a scenario when the controller or another hardware element breaks down suddenly.
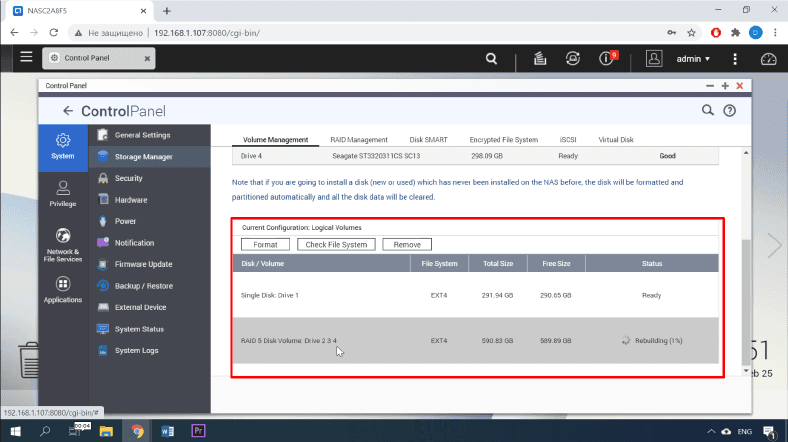
Before you start the recovery process, make sure you have a storage device with the capacity equal to or larger than the amount of data stored on your RAID system.
The next step is to connect the hard disk to a Windows computer.
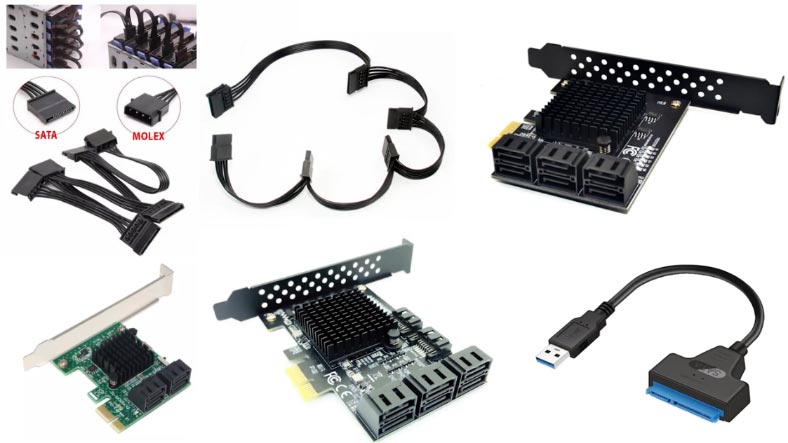
The usual problem with connecting multiple disks is that your computer may not have enough SATA ports or power connectors. However, this can be fixed with various power splitter adapters and expansion cards.
Make sure that everything is connected properly, power on the computer, download Hetman RAID Recovery from the official website, install and run it.
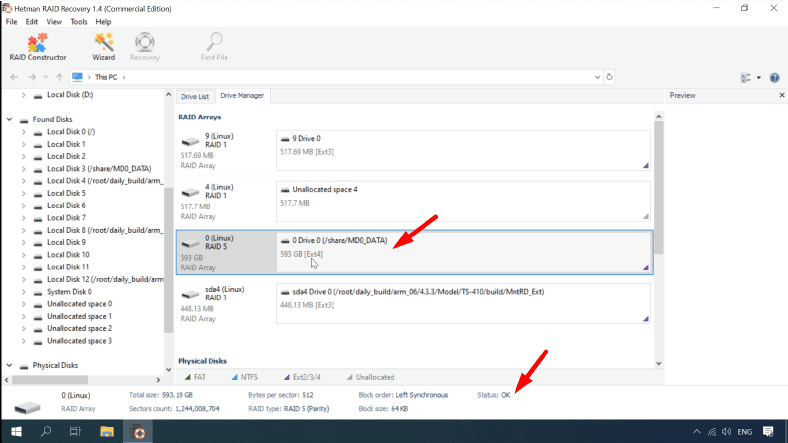
When started, the utility will scan the disks automatically and will also try to build the RAID system and then display all available information. Right-click on the array icon, and select Open from the list.
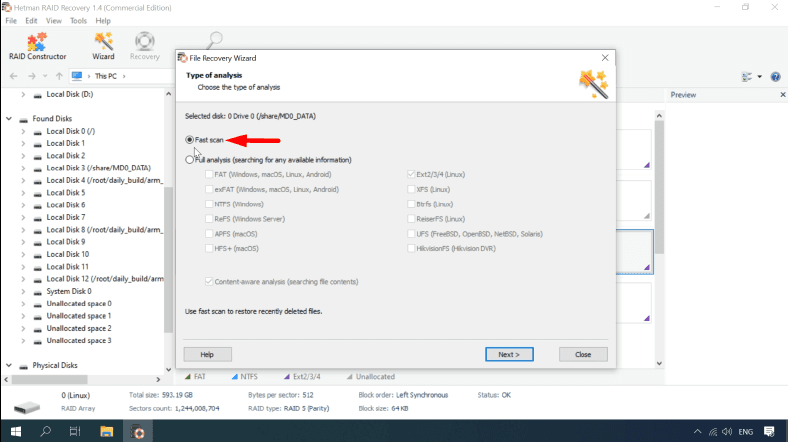
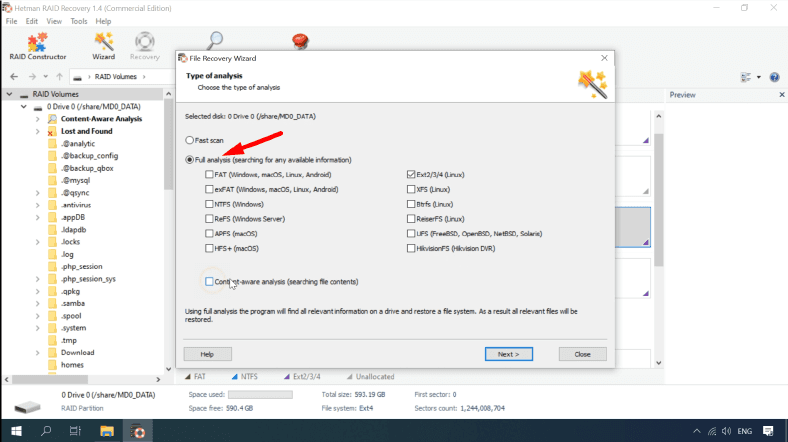
Let’s run the Fast scan first. If the disks and the information stored on them are not damaged, recovering data from the RAID system should be easy. Even if the Fast scan couldn’t find the files you need, just try again with Full analysis.
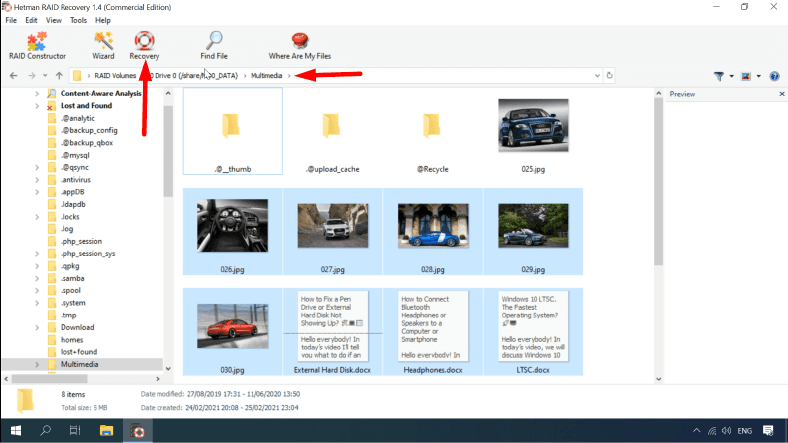
The required data is located in ”Multimedia” folder where it was downloaded through the web interface of the storage system.
One by one, select the files to be recovered, and then click Recovery. Specify the directory to save the files to, and click Recovery again. All the recovered data will be saved to the directory you have chosen.
Many users are wondering how to recover an array when only one disk is down. In theory, the broken disk in your RAID 5 needs to be replaced, and everything should be fine again.
However, things may go wrong from time to time, and during the recovery process you may encounter an error or some other nasty thing that will inevitably result in loss of data. QNAP uses a Linux md-raid driver to manage the disk array. If these records are damaged, the operating system cannot access a RAID volume any longer, and to the user, this situation looks like a typical scenario of losing all of their data.
Hetman RAID Recovery can recover your data even if the md records are damaged, or when one or several drives are out of order.
Conclusion
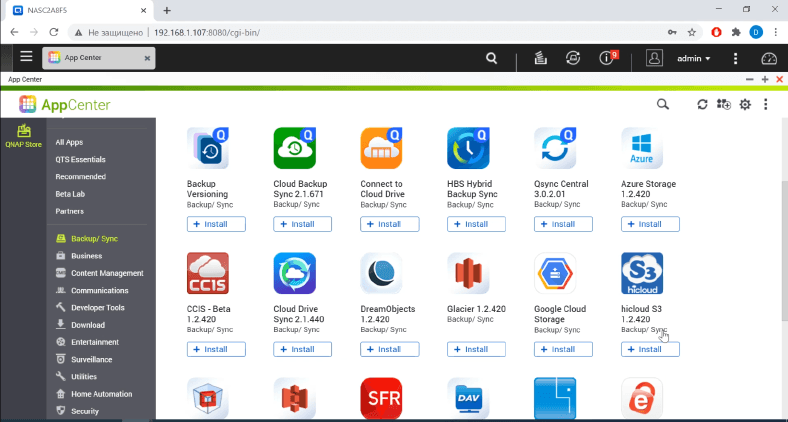
It should be remembered that the best way to avoid data loss is to back up your information regularly. QNAP supports a lot of third-party tools to back up your files and even entire disks to external storage devices, remote servers or cloud services.


For various RAID patterns, this term means different things. For RAID 5 and RAID 6, rebuild is a process when parity is calculated and written to disks. For RAID 1 and RAID 10, rebuild means copying data to achieve redundancy. During the rebuild, all array data is read.
Usually rebuilding operations are performed in the background mode, so you can still access your RAID during the rebuild, although it will be much slower. Until the first rebuild is finished, RAID cannot provide any fault tolerance. In case of large arrays, rebuilding may take several days to complete.
From the viewpoint of disk failure, these arrays are the same. Both can survive a single member disk failure.
From the viewpoint of recovery, RAID 1 is much simpler. For example, in case of a controller failure, RAID 5 requires using a RAID recovery software first to determine RAID parameters, and may then require the use of a data recovery software to retrieve data; while for a RAID 1, each of the mirror disks could be used as it is.